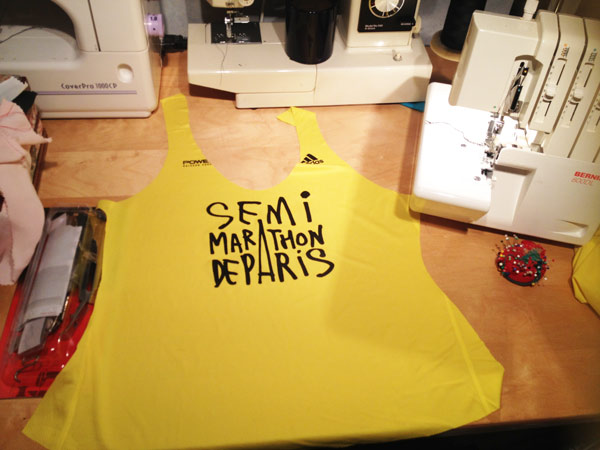
As I mentioned earlier this week, one of the projects I wanted to work on was refashioning the free (but too large) shirt given out at the Paris half marathon a few weekends ago. Pretty much every race these days gives out a shirt, and usually they’re in nice wicking fabrics, but very rarely are they nicely designed, or vests. I prefer to run in vests instead of teeshirts (even if I’m wearing a jacket over top), so after I finished sewing my mom’s latest chic sweatshirt, I set to work on the race tee.
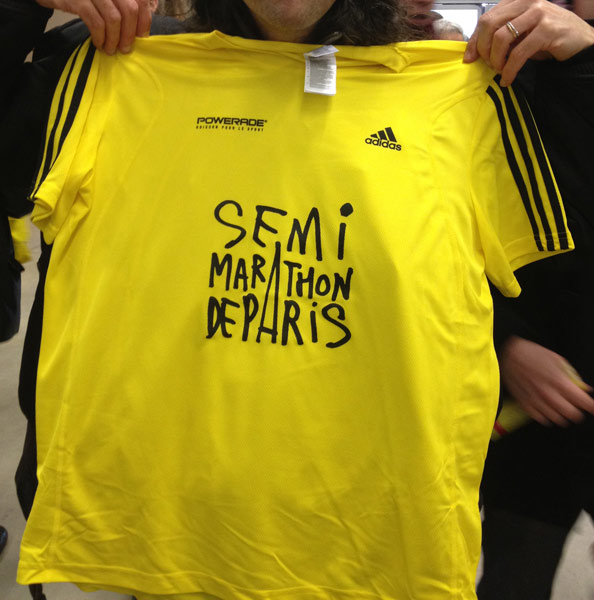
Here’s a “Before” shot, with my friend Daniel holding up his at the race expo (this is the “Medium”, but it’s massive, like a men’s large!)
I really like the Paris logo, so I wanted to keep that on the front, but I didn’t care about the adidas stripes on the sleeves or “boost” on the upper back (the new shoe they’re promoting). So the first step was to carefully cut along the sides of the shirt and sleeves, so I could lay the shirt out, folded along the centre front and centre back and pin my (self drafted but based on the Kristina Shin sloper) vest pattern pieces down:
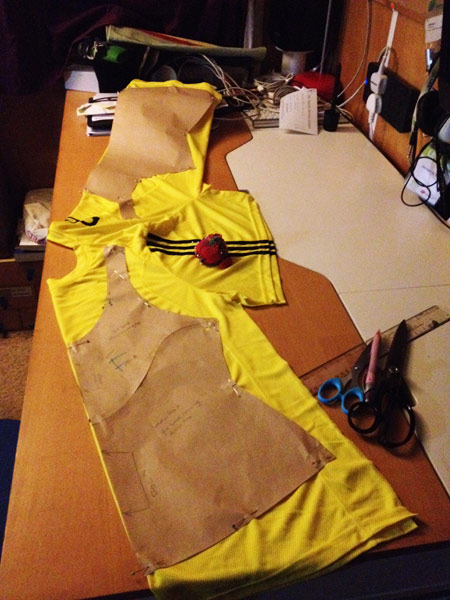
I then cut the pieces out, with seam allowances at the sides and shoulders, but none at the neck and arm edges, since I planned to bind those with some of the black technical strips I used with the disco running top.
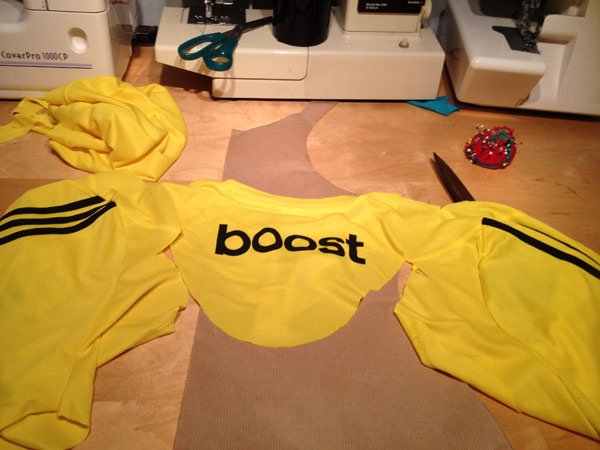
These were the only bits of the shirt I didn’t use!
First step is to use my little pizza wheel measuring device along the bound edges to work out what length strips I need…
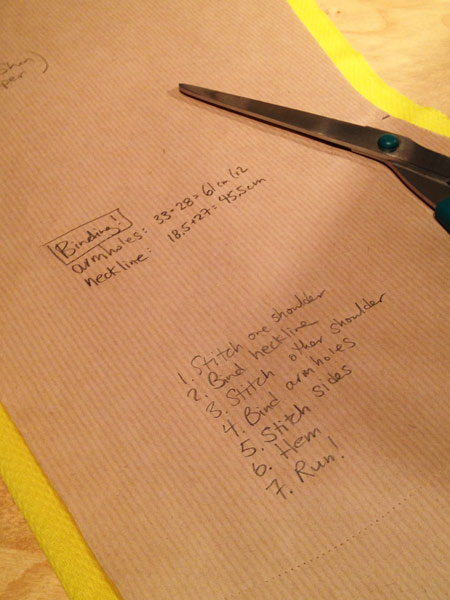
I caught my mistake before binding – the neckline length needs doubling, as I measured both on the fold!
You can see my hastily scribbled instructions to myself here, too – I just tend to write a brief plan on one of the pattern pieces. For this, it’s:
- Stitch one shoulder
- Bind neckline
- Stitch other shoulder
- Bind armholes
- Stitch sides
- Hem
- Run!
To make a long story short – the coverstitch binder gods were not smiling on me. Sometimes I can bind up everything without asingle hitch, but not so last night, oh no!
First, when I was binding the neckline, I took my eyes off the strip for like 2 seconds and it got folded up inside the binder. Some swearing and some fancy work with a pin through the holes fixed most of it, but I ended up with an ugly mess (of course right in an obvious area on the front! I’m pointing to it in the photo below), which I then had to unpick, attempt to fold back correctly, and stitch down with the sewing machine. It’s still a little bit off there, but not too bad.
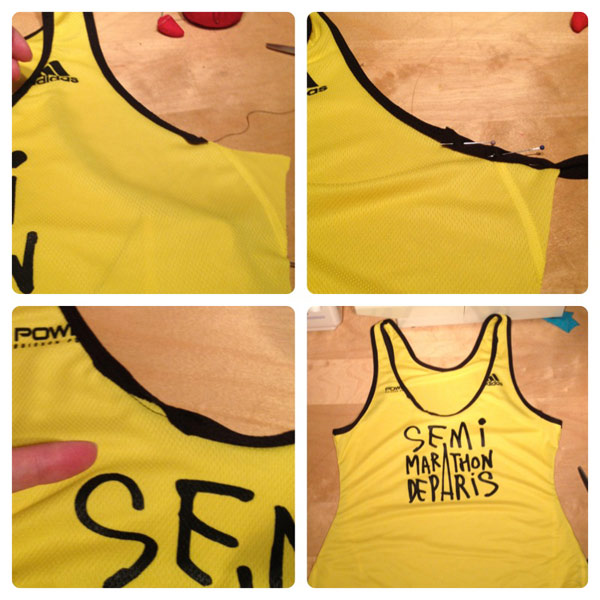
Then, when I was binding one of the armhole edges, one of the upper threads snapped and I didn’t realise it so instead of a nice binding with double coverstitching, I had a binding with just a single chainstitch, which didn’t keep anything together. So out came the seam ripper again to unpick the whole thing, then I re-threaded the offending needle, and ran the same strip through the binder all over again!
Then on the other armhole, the binding came up short, argh! It’s always a bit of a guess since you need a few cm at the start to get it going before you bind your fabric, and sometimes it can stretch a bit (or not) during the binding process. Since I was so close to the end, I just took an excess strip and attempted to fold it like the binder, pin it, and sew it on with my sewing machine, which ended up looking fairly decent.
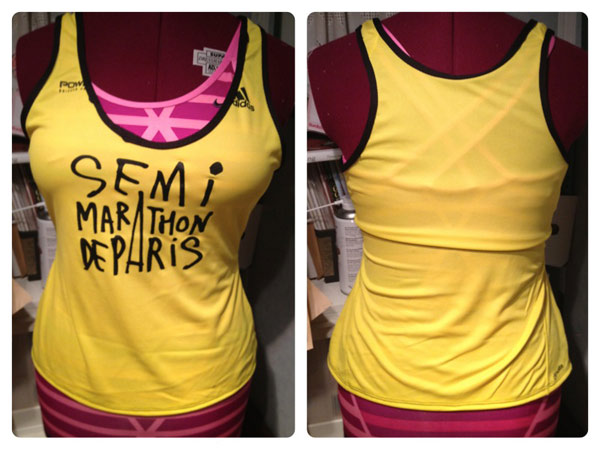
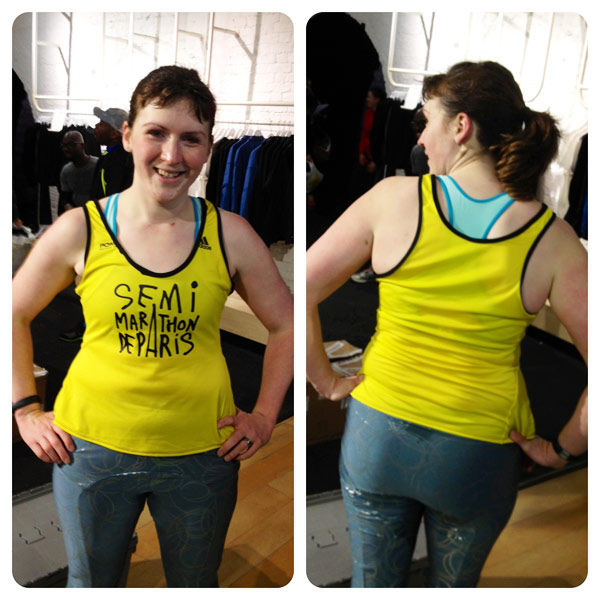
But the important bit is I persevered and didn’t get stressed over these setbacks (though I did have to stop and go make diner after one particularly long unpicking session), the result of which is that I’ve got a new (well, kinda) vest to wear to my running group on Tuesday, while everyone else will just have the original version! I’ll try and get a snap on Tuesday of me wearing it, too.
Oh, and I’m also meeting up with another girl in my running group this weekend to help her sort out her overlocker, draft up a leggings pattern for her, and help her get re-familiarised with sewing knits again. Fun!!
UPDATE: I wore it to my running crew and it felt great on the move!