Yesterday was a beautiful, warm and sunny day – I’d already done all my DIY work on Saturday (plus cooked and hosted a three course charity dinner for 5!) so the day was all mine to relax and sew for a change!
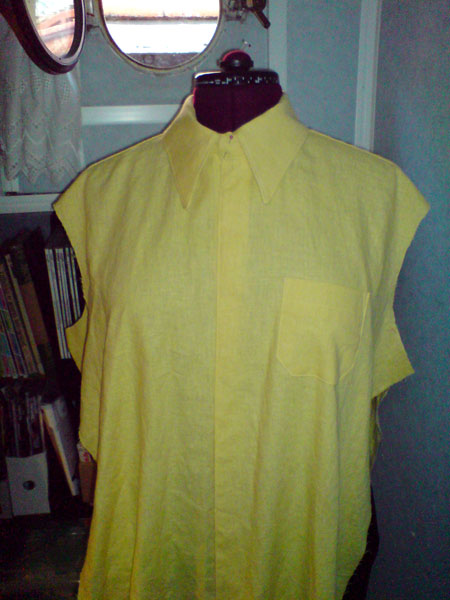
I’ve been slowly working on making BurdaStyle’s Jakob pattern in a lemon yellow linen/tencel blend for James, but it’s been slow going because I’ve been trying to unlearn all my bad habits and follow David Page Coffin’s “Shirtmaking” book to the letter. I cannot say enough fabulous things abut this book – really, within 5 pages I knew I could never, ever go back to my old ways. Even if you never sew menswear, it’s still a must buy in my opinion for its techniques in dresses, shirtwaisters and the like.
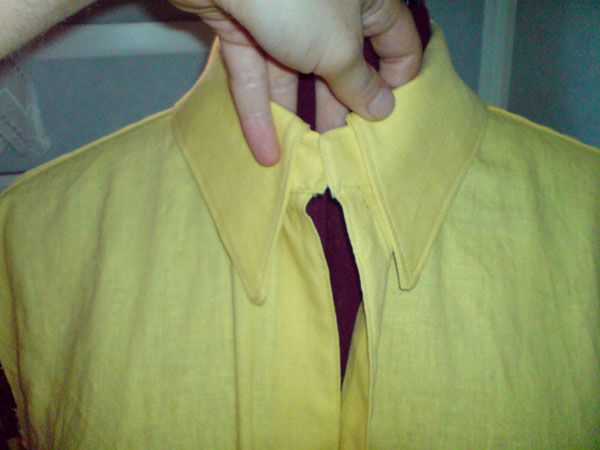
My only problem, however, is that I was paying a bit too much attention to the book and not enough to what I was actually doing, and after sewing the collar, attaching it to the collar stand, then sewing BOTH sides of the stand to the shirt, I discovered I’d made a really stupid mistake:
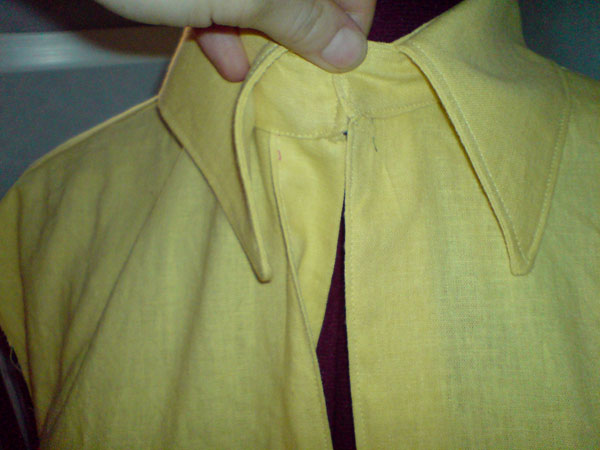
It’s an indication of my growing Anglisation that the first words out of my mouth were actually “Bollocking bollocks!!” and not one of my usual repertoire of choice sailor words. So I walked away, had some lunch, and unpicked both of the stitching lines that attached the collar stand to the shirt. I then made sure to press AND BASTE both front facings in before attaching the collar stand again.

I then moved on to the next step in Coffin’s order of construction, attaching the sleeve plackets. BurdaStyle’s pattern only calls for a thinly bound sleeve slit, but I figured since I was doing everything properly this time around, I should just go ahead and make the full sleeve placket, too. So I drafted one based on his instructions and diagrams, and the placket came out beautifully, like magic!

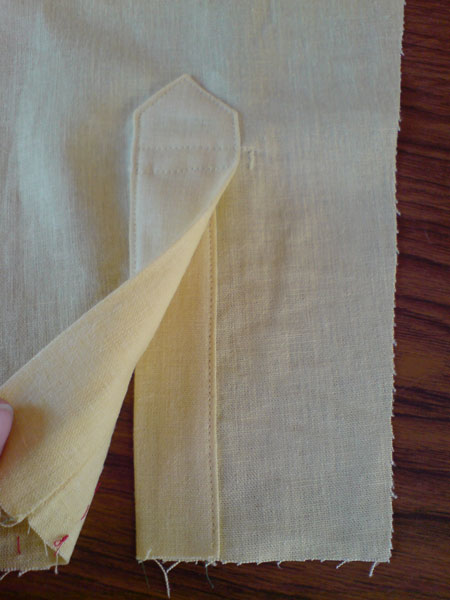
Really, I was just SO pleased with myself for this! I then went on and did the other sleeve, whose placket turned out even neater than the one pictured above. I continued to feel pleased with myself until I pinned the sleeve onto the dressform and realised that somehow I’d done all ten steps of the sleeve placket construction on the wrong side of the sleeve fabric!
So out came the seam ripper AGAIN, and I had to remove all the stitching on the sleeve placket, being incredibly careful around the Y-shaped slit, because linen really doesn’t like being handled on its cut edges. I then flipped the sleeve fabric over and constructed the sleeve placket for the third time (let me tell you, I could do those by heart now!).
At this point I decided that I was clearly a danger to myself and that I should not be behind a sewing machine with my sun-addled brain, so I turned off the machine, unplugged the iron, and headed up to the wheelhouse and read my book, The Tailor’s Daughter, eventually finishing it after a lazy few hours.
The next step in Coffin’s construction is the sleeve-body seam, which he sews in a truly unique way to get that flat-felled look without actually flat-felling it, so I have a feeling I might be in for a bit more seam ripping before the shirt is finished. The funny thing is, I’m still really enjoying this shirt despite all the setbacks (all of my own doing!) and the new techniques I’m learning are going to be so applicable for other projects.