Continuing on with Lingerie Week, I wanted to give you some extra construction tips on my Lacey Thong pattern that wouldn’t quite fit in the pattern itself (if you start adding in large photos, the Pdf filesize goes up really quickly!).
First of all, I wanted to start with two areas I’ve had some questions on:
“The 4cm ruler isn’t 4cm when I print it”. If the ruler on page 3 isn’t measuring exactly 4cm when you print it, then the print software you’re using is scaling the pattern! I use Preview on OSX, and I know it’s got its quirks – on this particular programme, if you enter in 100% and just click Print, it’ll still print at whatever the settings were before you changed them. You need to enter 100%, tap elsewhere in the print preview to watch the thumbnail resize, and then click Print. I’m sure other programmes have their quirks, too, but the bottom line is, if your ruler doesn’t measure 4cm, the pattern is not at the proper scale!
“Which size should I choose?” Sizing if difficult from a pattern creator’s perspective, because so many bodies wear a full range of sizes. I’m most confident of the Burda sizes recommended (much less so for the Big Four), so if you know your Burda size, go with that. The finished half-hip measurement is probably less helpful, but it’ll save some of you measuring it yourself.
If you’re unsure of your size, another approach to take it to “try on” the elastic before you start. Measure the waist elastic for the different sizes (pin or mark it, don’t cut!) and try it out by checking the feel around your half hip area (these panties sit over your hip bones, well below your belly button). The elastic should be snug and partially stretched, but not tight or loose.
During the construction of my black pair I took some photos of the trickier construction tips so those of you who prefer photos to diagrams can have a better look (though perhaps choosing a black fabric with similar-looking right and wrong sides wasn’t the best idea, sorry!).
I’ll use the numbers from the steps in the Pdf pattern’s Sewing Instructions below so you can easily refer back. As usual, click any of these to view the larger versions.
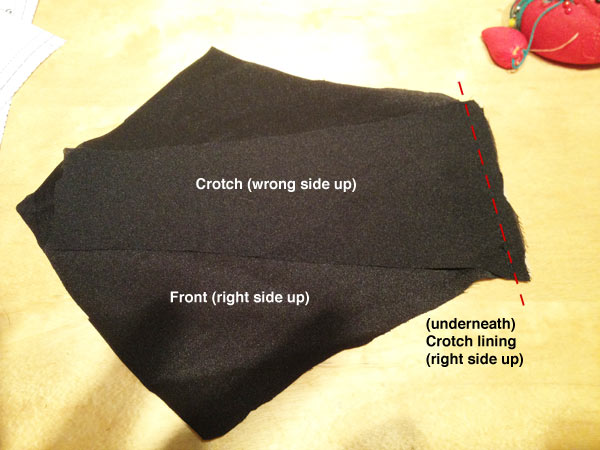
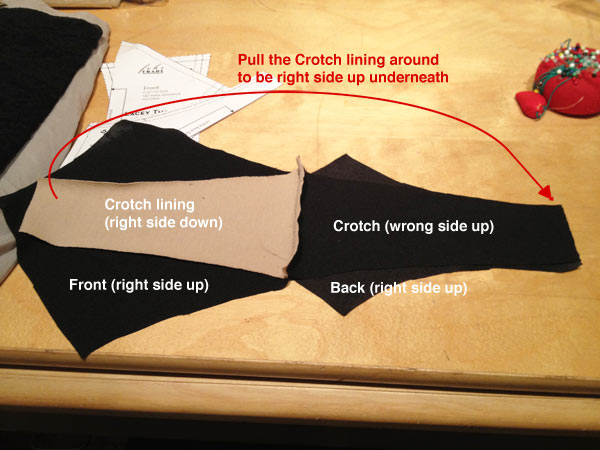
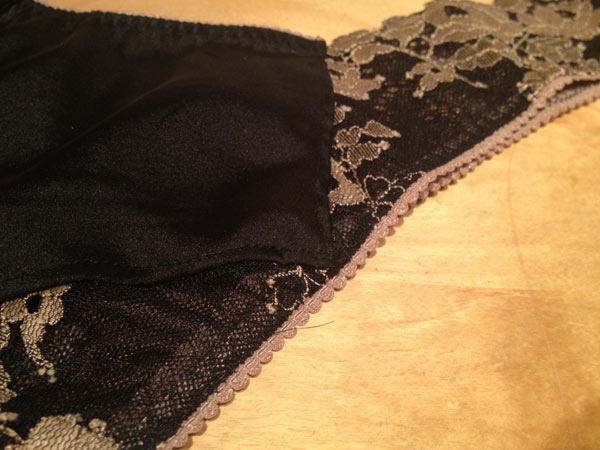
1. Join the Crotch to the Front
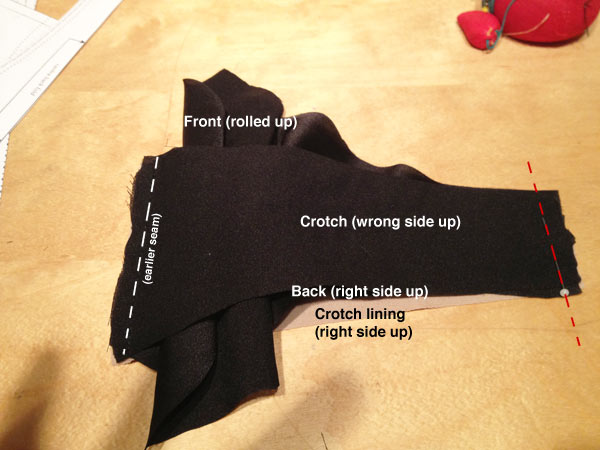
2. Join the Crotch to the Back
5. (Pin leg elastic to right side of leg opening)
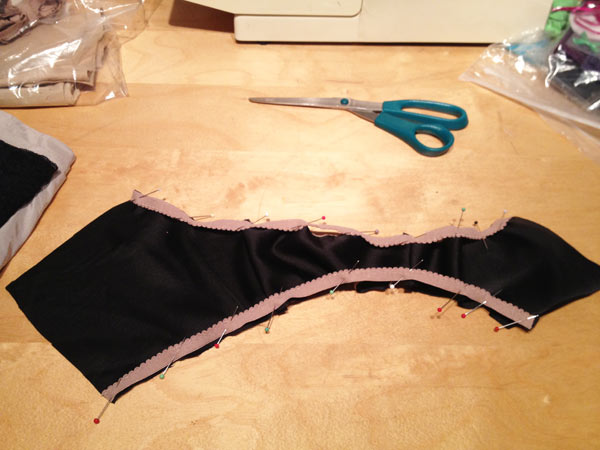
6. (Zigzag stitch along the picot edge)
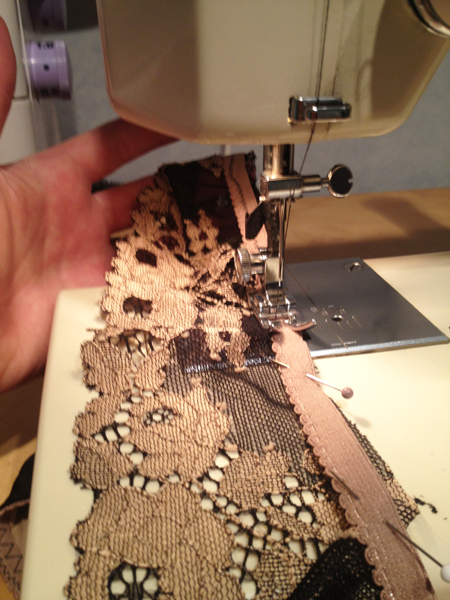
8. (Flip the elastic and triple zigzag stitch from the right side)

The above photos are from zigzagging the waistband elastic, but it’s the same technique for all three pieces!
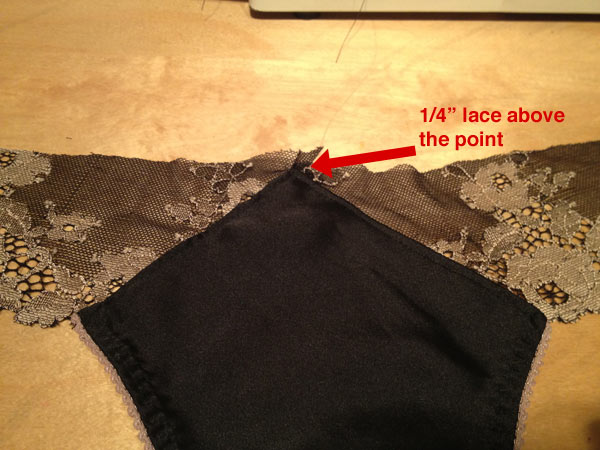
12. (The lace should extend 1/4 inch above the centre point on both the front and back)
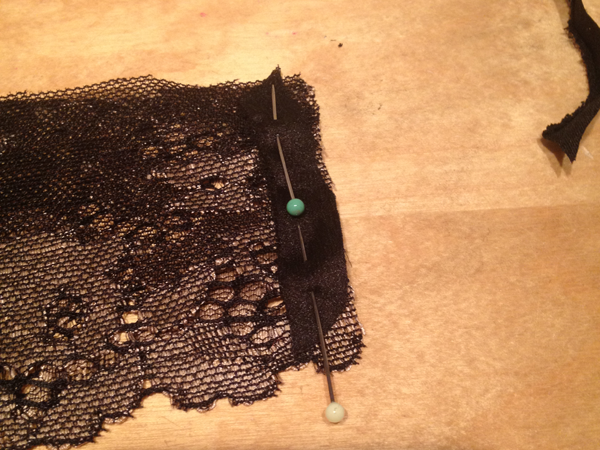
13. Side seams (You may want to reinforce this if your lace is flimsy, like I did here with some satin selvedge)
I’m pleased to report that we’ve broken 300 downloads already and I’ve even seen some of your finished panties!! Please keep the photos coming and we’ll have a Show & Tell in a bit. But tomorrow we’ll wrap up Lingerie Week with a special giveaway!
Thanks very much to everyone who sympathised with my shingles plight. I’m sorry to say I’m 2.5 weeks in and still in a considerable amount of pain, and I’m told I’ve still got at least several weeks more Serious Rest ahead of me, which drives me crazy. If you are over 50, please, please go get the shingles vaccine – I wouldn’t wish this on my worst enemy.