A better elastic waistband finish – tutorial

//

While I await a photoshoot on my new Papercut Ooh La Leggings, I thought it’d be nice to share with you what’s become my go-to finish for elastic waistbands. Oftentimes pattern instructions will tell you to create a casing, leave an opening, and thread the elastic through it. I totally hate this! You end up with uneven bunching of fabric, plus the waistband tends to fold up and twist and generally get really uncomfortable to wear.

Over the years, I’ve developed this method which a) attaches the elastic directly to the fabric, and b) protects your skin from direct contact with the elastic. I find it’s much more comfortable than the casing method, looks much neater, and also gives you the added option to have greater stretch in the back if you need it (swayback/bootay ladies, listen up!).

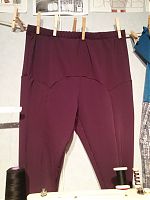
Finished leggings:

Step 1


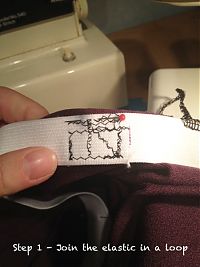
Step 1 – Place the elastic around yourself where the waistband will lie, making sure it’s snug, but not tight (you may want to pre-stretch the elastic a bit first). Mark the overlap edges with a pen, and trim so the edges overlap by an inch or so. With your sewing machine, zigzag the crap out of it so it’s not going anywhere!

Step 2
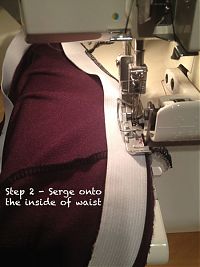

Step 2 – Make the overlap the Centre Back, and mark the opposite side with a pin as the Centre Front. Mark midway between these two with pins as your side seam marks (or offset towards the CB if you want more stretch in the back). Place your elastic against the inside edge of your waistband, and serge/overlock the elastic in place, taking care to not cut the elastic with your serger blades! If you don’t have a serger, that’s cool, just sew near the top edge of the elastic with a narrow zigzag and very short stitch length. Stretch the elastic as you sew/serge so all your pin markings line up.

Here’s what it’ll look like on both sides:

Step 3
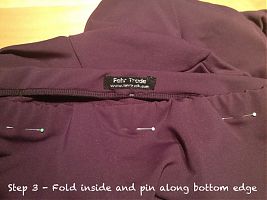

Step 3 – Fold the elastic to the inside again (so the serged elastic edge is at the bottom), and pin along the bottom edge of the elastic on the right side.

Step 4
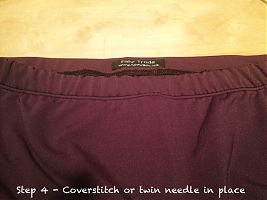

Step 4 – Coverstitch (or use a twin needle) along the bottom edge of the elastic from the right side. And you’re finished!

I don’t want to say you have to do this if you’re joining Karen’s Pyjama Party Sewalong, but there may very well be an inspection!

8 Comments

Add Yours
  1. 1
    Wai

    Thank you for this Melissa, especially the final step of coverstitching or twin needling the bottom of the elastic – only got as far as stitching in the ditch to stop waistband flipping back.

    One tip I found helpful was from Nancy Zieman, where she eliminates the bump from overlapping the ends of elastic by sewing abutting both ends and sewing onto a small piece of fabric – https://youtu.be/t3C9RIwtwGU (6 mins mark)

    • 2
      melissa

      I’ve heard that butting elastic trick before but in my experience, it’s nowhere near as strong as overlapping the ends. Elastic has a tendency to shred over time and you can only anchor the stitches half the width of the widest zigzag stitch with that method.

  2. 3
    Mel

    On the final step should I stretch as I coverstitch. That’s what I did when I tried this method and I was pulling the needles and had tons of skipped stitches.

    • 4
      melissa

      Ah, I’m so sorry, this got lost in my comments! If you’re getting skipped stitches, that’s usually a sign that your needles are either dull or not right for the fabric. If it’s still skipping after replacing the needles like-for-like, try stretch needles (if it’s on lycra/activewear fabrics). As for the stretching – depending on the elastic to fabric ratio, you’ll probably have to stretch the elastic a little so it matches the fabric, but don’t stretch beyond that (ie: don’t stretch the fabric too much). And always have a hand behind and a hand in front of the needles as you stretch so your hands take the stress instead of the machine.

      Hope this helps, and sorry for the delay!

  3. 5
    Hali

    I have been looking all over and canNOT find a tutorial on how to get my Brother 1034D to make a coverstitch like the one that you used in the last step of this tutorial (the one that looks like a 2 needle stitch on a sewing machine.)
    HALP!:)

    • 6
      melissa

      Hi Hali. I have no experience with your particular serger/overlocker so I can’t help at all there, but the last set of stitches was done on my coverstitch machine. Some overlockers have a separate mode where you can convert them to do a coverstitch, but most people opt for a separate machine to just do stretchy hems like this. Since I don’t know anything about your specific machine, I don’t know whether yours is one of the combination machines, or just an overlocker (maybe look at your manual?).

Leave a Reply