Blog

Vintage silk roses for a wedding bouquet

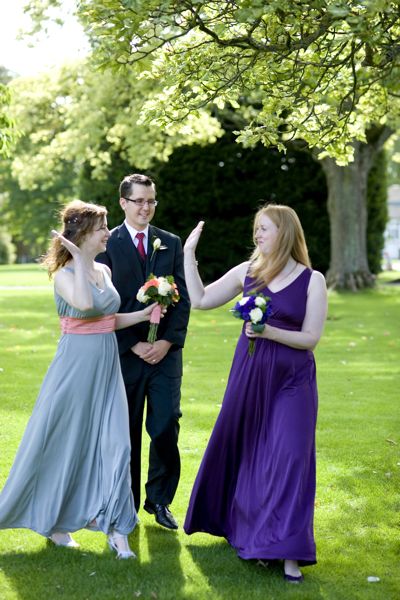
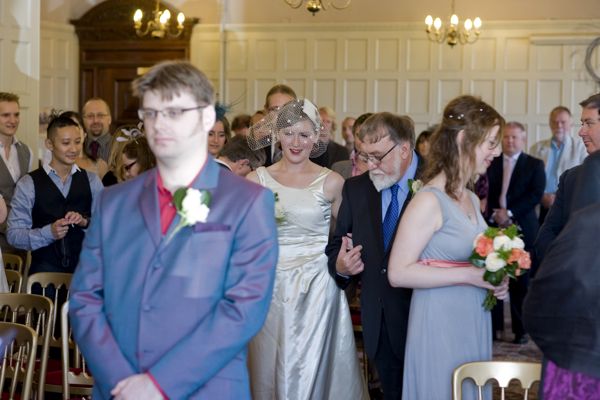
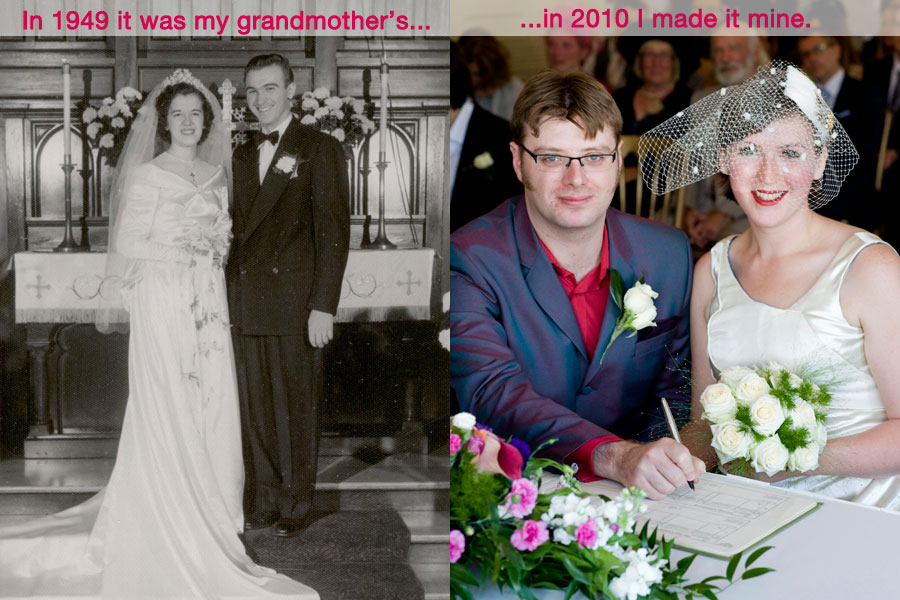
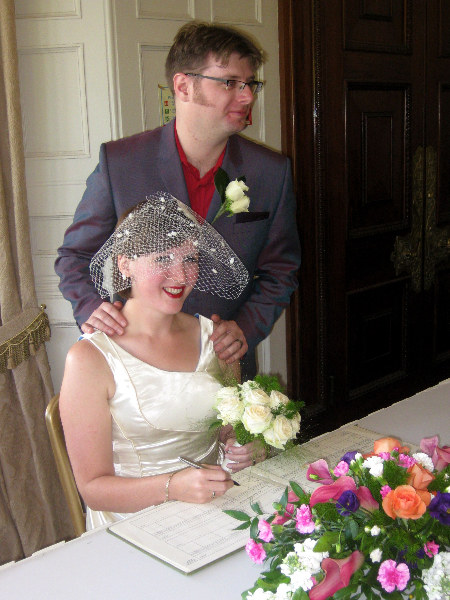
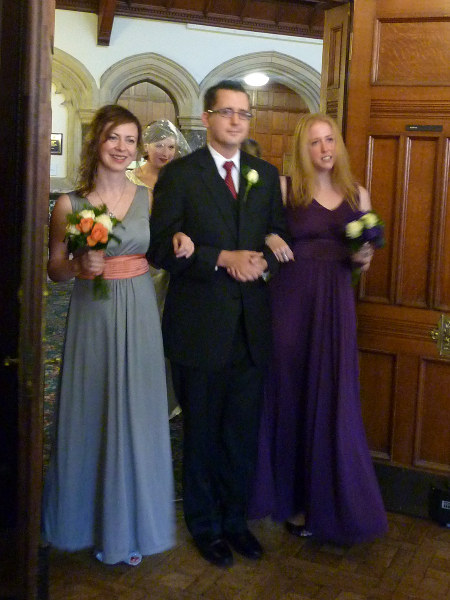
The main reason for our recent trip to the States was to celebrate my Aunt’s wedding, and since I still had some scraps of my grandmother’s (her mother’s) gown leftover from when I refashioned it into my wedding gown back in 2010, earlier this year I offered to make her something from the silk so that her mother could be a part of the day, too.

I thought perhaps she’d want a clutch bag, or cropped jacket or something, but she requested fabric roses instead. And a lot of them!

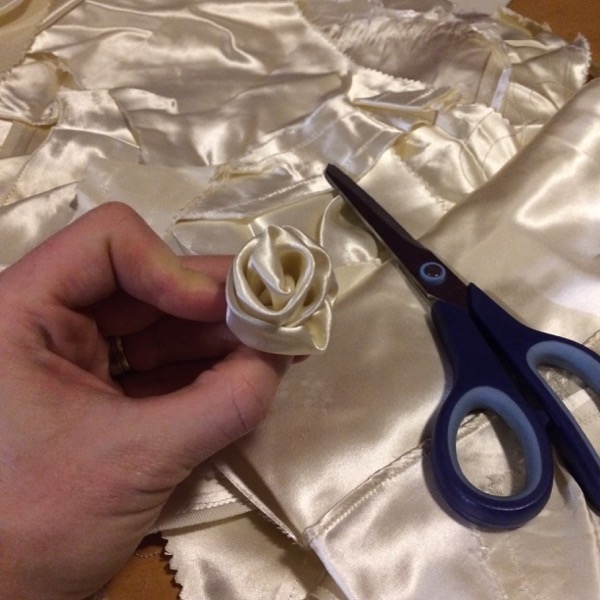
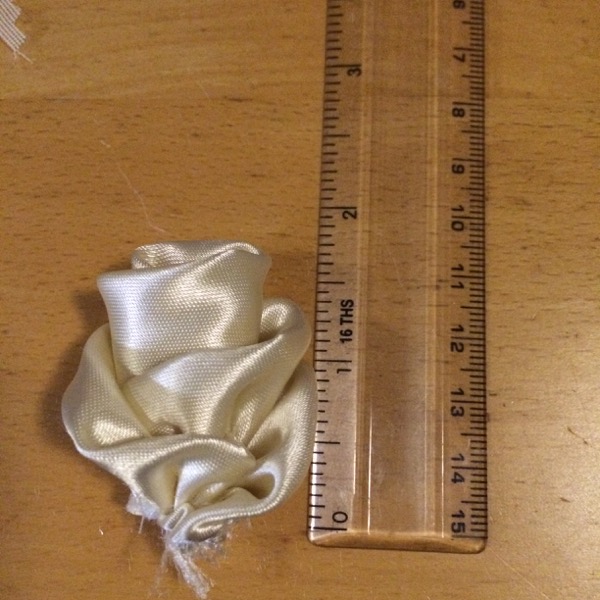
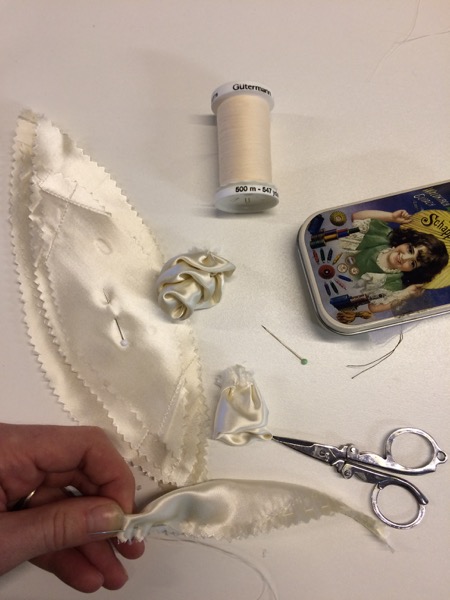
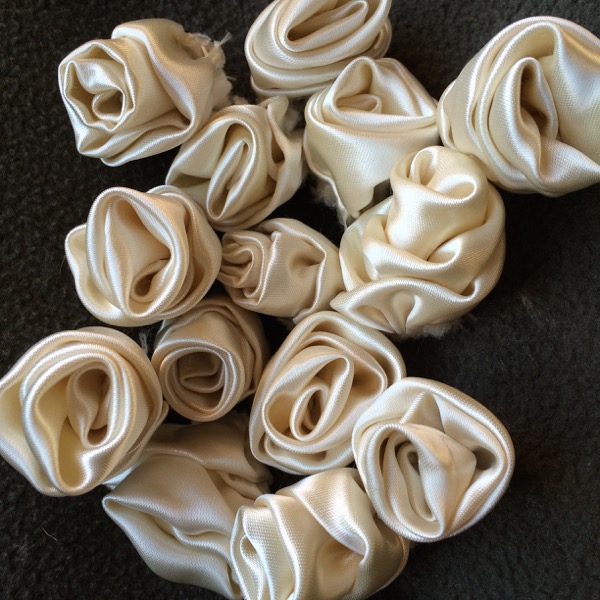
I made my own “pattern” so all of the roses would be the same size, but the pattern was really just two different sizes of pointed ovals. To make each rose, I just folded the oval in half lengthwise and gathered together the cut edge by hand with some running stitches. I rolled up the larger one, tacked it together at the base, then wrapped the smaller around the outside of it, and tacked that together by hand, too.

It took a few minutes to make each rose, so I made myself a little kit and tried to do one or two each lunchtime at the office (after I’d finished any messy eating!!).

And before too long, I had a whole herd of roses to post off to DC!

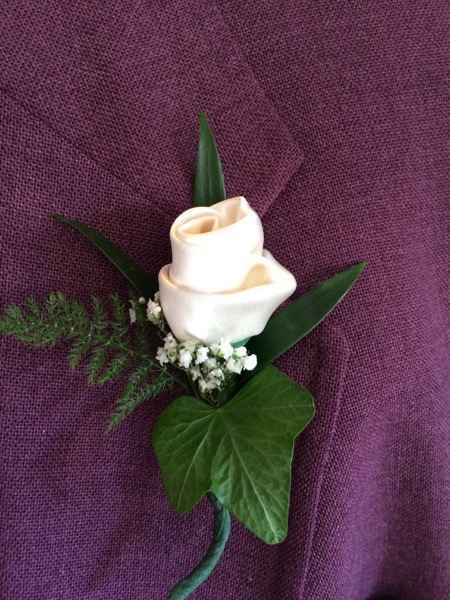
Then her florist used floral tape and wire to create “stems” on each and worked them into the bridal bouquet, the flower girls’ crowns, and the buttonholes for all of the men on our side of the family, including my granddad. Apparently as my Aunt pinned his buttonhole onto his label, she told him that the roses were made from Granny’s gown, and he was so touched he started crying!

In America…

Having an international relationship (even when the expat half is as firmly ensconced as I am) makes weddings a bit tricky. We’re lucky that we didn’t have to take immigration laws into account, but even so, we needed to have wedding celebrations on both sides of the Atlantic to include as many people as possible. So a few days after the wedding, we flew over to Pennsylvania, spent a few days at my parents’ house in Perry County, then had our celebration dinner in Lancaster, taking the train down to Philly to catch up with my Man of Honour, then the Acela train up to NYC for a week of a proper honeymoon before flying back home to London.

So to start, I decided that I wanted to give my Granny a nice memento of her gown, since she had given it all to me, and I ended up with some medium-sized scraps of the really nice silk satin after finishing my gown. So before I left I made up four sachets filled with lavender buds I’d grown on deck, and during the flight I embroidered a silk square for each of these with the initials of her four grandchildren and their spouses, plus the year they were married. It just worked out nicely that my cousin Charlie was the last of us to wed, having their wedding two weeks after ours!

I then finished up the sachet construction at my parents’ house and presented these to Granny before the Lancaster reception dinner.

There was also a nice surprise of a massive box of vintage haberdashery she’d found in a charity shop. I only picked a few things out of it, but I just couldn’t resist some of this glorious packaging!

Then my mom insisted on driving me out to this Amish fabric shop she knows in Perry County – it was only a little ways past my old high school, but I was just blown away by the prices!! I went NUTS in the zippers – tons of really long invisible zips for 75 cents or a dollar (when I’d pay at least £3-4 each for these in London), buttons for as low as 2 cents each (when’s the last time you saw anything for 2 cents??), tons of ricrac and trims, embroidery floss for 30 cents, and (of course!!) they had the bobbins for my hand crank vintage Singer. For 15 cents each!

Our DIY wedding – the dresses, makeup, and final photos

Either groan or rejoice, but this is the last of the wedding posts!

The bridesmaids dresses

If you cast your mind back, you’ll remember the selection process, how I fitted and then hand-pleated, the lined, silk jersey dresses for my two bridesmaids, but even after I finished them, there wasn’t a chance to see either P or G wearing their dresses, let alone together!

It was really nice on the wedding day to be able to see both of my great friends looking so happy and nice, and comfortable, too, in the bridesmaids dresses I made for them.

Their colour choices really suited them both, too, and even though I offered to shorten them after the wedding, I know P (in purple) is definitely keeping hers as a wonderfully posh maxidress. (S was my Man of Honour, but no, I didn’t make his suit!)

My dress

You’ve seen it in pieces and finally, in comparison with my grandmother’s original gown, but here’s some more photos where you can see the seamlines particularly well:

Our DIY wedding – the music

We’ve been to quite a few weddings and big parties over the last few years, and one thing became painfully apparent after one or two – event DJs are absolutely, embarrassingly awful and there is no way that we were going to have one ruin our party. We’ve heard DJs consistently call the guest of honour by a wrong (but similar) name, play tracks they utterly hate, and totally ignore those cds of “special songs” that they really, really wanted to hear on the night. We’ve heard so much bad and inappropriate music at weddings that James and I even have a running list of Songs That Should Never Be Played At A Wedding Ever (which includes Toni Braxton “Unbreak My Heart”, 50 Cent “Candy Shop”, and Shaggy “It Wasn’t Me”, which we’ve all heard firsthand at weddings).

Now, really, I don’t say this lightly – we are both huge music lovers. We both worked in student radio for years (mostly to get the free cds!), and I’ve worked on the fringes of the music industry for the last eight years (remember the Glastonbury dress?). So not only do we love music, but we know good music, and we know instinctively what order and flow to put the music in over the course of an evening when you want to get the dancefloor going and keep it going. We know when to play obscure (but danceable) indie music, and when to throw in those nostalgic, floor-filling trashy hits (“Baby Got Back”, I’m looking directly at you!).

Our DIY wedding – Cupcakes

Mmm, cake, the sweetest decision to make for any wedding, yet one that’s all-too-easy to get horribly wrong (Unfortunately one wedding I attended years ago had a beautiful cake that was mouldy inside when cut into!!)

Luckily, we had Sarah at Maison Cupcake, a friend of a friend and an amaaaazing food blogger and baker, on our side. Honestly, she’s already in my RSS feed reader and I want to eat her whole site on a regular basis!! Like James’s Auntie Anne (who did our flowers), Sarah’s also a “keen amateur” and not usually a baker for hire. With the quality and detail in the cakes she made for us, though I’m sure she could make a living from this if she wanted to!

We mostly wanted cupcakes, both for ease of serving and the ability to taste more flavours, but we also opted to have a small cake for us to cut. All we stipulated is that we didn’t want a fruitcake (as is traditional for UK wedding cakes) and that we didn’t want to use a cake topper or have writing on it or anything. Sarah suggested something like this chocolate and booze-soaked cherry cake and we nearly bit her arm off! She topped it all with a delicious fondant icing, and yes, she made all those tiny flowers herself!!

Our DIY wedding – printed materials

One cost that can add up really quickly for a wedding are all the printed materials you need for the day. I’m not just talking about the invites (which can get ridiculously expensive if you go the letterpress, inner envelope, return card, RSVP envelope, etc route!), but also all the other bits of papery stuff that is forgotten until a few days before when you realise you actually do need them!

The illustration

The first step in our wedding design process was to commission a cartoon drawing of us from the illustrator John Allison (of Scary Go Round fame). James has been a big fan of his comic for ages now, and we both really liked his design style. So we sent him a photo of us, a brief description of James’s suit and my dress (at that point I was still thinking of that Vogue cowl-neck number) and to imagine 6 months’ more hair on my head. Which somehow he got eerily spot-on.

(Apologies for the awful jpg artifacting – I’ve not got the big version of the illustration in front of me to work from)

The wedding website

With the illustration in a nice, big file, we could then set about making our wedding website, which was to be the crux of our invitations. We both work in web developments, and absolutely everyone we know, right up to my grandparents, has an email address, so this way we could put the bulk of the information for both receptions on our site and be able to update it later, too. The RSVPs were all online, using a Google Spreadsheets form (easy to set up, easier for people to reply to than a trip to the post office, and we could both get access to the running tally), and all the usual venue info and registry links could be added without having to worry about word counts and layout.

I can now post a link to it for you to have a look at James’s standards-compliant coding prowess, because I don’t have to worry about you all messing up the RSVPs or gatecrashing or anything! The worst that can happen is that you decide to buy us some more insulation off our registry…

Invites

So with the website in place, all the invites really had to do was give folks the date, and point them towards the website. We ran up two sets of postcards from Moo.com (one set for the UK wedding and reception, and one for the Pennsylvania reception). And to set the tone, the wording was “James and Melissa are finally getting married!” ha!

Our DIY wedding – the flowers

To carry on with the rest of our DIY wedding (oh no, it didn’t end with the wedding dress!), the flowers were something we’d both thought about, but hadn’t really wanted to go overboard with, preferring instead for subtle and personal accents. My bridal bouquet of white roses, plus two bridesmaids’ bouquets, and a ton of rose buttonholes for the gents, were all made by James’s Auntie Anne, who is a keen amateur florist. She even sent me a self-addressed envelope to get fabric swatches of the bridesmaids dresses so she could best match their bouquets to their dresses!

How gorgeous is this centrepiece, too? I told her since we wern’t having “wedding colours” (ugh ugh ugh!) that she should either go for all colours, or just white. So she incorporated the bridesmaids’ dress colours into it and I just love it. I think it’s just stunning, and I’m glad we got to enjoy it during the ceremony and then again during dinner at the top table.

Our DIY wedding – refashioning my grandmother's gown

I’ve got many, many more wedding photos to come, but as I was slowly going through all the photos from friends and our professional photographer, I realised that there were a lot of parallel poses between my grandparents’ photos and ours.

Big thanks to my Dad for taking the time to scan in my grandparents’ wedding album in hi-res format, and also to our truly INCREDIBLE and AMAZING wedding photographer, Paul Tanner. I’m pretty sure he was the best money we’ve ever spent.

Confetti toss:

Post ceremony posing:

Walking back down the aisle:

Cutting the cake:

Pre-wedding girly preparations:

If you’re new to this site, let me back up a minute and explain what went on here. First of all, yes, I sewed my own wedding gown. But that would be too easy (ha!), so I decided to sew it from my grandmother’s gown.

Our DIY Wedding – first friends' photos

It’s going to take us quite some time to filter through the 300-odd AMAZING wedding professional photos that we just got through, but in the meantime, here’s some of my favourite shots of the wedding from those that our friends took.

It should give you a great idea of what the dress looks like, and how it held up throughout the day and dancing, anyway!

Signing the official registry:

My bridesmaids and Man of Honour (remember I made their silk jersey dresses?)

Something old…

Check back on Sunday around noon (London time) for wedding dress photos!

Around the end of August, I got an MMS (photo text message) from my bridesmaid Pip’s boyfriend Rob of a brown case next to an assorted pile of clothes with the message “Saw this and thought you might be interested.”

I replied with “Ooh what’s inside? Have you got a model no or year? And does it work, or Need Love?”

To which he said “No idea at the moment. It’s in the window of a charity shop, I’ll check it out on Tuesday.”

And I said “Ah I can’t really justify a 3rd machine! But if it’s a vintage Singer I’m interested (I’ll pass on any others, so don’t spend too much energy on it!)”

And since I never heard anything further about it, I completely forgot about our conversation (conveniently still saved in my phone though!) until they presented it to me as a wedding gift!

It weighs a TON, but it’s got a great hard case:

…which opens with an altered Citroen car key! ha!

Front, left, and back views: