I think it was inevitable that I’d need a quick and fun distraction from all my pattern drafting and muslins, and nothing spells “quick” and “fun” like lingerie! Seriously, if you’ve never sewn lingerie, you won’t really understand the appeal, but playing with tiny bits of lace and trim is just so creative and rewarding, especially for ladies like me who really aren’t into embellishment elsewhere in their wardrobes.
Since it fit so well before, I used the same modified bra pattern from my purple hearts bra, though this time I used black, pushup foam cups and the black/brown Alice lingerie kit from The Sewing Chest.
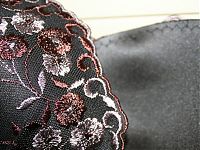
The first step was to cover the cups with the rigid lace. The lace in the kit was 50cm long, with two scalloped edges, so I aligned a scalloped edge along the top of the cup, then pinned and smoothed and made a few needed pleats in order to get it looking nice. If the lace or covering material is stretchy, then you don’t need any pleats in it, but as mine was rigid, a few small pleats were necessary towards the bottom.
Here’s the covered and uncovered cups:
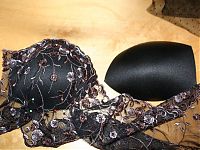

Then I did the same with the other cup, though I had to use the opposite scalloped edge so both cups were symmetrical. In bra making, symmetry is king!!
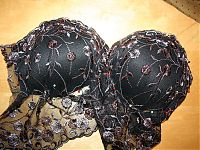
With a wide zigzag stitch, I basted the lace around all the edges and trimmed the excess. I actually went back later and added some stretched, narrow elastic on the inside of the top of the cups, but I’d recommend actually doing this, or applying FOE (foldover elastic) to the upper cup edge before stretching the lace over your cups to avoid a second line of zigzagging over the lace. Even if you think your cups are sturdy enough to not need the elastic, it really makes a difference in keeping the top of the cup close to your body and not getting any gaping.