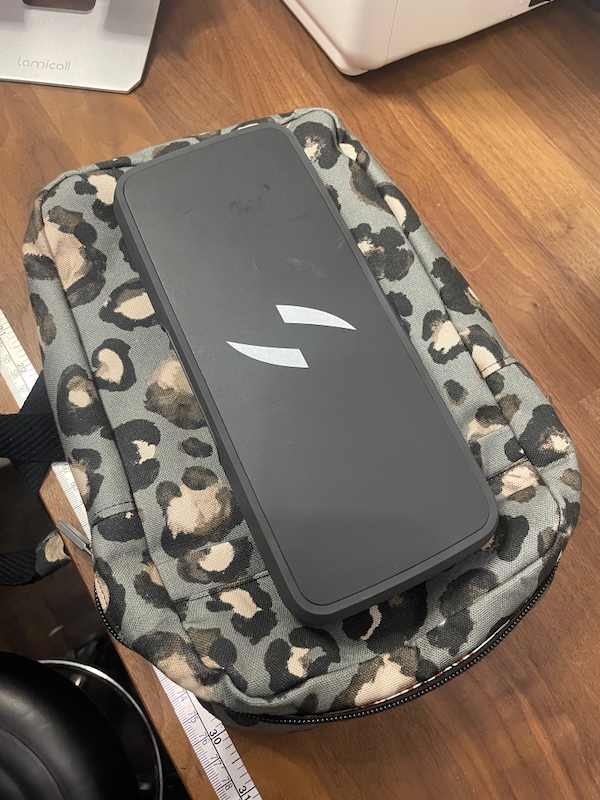
As I’ve started to cycle around London on our friend’s borrowed e-bike, I’ve noticed a problem that I could fix with sewing. Both the borrowed bike and mine (on order) use a Swytch conversion kit, which means the battery can’t be locked to the bike and therefore must be carried with you when you reach your destination. It’s not particularly big or heavy, but it’s bigger than my waist packs, which meant I had to wear a big backpack everywhere, even if there wasn’t really anything in it except the battery!
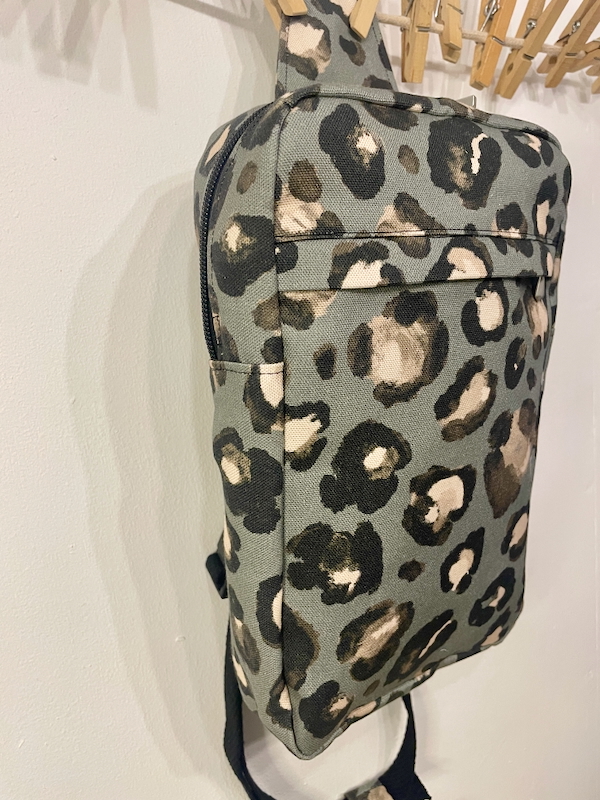
So I went on the lookout for a bag pattern that was big enough to hold the battery, but is smaller than a backpack, and found the Noodlehead Sandhill Sling bag. I’ve not sewn any Noodlehead patterns before, but I’ve heard good things, and I see why now! It’s a great little pattern and definitely fills a void in pattern offerings.
I could’ve used leftover denim from my stash – I’ve collected quite a few short lengths of leftover denim with the plan to eventually make the jeans pattern in the first Named book that uses recycled old jeans, but I didn’t really gel with the idea of a denim bag. I even thought about using waterproof fabric but I’m glad I didn’t as it would’ve been too thick and made construction a hundred times more fiddly.
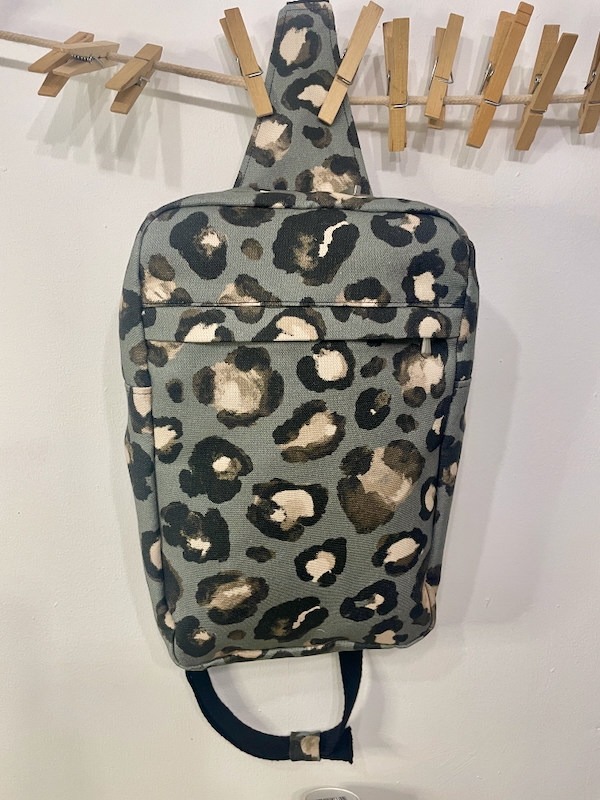
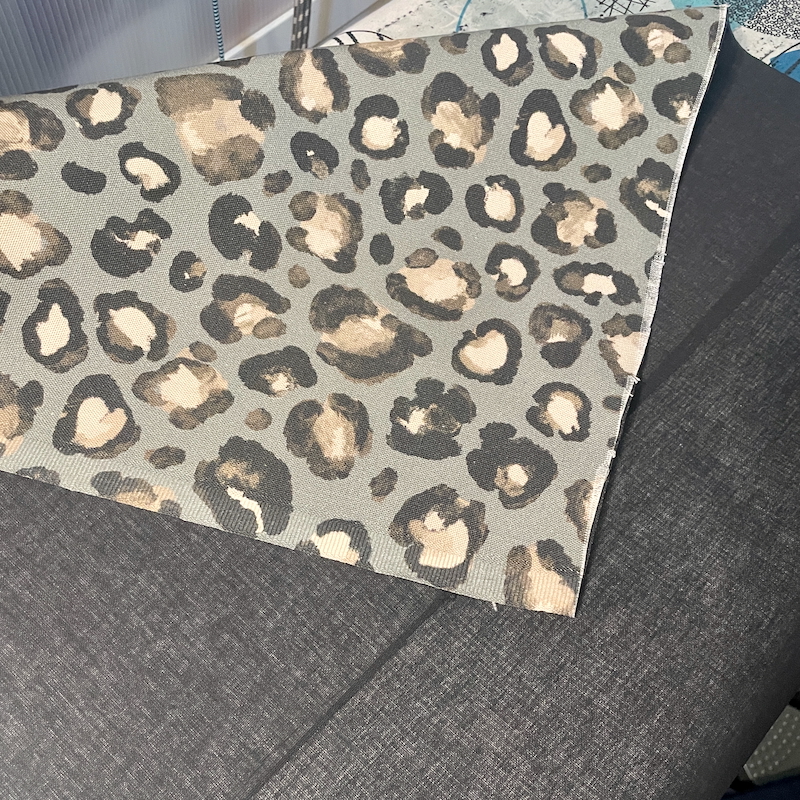
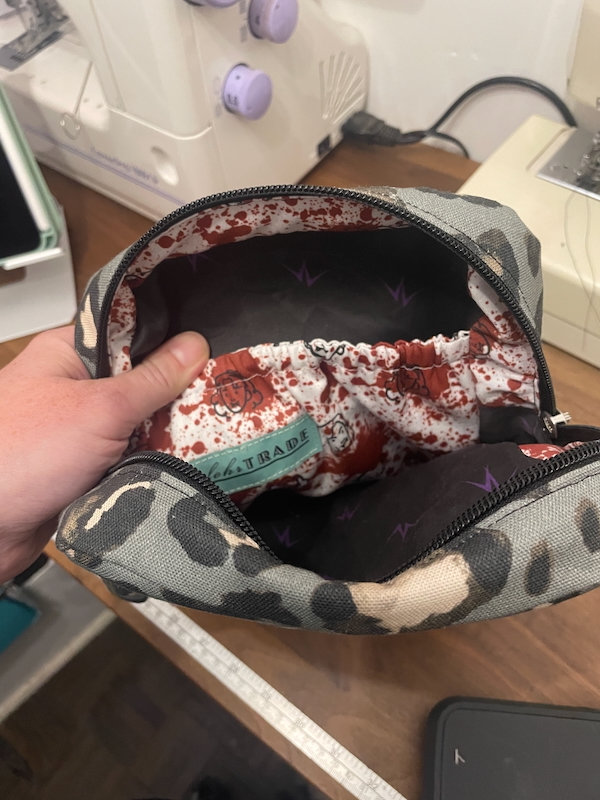
So in the end I walked(!!) up to Fabrics Galore and bought a half metre of this leopard print cotton canvas (also comes in two other colourways) for £7. I block fused the full yardage to reduce fraying on all those rectangles, and also minimise waste. And I definitely succeeded because it looks like I have enough for a second bag out of it too?? Bargain!
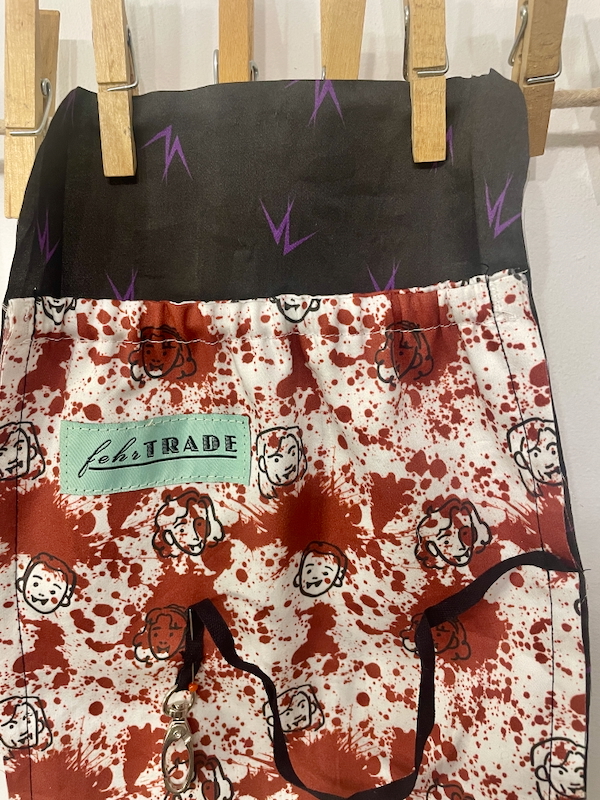
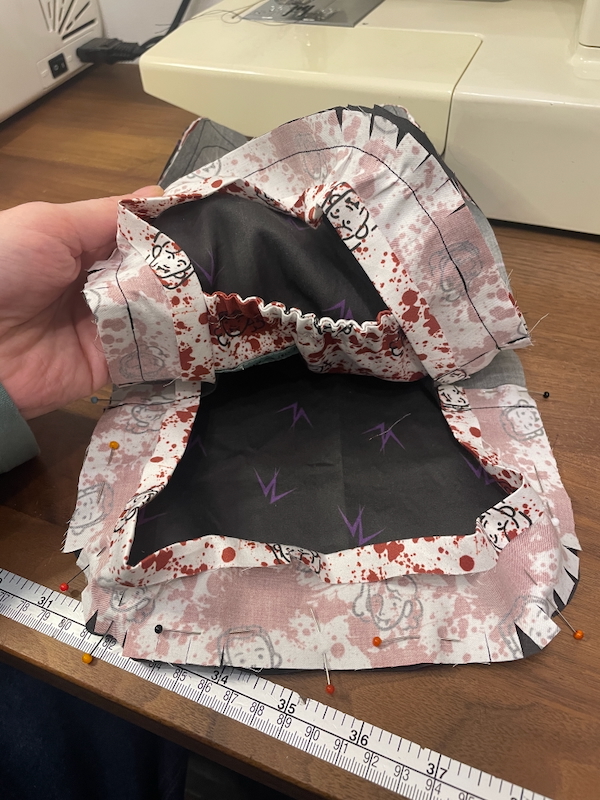
The lining pieces wouldn’t fit into a fat quarter so I used two from my stash – leftover Maake fabrics of custom vampire prints where the base fabric (organic cotton satin) wasn’t quite what I was expecting. One has tiny purple VL symbols on a black base, and the other is little doodleheads of the four main vampires on a white background with red blood splatters. They don’t coordinate in the traditional sense but they certainly make me laugh when I look inside my bag!
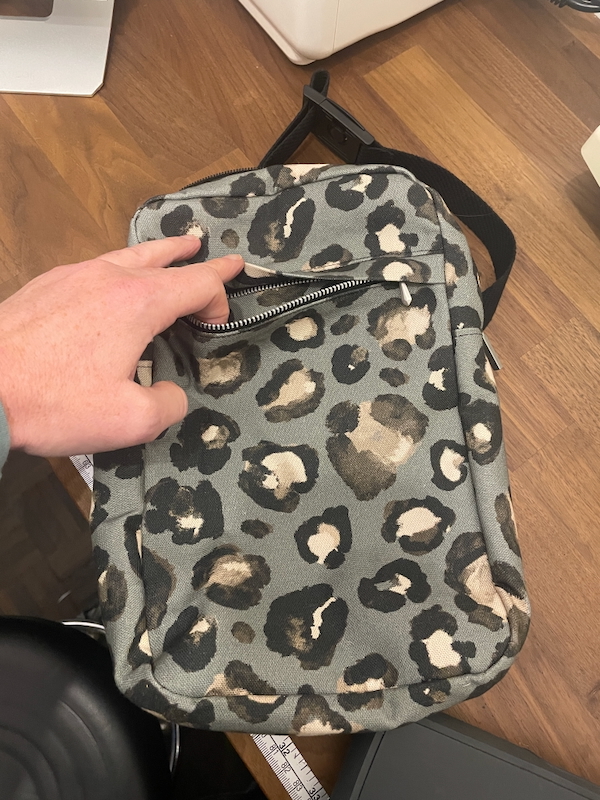
I e-biked up to MacCulloch & Wallis for the zippers and webbing, finding a lovely cotton webbing (usually they’re all poly or nylon!), metal zip for the front pocket, and a double headed zip for the main bag opening.
I specifically wanted 1 inch webbing instead of the 1 1/2 inch called for in the pattern so I could use a fancy magnetic buckle and slider I bought at extreme Textil in Berlin in 2023. This meant I needed to redraft the triangular Shoulder Connector piece to narrow down further to be 1in at the end instead of 1.5in. I redrafted the Strap Holder too, then realised with my different buckle mechanism that I didn’t need that piece at all since my webbing attached directly into the seam.

I’ve got no complaints about the pattern instructions – they’re clearly written, nicely illustrated and in a good and clever order. There are a few steps with videos too, but I’d rather pour salt in my eyes than watching sewing instruction videos, so I didn’t even look at those (nor did I need them!).
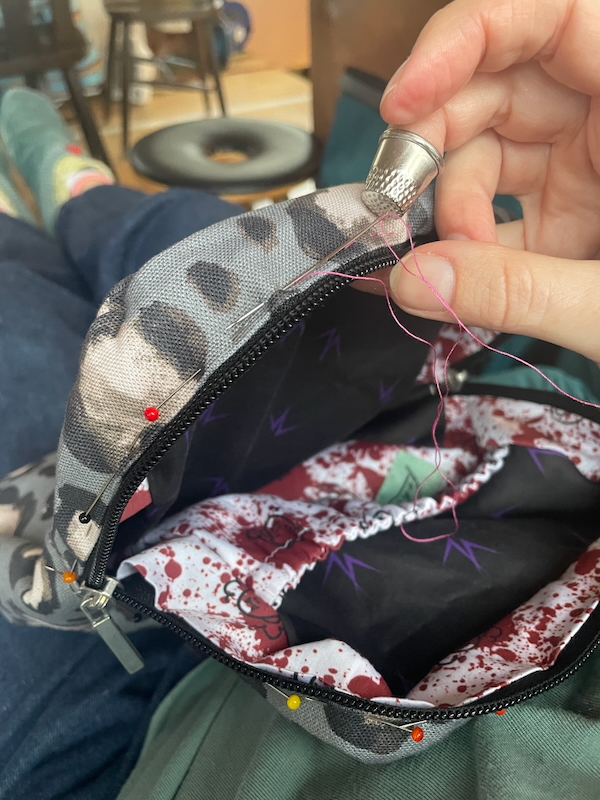
I added a key leash to the lining but that was my only change inside. In the last step I opted to hand baste before sewing around the zipper opening, but next time I might just pin and skip the basting…
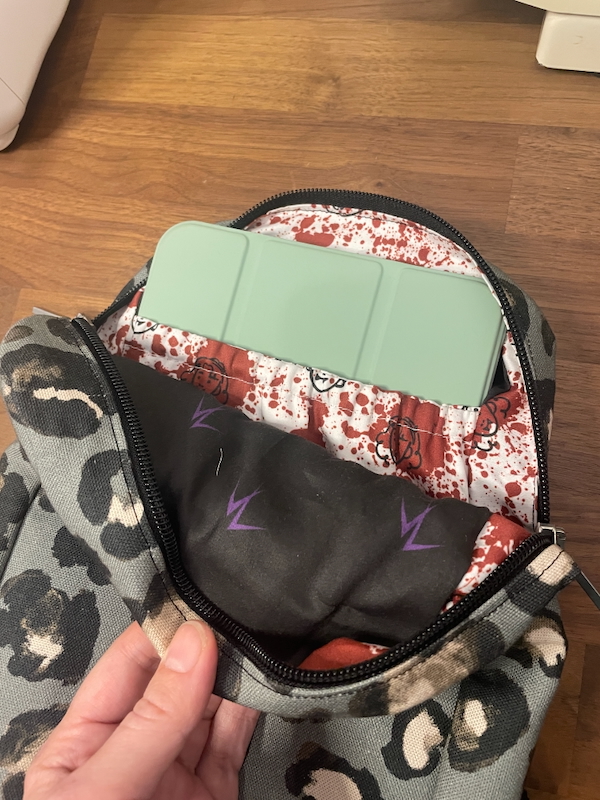
Surprisingly, this also fits my iPad mini (including its case with the ApplePen on the side) AND the ebike battery! It’s easy to wear while cycling and looks really nice too I think!
The biggest cost was the zippers and webbing, (and pdf pattern) but it still worked out to under £20 all told!
I actually made this bag in October, and since then I’ve been brimming with ideas for things I want to sew, so I consolidated these into a Winter Sewing Plan:
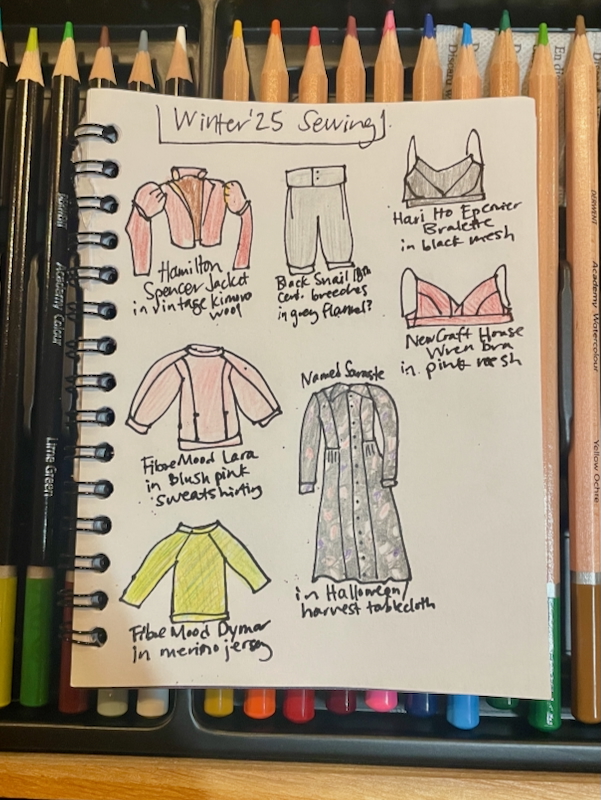
If you follow me on Instagram, you’ll already know which of these I started with…