Many of you correctly guessed that my first project from my post-coat winter sewing plans would be the Lekala knit top, as there’s nothing better than a “quick knit top” after a long and involved project!

Even better – this is my first ever Lekala pattern! This top is very similar to Burda magazine 05/09 #103A, but I’ve been wanting to try Lekala for months now, so I went with this instead.
Lekala patterns are usually €0.50 each (€1 if you want seam allowances included), but 8004 is one of Lekala’s free patterns made to your measurements. You enter in your height, bust, underbust, waist, and hips (all in cm), and then you’re emailed a pdf pattern! I chose the pdf pattern for A4 paper with no seam allowances.
Pattern notes:
- This was really easy to trim and tape together (very similar to BurdaStyle.com’s patterns).
- It took me about 15min from printing to cutting out the fabric (so about as long as tracing this would’ve been)
- The back and lower front pattern pieces were not on the fold, though, which wasted about 5 pages.
- The grainlines are confusingly labeled as “Beam”
- I folded the back and lower front pattern pieces in half and cut the fabric on the fold anyway
- Amazingly this top only took 1m of fabric!!
Construction notes:
- Some of Lekala’s patterns have English instructions, but this one was only in Russian so I didn’t even look at them.
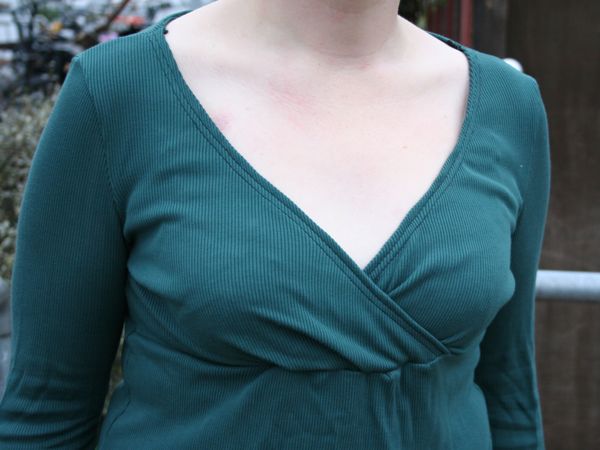
- I applied clear elastic along the upper front opening, then folded it inside to prevent gaping (I stretched mine slightly as I sewed but I think it’d be better if I hadn’t)
- I used vilene bias tape on the shoulder seams, as with all knit tops, to keep those from stretching out over time
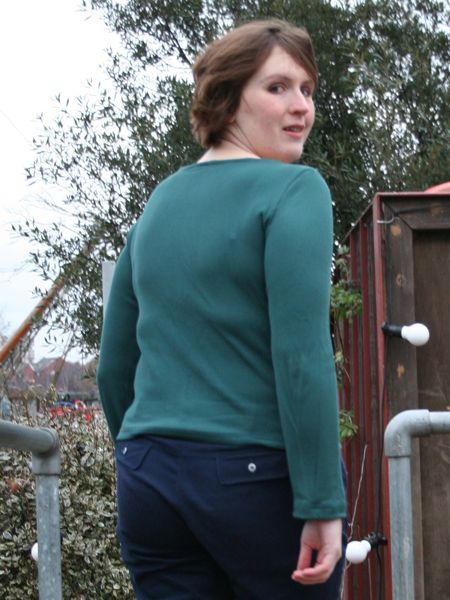
- No back facing is given, so rather than fold over and clip the seam allowance, I took a strip of leftover fabric about 1 1/2” wide, sewed it to the back neckline right sides together, flip to the inside and coverstitch (or twin needle)
- Fold the pleats on the upper front pieces, pin, and baste along the lower edge
- Pin clear elastic to the wrong side of the upper fronts, a 1/4” or so from the diagonal opening edge so the edge of the elastic sits right on the seam line. Use a wide zigzag stitch through the centre of the elastic.
- Stabilise the back shoulder seams with vilene bias tape, lightweight interfacing, or clear elastic
- Take a strip of fabric 1 1/2” inches wide and pin along the back neckline, right sides facing. Sew together.
- Sew the shoulder (and facing) seams together, folding the back facing flat and attaching that to the front seam allowance (the back facing will be a bit longer though)
- Fold the front neckline edges over so the clear elastic is concealed and pin in place. Fold the back facing strip to the inside and pin in place. Coverstitch (or twin needle) stitch 1/4” away from the folded opening edges.
- Place the upper front pleated edges against the lower front’s top edge. Overlap the pleated portions so that the edge of the left upper front meets to the right side notch, and vice versa. In the photo and tech drawing, the right upper front is on top.
- Attach the sleeve to the armscye, matching the notch to the front piece and easing where necessary near the top of the cap. Repeat for the other sleeve.
- Sew the sleeve and side seams in one go, making sure the underarm seams match up nicely.
- Fold under the seam allowances of the sleeve and hem. Coverstitch (or twin needle) near to the edge
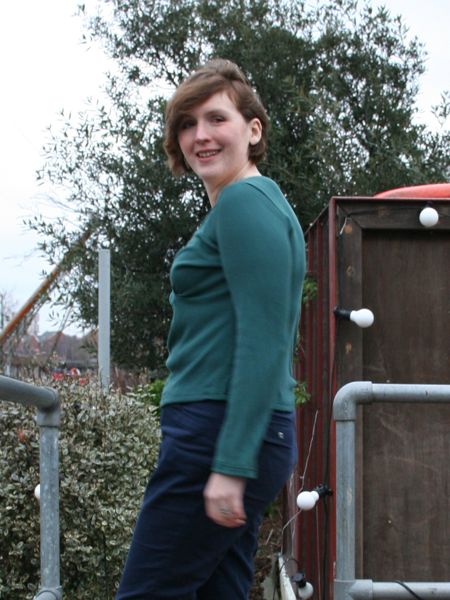
- Strut.
My suggested order of construction:
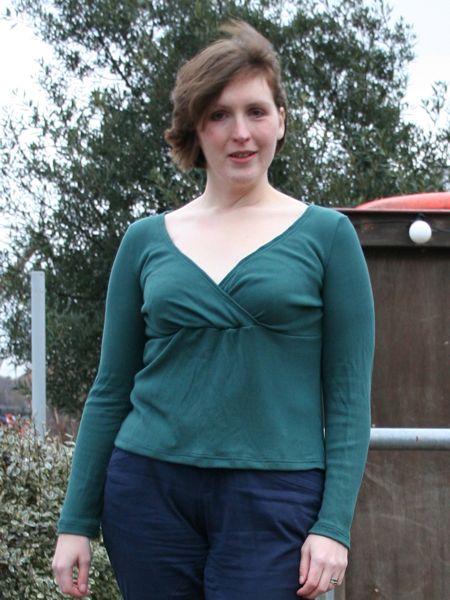
As expected for a made-to-measure pattern, the fit is spot-on! And happily, the wearing ease is much closer to the fit of European patterns like Burda or Knip (I was hoping it would be – nothing’s worse than the unpredictable ease of the Big 4!!).
This fabric is a viscose(rayon)/lycra mix rib knit from Ditto, which I got for Christmas this year. This is such a big, lovely beefy rib knit – not like the pathetic and flimsy rib knit I got from Fabric.com recently (that one is really only fit for muslins!). My first thought when I opened this fabric is that it’s almost an exact match for a top I bought from the Gap at Penn State that I loved and wore for YEARS. And since this top miraculously only took 1m, I’ve still got another metre of it to use for something else!