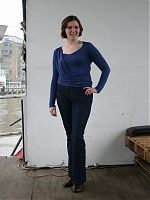
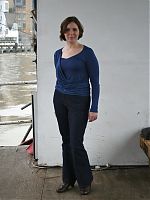
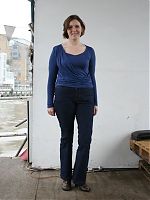
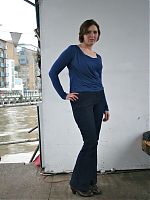
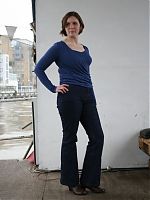
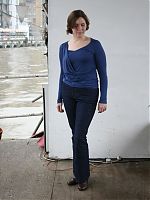
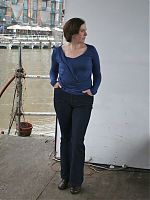
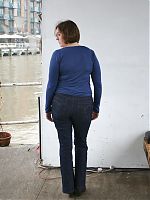
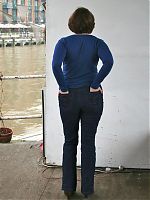
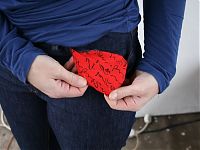
The ladies at the Walthamstow meetup got a sneak peek of my new jeans on Saturday, but now everyone can have a look at my (mentally counts…) sixth pair of jeans!
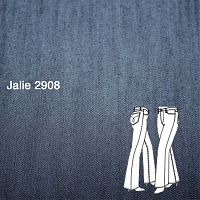
I wanted to try out the Jalie 2908 jeans pattern in cheap fabric before I broke out my good stuff, so I made these using some cheap stretch denim from Goldhawk Road, bought for £3/m. It’s papery and stiff and smells kinda like petrochemicals when you iron it, but it was taking up room in my stash and was good enough to try out the pattern (and good enough for wearing round the boat, too!).
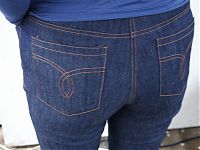
I made the regular rise version (as opposed to the low-rise) and I knew these were bootcut, but wow, this has a VERY flared leg! But the fashion mags can’t stop going on about how flares are big for SS11, so I suppose I’m ahead of the pack with these. I think the rise here is good and comfortable, and the crotch curve, bottom, and thigh fit my “white girl pancake butt” really well. The leg length on these was almost perfect for me, too – I only needed to add 1-2 cm past their hem line (I usually have to add more for Burda trousers, and nothing at all for Knip’s).
I’ve sewn with Jalie before, but it was nice to see that the instructions are as fabulous here as they were for other patterns. I just print off the pdf rather than refer to the (really awkwardly placed) instructions on the pattern sheets. The only construction order I really didn’t like was that they have you sew on the back pockets before sewing the centre back seam, which means your pockets may be slightly off. RTW jeans always have the back pockets centered to the CB topstitching, not the CB seam, so I found it much easier to sew and topstitch the CB seam and then attach the back pockets.
Now for the bad.
I HATE the waistband on these – hate it. I’m completely redoing it on my next pair. The waistband pattern is a long rectangle, cut on the bias, with a centre back seam. This is un-interfaced and folded over to form a self-facing.
This causes a multitude of ugly problems. First of all, the flimsy waistband means it started crumpling and folding over within 5min of the first wear, and no amount of belt will help that. But the bigger problem is that the buttonhole stretches out of shape immediately due to the lack of interfacing, and means it doesn’t keep the stress off of the zipper. The result? The zipper falls down constantly. Think about a pair of trousers that have no button or hook at the waistband – there’s nothing to keep the zipper closed at the top so it just falls open. That’s essentially what’s happening here, because the waistband is stretching so much that the button is essentially worthless.
Are you ready for the ugly waistband horror show?? If not, avert your eyes and scroll down quickly!
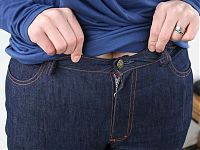
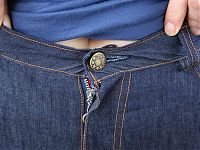
(Oh yeah, I’ll be wearing these with long shirts overtop!)
Not long ago, I would’ve thought there was something wrong with me – that I’d fitted them badly, or I’d sewn them wrong, or something. But with the eyes of experience, I can see that this is a problem with the pattern, NOT me, and how I want to fix it.
On the next pair I’ll be carefully selecting a curved waistband off another trouser pattern, interfacing it well, and cutting a separate, curved facing. I’ll also be extending the (nonstretch) pocket lining piece into the fly construction like my favourite Burda trouser pattern (it helps to keep my gut in a bit, ugh). I’m pretty confident that these two changes will make this my go-to fabulous jeans pattern! Confident enough to cut into my good Mood denim for the next pair, anyway…
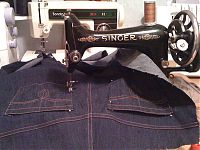
As I said last week, I love love love my vintage Singer hand-crank machine for the topstitching! It went through 8 layers of denim like it was nothing at all! I often end up with weird bobbin thread stitching when I’m topstitching through denim, but with this machine it was just as pretty on the underside as it was on top! LOVE!
As per usual, I used some fun quilting cotton (a wedding gift from from Sharon!) on the pocket linings and fly underlap!
Tips for sewing jeans
In the comments last week, Megan asked for tips on sewing her first pair of jeans, so I thought I’d share my own personal jeans-sewing tips for anyone looking to take the plunge!
Jeans aren’t any harder than normal trousers, they just take a bit longer to sew because of all the topstitching!
Things I’d recommend:
- Start with either a Burda or this Jalie Jeans pattern, as their crotch curves tend to work for most bodies (way more than any of the Big 4, and that’s not just me being biased!) and that is by far the hardest area to fit properly. Everything else can be easily fixed if you’ve got the crotch right.
- Stretch denim is MUCH more forgiving to fit than 100% cotton denim (so buy a pattern that specifically calls for stretch denim!)
- When topstitching, use Gutermann upholstery thread in the needle (NOT Gutermann “topstitching” thread, which is too thick for most machines!), and regular thread in the bobbin, and you’ll more than likely need to turn the top tension down to get a nice stitch
- If you’ve got a second sewing machine (even if you have to borrow one for a weekend), it makes it SO much quicker to have one threaded in navy and the other threaded for topstitching. Otherwise you are literally changing the threads on a solitary machine every 30 seconds (no exaggeration!).
- If you’ve got really heavy denim, you’ll need a denim needle (you’ll know if you need one because you’ll be breaking needles when going over thick layers)
It might also be worth having a look at the Cupcake Goddess’s Trouser sewalong for fit issues as she did some really good posts on fixing common problems! But as always, if you’re unsure of how the pattern will fit you or have expensive/nice fabric, then be sure to make a muslin in cheap fabric with a similar weight and stretch first!
Edit: To answer the comments asking about the top, it’s a RTW top from ASOS.com that I liked so much I bought in two colours. But it’d be very simple to draft your own from a basic, long-sleeved tee!

