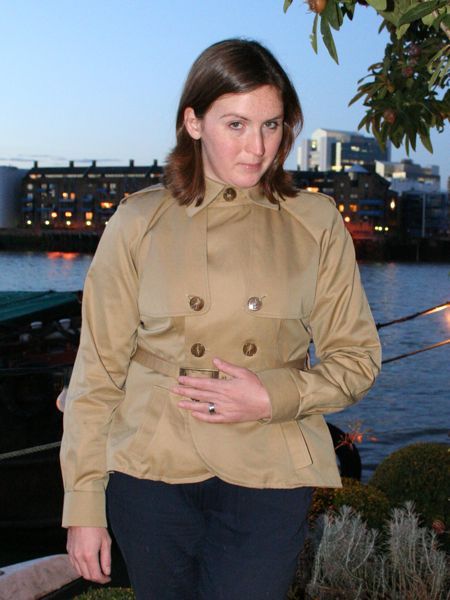
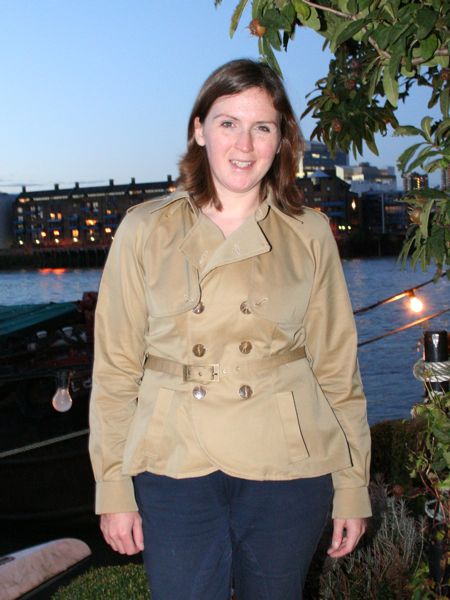
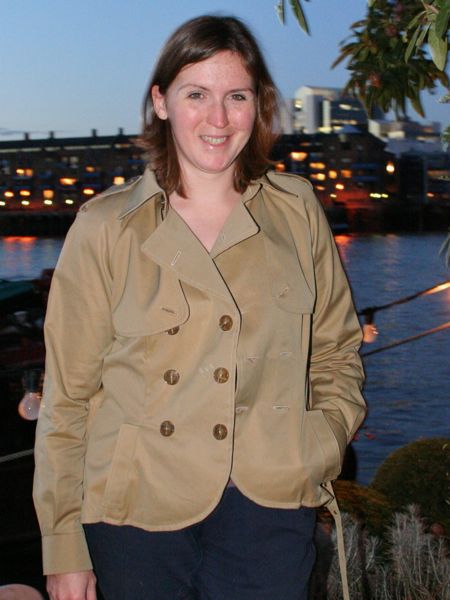
I’m so pleased to finally show you the first piece from my Fall 2011 sewing aspirations – the trench jacket!
As you recall, I was restricted in my pattern choice since I bought the last 2.5 yards of this waterproof gabardine from Mood when we were in NYC last Fall, but in the end I settled on Burda 02-2009-112. The gabardine feels great – it’s not coated with anything and it doesn’t feel plasticky – it’s just that the weave is so tight that water beads on it! Perfect for London!

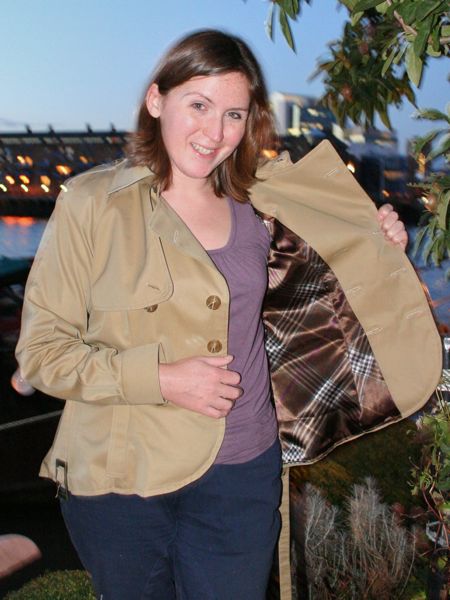
This is a Burda Petite pattern, but the only change I needed to make to the muslin was to lengthen the sleeves! I’ve been busy sewing this in tiny increments over the past few weeks because I’ve been so busy, and you can see that we had to squeeze in this photoshoot after work, too!


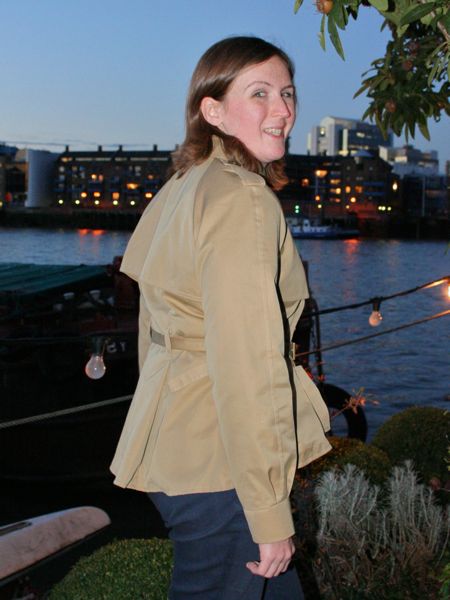
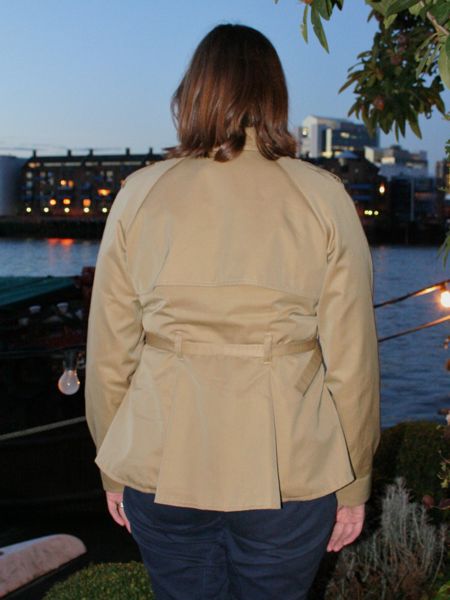
I really love the overall shape of this totally curvy jacket, but I especially love the pleated back vent, which was surprisingly very easy to sew! I cut the same pieces in the lining, and I cleverly waited to sew the diagonal topstitching to keep the folds in place until after the lining was in so the two layers stay together nicely.
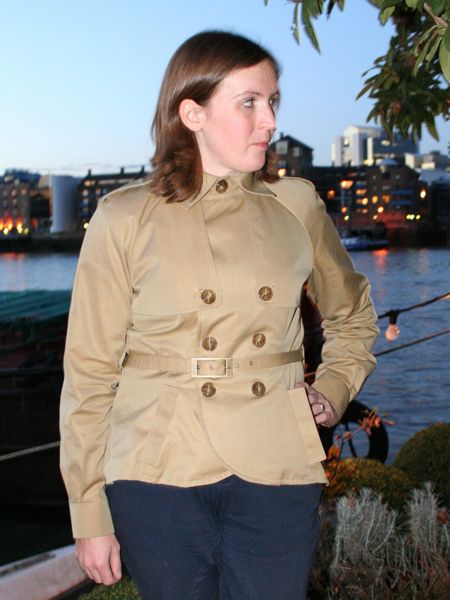
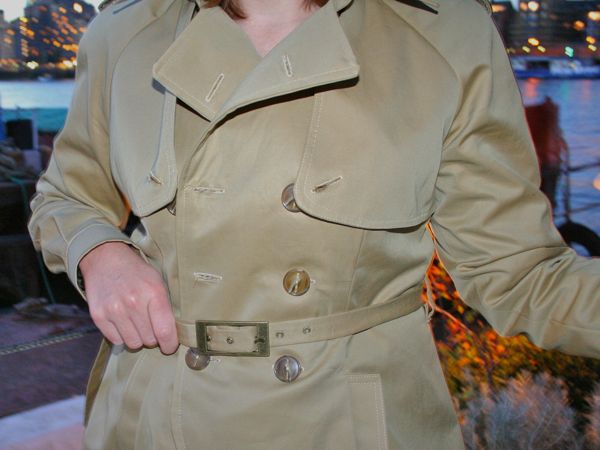
My only major change to this pattern was to add a belt. Personally I think it was strange that this didn’t already include one, since they include belt loops and trench jackets tend to be belted… Anyway, I had enough room to create an interfaced, 1 inch wide belt, using a brass buckle and great eyelets bought from Botani in NYC at the same time I bought the buttons. Even though I hadn’t picked a pattern yet last year, I somehow ended up buying only one extra button than I needed!
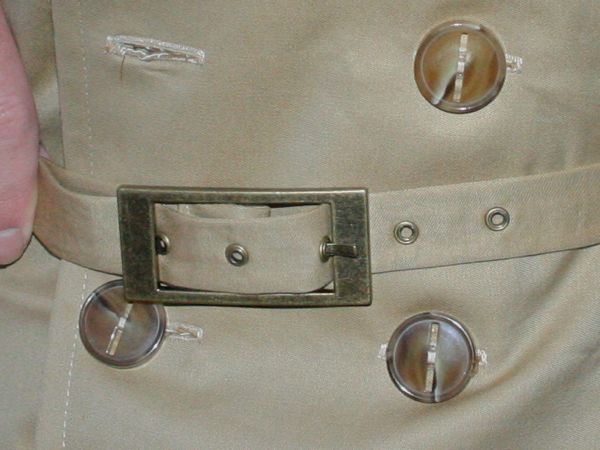
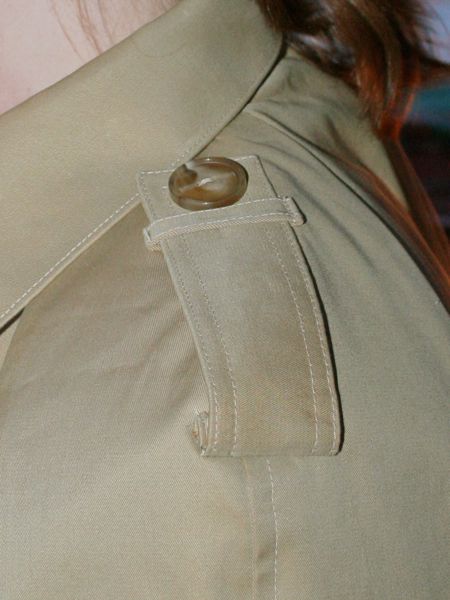
I used my Crop-a-dile tool to cut and set the eyelets, which was a huge time saver! It’s designed for scrapbooking, but I’ve used it for eyelets on leather and now thick, interfaced gabardine and been really pleased with the results both times.
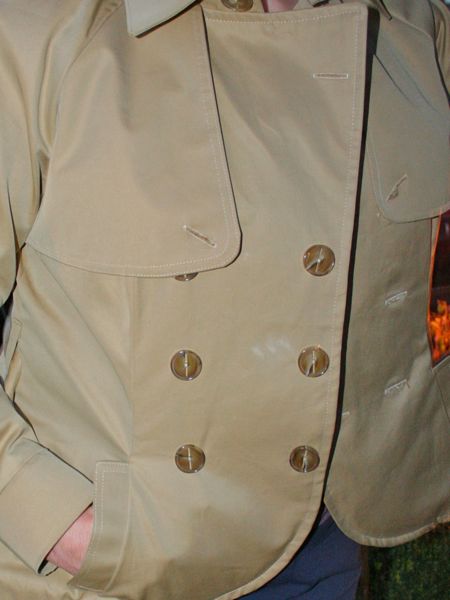
There were two weird things with this pattern, though. First, the pockets are t-i-n-y, but with their placement near the centre front opening and down by the hem, there’s only enough room to make them another inch or so bigger. You can’t really move them to the side seams, as they’d be too far back to be comfortable, and if you moved the opening any higher, they’d be in the way of the belt. So I kept the placement the same, and just increased the pocket bag by as much as I could.
But the other thing is that this is an unlined pattern (in a jacket? weird.), and the front facing piece is just strange – it’s only about an inch narrower than the front piece, but extends up the neckline, over the sleeve pieces at the shoulder, which just complicated matters when sewing the lining. If I made this again, I’d throw away this piece entirely and just use the front piece (piece no.1) as the front facing. I’d recommend anyone else do the same!
My only misgiving with this project is that the front hem doesn’t really hang as well as I’d like here, and I’m not sure if it’s because the waterproof gabardine is a tad too stuff, or because the lining is a tad too short, but it’s not really enough to detract from the rest of the jacket for me.

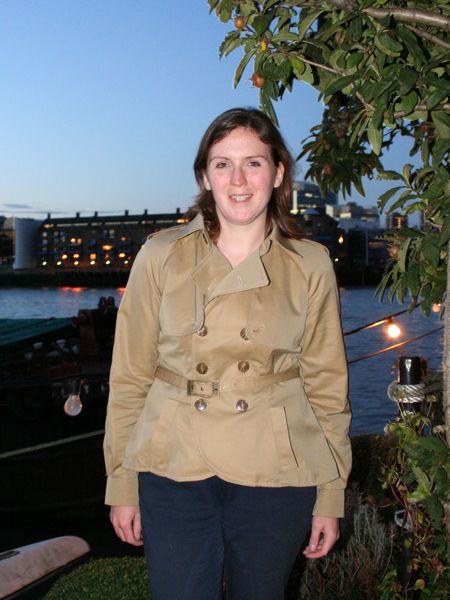
The only real downside of this jacket is the amount of time it takes me to button it up! I guarantee I’ll be the last one out the door every time! It’s got six double breasted buttons that you can see, but two of these also button through the front flaps, there’s a hidden button under a flap, too, plus one at the collar stand. I also inserted a clear, flat button on the inside to keep the underlap neat inside, but this is totally unnecessary and I’ve yet to bother buttoning it.
Oh, and the limescale my iron spewed on the front never fully came out, so I just lapped the left side over top instead. But you can see the remains of it here:
Overall though I just love what this jacket does to my figure – it actually gives me a whole lotta curves! I’m really glad I went with this pattern, as it’s classic enough to be identifiable as a trench, but just different enough to be something you couldn’t buy in shops. And at a cost somewhere around $30, I definitely have a fashion bargain on my hands.
The jacket isn’t 100% done yet, as I still have a small amount of handstitching to do on the inside (mostly on the sleeve linings), but we’re off to Hungary for our anniversary next week so I’m taking this along to complete then. It’ll be my (counts…) fourth time in Budapest (James’s third) but our first trip out to Lake Balaton, so we’re really looking forward to all the thermal spas and gourmet food!
Don’t look too sad, though, as I’ve got a few posts scheduled to go up while we’re away… But seriously – can you believe it’s been a whole year since the wedding? Where did the time go?