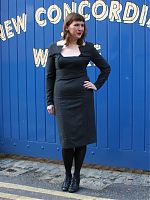
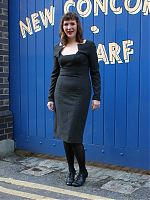
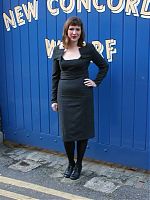
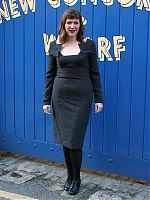
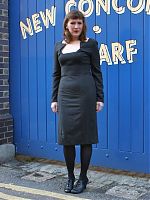
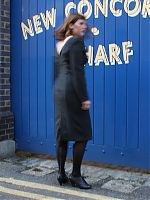
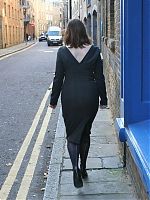
I feel like this post should have a warning, like those awful, dated jokes – Dangerous curves ahead! But to be honest, I’ve been running like a mad woman for the past few months, finally running much faster and further than I ever did before I got ill, so I’m relishing the chance to show off my running body right now*.
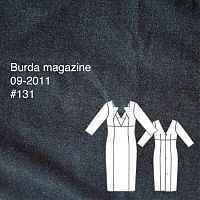
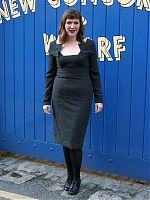
This dress was in the Sept 2011 Burda magazine, but it’s also available to buy as a download pattern on Burdastyle.com if you missed that issue (or believed the blog hype that it was a bad issue, gasp!). I really loved this pattern from the second I saw it, and all I really needed was a little nudge from BurdaStyle and I was totally sold on making this as my double-duty James’s birthday dinner and Christmas party dress.
Though on reflection, it might be a bit too sexy for my office party.
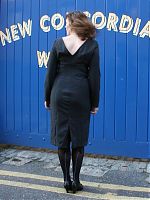
As this was a close fitting sheath with a non-stretch fabric, I opted to go right ahead and make the only fitting alteration I ever make with Burda patterns, and even then it’s only occasionally – I removed 2cm above the waist line across all the vertical panels so the waist of the dress is more in line with my own.
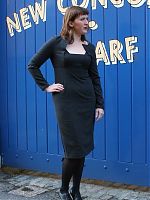
The only style alteration I made was to alter the sleeve length to be full length rather than bracelet length. To do this was a serious no-brainer – I just laid a regular Burda full-length sleeve underneath this one, matching up the underarms, and marked the new length. Then I just extended the sleeve seams down to the line. Done!
Seeing the ease markings on the sleeve cap made me nervous that there was going to be a bunch of unnecessary ease there, so I got out the super handy “pizza wheel” measuring tool I got from yoshimi and walked the seams of the sleeve cap and the armscye, only to discover there’s actually only 1cm of ease there, which is totally acceptable to me. So I didn’t make any changes there, and just did a bunch of perpendicular pinning as my own favourite easing method (none of that extra stitching business for me!!).
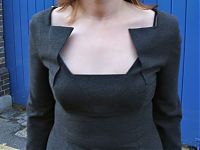
If you usually require an FBA, it’d be super easy to do one on this pattern – the little “wings” attach onto a glorified princess seam, so you just need to cut those off your pattern on the marked lining line, do your FBA, and then reattach them when you’re done. That being said, this is a low cut, very close fitting dress, so if either of those descriptions make you nervous, you can a) make a taller inset triangle piece to raise the neckline and/or b) go up one size in the skirt pieces or use a stretch woven fabric.
The instructions in Burda magazine are often very sparse and sometimes cryptic, but these were actually very useful and downright sensible. I followed them the whole way through the bodice construction, and only really deviated because I thought it’d be a better idea to attach the lining to the neckline before I attached the skirt to the bodice. But in hindsight, it really didn’t offer much of an advantage, so I’d just say to stick to their instructions.
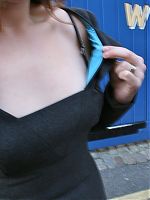
And since I mentioned lining – this pattern only calls for a bodice lining – the skirt and sleeves are unlined. I followed along with that here, since my flannel is soft and stable enough, but there’s nothing stopping you from lining the whole thing, and there’d definitely be less hand sewing if you did that, too! Instead, I chose to overlock the seam allowances of all the skirt pieces to prevent fraying, and then do all the construction as per normal on my sewing machine. On the hem, I used a bit of black lace before handstitching it on the inside.
The charcoal grey flannel was a gift from Neighbour Helen back from when she worked in the industry, and, as such, I can’t actually tell you which designer this (and its slightly-paler grey twin) is from, lest she get into trouble. But it’s a label most of you have heard of and it’s very, very nice quality. It still had the original label on it from the mill, listing its fibre content as 68% poly/29% viscose/3% elastane (though I swear it’s non-stretch!), with the designer name printed on it, too! I lined the bodice with the leftover turquoise bemberg I bought in Paris and used to line my motif dress, and I just adore the colour combination!
The nice thing is that I’ve got enough of this flannel leftover to make the vintage midi skirt pattern I picked up in Sheffield recently, too. And then there’s the slightly-paler grey flannel, too! It’s going to be a great winter, I can feel it!
UPDATE: I had no idea this was based on a designer pattern until people started pointing it out to me! See the similarities with Roland Mouret’s “Macha” dress here!
*Also, I’ve gone and signed up to run my first ever half-marathon in early March. In Paris! I’m excited but also deeply nervous!!

