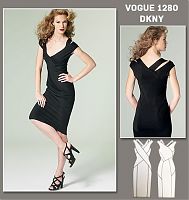
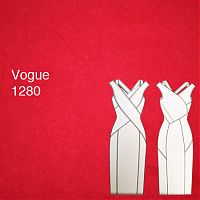
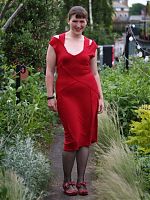
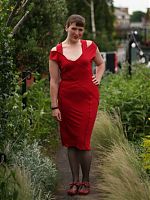
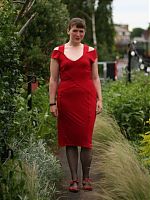
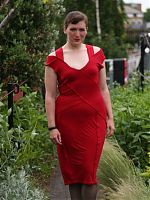
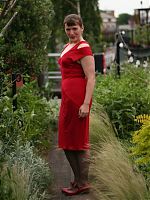
I don’t often sew Vogue patterns, but I am a massive fan of the Donna Karan patterns’ design and execution, so it’s no surprise that I added Vogue 1280 to my Wish List the second it was announced recently!
Happily, my mom saw there was a pattern sale where she lives in the USA and offered to buy a few patterns for me at US sale prices – she paid less than half the price for the pattern + shipping to the UK than I’m charged just in postage to the UK for the same pattern! I wasn’t planning on sewing a dress right now, but I got so excited when I saw Vogue’s numbered pattern marks for the first time (possibly in response to my complaints regarding Vogue 1259’s instructions), that this dress moved quickly up my Must Sew list.
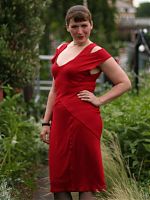
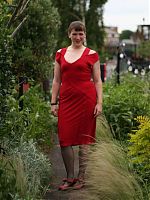
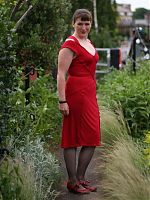
Like all DKNY & Donna Karan Vogue patterns, this one’s a great mind puzzle to put together! It also has the joy and wonder of looking like a total mess until the very end, when it all comes together into a dress shape. I found it to be true to size, so go with your measurements, not some vague idea that all Big Four patterns have tons of ease. Most of the pieces are cut on the bias (not that it means much in a jersey!), and it hugs the body very closely. If you’ve got any lumps and bumps, though, this is not the pattern to hide them, and so you’ll probably be wearing Spanx underneath in addition to the strapless bra the bodice requires (Full disclosure: I’m not wearing Spanx in these photos!).
I love it when I’ve already got the perfect fabric in my stash for a pattern, and this cherry red bamboo lycra from Ditto was exactly right for this! I’ve sewn with Ditto’s bamboo jersey before and it’s so wonderful, with wonderful softness and recovery, and reasonably priced, too. I’ve been told the processes involved to create bamboo fabric are not as eco-friendly as they’re made out to be, so I don’t know if I’d be keen to buy more, but since this was received as a Christmas gift last year, what’s done is done and I’m just going to enjoy wearing it.
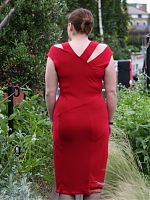
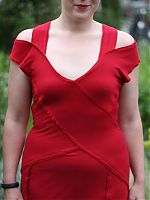
The only things I don’t like about this pattern is that I wasn’t aware the wide straps were as off-the-shoulder as they are. As a result, I moved the right, narrow strap down a bit on the neckline (ie: I moved Mark #15 to be closed to the CF) to be a bit more supportive. If I were to make this again, I’d pinch some length out of Pieces 2 and 4 at the shoulders so they’d be more cap sleeves than off the shoulder.
The other point is that this is REALLY FREAKING LOW CUT. I’m talking low by even European standards. If you’re American, you’re going to feel like your navel is exposed in this. After construction, I hand-sewed a small piece of leftover trim to the inside neckline at the Centre Front, and when I’m wearing the dress, this piece of fabric goes under my bra, and keeps the dress anchored at my chest and helps stop my bra from being exposed. It’s a trick I’ve used extensively in the past with cowl-neck tops, and it’s a great one to use here, too.
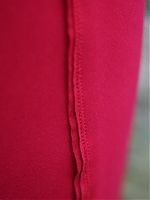
It’s difficult to see in the online tech drawing, but nearly all the seams are trimmed, then lapped, with a raw-edged piece of trim inserted, and then double-stitched (hello, coverstitch!) on top. There’s really nothing stopping you from constructing this on your overlocker (serger) and using a traditional seam construction, though, if you don’t like the double raw-edged look.
I had a stroke of genius here in my quest to find enough red thread to fill my overlocker, sewing machine, and coverstitch, and I ended up using Gutermann upholstery thread in the needles of the coverstitch machine. This turned out to be such a good idea, once I got the tension right, as the thicker thread really makes the interesting lapped seams stand out more!
Overall, though, I’d say the construction of this dress was 20% sewing machine (for basting the trim), 5% overlocker (for two back skirt seams, sewn traditionally for some reason), and 75% coverstitch machine. If you’re thinking of buying a coverstitch, this would be an excellent pattern for getting lots of practice in!
Otherwise, I’d strongly suggest using twin needles on your sewing machine instead of Vogue’s two-pass approach. If you’ve only got one sewing machine, baste the trim on all your pieces first, then thread up your twin needle and construct according to the instructions. That way you won’t be constantly rethreading the machine.
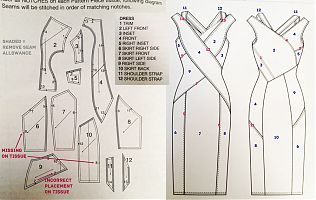
While I was tracing and sewing the pattern, I made some notes on my pattern sheet. Vogue suggest in their instructions that you use low-tack painters tape to label the various numbered marks, and this is something I highly recommend!
On the left you can see I’ve shaded which seam allowances require removing if you follow the pattern’s trim suggestion. I folded mine out of the way so I could cut along this line when cutting out my fabric, rather than having to cut, then trim away later. But I left the seam allowances attached in case I want to sew this later with traditional seam construction (since I knew I’d forget which had included them and which I’d removed).
You can also see I’ve noted where both Mark #8s were missing on the pattern tissue (it was missing on both pieces), and also that Mark #7 was in the wrong place on Piece 9. None of these caused any particular problem during the construction, just be aware that they’re mistakes, and you’re Not Going Insane.
Also, up on the right side I’ve marked the piece numbers in blue, and the marking numbers in pink in case it helps others figure out the construction. Note that I’ve not included all the markings here – some of my painters tape pieces fell off before the final construction so I chose to omit them rather than accidentally put them in the wrong place!
We took these photos just before we left to go out on Saturday night to James’s Aunt & Uncle’s 50th Anniversary party. They’ve been so wonderful to us over the years, and Auntie Anne did the flowers at our wedding, too, so we really wanted to make an effort for them!
You’ve seen what I was wearing, but James brought out his new “Pete Campbell blue” Jump the Gun suit, too:
It’s the same 1960s mod cut as his wedding suit, just in a different colourway, and he’s been coveting it for about three years now. Doesn’t he look dashing! Shame we didn’t grab a neighbour to take a couples shot of us together!

