Happy Friday! To celebrate, I’ve got the last of my made-on-Easter-weekend, photographed-in-Baltimore makes to show you!
This one’s from the second Drape Drape book, which I received as a Christmas present this past year. Even though I’ve had the first two books for a while (and just received the third this weekend!) this is the first thing I’ve made from the series.
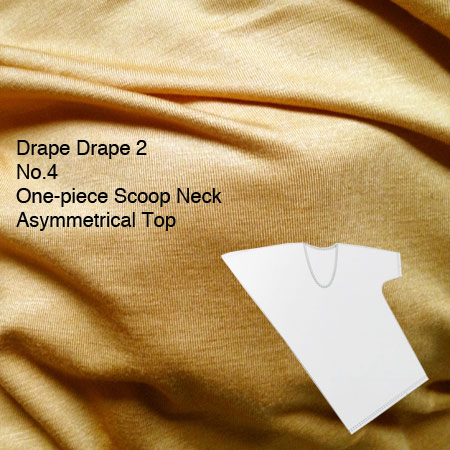
I think part of my hesitation comes from the very Japanese sizing – this is drafted for ridiculously tiny Japanese ladies – in their sizing I am an XXXL!. For this pattern there were only two sizes, though: S-M and L-XL. I made the larger and just crossed my fingers that my Burda size 42 body would fit in okay at the hips (the only even remotely fitted area).
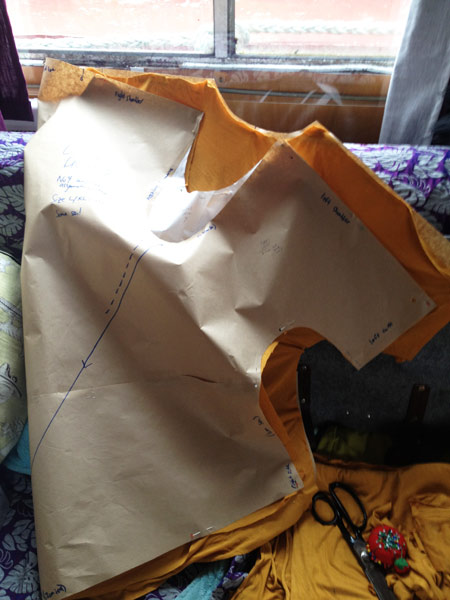
Unlike the Pattern Magic books, these patterns are traced from sheets at the back of the book rather than drafted from a block, so it’s not as easy to just adjust the design around your own measurements.
But anyway, I needn’t have worried, because the L-XL size fits me beautifully, hooray!


In case you’re wondering, the Drape Drape patterns do include seam allowances but seamlines are also indicated, so if you would rather trace along the seam lines and add your own allowances later, it’s an option. I always like it when patterns do this, but obviously it’s something you can only do if you offer a few sizes, otherwise it really clutters up the pattern sheets!
This top is cleverly made from only one piece of fabric, but its pattern piece is ENORMOUS! So big that it had to be pieced together after tracing and it was a PITA to cut the fabric, too, taking up my entire living room floor space!
The books only contain the briefest of sewing instructions (really more like an order of construction) but crucially have some diagrams so it makes them a bit easier to follow, than, say, Burda magazine, even though they’re terser. For this top, it was really just: finish the right side sleeve opening, sew the shoulder seams, sew the left side seam, hem the left sleeve, finish the neckline, hem the bottom, done!
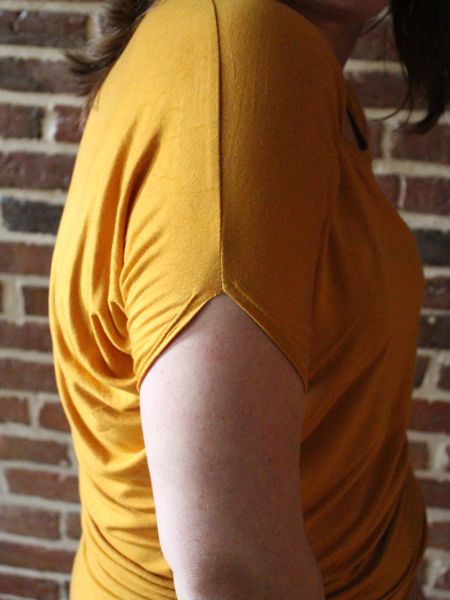
Thank you so much to all of you who commented to say the neckline was ridiculously low! Because of this, I raised the neckline 10cm (4 inches) and it’s perfect for me now! (Remember if you do this that your neckline binding doesn’t need to be as long!)
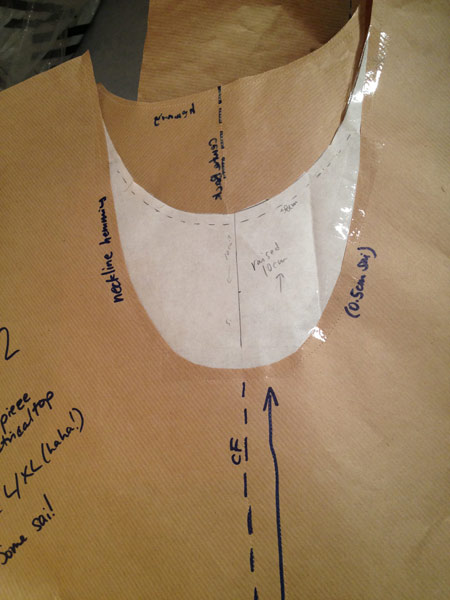
(The white part is my change – the back neckline in brown is shown behind it for comparison)
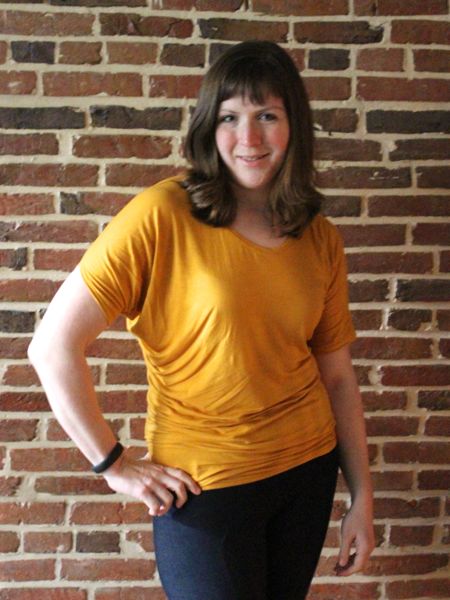
I really love the design – it’s easy to wear with leggings or jeans and it feels really stylish for what’s essentially just a drapey teeshirt. I’m a total sucker for anything asymmetric and this has got some fantastic draping under the right arm when you wear it, and the right arm opening is really just a finished slit (the left side is a short kimono sleeve).

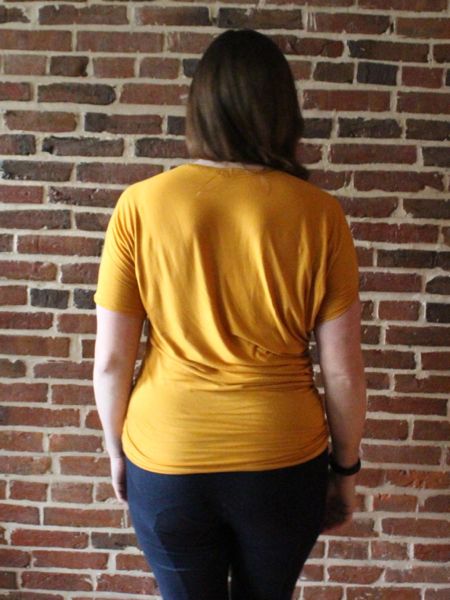
I’d totally make more of these now that I’ve traced it out – the pain is in cutting the fabric (and getting Nishi not to sit all over it!) but making it is really, really, quick, and Tissu’s viscose lycra jersey is so cheap I can really make these very economically. Here I’ve used their “Mustard” colourway, but I have plenty enough leftover from the 2m I bought to use again, too (which is great because I love the colour!). So look out for this in a week or two, as it’ll probably be incorporated into my Ivy tee!
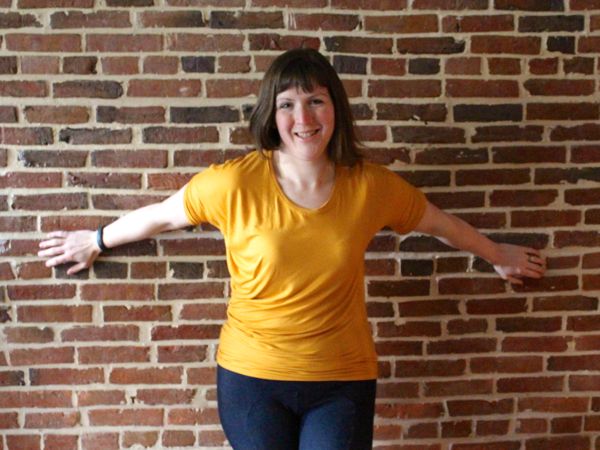
Funny, I wasn’t really expecting to like it as much as I do, but it’s a great little stylish teeshirt pattern!