Mari’s very kindly let me hijack her blog today to show you truly one of the easiest, yet most versatile items you’ll ever make. If you’re anything like me, you’ll take a look and think “Really? Just a tube of fabric?” but trust me on this – it’s super useful and if you know anyone who’s into adventure sports, they will love you forever if you make them a few from your jersey scraps. Win for them and a win for you as you’re clearing out your scraps to make room for more fabric, right?!
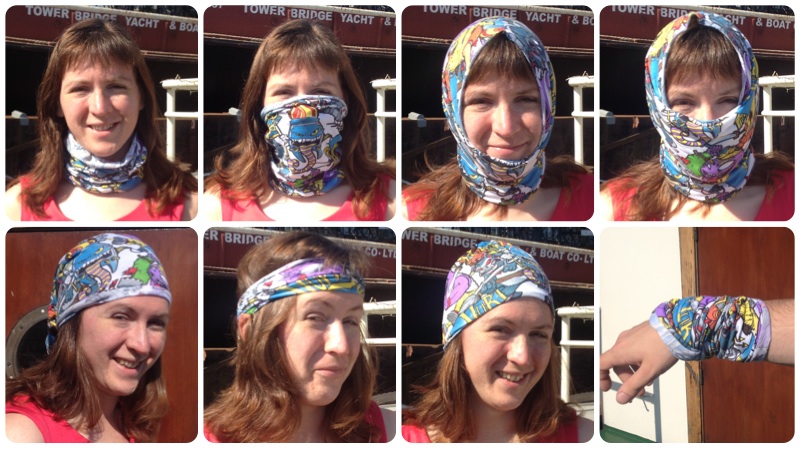
In short, yes, this is just a tube of fabric. But like the infinity dress, it’s a lot more than that – you can wear it as a muff around your neck, a headband, a balaclava, a scrunchie, a do-rag, and (the coolest IMHO) with a twist, you can make it into a beanie, too. The original Buff man explains it best in their slick video.
A friend of mine came to visit recently and he’s a big bouldering fan (that’s rock climbing without the ropes, to you and me!). He wears Buffs all the time while climbing, and says they’re great in the winter for keeping warm, great in the summer dipped in ice water for keeping cool, and great all year round to prevent rubbing or chafing from helmets, too. They’re also a big hit with trail runners, hikers, and snowboarders, too!
The original Buffs that you buy are a seamless tube of fabric, but unless you have your own jersey loom (didn’t think so), we’ll just have to accept having one seam in ours!
You’ll need:
-
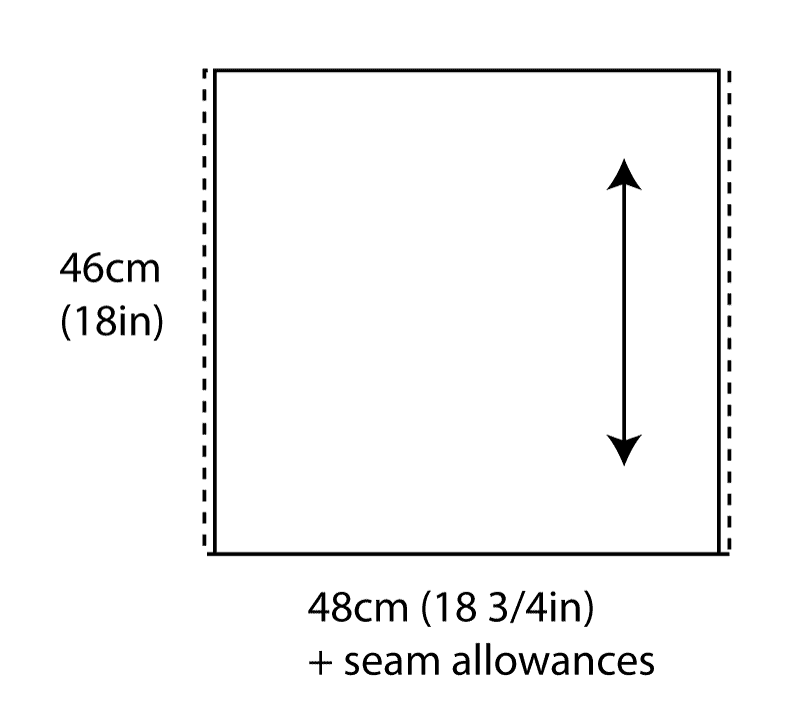
- A piece of jersey 46cm x 50cm (about 18in x 20in). This needs to have good stretch and recovery, but should be soft against the skin, too. Wicking fabrics or merino wool jersey are ideal!
-
- Sewing machine or serger (overlocker) with matching thread
-
- Large-eyed needle (optional)
Step One – Cut
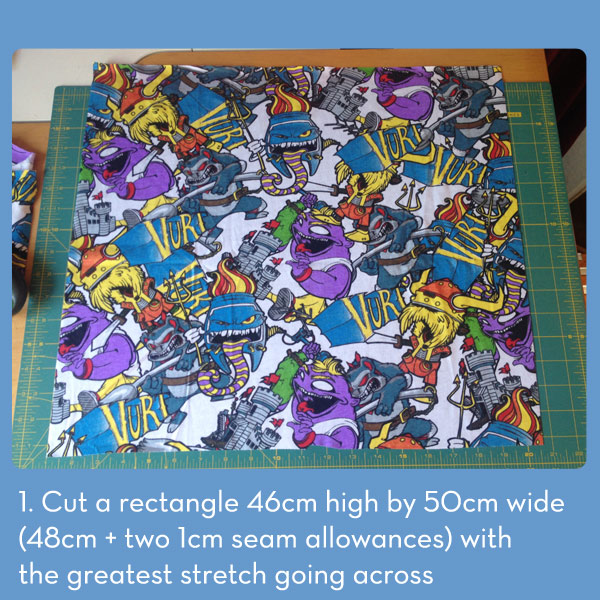
Cut your fabric down to 46cm high by 50cm wide, with the stretch running across. I’ve included 1cm seam allowances on the sides, but the top and bottom will be left unfinished (like in the original) as jersey will just curl instead of fray. If you’d prefer to hem the top and bottom, add seam allowances onto there, too.
Step Two – Sew
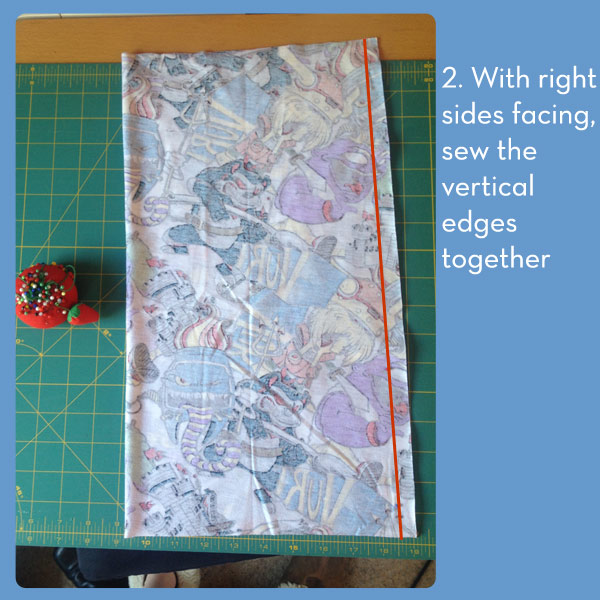
Fold the left side over to the right, and sew along the right edge. If you’re using a sewing machine, sew with a narrow zigzag stitch. Or if you’ve got an serger (overlocker), use that!
Step Three – Finish
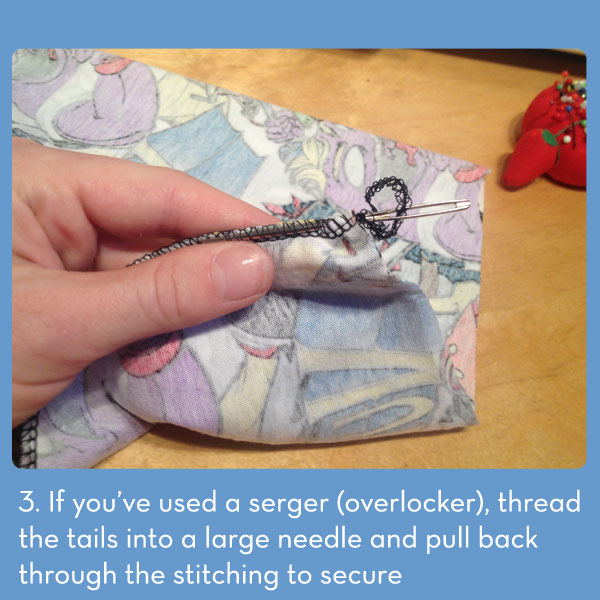
If you’ve used a serger (overlocker) in the last step, you’ll need to tuck your thread tails inside the seam so they don’t unravel (Fray Check can be scratchy when it dries, so try to avoid that here). If you opted to finish off your top and bottom edges, fold these to the inside now, and topstitch using a twin needle (or coverstitch machine).
Step Four – Wear
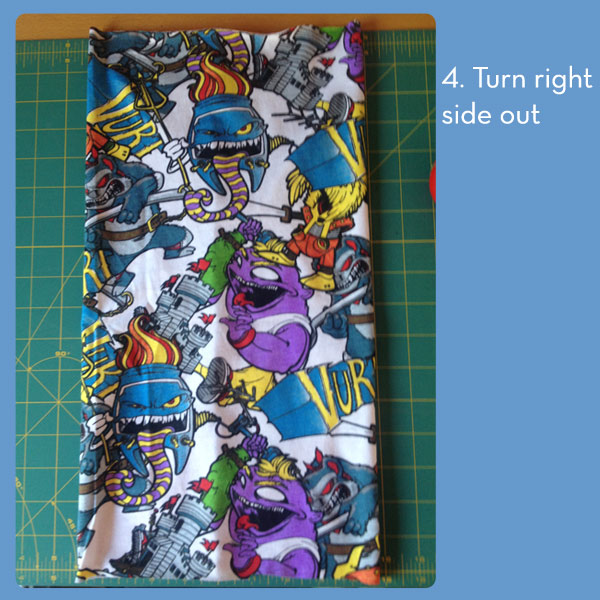
Turn it right-side out and it’s ready to wear!
Not often do you come across an item that’s easy and quick to sew, only uses scraps, makes a great gift and is super useful, too! My friend liked this example monsters version so much that he wore it all day then took it home with him!
This post is getting a HUGE amount of traffic recently (for obvious pandemic-related reasons!) so first of all, big up my hosting provider for bumping up my bandwidth without charge, because y’all have absolutely crushed through my normal allowance.
Also, while I’ve got your attention, please have a look at my activewear sewing patterns over at shop.fehrtrade.com – there are even some free and very beginner-friendly patterns to take your newfound sewing skills to the next level. If you need some help and advice, check out my “Sew Your Own Activewear” book, or my Bluprint “Serging Activewear” class. Stay safe, people! -melissa, May 2020