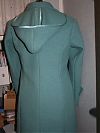
Are you thoroughly sick of the sight of the Patrones spring coat yet? Well, too bad, because it’s taking me forever!
The good news is, I sailed smoothly over the speed bump that caused me so many headaches and delays in making my winter coat – the bound buttonholes. I’d already decided that with such a thick, loosely woven fabric that’s so prone to unravelling, that I’d use the satin bias tape I’d bought for binding the hood seam allowances to also make the bound buttonholes.
So I pressed the satin bias tape flat, cut it down to 1/2 inch wide strips, then folded these in half (right sides out) to make the buttonhole “lips”. After basting my ladder stitches on all the coat tabs, I did the usual technique of sewing these lips to the right side and cutting open the buttonholes.
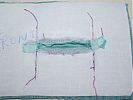
But here’s where I deviated a bit – since my wool unravels so much, I knew that trying to stitch those tiny triangles at the ends would just be an exercise in futility, so I pulled out some lightweight knit interfacing and cut out a tiny strip. I then pulled the triangles to the back and fused the interfacing over top to keep them out of the way:
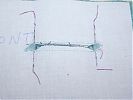
(It’s a bit hard to see but the mesh white interfacing over the left and right ends is there!)
This worked so well that I carried on and fused over the ravelly long edges of the lips, also, after I’d folded them over to the right side:
This made the reverse of the front tabs nice and neat, but creating the hole on the back of the tabs was equally annoying, so I pulled them back and handstitched as best I could, and after testing on a scrap, fraychecked the heck out of the back of the buttonhole!
I really like how the satin makes the buttonholes stand out on the coat, and the buttons are so big that it’s really a feature you’ll only see when the coat is open.
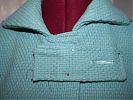
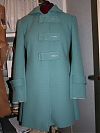
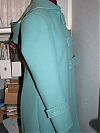
I’m topstitching the button tabs onto the coat at the very end (so they’re just pinned in these photos), but I’m otherwise done with the shell of the coat! I’m really, really happy with the overall line and shape of the coat and sleeves here – they hang beautifully and this pattern’s got such great bones!
I always find that the shell of the coat takes way longer to sew than the lining, even though it appears as though there’s just as much inside as out, really. But I cut out the lining pieces at the same time as the shell, and in about 5 minutes I’d already assembled the entire back lining, so I’m optimistic it’ll get finished this weekend (especially since I’ll have a lot of time to handstitch the hem and sleeve hems at the moorings craft night on Monday!)..

