I don’t tend to post about in-progress garment much anymore. I think part of the reason is that I tend to make projects quickly, so there’s not much to document and I roll any construction notes into the finished garment post, but also because I’m not not exactly light on garments to post about and it takes enough time putting together the ones I do share without adding any more to the To Blog pile!
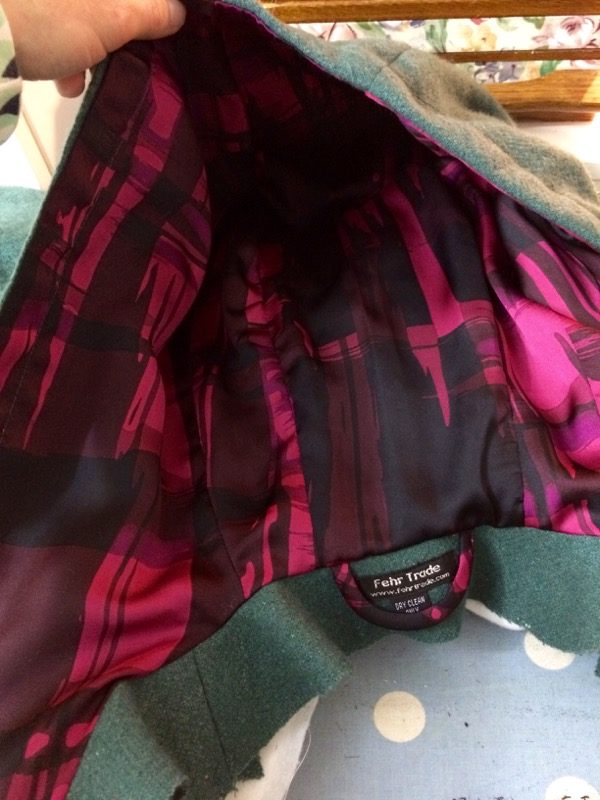
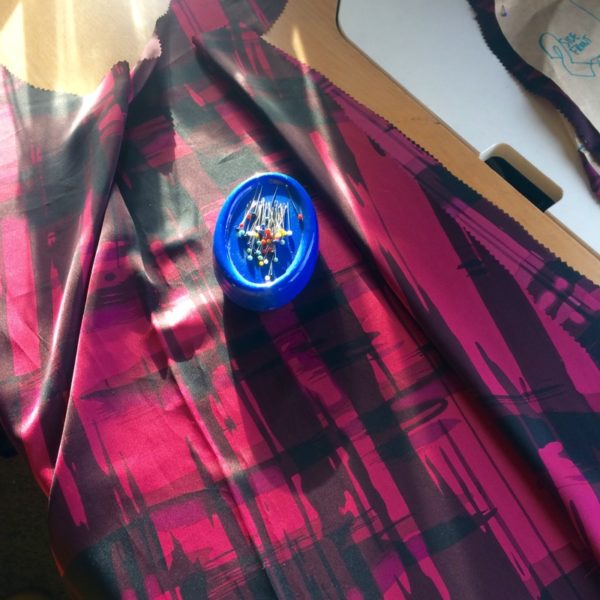
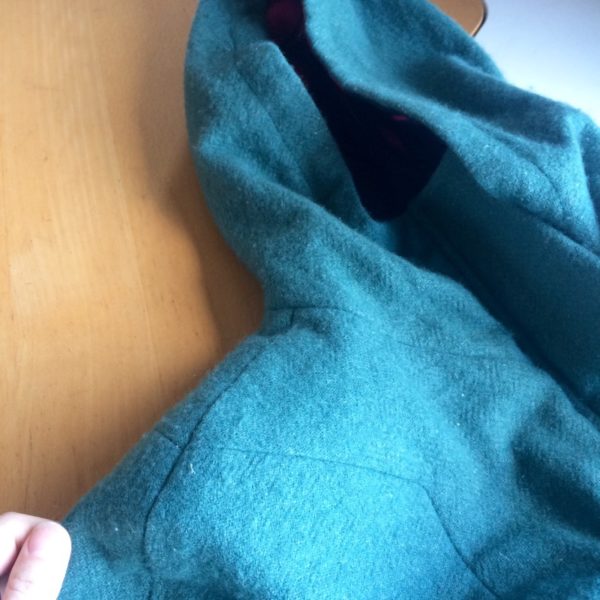
But I’d been making a lot of quick garments in the past few months and decided I wanted something a bit more involved to sink my teeth into, so I started making a cape, using this Burda magazine pattern from 2011 (still available to buy as a pdf). I had some gorgeous teal wool coating a friend had bought for me in Tokyo in January, and I thought it paired really beautifully with some black and pink abstract tartan fabric I chose from Sew Essential as my #sewphotohop prize draw. It’s a lightweight John Kaldor satin with a lovely hand that you really could believe was silk, but alas, it doesn’t appear to be on the site any longer!

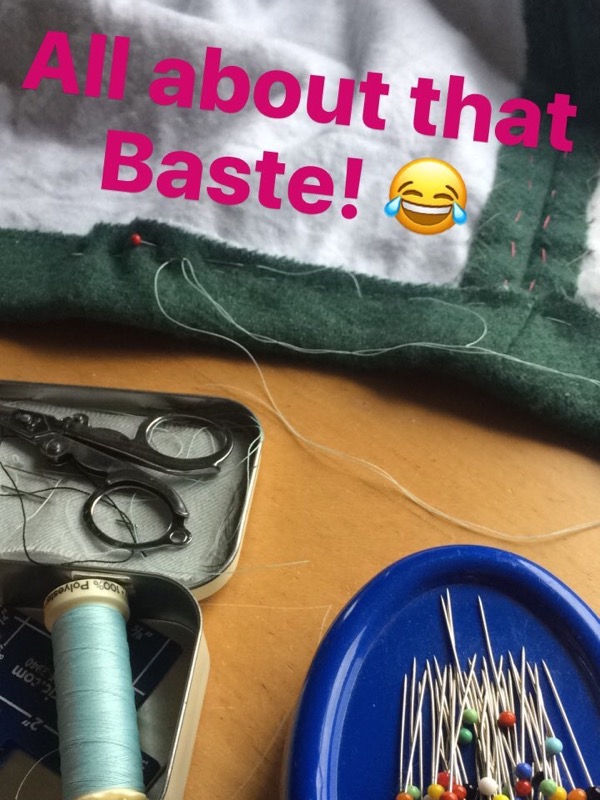
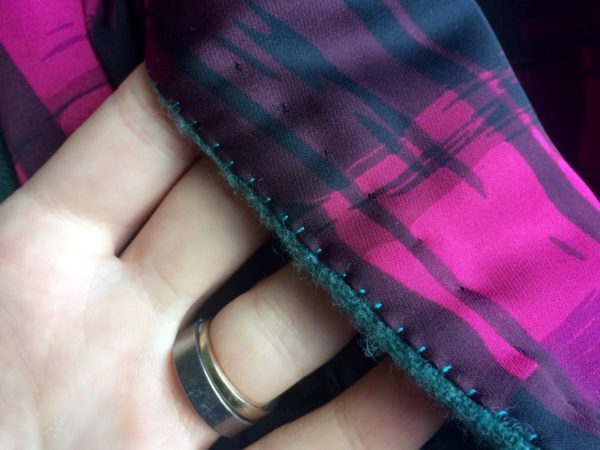
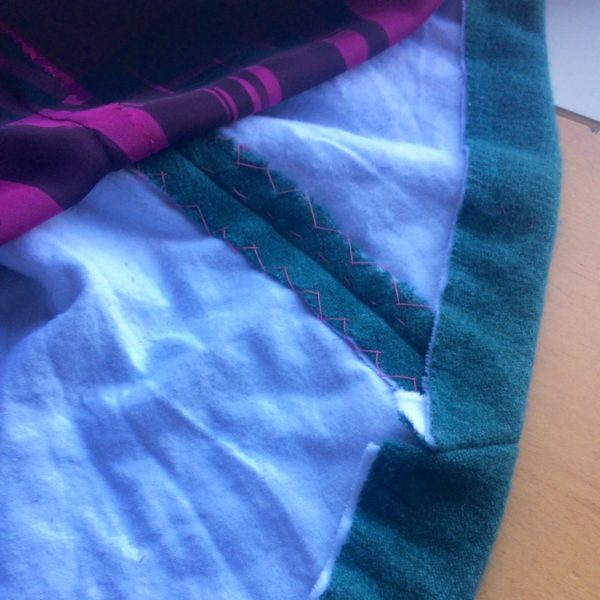
So the only part of this garment that didn’t come from my stash was some cheap cotton flannel for underlining – I’ve been underlining all my winter coats with cotton flannel for quite a few years now and it makes such a difference in warmth! I think it’s particularly necessary in London because it’s so windy along the river (where I tend to be most often due to living on a barge), and the extra layer really helps to cut the wind. You can choose to baste the underlining to the exterior by machine, but I always like to do this bit by hand as it keeps the layers together a bit better, I feel.
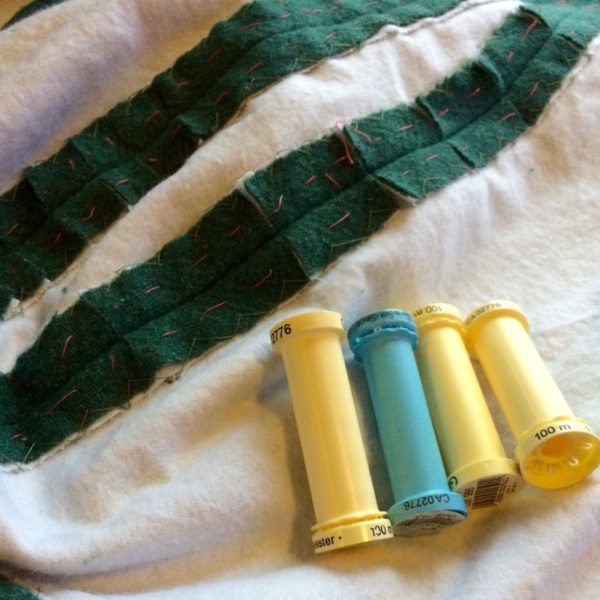
I also like to catchstitch all the seam allowances open inside – it keeps them flat, which both looks nicer on the outside, but also keeps from getting lumpy seams inside, which drives me crazy on coat sleeves (which obviously weren’t an issue here!). This does mean, however that you have a lot of extra hand sewing time, but also you’ll go through a lot of thread! My preferred thread for basting I’m going to remove is the silk as it really glides out easily and doesn’t tangle quite as readily, so I finished my spool of that, then proceeded to finish off three more spools of random colours which only had a bit left on them and were taking up space in my thread rack!

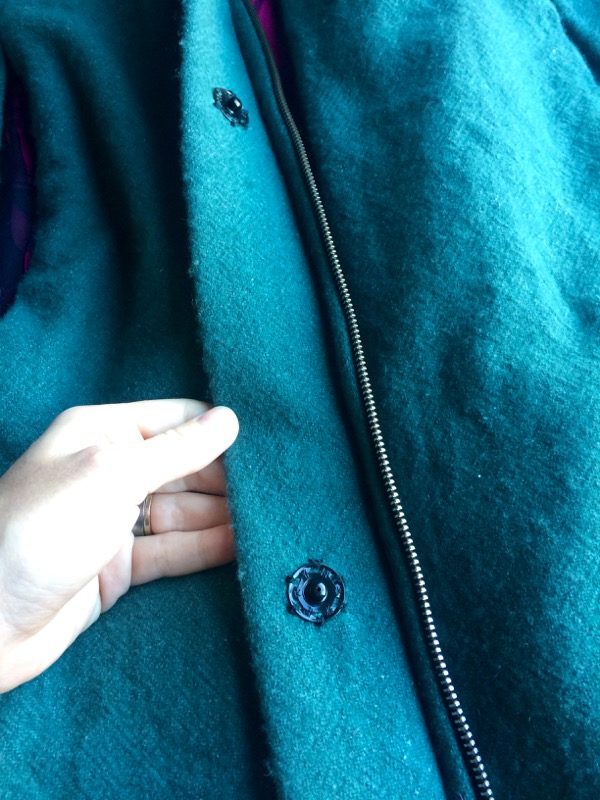
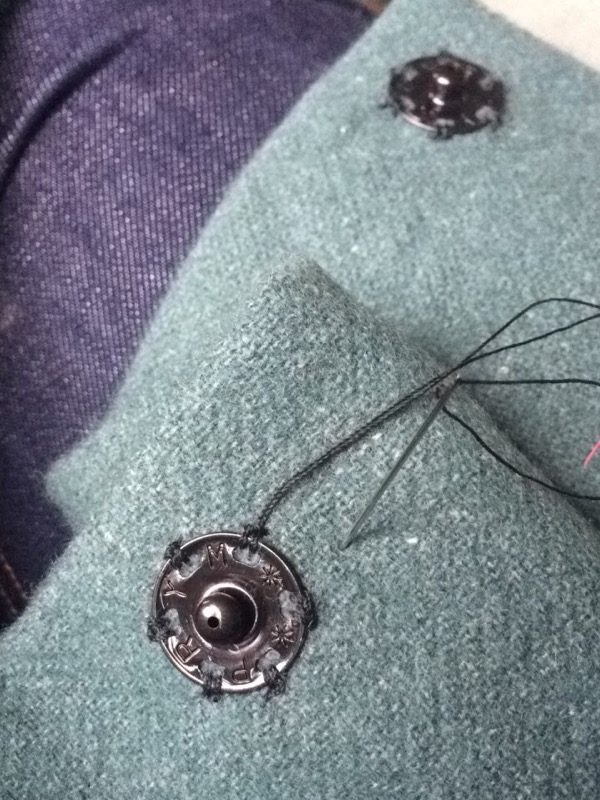
I looked through a lot of cape patterns before narrowing it down to this one. I liked that this one was fairly long, plus had the big hood but still didn’t take up that much fabric. I only had 2m of the wool (and the luxury lining), and it did take some creative fabric tetris, but I managed to squeeze it all in. I also liked that this one has slits for the arms to go through, rather than exaggerated bell sleeves (lots of fabric!) or using the cape’s hem as the opening (which seems cold and limits the length you can have). I also really like that this pattern has a zipper front and an extra flap (fastened by big snaps) to cut out the wind as the zipper doesn’t have a underlap.
Oddly, this pattern only calls for the hood to be lined, though, and just uses some facings around the neck and opening edge. As I wanted a more substantial cape, I simply subtracted the facings from the main cape pieces and cut the linings minus those facings. Super easy!
Along the arm openings, I simply folded back the coating’s seam allowances and catchstitched, just as I did with all the exterior seam allowances. But on the lining, I knew I wanted to add in pockets somewhere, not just because a coat without pockets is wholly impractical (who designs these things??), but also because I know I’d want somewhere warm to jam my hands as I walk. Having tried on the shell, I realised that the ideal placement would be just inside the arms slits, up to the centre front. So I mentally devised a way to incorporate some invisible zipper pockets along that same opening slit edge, between the lining and a second layer of lining to act as the pocket.
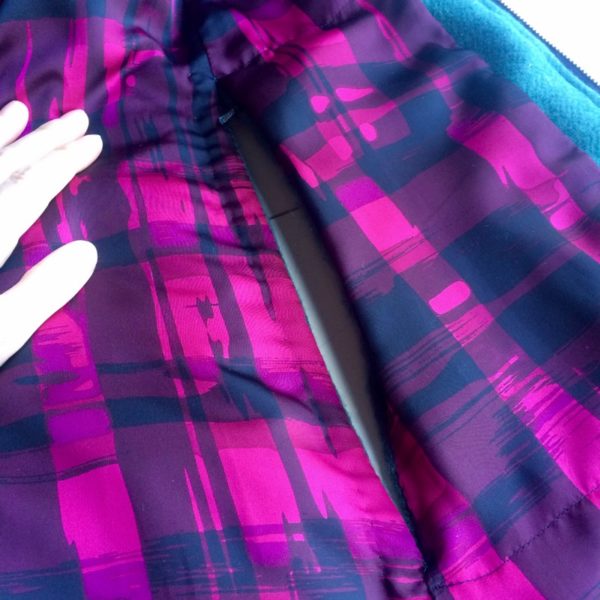
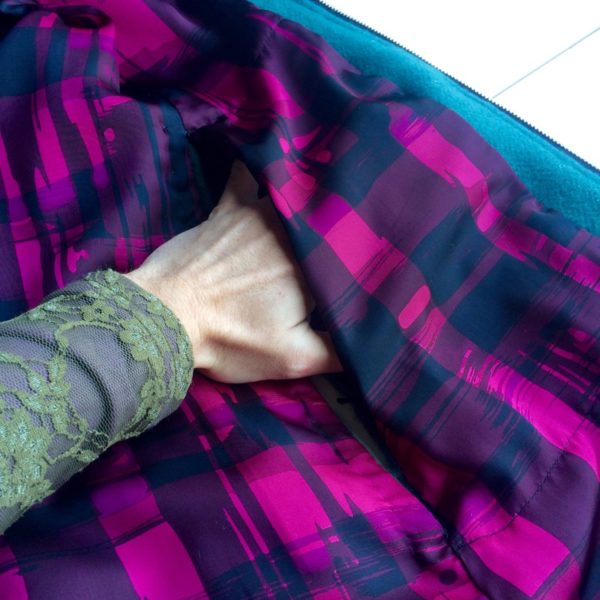
It means that the pockets are really inconspicuous – just a single black zipper pull on each side, but as they’re nearly the same height as the opening slit (I only had two 20cm/8in black invisible zips in my stash), plenty big enough to put my hands in plus some extra depth to store tissues or gloves. Once the invisible zipper pockets were installed in the lining, I then folded back the lining edges and carefully fell-stitched these to the opening slit edge. When I tried on the cape, the outer lining edge still wanted to come through the opening, so I made another line of prick-stitching a few centimeters away to control it a bit further. I might end up doing this on the zipper side as well as it’s not lying quite as flat as I’d like due to the stiff zipper tape!
I also added some thin raglan shoulder pads inside – not for any sort of 1980s power dressing look but simply because I’ve found that jackets and coats just need a little bit of extra structure to give them a bit of gravitas. Plus, this cape has such luscious shoulder design lines that I wanted to make sure the shoulders looked their best!
I did say this was an “in progress” post – I’m still not quite done with it despite plowing through two whole seasons of Ru Paul’s Drag Race during all the hand stitching (I’m addicted and there’s thankfully no adverts on Netflix!). I’ve finished hemming the exterior to the underlining, but I’ve still got to baste the lining around the hem, before checking how it hangs and then invisibly stitching that, plus sew the other half of the snaps onto the front opening. But that’s it!
But I’ve got a busy week this week, made a bit shorter by a quick trip to Dublin to see some of James’s family, so I reckon I’ll either bring the last bit of handstitching along to do on the journey, or I’ll bring the finished cape along and see if we can get some finished garment photos by the Liffey. It’s been eight years since we had a proper visit to Dublin (solo day trips for work certainly don’t count!) so I’m looking forward to visiting again, albeit briefly!

Oh and speaking of hand stitching, you all know you can revive your beeswax when it gets a bit tired, right?
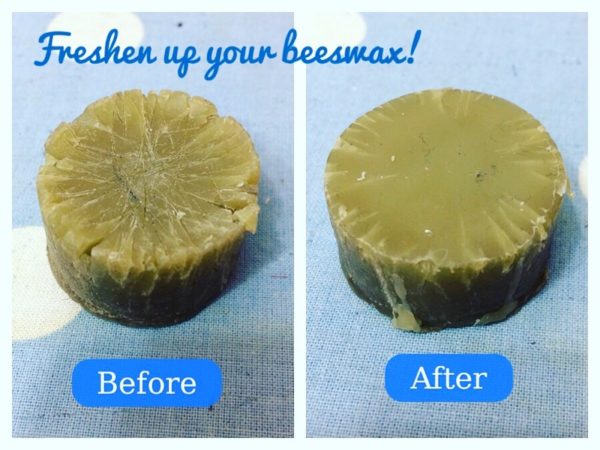
My beeswax was looking really sorry for itself so I freshened it up in 10 seconds flat… Wrap the beeswax in some wax paper (greaseproof paper) or parchment paper and apply an iron to remelt the surface and make it as good as new! If you’ve never heard of using beeswax for sewing before, it makes your thread super strong and less prone to tangling when you hand sew so it’s great for things like buttons or snaps! Just slide the thread through the wax lump, then lightly press the thread to set the wax into its fibres. Easy peasy, and you’ll save a lot of frustration in tangles!