I had a busy yet productive weekend – not only did I finish my Colette Patterns Beignet skirt, but I also made the Patrones 292 sleeveless bias cowl top, too! I didn’t have enough time for a photoshoot over the weekend, but I did remember to finally document my favourite way of finishing the edges of thin blouses like the cowl top so I can finally share this with you.
This technique is great for necklines and armscyes on sleeveless tops, and is my preferred way to finish any kind of blousey, lightweight fabrics like silk satins and the viscose (rayon) you see here. You get a thin, finished edge that looks good inside and out with a minimum of fuss, and you don’t have that awkward problem of facings flipping out or anything, either. As long as you’re okay with a small amount of topstitching on the right side, this is the technique for you…
So before we begin, sew one of your seams so you’ve got a C-shape. If you’re finishing a neckline, this means you sew one of the shoulder seams. I’m finishing the armscye of a sleeveless blouse here, so in this case I’m sewing both shoulder seams, leaving the side seams free.
Step 1
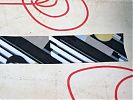
Cut out a bias strip that’s the length of your opening edge, plus a few centimetres just to be sure. For the width, I prefer a finished facing of just 1cm, so my width here is 1cm + (2× 1.5cm seam allowances) = 4cm.
Step 2
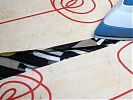
Press the strip in half, lengthwise, with the right sides facing out.
Step 3
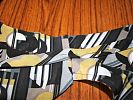
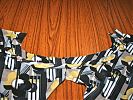
Pin the bias strip onto the right side of your garment, with the strip centred over the seam line and the cut edges together (ignore my giant seam allowances in my photo – I was working with a bias-cut garment). Due to the nature of bias, you’ll have magically lost 0.5cm in the pressing and pinning process, so now you’ve got 1cm seam allowance there, which is much easier as you now only have to sew straight down the centre of the bias strip!
Sew the bias strip onto the garment along the seam line and the centre of the strip.
Step 4
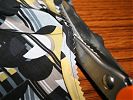
Trim the seam allowances as close as you can, making sure they’re now less than 1cm so they won’t show through.
Step 5

Press the seam to set in the stitches and help the bias strip lie flat.
Step 6
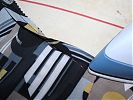
Press the bias strip towards the opening edge, with the seam allowance underneath towards the garment.
Step 7
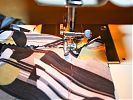
With the bias strips extending past the opening edge, now sew the remaining seam to complete the circular opening. In the case of neckline, you’d now sew the other shoulder seam, but in the armscye I’m finishing here, it means sewing the side seams. Press the new seam, and press those seam allowances open.
Step 8
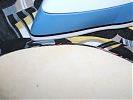
Press the bias strip into the inside of your garment, covering up the trimmed seam allowances from earlier. Pin in place.
Step 9
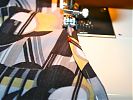
From the inside of the garment, stitch very close to the edge of the bias strip. Press to lock the stitches.
Step 10
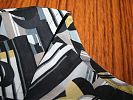
And you’re finished! What a nice edge, inside and out…
Bonus baby stuff
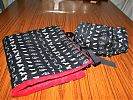
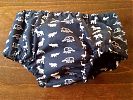
And in other news, I’ve got a surprise baby shower this week (not that it’s a surprise she’s having a baby, but a surprise she’s getting induced so we have less time than we thought to plan!) so I quickly sewed up another changing mat and a pair of the baby pants from the June 2010 Burda magazine.
The changing mat is my go-to baby pressie I’ve been making for years – grab a hand towel and cut out a piece of fabric the same size as it, and another piece the same width but a third of the length. Fold down one edge of the smaller fabric piece and sew it onto the bigger to form pockets, then put the fabric+pocket face down on the towel, shove some ribbons in for ties, sew around the perimeter, flip inside out, et voila! A nice, clean place to lay baby that folds up small, with space for nappies (diapers) and wipes in the pockets. And it’s machine washable.
The Burda panties were just an afterthought since I had some extra fabric and the magazine was lying right there. They were quick to sew up, but Burda’s method of finishing the edges was just stupid. I went into more details on the pattern review for this, but for the non-PR members, I’d highly recommend extending the waist edge and folding that in for the waist elastic casing, and creating a quick facing for the curved leg opening casings. Or alternatively, cut two pants to have a lining, then topstitch to create the casings. Either way would still be less frustrating than Burda’s method of folding in the very curved leg edges!

