True confessions – I took a brief break from the wedding gown. I don’t deal well with long projects and I was getting really itchy to complete something (I didn’t have any completed projects in July because of the gown, aaaaagghh!).
So I took one evening out to do a test run of one of the patterns I’d earmarked for honeymoon lingerie and Shasha’s Malaysian silks, Burda 7418 (on the right in my earlier image below):
This is a brand-new Burda envelope pattern, but I just went and bought the pdf version instead because a) I’m impatient, b) the pdf patterns are way cheaper than the paper versions (we have a laser printer and printer paper is cheap!), c) piecing together pdf patterns takes only 5 minutes longer than tracing a paper pattern and I can do it sitting down, and d) no seam allowances, woooooooop!
This was my first downloadable pattern from the German Burda site, and I was pleased to find that the instructions were in nine languages, with fully illustrated instructions. I was expecting it to just be in German! But do pay attention to the print preview, though, because you may not need to print the last ten pages or so (the English instructions only take up a few pages). The only weird thing is that they decided to waste some paper giving us two side panel pattern pieces (one to be cut in lace and the other in self-fabric) and the two pieces are absolutely identical. Weird.
When they say stretch satin (or jersey), they mean it, despite my flat-pattern measuring thinking there’d probably be enough ease there! This really hugs my curves nicely, but it’s just too tight to be comfortable enough to sleep in (lots of horizontal pulling wrinkles…). And you really don’t want to be adding zippers or buttons onto sleepwear! So if I make this again, I’ll be doing it in a poly stretch satin or going up to a size 44.
But the whole point of this was to test and see if it’d work well in my non-stretch silk charmeuse, and this Ikea cotton print was just languishing in my stash anyway after the Alexander dress (it’s too distinctive to use in another dress). So as far as I’m concerned, this nightie served it’s purpose, and I got my answers, without too much time lost at all.
One thing I didn’t like about this pattern was that it just had you finish the top edge by folding down the seam allowance and zigzag stitching over it – sloppy. And you’re just supposed to clip the point of the V and fold it inwards, which leaves a bare edge to fray there, too. So if I’d do this again, I’d either create a narrow facing or narrow bias edge (with the latter method, treat the V neck as a curve to bind it, and then pinch the V and secure with a few stitches at the very end to make a sharp point).
Another minor issue is that this pattern calls for you to create narrow straps and then use bra rings and sliders to make the straps adjustable. Which is a nice touch and all, but completely unnecessary for something with as little support as this that’s being worn only by one person (how likely is it that your strap length is going to change during the life of the nightown?). Save yourself some time and just use fixed straps or some nice plush bra strap elastic if you’ve got some on hand like I did.
But the other problem with this pattern is one I don’t know how to fix!
Pointy boobs!
I mean, think of how smooth the curve is on your average princess seam… and look at the inset corner there (yes, I know it’s only half the seam as a princess, but really, my point, err, stands.). Holy Madonna! (Though now as I think about it, I suppose I could do some pattern manipulation of both sides of that seam to make a curve there rather than a sharp point…? Maybe one to save for after the wedding madness though.)
So since this was too tight to wear and was essentially just a muslin anyway, I gave it to Neighbour Jamaica, who’s a size smaller than me and in need of cheering up!
So my thought now for the silky honeymoon nightgown is to do a test-run of the slip-dress pattern from the May 2010 Manequim magazine (#219) before I cut into those silks:
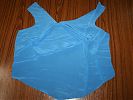
And to prove this really was only a one-night diversion, here’s the front half of my bridal bodice lining, all nicely assembled and pressed:
The silk crepe was being really ornery when I went to thread baste it, and it wasn’t holding a chalk line well, either. So I just went for my usual eyeball-it method of seam allowances, since it works well for all my other garment sewing, and accuracy in the lining isn’t quite as important as in the shell.
Next up: continuing on with the lining assembly…

