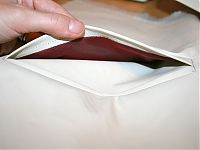
It may be FREEZING in London, but the heat is on for me to sew James’s fantasy jacket in time for his birthday on Saturday!
I’m calling it his “fantasy jacket” because he’s asked me to recreated a beloved unlined, simple, waterproof jacket that was stolen from a pub on the night he met me. So he recalled it from memory while I attempted to create an accurate tech drawing. Then I compared this against my vast pattern magazine archive and decided that BWOF 10/08 #134 minus all the bells and whistles plus a few different whistles and bells was the best starting point. The muslin went well, so this weekend I started on the final jacket, made from a very cool laminated linen from Mood in NYC, with bias binding made from some dark red and black tie silk bought in Dublin three years ago.
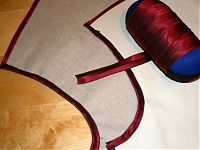
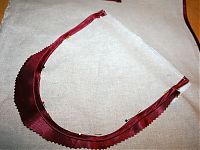
The rubberised coating on the fabric means any and all pin holes show, so I needed to treat it like leather – pattern weights and rotary cutter for the pieces, and since it’s unlined, I also needed to create metres upon metres of bias binding for the exposed edges. I used a continuous bias binding method for the first time ever and it was very quick, though not very intuitive.
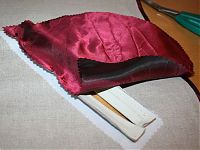
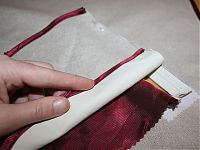
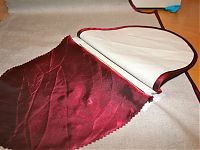
(I wrapped the binding around a sunglasses case to avoid creases. And because it was handy. Let’s face it – I’m not going to be needing the sunglasses any time soon!)
After binding most of the edges, I then set to work on the front welt pockets, which were rather tricky on a fabric that requires a press cloth (I’m paranoid that the laminating will melt!) and can only be basted where it will never be seen. So I thought I’d document the process and give you all a little welt pocket tutorial.
This is also exactly how I do bound buttonholes, but because the scale is much larger here, it’s easier to try welt pockets first to get the technique down and then just do the same thing on a smaller scale for buttons once you get the hang of it.
How to sew a double welt pocket
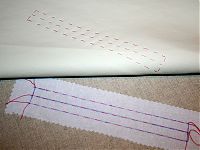
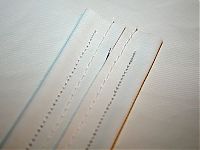
My pockets here are 7 inches long (6” is standard but I wanted to make sure his big man paws would fit in), and the opening is a total of 2cm wide (1cm on either side of the centre opening line). So the welts I cut out were 4cm wide (folded in half, they’re 2cm wide so straddle the stitching line nicely), and 8 inches long (so I get some overlap at the ends). You’ll need two welts per pocket. I folded each of these lengthwise and machine basted close to the cut edges to keep them together. If your fabric frays or shifts in anyway, you may want to interface the welt pieces in addition to the area around the pocket opening.
Step 1
Hand baste the pocket edges and central line. When you’re basting (in general), never turn a corner with your hand stitches, but leave the tails free at the corners. Also, you should extend the short edges here two centimeters or so beyond the long lines. I haven’t here because the needle holes would show!
Step 2
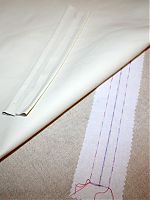
Place the cut edges of each welt along the centre basting line on the right side of your garment. Pin the centre of the welt directly through the other basted line, with the welt centred over the ends of the pocket.
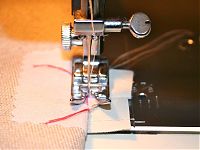
Beginning precisely at the point where the end basting lines cross the welt (not shown in my photo, but I used a bit of sticky tape to extend the end line as I couldn’t baste there), stitch down the centre of the welt, ending precisely at the crossing point at the other end. I like to use very short stitches at the beginning and ends to make things accurate, but also take away the need for backstitching.
Repeat for the other welt, once again with the cut edges along the centre line, sewing down the centre of the welt.
Step 3
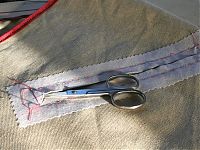
With a very sharp pair of scissors (I like to use some cuticle scissors), carefully cut along the centre basting line, making sure not to cut through the welts! When you get to about a centimeter from the end, cut diagonally to the corners, forming a little triangle and making sure to cut precisely to the ends of the stitching lines or you’ll get puckers.
(You might also want to unpick your basting stitches at this point to make your life easier)
Step 4
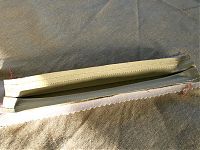
Flip the welts to the inside, making sure that those little triangles also come along to the inside, and the folded edges of the welts just touch (kissing lips, anyone?).
Press well. Your fabric will hopefully take a pressing better than mine, and stay flat!
Step 5
Stitch the little triangle to the two welts, along the end line, making sure to not catch any of the other layers in. Repeat for the other side.
Step 6
Now’s the time to attach the pocket bags (and the part where welt pockets and bound buttonholes part ways)! Sew the pocket lining (the part you don’t want visible) to the seam allowance of the lower welt, with the right side of the pocket lining towards the opening.
Step 7
Attach the lower pocket (cut in the same fabric as your garment as it will show through the welts!) to the seam allowance of the upper welt, with the right side of the pocket towards the opening.
When done it should look like this, with the right sides of the pocket backs facing up.
Step 8
Lay the pocket bags together and stitch together, making sure to only sew through the pocket bags (and the ends of the welts near the opening). The edges of the pocket bags may or may not line up – it’s more important that they’re lying flat! You can trim off any excess after stitching if you’d like.
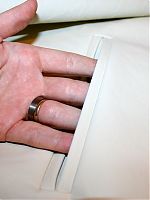
Finished!
Ooh-err, what a pretty little pocket, inside and out!
Welt pockets are great on things like jackets, trousers, coats, or skirts – anywhere you want a nice little touch on a pocket opening.
Coming up this week: A lacey teeshirt, the exciting conclusion to the Motherload of KnipMode, and a new pattern magazine!

