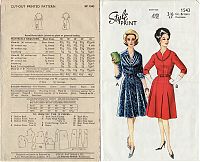
Remember the vintage dress pattern I graded down to my size a few weeks ago?
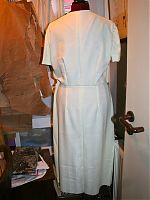
Well, I made up a muslin with my grading changes in place, and though I didn’t get any photos of it on me, I did get some on Susan. I realise that diagnosing fit issues on a dressmaker’s dummy is particularly futile, though, so you’ll just need to take my word for it!
On first glance, the worst issue is that there is way too much fabric in the upper back, but also I think I may need to raise the waist seam by an inch, and narrow the shoulders by an inch or so, too.
The skirt length is d-o-w-d-y so I’ll need to shorten all those panels, too (happily I’ve got a “lengthen or shorten here” line on both the bodice and skirt pieces).
While the sleeves themselves fit nicely, there is an unholy amount of excess ease in those sleeve caps, omg. So I’ll need to shave down those caps to take a good few inches out of there.
It wasn’t necessarily the list above that made me lose enthusiasm for this dress, but I can’t really put my finger on what it was. But it turned out that doing all the boring grading reawakened in me a desire to conquer pattern drafting, which I dabbled in when I received “Metric Pattern Cutting” by Winifred Aldrich last year, but didn’t get far.
So while I was starting to investigate my drafting options, I came across Flekka’s series of posts comparing the Aldrich and Bunka drafts and felt inspired to try Bunka’s method since the bodice drafting instructions are included in both Pattern Magic books anyway.
To be honest, I had never really considered using the Bunka draft before Flekka’s posts because, well, I am in no way shaped like a Japanese woman (in fact, I’m so big I’m off the charts in the Bunka standard measurements! sob!). But I was also doubtful because the Bunka draft relies only on three measurements – Bust, waist, and back length.
But I pushed all that aside and followed the visual instructions as well as the English comments and got reasonable far in a few minutes, until I realised that you need a protractor to draw a few of the angled lines. Then I spent ages looking for mine until I finally just made do with one printed off the internet!
The only part I found confusing was calculating the waist darts, but I think I got it right:
I think what they want you to do is take (Bust divided by 2) minus (Waist divided by 2, plus 3cm). For me this was (100/2) – (83/2 +3) = 50 – (41.5 + 3) = 5.5cm total dart measurement. And then, since 5.5 is off their tiny Japanese dart chart, I multiplied 5.5 by each of the percentages for the darts a through f. Then I used the results (which were all a centimeter or so or less) as the total width of the dart, centred over the line they have you draw.
After doing all of the above and finishing my sloper, I then closed some of the darts as indicated in the diagrams before sewing up my first muslin (since most of their patterns use this version as their starting point it seemed sensible to test using this).
After the first muslin, I realised there was way too much ease in the waist, so I increased the back and front waist darts, and I also discovered a dumb mistake on my back shoulder dart where I mistook a guide line as a dart leg, so I corrected that, too. I unpicked all the seams and darts, marked the new ones on the muslin and my paper, and sewed it up again. And hurrah! It’s actually very good indeed.
Sorry I don’t have any photos of it on me to show you as it was rainy and I was alone, and I could’ve shown you photos on Susan but those are never very representative of fit!
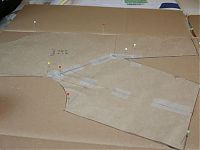
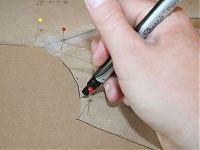
Then I transferred my altered bodice sloper to cardboard by pinning it on and tracing around in a thin pen, then cutting it out:
(If I had easy access to oak tag or thinner cardboard I would’ve used that, but unbent corrugated cardboard was all the communal recycling bins had to offer..)
Then I traced off a few fresh copies by just tracing around the cardboard onto my usual kraft paper, ready to alter into new styles.
My first style is going to use the “Tying a Bow – D” style from Pattern Magic, which I want to elongate into a dress, so guess what? I’m drafting a skirt sloper now…
But the above drafting exercises have given me the chance to determine what I’m going to do regarding the vintage tab dress – I really like the bodice front, so I’m going to take those two parts, join it to my sloper bodice back, and put my own skirt onto the bottom. I’m still mulling over my sleeve options, but it seems just as much effort to draft a new sleeve than to remove all the excess sleeve cap ease from the provided one, so I might as well.
And stylistically, this is going to look SO much better with a slim skirt to even out all the draping going on in the bodice… It all just seemed like “too much” with the draping fabric on top and a large, long skirt on the bottom.
But before all that is the Pattern Magic dress, and I’ve got just the fabric in my stash already!


