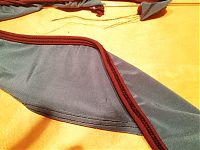
Way back when I was making my first muslins of my new running gear, I realised that the methods I’d previously used to finish knit necklines (elastic, FOE, serged bindings, etc) were just NOT going to cut it on slippery exercise lycra. The results were awful and sloppy, so I allowed myself to be convinced by Pattern Review that a coverstitch binder was the way forward.
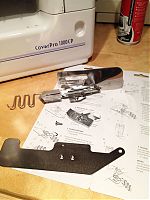
At £80 a pop, they’re not a purchase to be taken lightly, and they’re probably about the most expensive thing you can buy for your sewing room, short of a machine or a dressform! But I wanted to ensure the most hassle-free experience, so I went for a brand-name Janome attachment rather than one of the cheaper, much more hacky eBay jobs. I bought mine from Jaycotts and Janome shipped it directly to me:
Unlike a lot of the eBay binders, this comes with everything you need to get started – the big metal plate, the shorter foot, and a big set of instructions on top of the binder attachment itself. So it’s expensive, but you don’t need to then go and buy all the non-optional bits separately – but I can understand the allure of just buying the binder for your second or third if you’ve already got the plate, foot, and instructions!
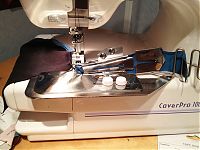
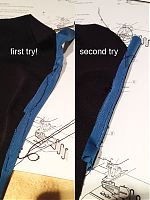
But my first several attempts to bind my test lycra strips were just laughably awful, so after fiddling with my tension and foot pressure, I turned to the internet for advice. I’m not sure whether it’s because not many of us own coverstitch machines (I fully admit that mine was a luxury purchase, bought just before I went into hospital), and even fewer of us own binders, but there is precious little information out there.
So I decided, after going through about 50 feet of test binding and finally getting good enough results to finish my sequin running vest, that I should do the sewing public a service and compile a bunch of useful coverstitch binder tips all together into one place. I’ve bolded the ones here I’ve found to be particularly helpful.
Tips from Lynn Rowe on Pattern Review:
- Do not stretch the binding
- Cut the binding to be at least 6” longer than your neckline
- Pull the binding under the CS foot and anchor it by taking a few stitches into it, THEN insert your neckline into the binder edge and start stitching
- You can’t bind with a binder in the round (ie: you need to leave one seam open before binding)
- Continue stitching for a few inches into the binding after the top is completely through the coverstitch machine, then cut the binding & threads and remove the top
- When you go to serge/overlock the last seam, make sure to press (or even hammer!) the two bound edges really flat before serging. Or hand baste the two edges together so they don’t shift as you serge.
- A slightly longer stitch length may also help with serging over two bound edges; with the higher thickness in the binding area, you need a slightly longer length of thread to make the stitch. You can lengthen the stitch by a click or two just before entering The Binding Zone
More tips from other PR members, some of which came from my initial thread:
- If the binding is veering off course between the attachment and the CS foot, you may need to tighten your foot pressure using the knob at the top of your machine
- If your fabric is really prone to curling, try spray starch, or dunking the whole binding in a corn starch/water solution and ironing dry. Either of these are, of course, for clothes you’re planning to wash before wearing!
- To practise using your binder try using a cotton fabric and cotton binding. Knits naturally stretch when sewing – even when cut with a rotary cutter a strip of knit will shrink after it’s cut and measure slightly less.
- The activewear fabric I used has enough recovery not to need any inserted elastic or stabiliser. I made these tops a few years ago now and the binding is still going strong and hasn’t stretched at all. (Sew4Fun)
From Sarsez on PR:
- You need a special binding foot. The binding needs to be delivered as close as possible to the needles to ensure nothing escapes and slips away.
- You can run elastic through while you bind if you wish. You need to use the smooth white/black rubber “swimwear” elastic. It will be powdered to run through your binder easier. I use 8 – 9mm width elastic for a 10mm finish bind. I usually end up with snow white hands.
- If you are dealing with a 4-way stretch fabric esp. fabric containing lycra, binding cut on the cross wise grain will NOT EVER behave itself. Use lengthwise grain to cut you binding.
- I use a “single fold” binder rather than a double fold. Less bulk.
- You might like to try woolly nylon in the looper for a softer finish.
- The binder must be mounted firmly because you need to apply tension to the binding as it goes through (this will depend on your fabric of course). If it gets knocked your alignment can be ruined.
The real breakthrough for me came really when I started experimenting with different fabrics as the binding. The “silk touch” lycra I had been using was sliding all over the place, with skipped stitches and loopy undersides as well, but I found that if I applied a lightweight knit fusible to the same binding fabric, there was now enough “grab” on the underside to really hold the slippery lycra neckline in place. Likewise, the (un-interfaced) Suziplex supplex also worked really well as binding fabric, as it’s got a slightly loopy/brushed texture on the underside.
Katherine at Sew Blooms, who’s also been experimenting with her binder, too, then also emailed me some of her tips:
- Some binding fabrics work better on the lengthwise grain than the cross grain
- Stretchier fabrics need to be cut wider than less stretchy fabrics for the same binder
- For fabrics that don’t want to behave going through the binder, I stop every couple of inches and straighten the feed to the binder out
- Don’t let the feed to the binder hang off the table
- Don’t have a seam in the binding
- Stabilise any gathered sections on the main fabric before feeding them through the binding, as the gathers get pushed out of position
- Cut the binding strips just before you use them…don’t leave them lying around overnight as they can curl up.
Skye on PR even had her husband create a little spool for the binding fabric to rest on, and I can definitely see the advantage, as you really do need to keep an eye on the binding otherwise to ensure it’s not twisting or bunching on its way in.
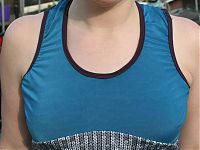
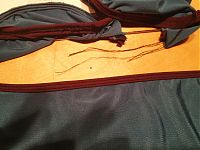
Finished binding on my sequin running vest!
I think my main lesson learnt is that the binder fabric has to have at least some “grabbiness”. I was trying with slippery lycra first and getting awful results. Once I lightly interfaced that, or switched to fabric with a bit of texture on the underside, it went much easier. Also, taking a few stitches on just the binding before trying to insert the body fabric helped, too! And when you absolutely can’t avoid having a seam in your binding, then you need to go slowly, do a lot of coaxing with the tweezers, and hope for the best!

