Blog

The Sewing Weekender

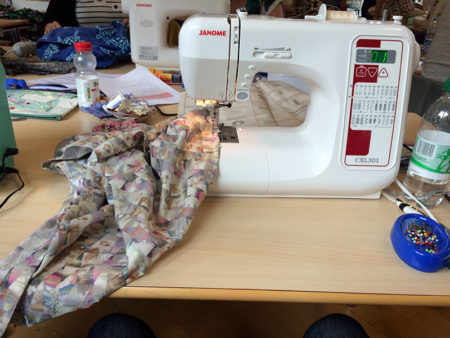
It’s taken the better part of a week for me to calm down and recover after the stimulation overload that was the first-ever Sewing Weekender, held this past weekend up in Cambridge. It was organised by the ladies behind The Fold Line along with English Girl at Home after being really jealous of all the great sewing getaways and camps run over in America, and it seems they were right to want to replicate over here. Tickets went on sale (for a very reasonable £45) and sold out in literally under an hour. I credit my being able to buy a ticket mostly down to following these ladies on social media and jumping as soon as they became available (Pro-tip if you want to attend the next one when it’s announced!).

The event itself was held in one of the Cambridge colleges, with the option to stay overnight in one of the residence halls (dorm rooms), which I took advantage of after seeing it was cheaper than other hotels in town and less hassle than another set of late night and early morning trains between Cambridge and London!

Sewing & shopping in Liverpool

If you follow me on Instagram, this might already sound like old news, but since I was up in Liverpool last weekend for the British Transplant Games, I took the opportunity to add a little sewing time into my athletics competition weekend (of course!!)!

I opted to stay in the University of Liverpool residence halls for the weekend (mostly since it was cheaper than a hotel, guaranteed me decent wifi and an en suite as well as official Game transportation!), so I decided to bring along my JL Mini travel-sized sewing machine for a bit of relaxation on Friday and Saturday. I still tend to get a bit of pre-race nerves for these shorter competitions, and I knew that a bit of sewing would help me to focus on something other than the races.

Pedal power

My main sewing machine is a JoAnn Sonata, and it has a bit of a history. It’s technically a vintage machine, I think, having been made in the early 1980s and then promptly forgotten by the entire world. Every now and then I get an email from someone who bought one at a yard sale, thanking me profusely for scanning and uploading the user manual, but for years the only Google hits for it were ones I’d written myself.
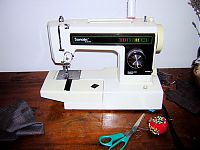

My machine, photographed in 2006

To complicate matters even further, my machine began life as my sister-in-law’s grandmother’s machine, which was gifted to me well over a decade ago when my mom brought it over as checked luggage on a flight from the States. So on top of being some random, vintage brand no one’s ever heard of, it’s also the wrong voltage (I run it through a voltage converter).

Considering the sheer volume of use it sees, the machine does so well, and I have no intention of ever replacing it so long as I can keep repairing it. I mean, I clean it fairly regularly, but I hardly ever oil it, and it only went in for its first ever service (during my tenure, anyway) last winter when the foot pedal stopped responding. My man at Maury Sewing was able to repair the foot pedal then, but advised that if it failed again, I should buy a replacement pedal from the States and just swap out the plug end (he looked into replacing the motor with a 220v one but couldn’t find one to fit the body on short notice).

The repairs lasted a good six months, but again recently, I found myself having to pump the pedal to get it to respond, and even then, it’d only go at maximum speed which isn’t exactly ideal. So I hunted on US eBay and found a really similar-looking vintage, metal food pedal in 110v wiring, with the thought of recruiting James to rewire the old plug end onto the new-to-me pedal.
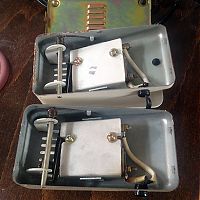

The eBay replacement (top) and my original (bottom)

But our friend Alex happened to be visiting after it arrived, and said he’d be happy to have a look. He grabbed a screwdriver and opened them up and to our amazement, the pedals were actually identical inside!
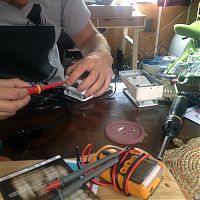
The Sonata is Saved

My main sewing machine is a Joann Sonata, metal-body sewing machine, produced in 1984 and running on a voltage converter since my mom brought it over in her suitcase 12 years ago. It was a gift from my sister-in-law, having been in her family for the past 30 years, and it has been sewing like a dream through pretty much everything you’ve seen on this site since I started writing it in 2005.


The Sonata in 2006(?), pre-boatlife

In all that time, I’ve never taken it to be serviced, and – I’ll admit – I’m not the most regular oil-er, either. But everything was fine until a few months ago, when the foot pedal started to feel decidedly jerky. I’d have to press down quite far before the machine would respond, and then it’d be off at positively industrial speed.

This I could live with.

But then it started to continue sewing even after I’d left my foot off the pedal, sewing off happily into the beyond at lightspeed, leaving me to scream and kill the power switch. Obviously this could not really continue, so I begrudgingly rang up the Maury sewing machine repair shop I’d used a few years ago when my overlocker looper got bent out of shape. The shop isn’t that far away, but since the machine is heavy, I’d been dreading taking it up there, as I’d need James to drive me out on a Saturday.

I’m going to reiterate again that my machine is some random-ass brand no-one’s ever heard of, running on a foreign voltage. But he listened to the issue, and without even needing to open up the case to look at it, told me several ways he could fix it (he’d usually just graft on a new pedal, but with mine being 110v that’d be a long eBay wait). Plus I wanted a few other tweaks and a good oiling, and he said he’d give me a ring when he knew more. I should digress at this point to say that I also brought my overlocker along because I’d bought a replacement upper blade but didn’t have the special Bernina wrench required to take the &%^#% old one off. He swapped it over as I stood there (no charge!), then as we were leaving, ran out into the rain to tell me exactly which wrench to buy if I’d like to change it myself in future. What a dude!

How to change the presser foot on a JL Mini sewing machine

I do not work for John Lewis. Yet somehow, I know more about their sewing machines than the people who do, and I know this because I get a constant stream of emails and comments from people who find my review of the JL Mini basic sewing machine on Google and ask me questions about it.

By far, the Number 1 question is “How do I change the presser foot?” Apparently many John Lewis employees have told people that the feet cannot be changed. This is not true.

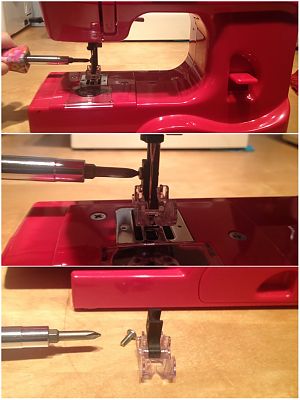
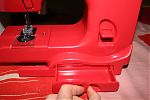
To change the presser foot, grab a Philips head screwdriver (the kind that looks like a +). Unscrew the screw to the left and above the presser foot (see photos below).

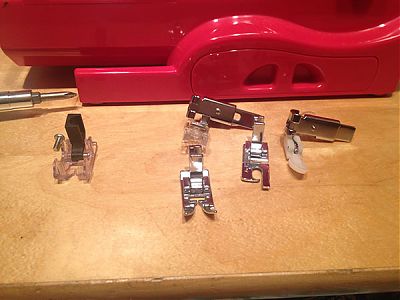
When the screw is completely loosened, you can remove the screw and the foot. You can now place any generic “low shank” foot on the machine (using that screw you just removed!), including a zipper foot, walking foot, rolled hem foot, you name it.

Temporary sewing

While our boat is in drydock for maintenance, we’re temporarily living on a very kind neighbour’s boat. Packing for a month (though possibly 2 weeks) was a challenge in itself, as you want to to give yourself choices (in clothing, entertainment, comforts, and cooking), but yet you’ve still got to physically move everything, so you don’t want to overpack, either.

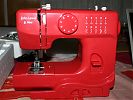
I brought the bare minimum of sewing supplies, which for me means my JL Mini sewing machine, which is great for travel and beginners alike (speaking of, I have a friend who’s selling her identical red JL Mini as she’s upgraded to a fuller-featured machine. If anyone’s interested in buying it from her for £30, please leave a comment and I’ll put you in touch!).

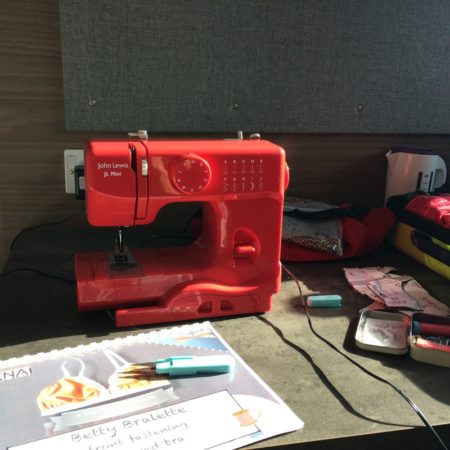
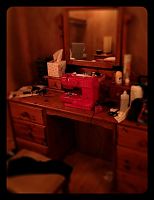
I also brought a few patterns and the fabrics to go with them, and I set up a temporary sewing station in the bedroom we’re staying in:

I thought it was quite amusing that the only place in the boat that was suitable for sitting and sewing was a pretty dressing table, and my boudoir sewing station inspired me to start one of my transported projects last weekend – another Ruby Slip!

My first Ruby Slip was seafoam green with brick red lace and I loved it so much that I knew I’d be making another. If you missed the discussion then, Sherry offered a free pdf pattern and fantastic photo tutorials, which I highly recommend, even for beginners, as it’s beautiful and quite easy to sew (especially if you choose a thin cotton lawn).

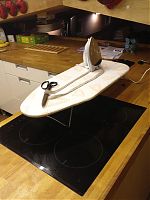
To match my sewing station, I set up a pressing station in the kitchen, with a travel iron and mini ironing board which live on the boat.

Coverstitch binder attachment tips & tricks

Way back when I was making my first muslins of my new running gear, I realised that the methods I’d previously used to finish knit necklines (elastic, FOE, serged bindings, etc) were just NOT going to cut it on slippery exercise lycra. The results were awful and sloppy, so I allowed myself to be convinced by Pattern Review that a coverstitch binder was the way forward.

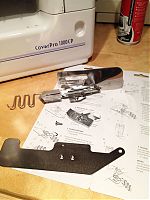
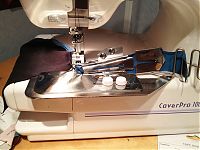
At £80 a pop, they’re not a purchase to be taken lightly, and they’re probably about the most expensive thing you can buy for your sewing room, short of a machine or a dressform! But I wanted to ensure the most hassle-free experience, so I went for a brand-name Janome attachment rather than one of the cheaper, much more hacky eBay jobs. I bought mine from Jaycotts and Janome shipped it directly to me:

Unlike a lot of the eBay binders, this comes with everything you need to get started – the big metal plate, the shorter foot, and a big set of instructions on top of the binder attachment itself. So it’s expensive, but you don’t need to then go and buy all the non-optional bits separately – but I can understand the allure of just buying the binder for your second or third if you’ve already got the plate, foot, and instructions!

Revisiting my John Lewis JL Mini sewing machine – a review for beginners

I’ve noticed that there’s a lot of talk online about sewing machines for beginners (especially with Christmas coming up!), and I’ve been asked several times online and in person about my opinion on the John Lewis JL Mini sewing machine and I realised I’ve never done a proper review of it.

I’ve had my JL Mini machine (in red – they change the colours a few times a year, but right now it’s offered in white, red, yellow, pink, blue, and purple) for nearly three years now and I’ve recommended it a lot for beginning sewers. On our moorings so far we’ve got my red one, a purple one, and a mint green one! I use mine as my travel machine (I originally got it when I was going into hospital so I could sew through my transplant!), but it’s a good, sturdy machine made by a good brand (Janome), and it has enough features that you should know in a year or two whether you’re into sewing or not and you can upgrade to a machine with more features. Or if you decide sewing’s not for you, you’re not out much money.

A beginner skirt sewing lesson

Sunday afternoon was Lesson Two for my beginning sewing ladies, following along from the first lesson a few weeks ago when they learned how to operate a sewing machine and make a shopping bag.

At the end of the last lesson, Holly, Ness, and Veda were all begging to learn how to make a skirt, so how could I refuse? I decided they should follow in my footsteps and learn with New Look 6843, which was one of the VERY first patterns I ever made (then remade over and over again with a few variations!).

They picked out their own fabric and zippers, with Ness choosing a navy corduroy (so we got to talk about nap!), Holly choosing a beautiful navy wool suiting fabric, and Veda going for a bright and cheerful Liberty print.

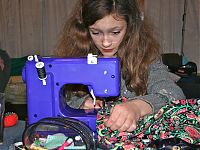
Here’s Veda sewing on her own purple JL Mini machine (like my red one!)

We talked through measurements, pattern layouts, what the symbols on patterns mean, and also how you don’t have to follow the directions if you don’t want to (since I thought New Look’s order of construction made it awkward to check the fit of darts, and their zipper insertion made things more difficult than they had to be!).

The loaner

Dateline – last week…

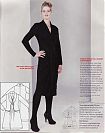
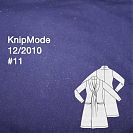
Wednesday: The new December KnipMode magazine arrived. OMG!! Best issue in a long time, holy crap! (It’s scanned and a preview is coming up very soon!)

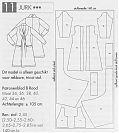
Thursday: I traced out dress #11, where the centre front portion of the skirt comes up and around to form the collar, joining back on itself. The pattern pieces were massive and several needed joining together and extending, so it took me much longer than usual.

Friday: Pip convinced me that this absolutely must be in a solid, and since my longest solid knit was only 2m, I either had to run into the West End on Saturday (ugh), wait a week for an internet fabric order, or hope against hope that the lady at Bhopal Textiles on Brick Lane (just about the only non-wholesaler there) had any suitable jerseys, and was actually still open when I walked past.

And score! She was in the midst of closing up (she said she normally closes around 6 or 6:15, which explains why sometimes she’s open and sometimes she’s shut when I walk home) and had a fantastic navy blue cotton-lycra jersey for £3.50/m. So the 3m length cost me £10.50. At first I felt guilty for buying new fabric when I have such an overflowing stash from NYC, but then it occurred to me that I’m sure James spent more than that at the pub on the same night…

So I came home and laid out the fabric and cut out all the pieces, needing almost the entire 3m, even with Knip’s single layer layout! I went to bed with all my pieces ready to go on Saturday…