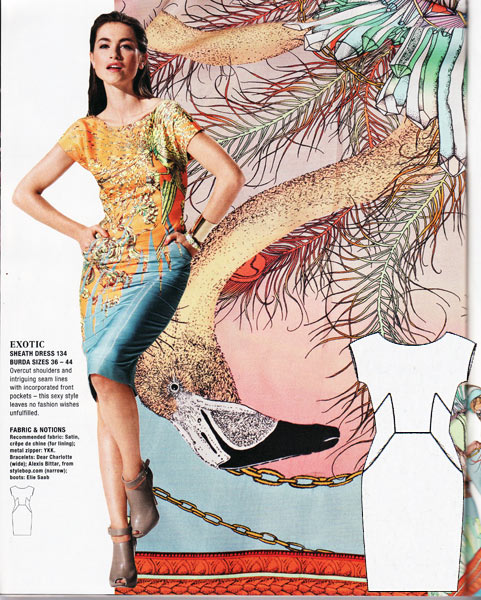
Happy birthday to me! I’m 34 today, and to celebrate, I’ve been making myself a special sheath dress designed by none other than Matthew Williamson from the September 2012 issue of Burda magazine!

If you’ve been following along, then you know I’ve been super busy for the past few weeks and it was a bit touch & go whether I’d finish this dress in time to wear to my special Mystery Birthday Dinner tonight. I’m proud to say that I did finish it in time, thanks in no small part to the snow cancelling our Saturday afternoon plans and giving me time to huddle down and sew! (It did not cancel my run though – we still ran 19 miles in the snow & fierce winds)!
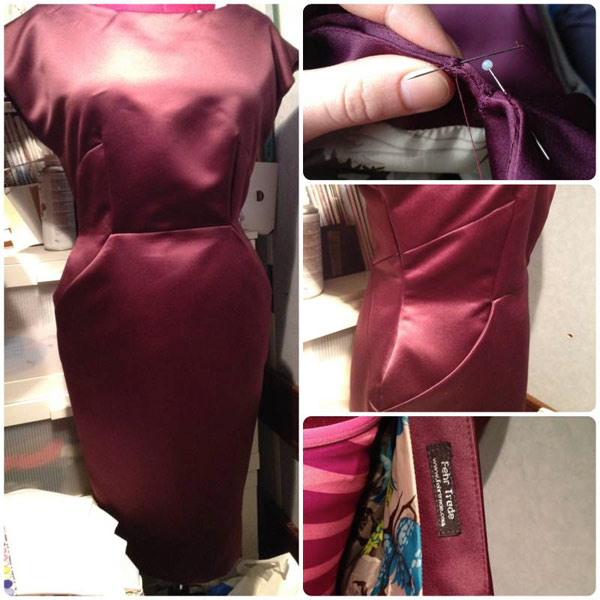
Unfortunately I didn’t finish in enough time to take daylight photos last night (plus it was snowing sideways & not exactly ideal photoshoot weather!), so I can only offer you some dressform photos right now, but hopefully we’ll be able to get a few shots of me dressed up before dinner tonight.
But — while everything’s fresh in my mind, I thought I’d tell you about the construction of the dress, and how I handled some of the trickier aspects of it.
I decided I didn’t want to fiddle about with a muslin for this dress, so I did the next best thing and sewed up the lining first, just to double check that my sole alteration of raising the waist 1”/2cm was right, and everything was okay.
After that I cut out the shell and facings from the purple duchesse satin, and the next hurdle was to attach the curved facings to the curved neckline and sleeves of the lining. The neckline wasn’t too bad, but the sleeves were a total bear! For this reason (and a bit that became apparant later, too), I’d recommend sewing the side seams dead last, after the lining and shell are joined at the neckline and sleeve edges, and then sewing the side seams. This means you can attach the facings flat, for starters…

Sewing the shell pieces meant a lot of tricky inset corners, but these didn’t give me much trouble – I always make sure I fuse some interfacing onto the inside corner, sew half of it, clip, then sew the other half, and press really well. It also helps that this is drafted beautifully, and with German precision, so it all came together nicely.
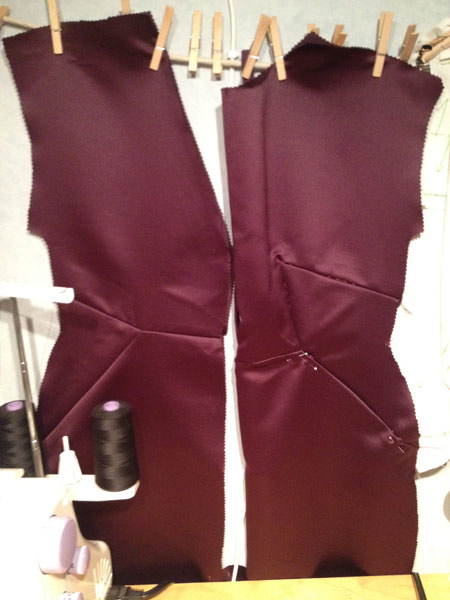
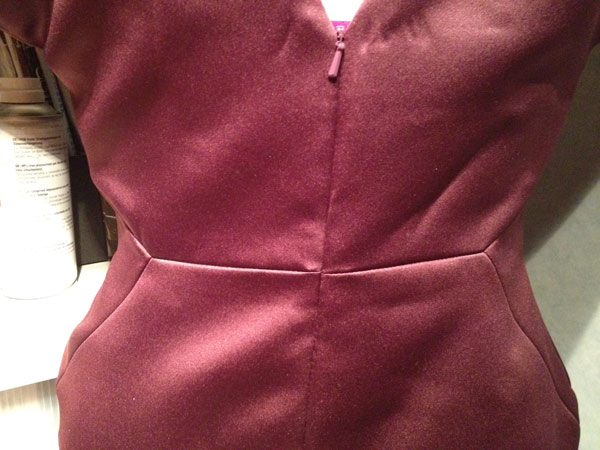
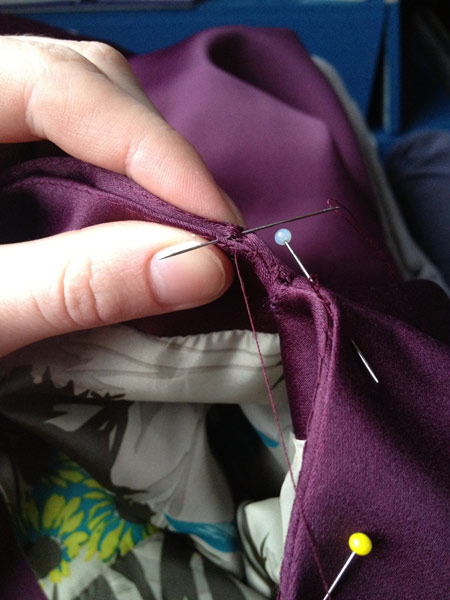
After that, the next tricky part was to ensure the waist seam matched up precisely across the invisible zipper. I always use a technique found in an old Threads magazine for this, which is well worth committing to memory (if you’d got the Archive DVD, it’s in an issue around 2008 or so but don’t have mine to hand).
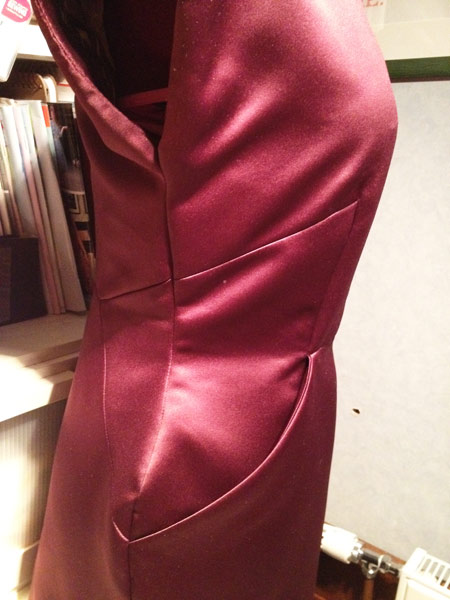
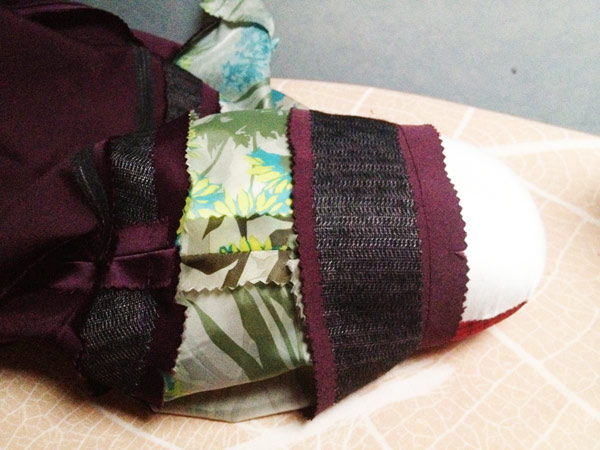
And a similar challenge came up when matching the diagonal section seams over the side seams – essentially, the trick here is to place pins perpendicular to your stitching line, on either side of the section seam, baste, then check everything’s lined up before stitching the entire seam. It’s less to unpick that way if anything’s off!
Then it came time to join the lining and the shell, which I then realised I could only do neatly and by machine at either the neckline or the sleeves, so I chose the neckline. I was debating about maybe prickstitching the neckline facing until I realised I’d need to handstitch the sleeves, so I understitched the neckline facing by machine instead!
Then, I decided I’d finished the sleeves using a trick I picked up in Bridal Couture, to press the seam allowances inside (though I skipped the catchstitching part here), place the two together, wrong-sides facing, and sew tiny fell stitches along the edge to hold them together.
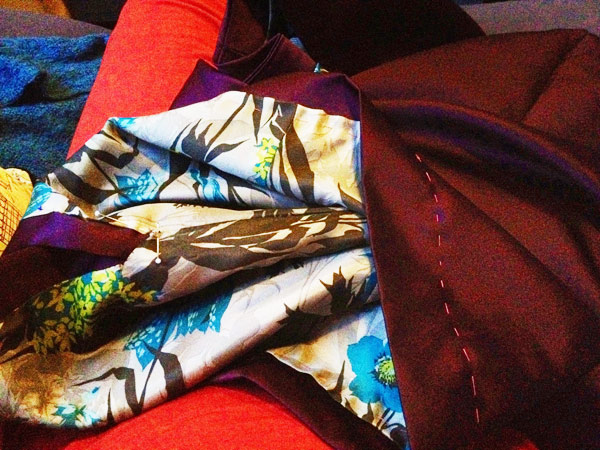
I then used a trick I picked up from (I think?) the Jalie jeans pattern and used a line of machine basting to mark exactly where the seam line should be, making my life a thousand times easier at the ironing board!
(See on the right – in an ideal world the stitching would be right at the edge of the interfacing, but it works & is close enough for me!)
Once I knew I’d pressed back the exact seam allowances, I pinned the edges together, and did my fell stitching, using matching Gutermann Sew All thread, reinforced with beeswax (and pressed to set it in!).
I then came to the walking vent and realised that I’d never actually sewn one of these properly – either because I’d shortened the skirt enough that I didn’t need one, or I, uhh, just kinda fudged it. So I had a look on Google and my friend Silvia’s unbelievably excellent tutorial came up. It was like the heavens opened and the knowledge of mitred corners and what exactly to do with the lining shone down into my brain…. Or something. Anyway, the vent looks fiiiiiine.
Onto the home stretch now, just the hemming to be done, which I do by pressing up the hem, hand-basting (with silk thread, so you can remove it with one pull – no unpicking!) exactly where you want to attach the hem, and then folding back the top of the hem edge to the basting line, one section at a time, catch-stitching the hem to a few threads of the outer fabric, from right to left (if you’re also right-handed). I admit that I find it easier to do this while wearing a head torch if it’s not the brightest of days outside!
This was the point at which I downed tools on Saturday night, so on Sunday evening I only had the lining hem to do, which I attached in a very similar manner to the shell hem. The big issue with attaching the lining to the dress rather than having both hems swing freely (also a valid choice!) is you’ve got to be really careful the lining isn’t slightly too short, pulling the dress up and creating weird bubbles. Been there, done that, so now I pin the hem, try it on, have James adjust the pins, then baste it, try it on again, and have James stop his PS3 game to tell me it’s still okay. ha!
And I reached the end, late last night! I gave it a good press, hung it around Susan’s neck, and let it sleep until tonight!
But like I said, you’ll need to wait a little longer to see a full photoshoot, which I’ll try and do tonight before dinner if we can. I want some photos worthy of the dress, so if they’re not right, we may need to wait til the weekend…
Oh, and we discovered on twitter last night that I am not the only London sewist celebrating her birthday, today – believe it or not, but DIY Couture and Sinbad & Sailor are also both celebrating their birthdays today (the ladies, I mean, not the awesome pattern companies they head up!). And then I got an email from Denise in West London, who’s yet another long-time sewist celebrating today, so there’s four of us!! Anyone else?