We’re travelling to Mexico in a few weeks, and I decided I should probably have a money belt to keep my passports and spare cash secure while we’re there, especially since we’ll be staying in mid-range hotels and travelling by coach. But the money belts available to buy are all really uncomfortable-looking, made of either rough fabric that will get soaked by sweat, or plasticky fabric that will stick to your skin, and with chunky buckles that will dig in over the course of a day.
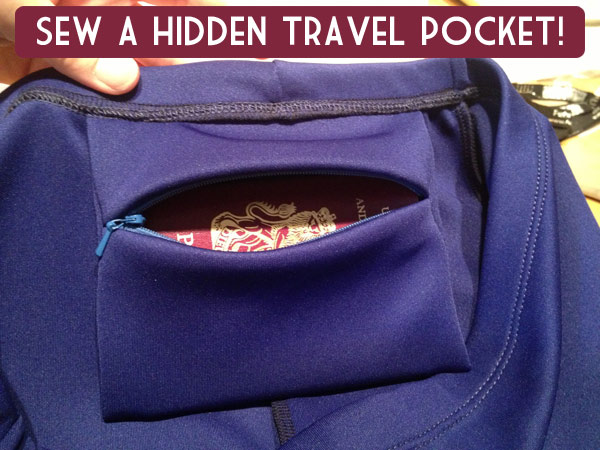
Since I’m sewing a bunch of bottoms for my trip anyway, I figured there must be another way, so I had the idea to draft up a simple zippered pocket that attaches onto the waistband and hangs discreetly inside. It can be accessed easily in a private place (like a toilet stall), but not easily seen or pickpocketed, and the zippered opening means its contents aren’t going to just fall out, either.
I’ve added this pocket into my recent travel skirt, leggings, and Hummingbird skirt already and I’ve worn these around London to test drive them successfully!
You can choose to either permanently sew the pocket into the waistband of your skirt or trousers, or you can use snaps to make it removable at the last step, like I did for my leggings.
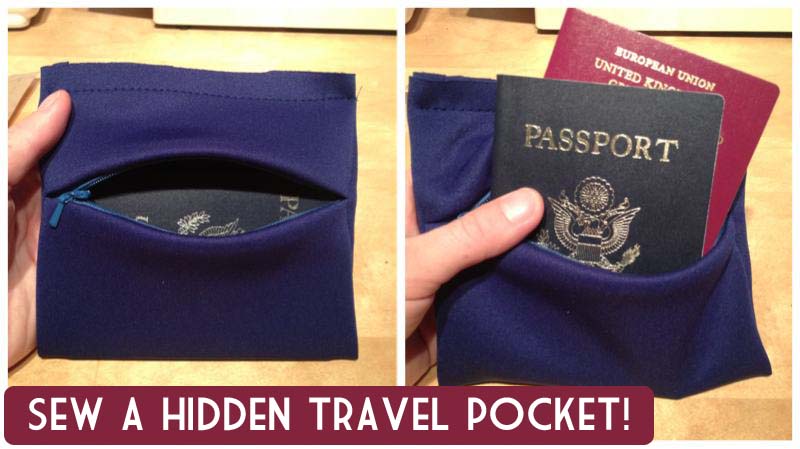
It’s sized to allow a standard passport to fit through the zipper, plus some emergency cards and cash and other small items you want to keep on you at all times, but that don’t have to be readily accessible.
You’ll need a 20cm/8” invisible zipper, and a small amount of fabric, either in matching fabric or something you’ve got lying around (since no one’s going to see it but you, why not make it FUNKY?). Why an invisible zipper? Well, because the zipper will be facing towards the body, you’ll probably want to minimise the contact of it against your skin, as fabric will be more comfortable pressing against your waist all day. But if you’ve got lots of regular zippers on hand and don’t mind this, feel free to use those instead.
Step 1 – Pattern prep

Print it out, making sure your print scaling is set to 100% or you may not be able to fit a passport in! There are only two pieces here, but one is too big for the standard Letter/A4 page so you need to tape it together, aligning the triangles. Cut along the solid lines so your two pattern pieces are free, then cut out each in the fabric of your choice (you only need one of each so cut in a single layer).
Step 2 – Invisible zipper
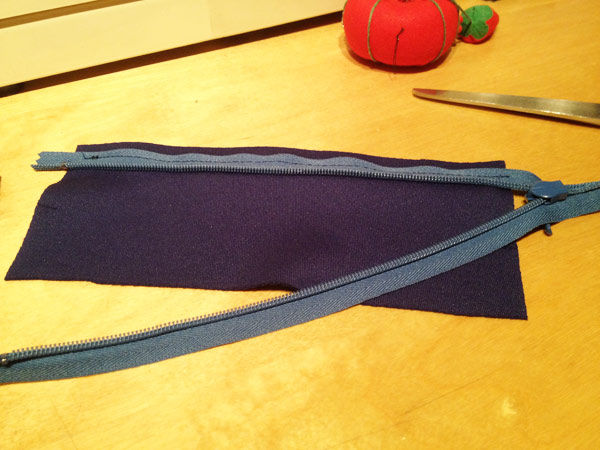
Open up the zipper and place it right side facing down onto the right side of Piece A, aligning the teeth with the dashed “zipper” line. If your zipper is too long (like mine is), align the open ends with the edge of the fabric and let the joined end hang off the edge. Sew the zipper to Piece A, using a zipper foot or invisible zipper foot.
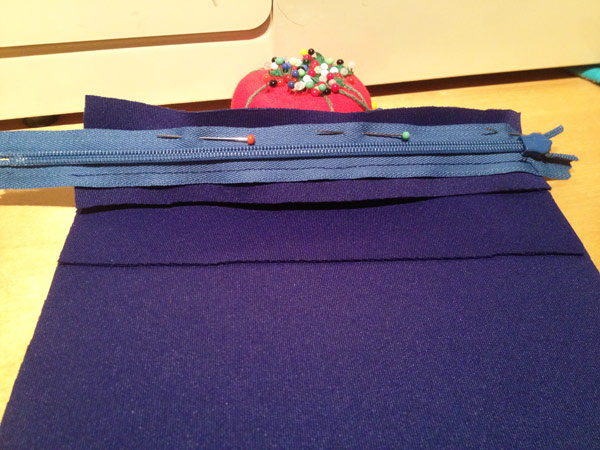
Close the zipper and align the teeth onto the marked “zipper” line on Piece B, right sides facing, and making sure that the sides of the fabric are aligned. Pin in place, then unzip the zipper and sew.
Step 3 – Side seams

Open the zipper part-way and fold the pocket pieces together, right sides facing, so that the marked “under waistband” portions are together. Pin the side seams and sew with a 1cm (3/8”) seam allowance, taking extra care to backstitch securely over the zipper.
Step 4 – Trim
Clip the corners, and trim the zipper teeth as closely as possible to the seams.
Step 5 – Flip & baste

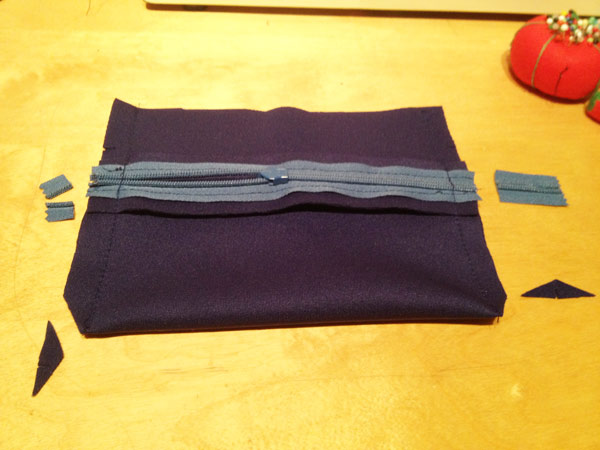
Flip the pocket right-side-out, and machine baste along the top edge.
The main construction of the pocket is now complete!
Step 6 – Attach to your waistband

If you’re making this pocket a permanent addition to your skirt or trousers you just need to sandwich the top portion of the pocket into your waistband facing and topstitch it in place. You may want to put your passport inside and pin or baste it into place first to check the placement. I found that an off-centre position in front worked best, but remember that passports don’t bend easily, so if you place it right over your hip, it may stick out funny!
Optional: Removable pockets
You may not want your skirt or trousers to have a hidden pocket in place all the time – one of my travel wardrobe is a pair of leggings, and I didn’t want the extra bulk for everyday wear, but I still wanted to option to have the hidden pocket during my travels. You may also decide that one or two interchangeable pockets is plenty, so can attach the same travel pocket to whatever bottoms you’re wearing that day.
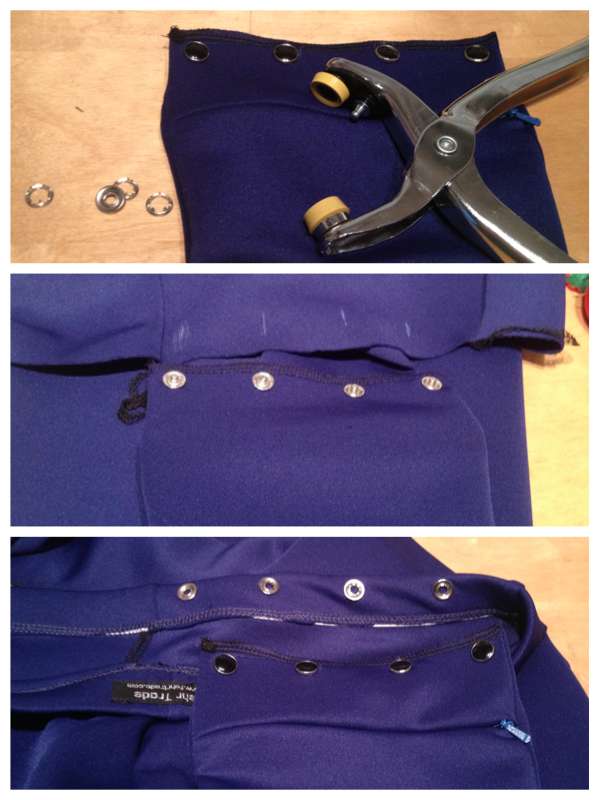
If this is the case, you can attach snaps (like I did) or velcro or buttons to the top edge of the travel pocket, and the corresponding side to the waistband of the skirts or trousers you’d like to attach them to. I used ring snaps here, but you could just as easily use sew-in snaps!
A word on comfort – always place the uncomfortable part of the fastening away from the body, on the pocket side (so the male portion of snaps, or the button, or the scratchy velcro). This way when the pocket is not in place, the softer potion on the waistband won’t irritate you.
Please let me know if you’ve tried this, or if you have any questions!
Pro-tip: You can now print this tutorial (or any other post on this site) without wasting paper on the sidebars or comments!