Happy 2018! (My Year in Review)

Happy fresh and new baby year, everyone! I always like to celebrate the first of the year with a look back at the year that’s just completed – this gives me a chance to reflect at the things I’ve accomplished, the garments I’ve made, and challenges conquered. As is traditional, I find myself starting 2018 with lots of great stuff on the horizon but unable to talk about it (this time last year my two big secrets were my Threads article and my book deal, so you’d better believe 2018’s secret project is a good’un!) so you’ll just have to trust me that the outlook for 2018 is rosy indeed!

The ombre denim Gimlet birthday dress

Happy (slightly belated) 38th birthday to meeeeeeeee!

My birthday was on Saturday and, after the stinker that was last year, I had a blast! I have a tradition where I like to sew myself something special to celebrate the occasion, and this year I decided to make myself a cocktail dress – rather fitting since I invited my friends out for cocktails on Friday to our favourite little whisky bar.

I’ve been utterly enchanted with the Gimlet dress pattern from the moment Capital Chic released it. Granted, Sally is a friend and I respect her work and design aesthetic so much, but this dress in particular was just too “me” not to make! I mean – sheath dress (tick), asymmetric (tick). And that’s pretty much all I need to add it to my To Sew list, ha!

Sewing jeans against the world

Sometimes you have to just close yourself into your sewing room, try to block out the world, and just make. This weekend I closed myself in my sewing cave and emerged on Sunday with a new pair of jeans and a teeshirt.

Let’s start with the jeans – I’ve lost track, but these are probably at least the 10-15th pair of jeans I’ve sewn myself, so I pretty much know what I want and how to achieve it by now. I usually try to make at least a pair a year, as they seem to live for just over a year of hard wear before the inner thighs inevitably start to wear thin and they’re relegated into “boat work jeans”.

Happy 2016! (My year in review)

Each year I like to take the first of January to look back on what I’ve sewn in the previous year. So while this post is a celebration of the new year, it also helps me to put into perspective the year that has just gone. Somehow I always think the year has been a bit low on finished makes until I put everything together for the year’s collage!


Click the image to see it better, or right-click here to see it in a new tab to get a better look!

Tip: If you’d like to skim back through the posts for the above projects, you can click Gallery in the top menu, which will only show you finished projects, without all the magazine reviews and in-progress reports getting in the way! (Though a few of the makes in the bottom row I haven’t blogged about yet!)

The Year in Stats

In terms of pattern companies used this year, I made:

  • 25 FehrTrade patterns (I put my money where my mouth is I guess!?),
  • 9 Seamwork magazine,
  • 6 Self-drafted (including traced from RTW),
  • 4 Jalie (well, the same sports bra pattern four times!),
  • 3 from the Great British Sewing Bee: Fashion in Fabric book,
  • 2 Burda Style magazine,
  • 2 Style Arc,
  • 2 Orange Lingerie,
  • and 1 each from La Maison Victor magazine, Named, Paprika Patterns, Imagine Gnats, Simple Sew, and Kwik Sew.

By my count, I made: 21 tops, 19 trousers (including leggings & shorts), 2 jumpsuits,
2 dresses, 10 pieces of lingerie (bras, panties, slips, etc), 1 bikini, 2 jackets/coats/cardigans and zero skirts (!). I made presents for my mom, sister-in-law, niece, and nephew, and James also received four tops and a pair of lounging bottoms this year, the lucky guy!

Navy twill Jamie Jeans

With my sprint training regime over the summer, I’d lost quite a bit of weight from around my waist and hips, while my legs essentially stayed the same size. This has meant that pretty much all my trousers are now too big (some of them, comically so), and I pretty desperately needed some trousers that fit properly.

With the Kimono Sweat pattern launch out of the way, I went through my fabric stash to find something trouser-y, and discovered a length of stretch navy twill from Ditto that my friend Pip bought me as a Christmas present two years ago and I’d been meaning to sew ever since. Then I had a little dig through my pattern stash for something easy with minimal fitting, and I pulled out Named’s Jamie Jeans pattern, which I’d previously sewn in silver denim. Unfortunately, that fabric was not the best quality, with the silver coating having worn away considerably despite zero machine washing, and are just murky black now. So sad. But I mostly liked the fit of those, and the pattern was ready to go, so the trousers were GO!


These photos were taken in Plaza San Martin in Buenos Aires last week, and were lightened to try and show the details a bit better!

In the silver pair, I loved the close fit through the legs, but the crotch was just not comfortable. To me, it felt like they were too low-rise, but upon closer comparison with my favourite (non-stretch) Burda jeans pattern, it turned out that the crotch curve was about an inch too high, so I lowered it to match Burda’s and the fit is just right now. So they hit at about the same point, just below my belly button, but the crotch isn’t pulling and feeling a bit too… camel-toe!

My galaxy-print birthday sheath dress

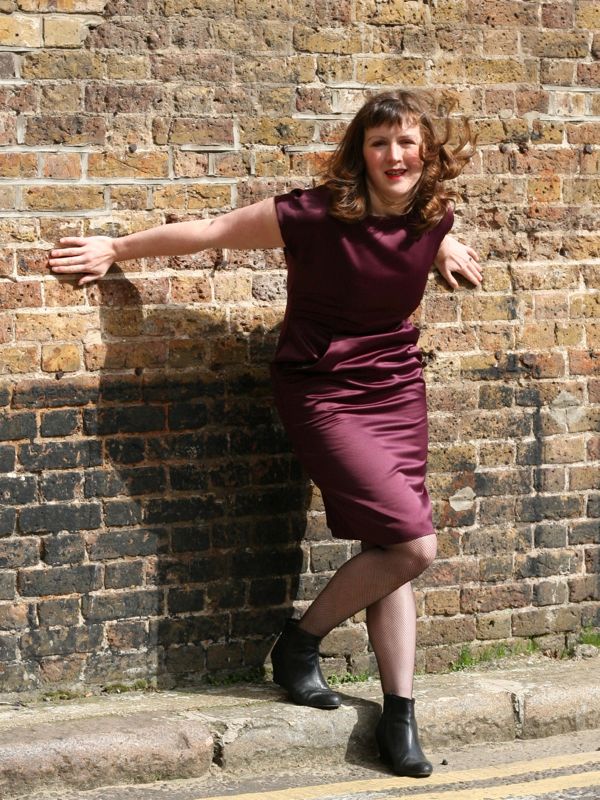
Happy birthday to meeeeee! I hinted about it last week, but I decided to celebrate the occasion this year by sewing up something special to wear, using a fabric that I’ve lusted over for months even before I broke down and ordered it. My feeling is that if you adore the fabric or pattern (or both!) then the resulting garment is pretty much guaranteed to be a hit.

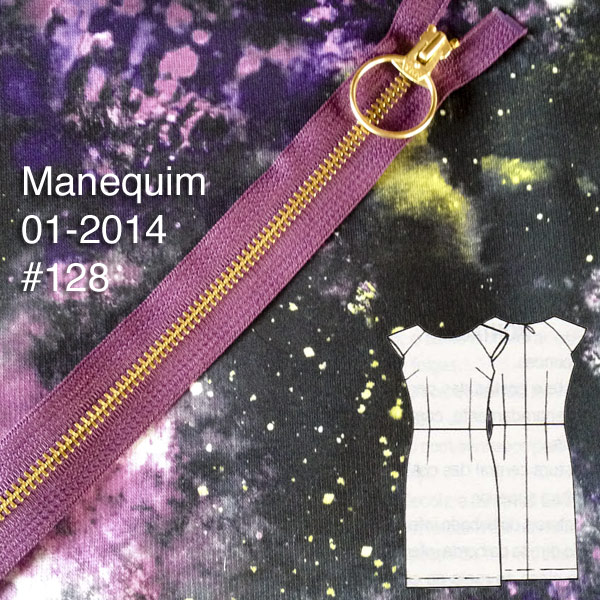
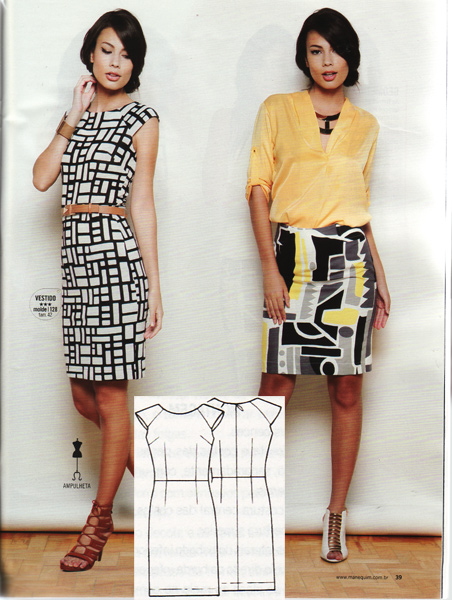
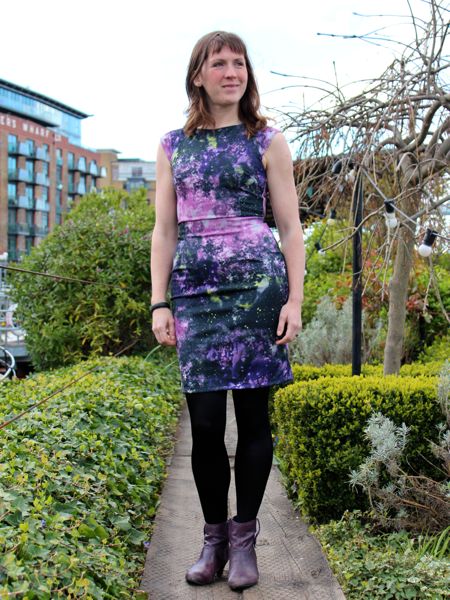
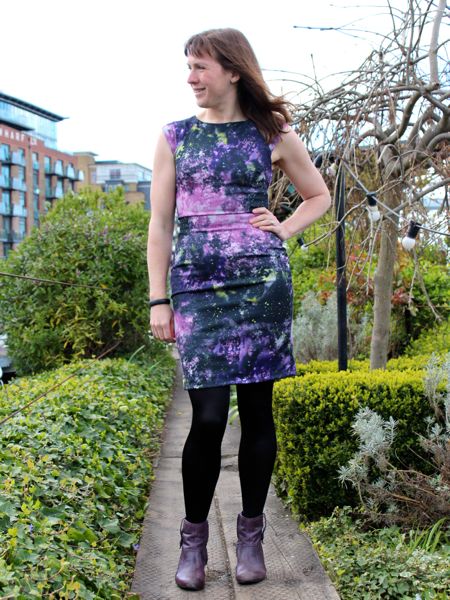
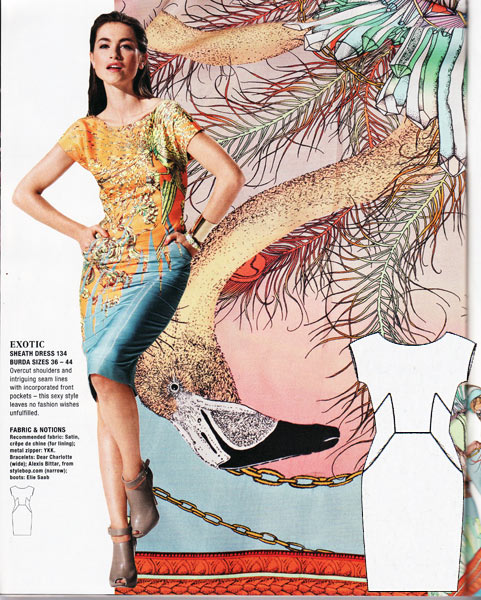
For this dress I used the Derek Lam-inspired knit sheath from the January 2014 Manequim magazine combined with the most amazing galaxy print ponte jersey which is even nicer in real life, I swear! It’s a digital print on a smooth, white ponte jersey base, and it’s both stable and stretchy, making it the bestest fabric ever (and I have just over a metre leftover! woo!).

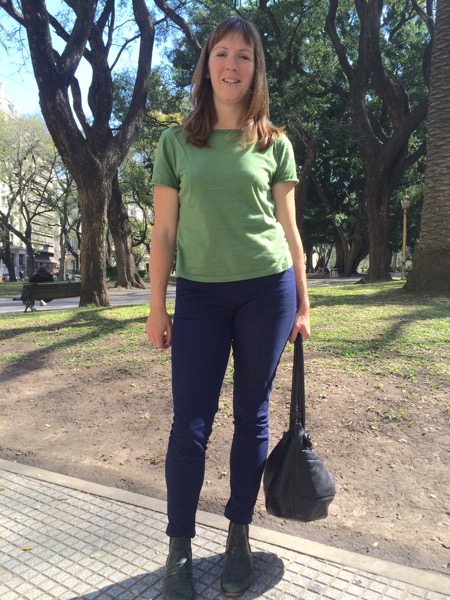
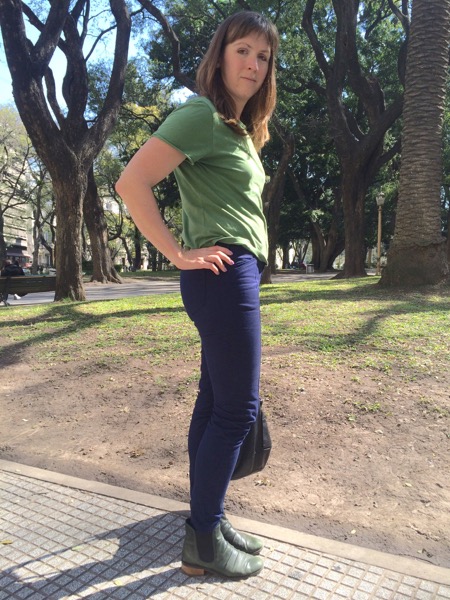
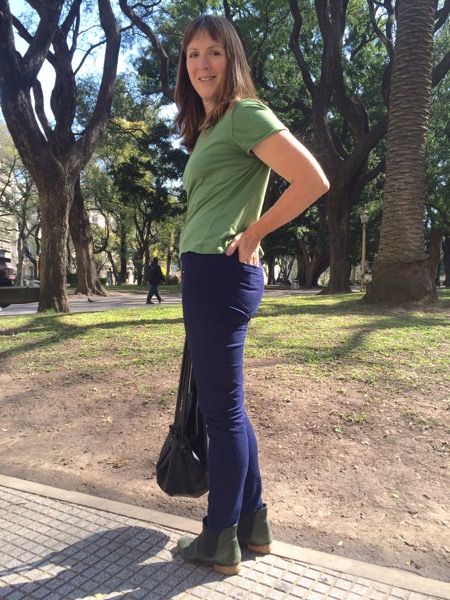
It’s been a while since I sewed a Manequim pattern and I’ve dropped in size over the past few months of marathon training to a 42 (Burda 40), so I decided to sew up a muslin of this first to test the fit. The resulting turquoise ponte muslin was very close fitting, and I wasn’t entirely certain at first whether it was too tight, or utterly perfect. So I lounged around in it for a day, decided it was comfortable enough, then cracked on with the final version without any pattern changes.

The final version is definitely tighter than the muslin, though, and I’m fairly certain it’s down to adding the lining layer, even though it’s stretchy! You can definitely see some horizontal pulls in the dress showing it’s a tad too tight, and it’s a struggle to get that waist seam on and off over my boobs, but one it’s on, it’s not uncomfortable, thankfully!

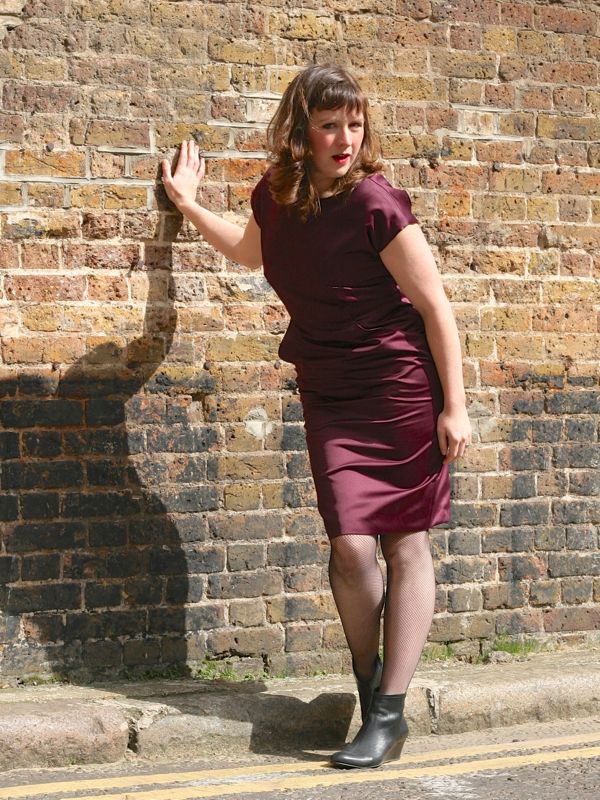
The pattern is really simple – a front bodice with both vertical and horizontal bust darts, back bodice with long vertical darts, raglan cap sleeves, and a skirt pattern with vertical waist darts (the same skirt pattern is used for both front and back). The pattern calls for a long invisible zipper, but as I could easily get the muslin dress on and off without it, I was going to leave it off the finished version, too…

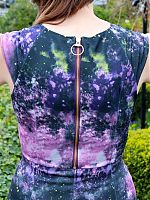
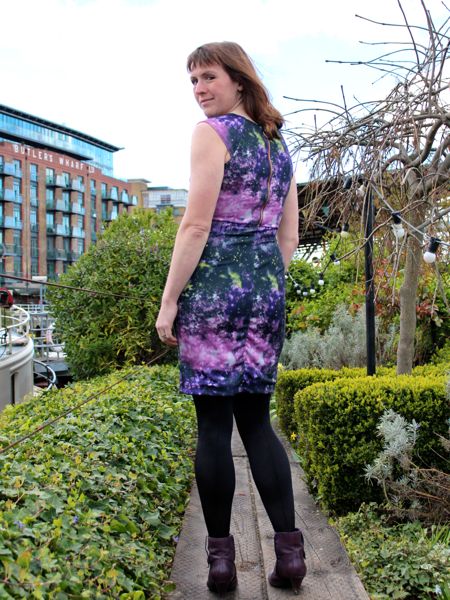
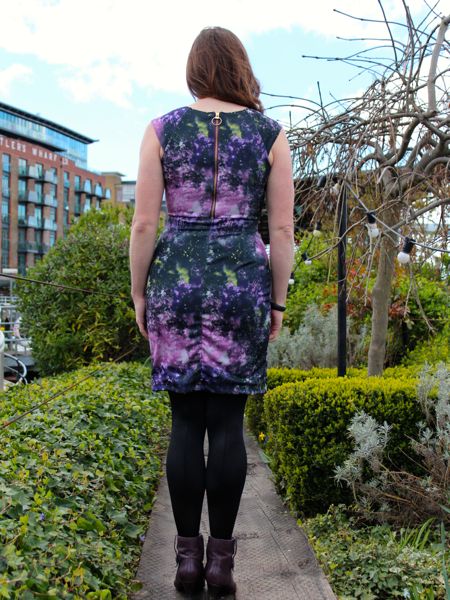
…until I discovered the most perfect purple, metal teeth zipper in my stash! So then I decided I had to use it and make it an exposed zipper feature instead. It was a bit shorter than I’d have liked, but it reached exactly to the waist seam, which worked out nicely visually (though for ease of getting in and out of it, a longer zipper would’ve been much better!).

My Matthew Williamson birthday dress

Thank you all so much for your patience! I finished sewing this dress in time for my 34th birthday on Monday (and I proved it by showing you dressform photos and talking in depth about the construction process!) but such a rich, dark colour really requires daylight to shoot properly, and today was the first opportunity we’ve had.

Another reason I wanted some great photos of this is because it’s an incredible pattern with some seriously striking design lines and beautiful details, and frankly, it deserves to be seen properly! In fact, it’s a true designer pattern, and from Matthew Williamson, no less! It was printed in the September 2012 issue of Burda magazine, but you can still purchase it as a pdf download if you missed it and want to make your own!

I made mine in some lusciously soft and supple “Ravissant Duchess Satin Plum” that’s been in my stash for three years just waiting for the perfect use, and paired it with a floral lining fabric gifted to me from Veronica when I was in Paris last Spring. Personally, I think these two make the most perfect pairing, even if it’s only me who sees the inside!

As I said on Monday, this pattern is a step up from the usual Burda patterns – more like a Vogue Designer pattern in all its wonderful details, but with the usual precise Burda drafting. I really wanted to do this dress justice, so I did quite a few things the long way, like the fell-stitched sleeves, walking vent, and all the matching seam intersections!

Birthday dress – just a peek!

Happy birthday to me! I’m 34 today, and to celebrate, I’ve been making myself a special sheath dress designed by none other than Matthew Williamson from the September 2012 issue of Burda magazine!

If you’ve been following along, then you know I’ve been super busy for the past few weeks and it was a bit touch & go whether I’d finish this dress in time to wear to my special Mystery Birthday Dinner tonight. I’m proud to say that I did finish it in time, thanks in no small part to the snow cancelling our Saturday afternoon plans and giving me time to huddle down and sew! (It did not cancel my run though – we still ran 19 miles in the snow & fierce winds)!

Unfortunately I didn’t finish in enough time to take daylight photos last night (plus it was snowing sideways & not exactly ideal photoshoot weather!), so I can only offer you some dressform photos right now, but hopefully we’ll be able to get a few shots of me dressed up before dinner tonight.

But — while everything’s fresh in my mind, I thought I’d tell you about the construction of the dress, and how I handled some of the trickier aspects of it.

I decided I didn’t want to fiddle about with a muslin for this dress, so I did the next best thing and sewed up the lining first, just to double check that my sole alteration of raising the waist 1”/2cm was right, and everything was okay.

After that I cut out the shell and facings from the purple duchesse satin, and the next hurdle was to attach the curved facings to the curved neckline and sleeves of the lining. The neckline wasn’t too bad, but the sleeves were a total bear! For this reason (and a bit that became apparant later, too), I’d recommend sewing the side seams dead last, after the lining and shell are joined at the neckline and sleeve edges, and then sewing the side seams. This means you can attach the facings flat, for starters…

Birthday leather iPad case

Yesterday was my birthday, and I wanted to start the year off right, so I got up early and ran the Sport Relief 6 mile run down on The Mall, and I’m happy to report that I ran a new PB of 46:38 for the 10k! Though I have my doubts as to whether the course was entirely accurate, since this is a full 5 minutes faster than before…

Then I came home and enjoyed the glorious sunshine, cupcakes, and the pressies James had in store for me – luscious new Wolfords, a beautiful hardback copy of Habibi, and a cool lunchbag that mimics the old school brown paper bags.

Oh, but there was one more thing…

So of course I had to sew a case for it!

I wanted something more classy than crafty, so I used bronze/black leather from the obi belt (which I actually hardly wear and is too big now!) and it’s lined with black sweatshirting leftover from James’s sweatshirt from a few Christmases ago.

I measured up the ipad and then cut the leather to be two conjoined rectangles of 21cmx26cm, plus about 6cm more length on one side for a closing flap, plus a facing (only because I didn’t have enough leather to do a self-facing

I used long strips of velcro (sewn on) for the closure, making sure the soft loops are on the flap so the iPad doesn’t get scratched as you slide it in!

(Vote for my) March Mini Wardrobe

It doesn’t seem that long ago that I was first laying out my initial plans for this mini wardrobe, but now I’ve had some time to step back and have a look over what I managed to accomplish last month. I made this wardrobe mostly for myself, to use some luscious fabrics from my stash in combination with patterns that really appealed to me, but I also kept one eye on the contest requirements running over at PaternReview.com to make sure I remained within their rules, too. Here’s my entry into their contest, or you can just read on below…

I started with a blue viscose, draped knit top that I’d bought from ASOS and really liked, but I wanted to wear with both casual and dressy bottoms.

To coordinate, I sewed:

1. Jalie jeans – I’d made a muslin but the waistband was horrible so I had my work cut out for me on this pair using great quality stretch denim from Mood in NYC, plus some London streetsign fabric for the waistband facings and pockets. I used my vintage hand crank Singer machine for all the topstitching, plus I got to use my vintage buttonholer attachment and high quality rivets for the first time! I fixed all the waistband issues in this pair and these are now my favourite jeans. Read more…