KnipMode and Burda June 2012
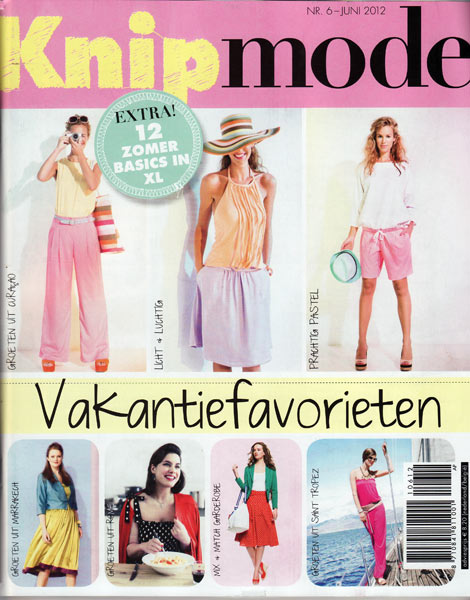
KnipMode June 2012

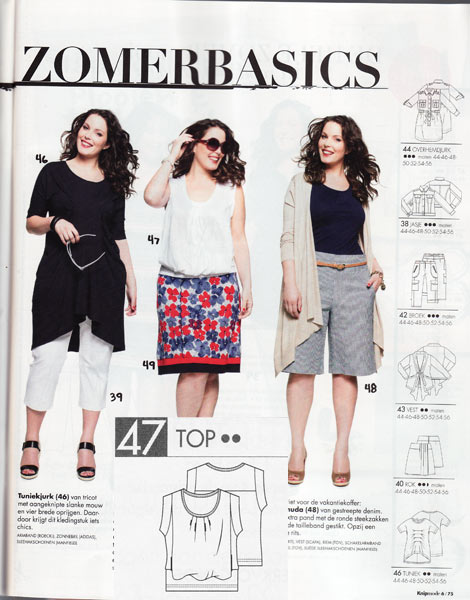
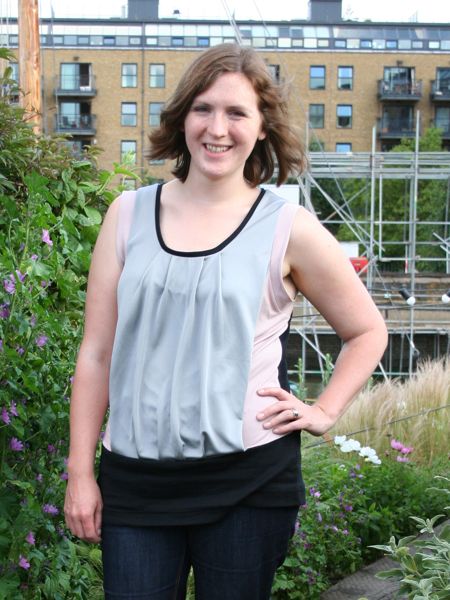
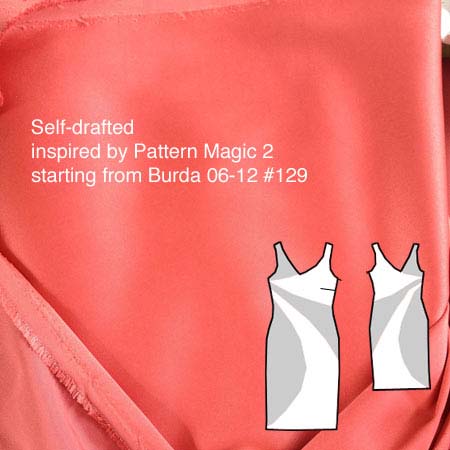
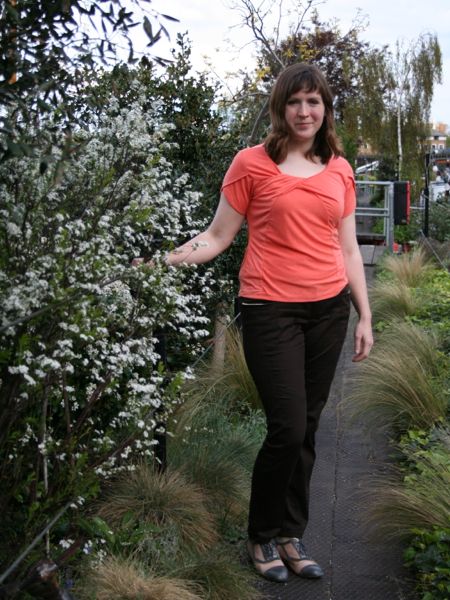
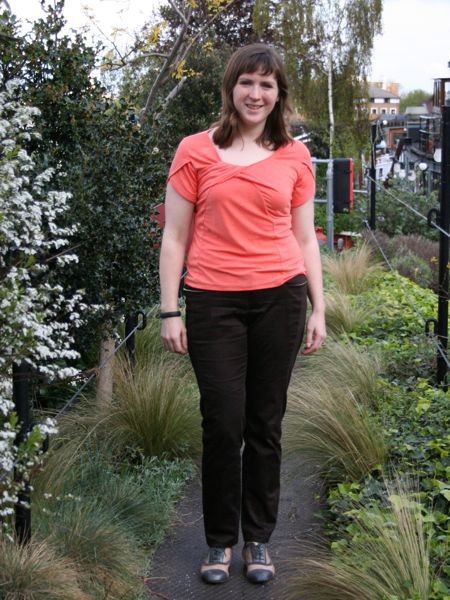
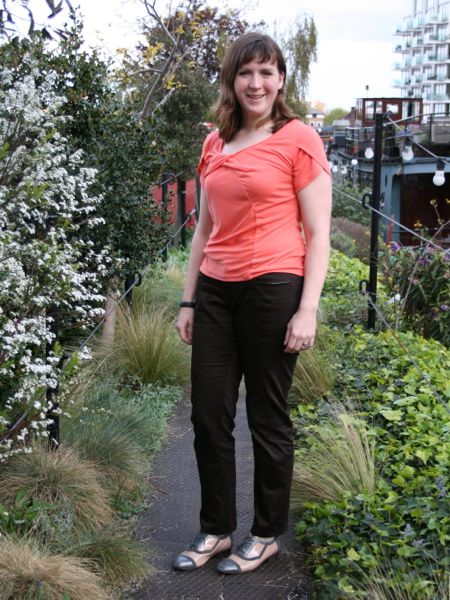
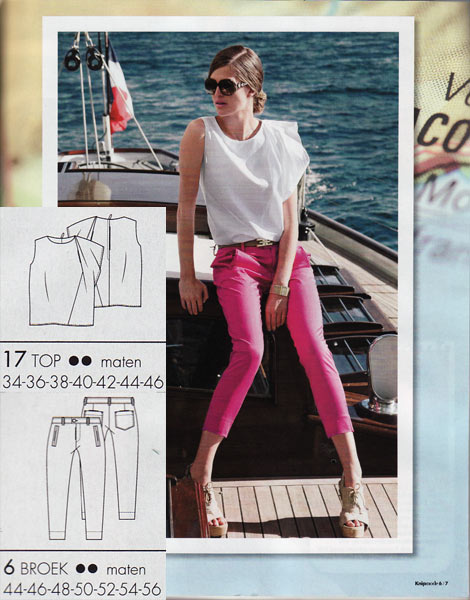
Let’s start off with the best from across both issues – this asymmetric, flounced top is just fantastic! I really like it paired with skinny jeans like they have here, too. It’s really important when you’re wearing volume up top to balance it with something slim below, or vice-versa!

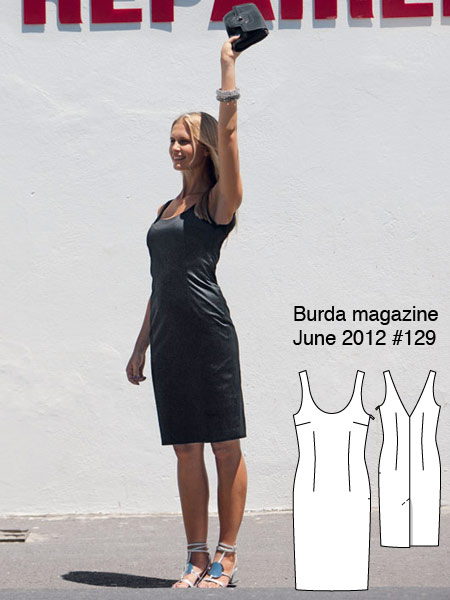
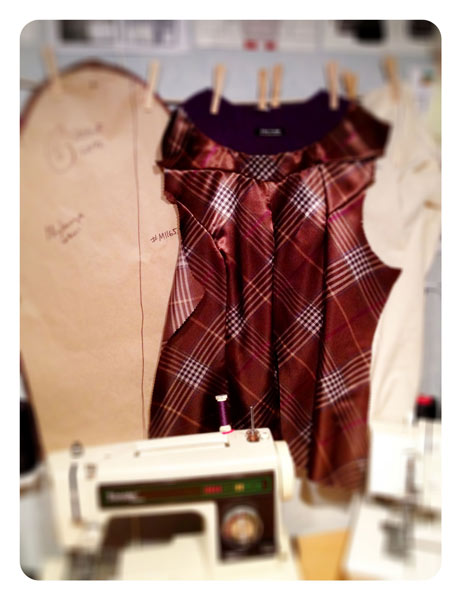
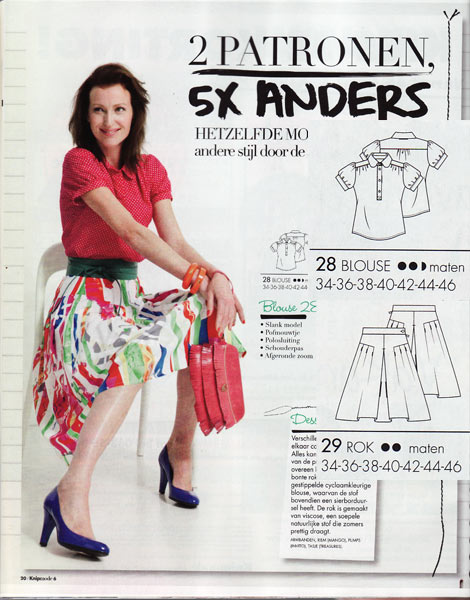
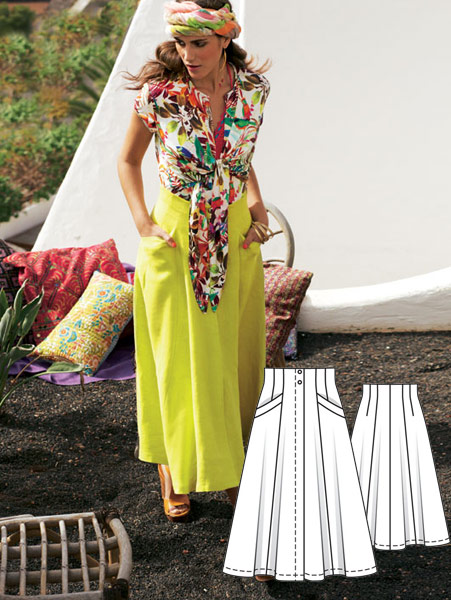
In my mind, this A-line midi skirt was almost identical to one in last month’s Burda magazine that I really liked (and already traced, but when I’ll sew it is another matter!), but when I place the tech drawings side-by-side, they’re actually not as close as I remembered…

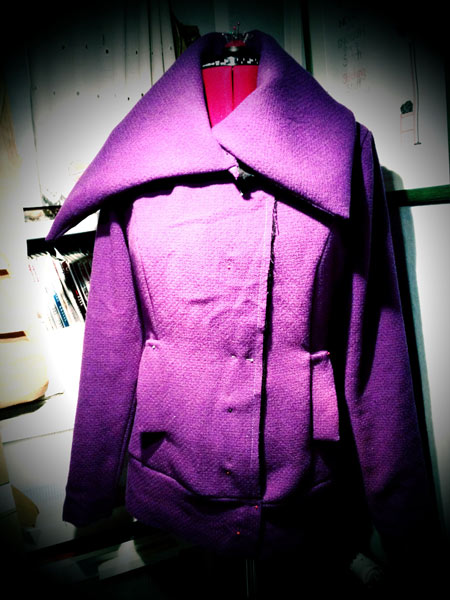
None of this combo of jacket, shell, or trousers is particularly earth-shattering, but I really like the look of pairing a cropped jacket (my forte) with a longer layer underneath. And beautiful, shimmering jewel tone solids are always a good choice!

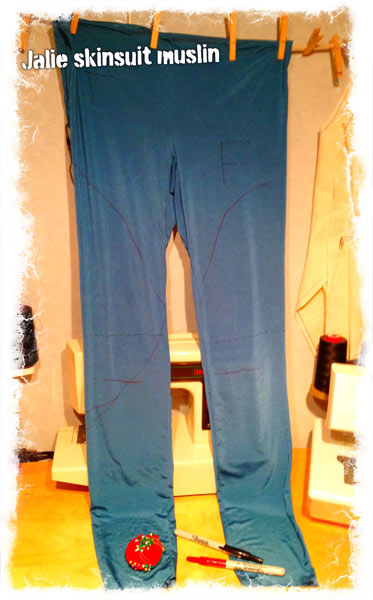
This is a bumper issue for Plus sized patterns, with something like 15 on offer this month, but the one that really caught my eye is that they’ve released a favourite of mine from last summer in larger sizes now!! This is one of my favourite casual tops, despite the tunic-length, and I’m really chuffed to see it made more widely available now.

Grey Pattern Magic "Flip Turn" top

Ever since I first opened the Pattern Magic books, a few designs have been burning a hole in my sewing brain. One of these was the “Flip Turn for a Draped Effect” bodice from Pattern Magic 2, and I was so happy that I was able to draft this on my Morley College Pattern Magic 2 course last month! It wasn’t too bad to figure out, but I’m still really pleased to have the instructor there and because I muddled through (albeit with help), I feel much more confident about tackling other designs in the books.

The only problem was that we drafted all the course designs based on the largest Bunka sloper, which was still rather a lot smaller than me, so if I wanted to actually wear the designs from the course, I’d have to create them again off my own sloper, which just seemed a bit dull.

Or maybe… just maybe… I wonder if the Bunka sloper version would fit if I eliminated the back waist darts and made it in a knit?

OMG a toile for a fashion college dressform fits me!! :O 😀

Since this was a total fit experiment, I wanted to try this first in a low-risk fabric, and I had just enough of this viscose grey marl jersey leftover in my stash from the Manequim “big shirt”.

One interesting part of this design is that the reverse of the fabric is shown on a large portion of the lower front, and in this fabric, the reverse is kinda textured and loopy, but without any major colour change from the “correct” side. It means you get a subtle texture change on that panel, but without screaming “hey! I’m the wrong side!”.

To further play up the texture change and to make it look more intentional, I used the wrong side of the fabric on the neck band, too (maybe I’ll do the sleeves on the wrong side next time, too?)

Neon trim gathered teeshirt

I bought a bit of fabric recently, and I had a spare few minutes in between packing and setting up our new bedroom, so of course I squeezed in a new top before we left for Mexico!

It’s #126 from the February 2013 Burda magazine, but the pattern is for sale on Burdastyle.com if you like it, too.

The fabric is a distressed jersey print from Minerva that I bought a fortnight ago. It’s not got the nicest hand and feels quite stiff from the paint used on it (and didn’t soften up much in the wash, either), so I had to choose a pattern carefully. I first thought of my tie-front Pattern Magic top but 1m wasn’t enough for that so I turned to this pattern instead since it was traced and nearby after I made it earlier this year for my gathered merino top.

The neon trim was just a happy accident – I’d originally planned a basic neckband of self fabric but I mismeasured the neckline (I forgot to add in the top of the raglan sleeves!) so I started to think outside the box and I remembered I had some of this stretch fluroescent orange binding (also from Minerva!) in my stash from earlier in the year. Now I can’t imagine this top without it!

The Swirl Sheath Dress

This dress has been an awfully long time in the making. The idea started back when I took the Pattern Magic 2 class at Morley College last winter, where we learned a technique called “Fundamentals: Create three-dimensional forms with design lines only” (it just rolls off the tongue, eh?).

Essentially what this means is you sew up a muslin, draw design lines all over it, cut along these lines, then introduce snips of ease until the pieces lie flat, and there’s your new pattern! I did all this (based on a sheath dress from the June 2012 Burda magazine, which doesn’t appear to be on the US BurdaStyle, sorry) last summer, but then the project stalled when I couldn’t find any heavyweight stretch satin anywhere in Europe, and had to import this gorgeous salmon stretch duchesse from Gorgeous Fabrics.

Then there were further delays as I didn’t have a wide enough cutting table to lay out the asymmetric and strangely-shaped pieces, until a few weeks ago when the Thrifty Stitcher invited me to pow-wow at her studio and suddenly my swirl sheath dress was back on track!

Because all the darts from the original pattern (bar one) are now incorporated into a bunch of curved seams, this means there’s a lot of easing going on, so if you don’t like easing princess seams, for example, you really won’t like sewing this. My easing motto is “pin the crap out of it”, and I’m proud to say that I didn’t have any tucks or unpicking in any of these seams. Though I did use 58 pins on just the lower semi-circular seam!

Postbags of Fun

I’ve been ill the past few days with some crappy bug that’s going around, and it appears that the postman has either a) been following me on Twitter and reading all my “bluergh I feel awful” tweets, or b) canoed alongside the boat and has been peeping in our windows watching me. I know I’d definitely prefer a).

But in any case, he definitely knew I needed cheering up, because look what arrived within the span of two days!

That’s right, the June Manequim magazine, the July Burda, and a bunch of StyleArc patterns I ordered a few weeks ago (they’re getting SO much faster at turning these around!!)

You’ll see my reviews of Manequim (awesome!) and Burda (pants!) next week, but the new additions to my growing Style Arc hoard are:

  • Audrey jacket, which just looks perfect for Fall to me
  • Pamela dress, which would be really great for taking on our big Mexico trip later this year
  • Emma dress, which is just way Too Me to pass up!
  • and the Freebie for June, Dee Knit Top, which is really cleverly, yet simply drafted

Flu shopping

While you all are out Christmas partying it up, I’ve been stuck in bed with the flu for the past two weeks. Horizontal and sleeping for up to 18 hours a day (yes, really) isn’t much fun. So when I bored of daytime tv after about two hours, I started doing some serious online shopping, oops.

Things I’ve bought:

Fabric from Tissu

(Seen on the right, above)

2 meters each of viscose-lycra jerseys in Rust, Mustard, and Bongo Jazz (awesome name for a bright orange!). One of these will become the Style Arc Marita dress in my Fall Sewing Shortlist. And I bought another meter of their “denim-look” jersey, because I freaking love my Not Jeggings and decided I want to make my Image Wear trousers in the same fabric, too.

Design lines and ideas

I know it’s a cliché to say so, but I’ve been very busy lately! So busy that there was no sewing activity whatsoever last weekend (though I did cut and fit an awful lot of insulation for the new boat bedroom, attended two out-of-town barbecues, and raced a new 10km PB in the weekend available to me!). In two weekends’ time I’ve got a friend’s wedding and ever since we were invited, I knew I wanted to apply a Pattern Magic technique onto a sheath dress for this occasion.

Overall, I was disappointed by the June Burda magazine, but I saw dress #129 and knew it’d be a great starting point since I know Burda’s dresses fit me very reliably (and I’ve already raised the waist by 1 inch to make it perfect).

The technique I’m looking to apply here is one I learned on my Pattern Magic 2 course at Morley College, though it’s well documented in the second book, too. Essentially, you make a muslin of a basic block (in my case, I’m using this Burda pattern), draw design lines wherever you like, cut along those lines, and then release any lumps into the curved edges of the new pieces.

So thus far I’ve copied the tech drawing off Burda’s site, raised the neckline a bit, and removed all the darts in Photoshop (since mine will be incorporated into my new design lines anyway), then printed off a bunch of these empty tech drawings onto a sheet of paper.

Peach flip-turned top and slim brown trousers

In addition to my exercise gear you saw yesterday, I actually made another top and trousers the weekend I got back from Montreal! Since I wasn’t in a fit state for a photoshoot until now, I kinda feel like I’m clearing out the cobwebs here…

This top is another “Flip turned for a draped effect” top from Pattern Magic 2 (drafted on my Morley College course!), this time using the tulip sleeves from Jalie 2806 for a more Spring/Summer look. This is the third time I’ve used these tulip sleeves and I really love the look and love wearing them – they really make a top much more special than just your average short sleeve! I used a lovely orange marl viscose jersey from Tia Knight here that’s just sooooo soft and lovely to wear! Hurrah for an impulse purchase!

The trousers are from the March Burda magazine (#126), using some stretch cotton sateen I bought at Tissues Dreyfus in Paris last month. It looked black in the dark lighting of the shop, but I got it home to realise it’s actually dark brown, which was fairly annoying, as I wouldn’t have bought 3m of brown had I known!

First running gear muslins

I love it when different areas of my life start overlapping! I’ve been a runner for about 7-8 years but I’ve only really sewn running gear a few times (mostly because my mom knows what I like and gets good stuff on sale for me!). But I’ve got the itch to sew the lycra again, and so I made the first steps towards making my own running gear designs a reality.

First step was to make quick and dirty muslins to check the fit and mark style lines. The Jalie 3135 skinsuit pattern was my basis for my running leggings (minus the top half and the front zipper opening!). I used the “silk touch” lycra jersey from Tia Knight as my muslin fabric here since it was the cheapest 4-way stretch she had, but it’s surprisingly really nice! It’s got a hand like a silk jersey, but seems a bit too drapey to be ideal in exercise gear, though it should be fine for the occasional accents or panels if I want to.

So I made my muslin, tried it on, and while I was wearing it, drew lot of placement and design lines straight on the fabric with a Sharpie:

  • I drew in my waistline just under the pattern’s torso double line
  • I marked the knees on front & back, and also where the curve of my bum lies (helpful for placing design lines later!)
  • I took out some excess in the ankle (no cankles here!) and about 4 inches off the length (the legs are reeeeeeeeally long – maybe to cover skates?)
  • And then, finally, I drew in some curved design lines where I thought they might look nice around my thighs and calves

The end result looks a bit like a liposuction patient (which is why I’m not modelling it!!), but it definitely served its purpose!

A bit of everything

Housekeeping time! I’ve got lots of little bits to update you on, either with my in-progress project, upcoming things, or small projects I managed to gloss over at the time…

So in no particular order:

My purple coat

Progress is slow on my purple jacket/coat from the Winter 2011 MyImage magazine, not because of anything to do with the coat, but because life keeps getting in the way. I’ve finished the shell and I’m onto the lining now, so I’ve just got to finish constructing the lining, attach the two together, flip, and sew the buttonholes.

I’d prefer to do the buttonholes on my vintage buttonholer attachment, but the templates I have aren’t big enough for my enormous (2.5 inch?) buttons. Anyone know a clean way around this? Can I set the buttonholer to do double-length holes somehow?

In any case, I should be able to finish this coat this weekend and (hopefully) get a photoshoot in. Not long now before I can do evenings photos again – it’s already light out when I go running before work!

Gift update

My go-to baby gift is to sew a changing mat, with a hand towel on one side, and nice fabric on the other with big, deep pockets and ties to fold it all up. I had two baby boys arrive in January, so both sets of parents got changing mats with this awesome Alexander Henry vintage robot fabric. 1 meter of it wasn’t quite enough to stretch to the pockets, too, so I filled in with some scrap denim.