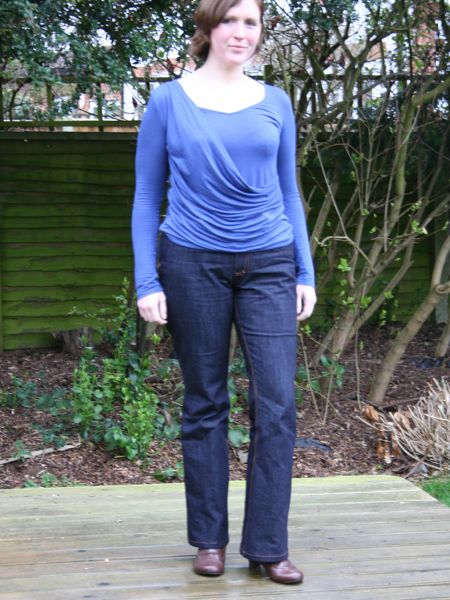
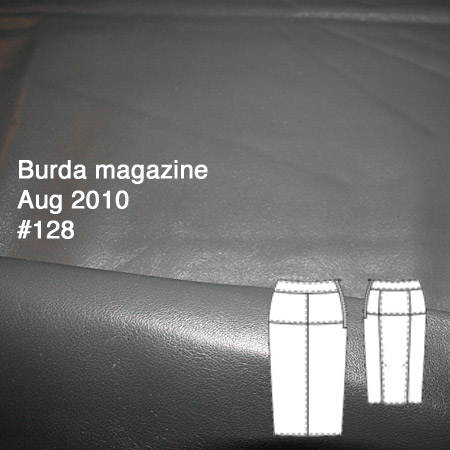
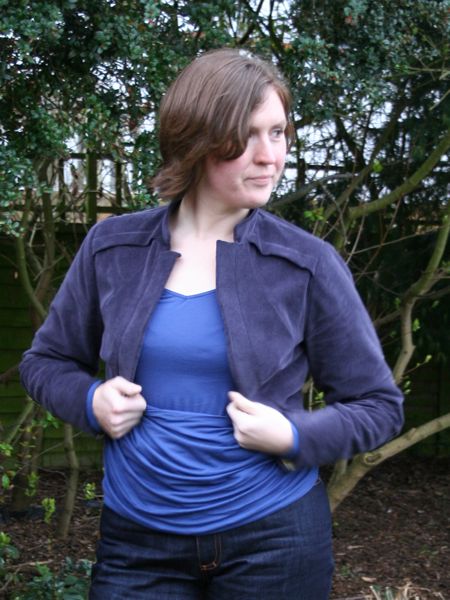
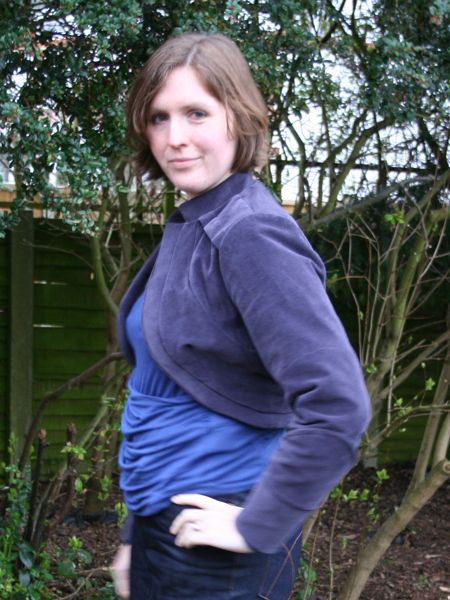
Grey Donna Karan leggings (Vogue 1378)

I don’t sew many “Big Four” patterns these days, but when I do, they’re invariably Vogues, and even then, they tend to be the designer patterns. The Big Four are really bad value in the UK, for starters, but then I also hate fighting with massive sheets of tissue paper, playing the “how much ease?” roulette, and dealing with outdated construction techniques. Give me a magazine maze to trace or pdf to tape together any day!

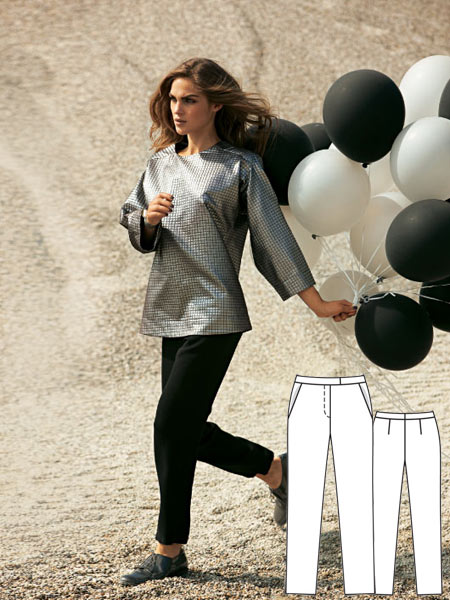
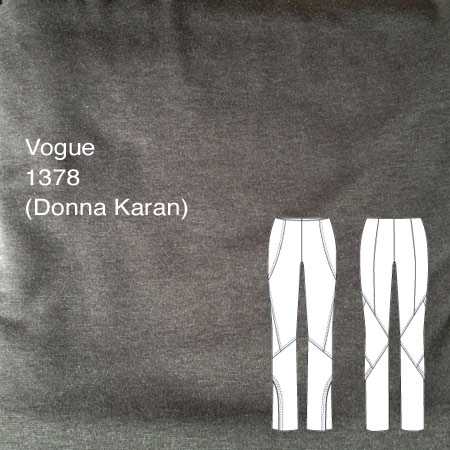
But I do love great and interesting seamlines, so when the Donna Karan coordinates pattern, Vogue 1378 was announced, I immediately wanted to make those leggings (the wrap top? Meh. I’ve seen a thousand like it).

Since there was a sale on Vogue patterns a few weeks before I was due to visit my parents last November, Stacy very kindly bought it for me at sale price (even without shipping, it was like a third of what I’d pay here) and it was waiting for me when I arrived! Thanks Stacy!

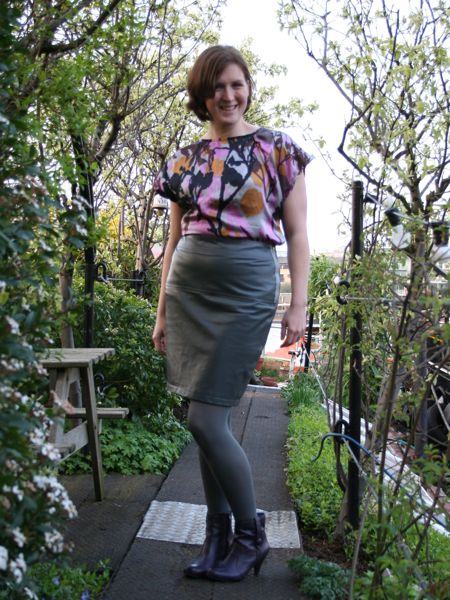
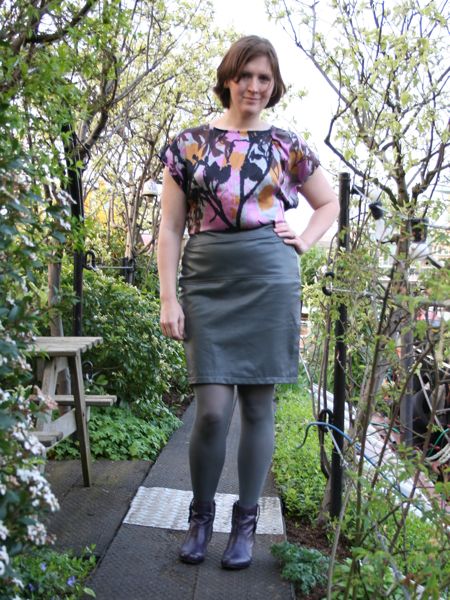
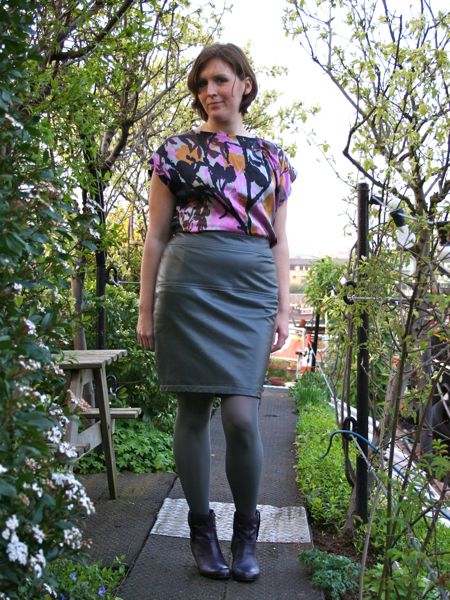
But for all the aforementioned reasons, I never quite got around to making it until now – the thought of unfolding all that tissue to trace the tons of pieces just made me choose other patterns instead. But eventually I realised that I really needed some basic, all-around trousers, so out they came! By my measurements, I should be a size 16, but I opted to throw all caution to the wind and make a size 14 instead, as I wanted them to be close fitting, like leggings. Having gone down a size, I now think the ease is just right – not stretched tight, but not baggy either.


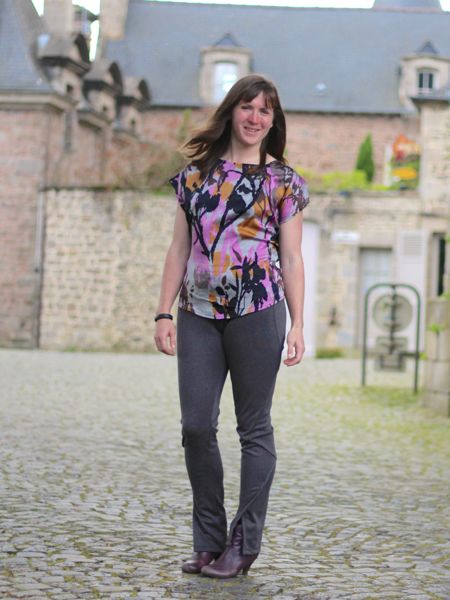
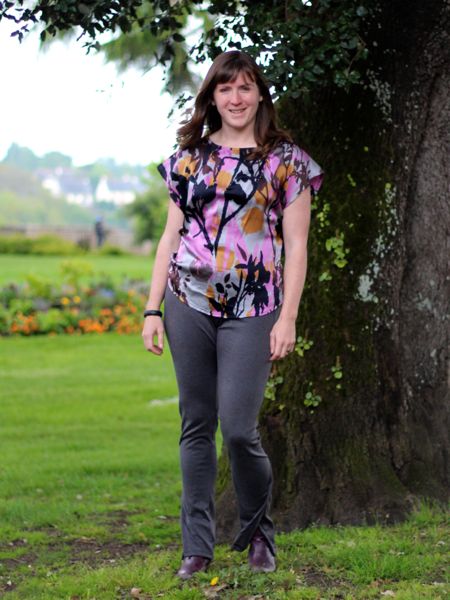
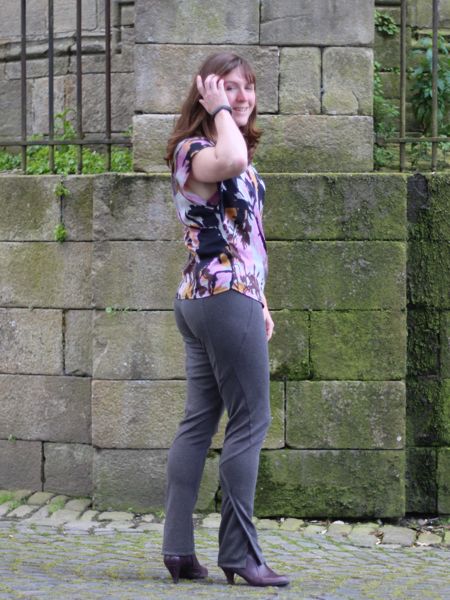
(Photos shot whilst holidaying in the medieval Breton town of Dinan, in France! Paired with my Manequim birthday silk blouse)

Better with friends

Last week I had the unusual pleasure of meeting not one but two fellow sewists who were visiting London, separately, and on consecutive days!

First the amazing Dilly came to the boat, bring not only cake but this incredibly luscious silk twill!

Silk twill is something that is really difficult to find in London (unless you want it white and/or £50+/m!), and the monochrome nature print is so me, too. This definitely falls into the “too good for linings” category, so I think I’ll need to narrow down some of the amazing blouse patterns Manequim’s been printing and sew this up.

After hours of chatting and showing her around the moorings, I think I left her with a desire to live on a boat, and she left me with a renewed fire to go visit CERN! I’m also very impressed that she’s been keeping up with her own Burda Challenge this year, too!

Then, on Thanksgiving Day I met up with lingerie sewing guru Norma for a visit through the new Isabella Blow exhibit at Somerset House. I always find it’s best to see this sort of thing with someone who can share in your total geekery for seam lines and fine details, and there was plenty to geek out over, too! Really, this was an early Alexander McQueen and Philip Treacy exhibit, as those were the majority of the designs. They even opened up the back room upstairs for this, so it was much bigger than the recent Valentino exhibit there.

A rare dud of the highest order

Last weekend I cut into cut into one of the oldest fabrics in my stash, a dark turquoise silk charmeuse bought in January 2009, to make the cover top from the Burda April 2012 issue:

There are so many things wrong about this pattern that I’m going to revert to list form to get the rant out of my brain:

  • The recommended fabric is silk, yet the instructions don’t tell you to sew French seams, or indeed finish the raw edges at all. As far as I can tell, even if you follow their insane instructions, you’re left with a triangular area of raw seams at the shoulder. If I’d liked the top enough, I’d have had to make my own weird facing to handstitch on to cover this.
  • There’s a ridiculous amount of ease in the bodice – way more than Sorbetto, for example, and that’s also a non-bias, slip on shell. I ended up cutting this with the front and back pieces a centimeter or two off the fold simply to fit it onto my narrow silk, but I checked first to make sure it’d not be too small. And having completed the shell, I can say that it’s still on the loose side, even with my reductions!
  • Facings on a silk. WTFOMGBBQ? Why?? I said Nuts! to the facing and did a narrow bias edge (in leftover silk from my birthday top which I still had lying around) on the neckline, and did a two-step narrow edge for the hem.
  • Burda tells to to cut an extra wide hem allowance on the sleeve edges, press in and out (and shake it all about, do the hokey pokey- oh wait) and mess about with it until the sleeve is entirely completed… and then sew an invisible hem by hand. On silk. And it’s a reeeeeeally long hem. I’d rather eat glass, Burda. The much better option here would be to cut a regular hem allowance, and machine-stitch a narrow edge or rolled hem before basting any of the sleeve pleats. Realising they’re crazy and trying to do this later is much more difficult (ask me how I know).
  • The sleeve instructions are absolutely incomprehensible. Burda would have you flip the entire pleated edges around the neckline and back to the armscye at the shoulder, which a) completely contradicts the photos, and b) there isn’t enough seam length to do. So I had to try and make the best of pre-basted pleats, attach to placement lines that may as well have not existed (since the pleated edges didn’t match up anyway), and a mess of raw edges (see above). My best attempt was not good enough.
  • And finally, when I tried the top on to see if I even wanted to carry on finishing the raw edges, the sleeves are just ugly. Less “quirky chic” and more “80s shoulder pads”. Ugh.

Brighton & Bank holiday sewing

We had a long weekend here in the UK this weekend, and I’m pleased to report that I made the most of it! On Saturday, James and I made an impromptu trip down to Brighton, and we stopped off at Lewes on the way down. Our main objective in Lewes is always the Harveys Brewery shop, but I also discovered The Stitchery just across the road upstairs in the Riverside Centre, which stocks a wide variety of fabrics, embroidery floss, yarn, and haberdashery. I checked my handy “sewing shopping list” on my phone, and bought black waistband elastic and trouser hooks, both of which I needed. Very sensible of me, I know.

But the real temptation was walking right past Ditto in the North Laines in Brighton, and I told myself I was only allowed to buy ONE fabric there, so it’d better be a good one! In the end, this gorgeous butter yellow floral silk charmeuse won out over a similar yellow coloured, textured, ex-Blumarine crepe.

Florals really aren’t my usual fabric choice (and I would’ve never bought it from the terrible photo on Ditto’s site), but in real life, I was just captivated by it, and I’m thinking I’ll need to pair it with some edgier like jeans or my leather skirt to diffuse the twee-ness.

After our big day on Saturday, on Sunday we didn’t leave the boat at all! I spent most of the day doing sewing stuff, starting off with fusing all the interfacing onto James’s reversible smoking jacket pieces. I find fusing interfacing to be really boring at the best of times, but it’s beyond teeeeedious with a mini ironing board and mini iron! Once that was all fused, I then moved on to hand basting all the pocket placements (it’s a fantasy jacket, so there are five pockets!) and then basted the bound buttonhole placements, too.

Great basic – grey flannel trousers

As I mentioned last week, I got gifted some wonderful grey flannel from Claire (however did she know I like grey? ha!). It’s so soft and lovely that initially I thought it should become a dress, but then realised I’m likely to get much more wear out of a really chic, comfortable pair of dress trousers.

I had just received the January edition of Burda magazine and so these jumped out at me – #122 (also now available as a pdf download if you missed this issue).

There’s nothing particularly earth-shattering about this design, but I just thought it looked nicely versatile, and something I could wear to business meetings as well as just team with a teeshirt if I fancied it. These also have the illustrated instructions for this issue, but I could sew trousers blindfolded by this point, so the instructions didn’t make much difference to me.

I did notice, however, that they do the particularly dumb construction technique of tucking one leg inside the other and sewing the crotch seam last – this makes NO SENSE to me, as it means you can’t check the fit until you’re 95% done. Whereas if you do the outer seams last, you can pin and adjust the fit in the thighs and hip before you sew it up…

These photos were taken after sitting in a car, then sitting through a big Sunday roast so there are more wrinkles here than I usually have! The fit on these feels a bit closer than with most Burda trouser patterns I’ve sewn, but it also might just be because I haven’t sewn trousers in a non-stretch fabric in a while.

Happy 2012!

As is traditional, I like to take the opportunity at the start of a new year to look back on what I’ve sewn in the previous calendar year.

Somehow I keep getting more and more prolific each year… and it’s a bonus that you get to watch my hair grow as you skim downwards, ha!


(Click the above to en-biggen, or right-click here to open it in a new tab to get a better look

You’ll notice a few at the bottom that I haven’t shown you yet (seriously I only just finished the maternity maxidress with mere hours to go!), but all the rest can be seen by clicking the Gallery link on the top left of the site, then clicking through to the full article.

To make a few statistical analyses of my own, by my count:

  • I’ve sewn 7 dresses, 18 tops, 8 trousers, 6 skirts, 6 jackets/coats, 2 bras, a ton of panties, and other miscellanea (cat toys, boat stuff, mixer covers, shopping bags, etc!)
  • The number of times I’ve sewn with pattern companies: 15 Burda magazine, 9 KnipMode, 2 Mannequim, 3 Colette Patterns, 3 Jalie, 3 Lekala, 2 La Mia Boutique, 2 Patrones, 2 My Image magazine, 2 vintage, and 1 each from Paco Peralta, Hot Patterns, Vogue, and Christine Jonson (so that’s only one Big Four pattern the entire year! I’m oddly proud of that!)
  • I taught 2 sewing lessons to help 3 friends learn to sew!
  • I’ve sewn gifts for 8(!!) other people (and 3 cats!)
  • I was published this year, with my dress variation instructions in the BurdaStyle Sewing Handbook! OMG!

Lowering the Pedestal

Can we take a moment to talk about “pedestal fabrics”? You know the ones – you saw it in a shop, it was too gorgeous to not buy, but now it’s too gorgeous to cut into? And now that you’ve put it up on that pedestal, it just sits in your stash, making you sigh with its beauty but ashamed that you haven’t used it yet…

I don’t often have this problem, but I have recognised that I’ve done this with a particular silk in my stash, a ridiculously gorgeous silk in a silver and black chrysanthemum print. It was a gift from AllisonC when I was about to go into hospital, and I initially didn’t cut into it because I’d gained some weight from my illness and I didn’t want to waste it on something that wouldn’t fit in a few months.

But I’ve been back to my usual size for a good year now, and it continued to sit in my stash, until I finally cut into it this weekend. It took some doing, but here’s some thoughts that helped me overcome this:

  • In what form will I wear this most? In my case, this was a good 2m of silk, so I kept thinking for ages that it had to be a dress, so I’d use the whole yardage. But then it occurred to me that I don’t often wear my silk dress because it’s so formal, and it’d be a shame to sew this silk only to not wear it very much. I thought about what I wear most often in similar fabrics, and it’s definitely blouses. So even though a blouse won’t use the whole yardage, I’ll wear it much more often than a dress, and I can always make something else with the rest.
  • It doesn’t have to be ground-breaking. You’ve already got fabric you love – that’s half the battle in a successful garment, so you don’t have to do a new, experimental, or technically challenging new pattern to interest you. Use a pattern you already know you love and fits you well, and then you don’t even have to do a muslin, either. Since it’s already a tested pattern, your chances of failure are greatly diminished.

(Vote for my) March Mini Wardrobe

It doesn’t seem that long ago that I was first laying out my initial plans for this mini wardrobe, but now I’ve had some time to step back and have a look over what I managed to accomplish last month. I made this wardrobe mostly for myself, to use some luscious fabrics from my stash in combination with patterns that really appealed to me, but I also kept one eye on the contest requirements running over at PaternReview.com to make sure I remained within their rules, too. Here’s my entry into their contest, or you can just read on below…

I started with a blue viscose, draped knit top that I’d bought from ASOS and really liked, but I wanted to wear with both casual and dressy bottoms.

To coordinate, I sewed:

1. Jalie jeans – I’d made a muslin but the waistband was horrible so I had my work cut out for me on this pair using great quality stretch denim from Mood in NYC, plus some London streetsign fabric for the waistband facings and pockets. I used my vintage hand crank Singer machine for all the topstitching, plus I got to use my vintage buttonholer attachment and high quality rivets for the first time! I fixed all the waistband issues in this pair and these are now my favourite jeans. Read more…

Grey leather pencil skirt

I’ve now finished the fourth garment in my March Mini Wardrobe plans and I think you’re going to love it as much as I do!

I bought some utterly luscious grey leather when I was in New York in September, and I’d thought about a few different patterns (even going so far as muslining one I never showed you), but I finally settled on the long, slim pencil skirt from the August 2010 Burda magazine (#128).

Since we’re talking about leather here and you cannot unpick any stitches once they’re sewn, I made a muslin, which revealed a few minor fitting issues which needed fixing in the final skirt. Other than that, I shortened the length to make it above the knee (which also eliminated the back vent) and removed the centre front seam to improve the look.

A velvety MyImage bolero jacket

Ever since I saw the first previews online of the MyImage Summer 2011 issue, I knew that this cropped, pieced jacket (M1107) was going on my Must Sew list! I just didn’t know quite how quickly fate would throw us together!

Even though MyImage are a new pattern company, other sewers have reported that the sizing was pretty consistent, so I just threw caution to the wind here, made a size 42, and cut into my fabric!

And yes, it goes really well with the jeans I’d just made, too!