Blog

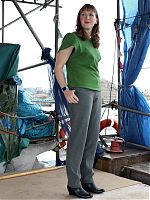
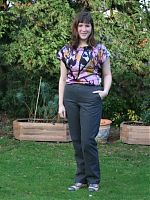
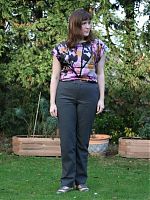
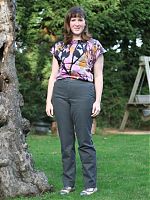
Grey wool trousers (with hidden biscuit pockets!)

I’ve been doing quite a lot of sewing recently (less so on the blogging!). Most of it is for an upcoming pattern, so I’m not able to really share details yet, but I’ve also been trying to take time out to fill a few holes in my own wardrobe. Specifically, I realised I was in desperate need of trousers – I pretty much only had jeans or leggings that still fit me, apart from the Navy twill trousers I made this summer of course. I have quite a few skirts and dresses that still fit, but I tend to only wear those once or twice a week to work and I definitely favour trousers in cooler, wet weather.

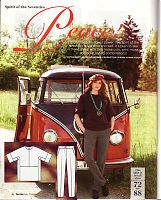
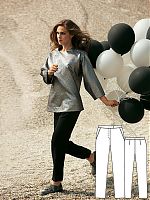
So taking inspiration from what I’d had that I wore the most, looked at the grey flannel trousers I made in 2012, which I absolutely wore to death over the past three years. They’re a bit too big now, aside from being bobbled, so I thought I’d look for a similar pattern and attempt to recreate them. I found this pattern from the October 2013 issue, though when I looked through my Burda archives there were a ton of slight variations on this general shape. Hooray for sewing from the archives!


(The top on this page was Tall sizes, but the trousers were the regular size range)

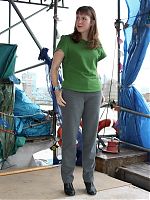
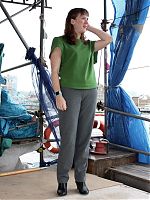
The fabric was from equally deep in my stash – I’d been given this soft, grey flannel by Neighbour Helen just before they moved off the moorings (4-5 years ago), and at the time I already had a similar grey flannel in my stash (which became the aforementioned trousers, a midi skirt, and a sheath dress amoungst other things) so I didn’t cut into this one until that had gone. For some reason I had noted in my records that it was a polyester, but when I did a burn test it turns out it was wool! I found hidden treasure in my deep stash, and there’s a good 2m of it left, too.


Seen here with my favourite green Kimono Sweat top, made with green fleck sweatshirting from Guthrie Ghani.

A bit of everything

Housekeeping time! I’ve got lots of little bits to update you on, either with my in-progress project, upcoming things, or small projects I managed to gloss over at the time…

So in no particular order:

My purple coat

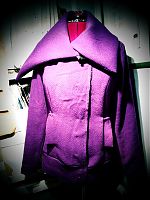
Progress is slow on my purple jacket/coat from the Winter 2011 MyImage magazine, not because of anything to do with the coat, but because life keeps getting in the way. I’ve finished the shell and I’m onto the lining now, so I’ve just got to finish constructing the lining, attach the two together, flip, and sew the buttonholes.

I’d prefer to do the buttonholes on my vintage buttonholer attachment, but the templates I have aren’t big enough for my enormous (2.5 inch?) buttons. Anyone know a clean way around this? Can I set the buttonholer to do double-length holes somehow?

In any case, I should be able to finish this coat this weekend and (hopefully) get a photoshoot in. Not long now before I can do evenings photos again – it’s already light out when I go running before work!

Gift update

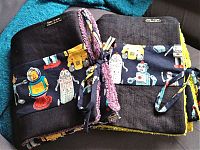
My go-to baby gift is to sew a changing mat, with a hand towel on one side, and nice fabric on the other with big, deep pockets and ties to fold it all up. I had two baby boys arrive in January, so both sets of parents got changing mats with this awesome Alexander Henry vintage robot fabric. 1 meter of it wasn’t quite enough to stretch to the pockets, too, so I filled in with some scrap denim.

My BurdaStyle Book contributor experience

This is a mirrored post to my spotlight on the BurdaStyle blog. I wrote about my experience back in September before the book came out!

When I heard there was a BurdaStyle book planned, I just knew I wanted to be a part of it! I had been a beta tester for BurdaStyle before the site ever even launched, and I’ve always felt that it was such a great resource for encouraging more people to sew and be creative and share ideas.

So last year I expressed my interest to be a contributor, and I was invited to submit some ideas for pattern alterations on two patterns for the book. I sat down with the details for the dress and coat patterns and just brainstormed for a week, drawing up loads and loads of ways I could take those basic patterns and morph them into something totally new. Some ideas were simple like, What if I lost the coat sleeves, shortened it at the waist and made it in fur? Or, What if I added sleeves to the dress, lengthened the centre front and made it a wrap dress? Eventually I paired down my sketches to about eight and submitted them for consideration.

I wasn’t really expecting any of my submissions to be picked for the book (my drawing skills have gone way downhill since high school art classes!), so I was ecstatic to learn that not only was I picked to be a contributor, but my dress variation was picked to be one of only two dress pattern variations in the entire book! Then it dawned on me that the tight deadlines would coincide with the few months I needed to sew my wedding gown! So I did some hardcore time management and set aside the better part of a month last summer to document my pattern alteration, write the new sewing instructions and sew up the sample for the book, PLUS get it sent off and done before the deadline!

Great basic – grey flannel trousers

As I mentioned last week, I got gifted some wonderful grey flannel from Claire (however did she know I like grey? ha!). It’s so soft and lovely that initially I thought it should become a dress, but then realised I’m likely to get much more wear out of a really chic, comfortable pair of dress trousers.

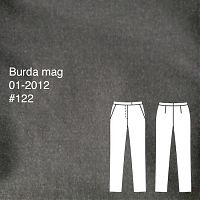
I had just received the January edition of Burda magazine and so these jumped out at me – #122 (also now available as a pdf download if you missed this issue).

There’s nothing particularly earth-shattering about this design, but I just thought it looked nicely versatile, and something I could wear to business meetings as well as just team with a teeshirt if I fancied it. These also have the illustrated instructions for this issue, but I could sew trousers blindfolded by this point, so the instructions didn’t make much difference to me.

I did notice, however, that they do the particularly dumb construction technique of tucking one leg inside the other and sewing the crotch seam last – this makes NO SENSE to me, as it means you can’t check the fit until you’re 95% done. Whereas if you do the outer seams last, you can pin and adjust the fit in the thighs and hip before you sew it up…

These photos were taken after sitting in a car, then sitting through a big Sunday roast so there are more wrinkles here than I usually have! The fit on these feels a bit closer than with most Burda trouser patterns I’ve sewn, but it also might just be because I haven’t sewn trousers in a non-stretch fabric in a while.

Piling up…

The number of posts I want to write is piling up at an alarming rate, and I have no time to do anything about it, what with work being crazy busy (I hate all of you who get tons of time off at Christmas – I only get 3 days off in total! And my days have mostly been solving one problem, and having five new problems pour in while I was fixing the one, then moving on to the next in a To-Do list which never, ever gets cleared.) and us spending all our weekends working on the boat (last weekend we spent 15 hours building the subfloor down there. No, don’t feel jealous – the boat blog is being neglected, too).

So rather than stress about the amount of things piling up, I’m going to present my pile to you in pictorial form.


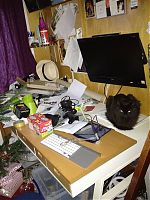
This is what James’s desk looked like this morning. It’s supposed to be my temporary cutting table while we’re building in the hold. How can I possibly cut the bias Ruby Slip or Holly’s maxi-dress fabric on this?? I’m pretty sure Bosco isn’t responsible, though he does look a bit shifty there…


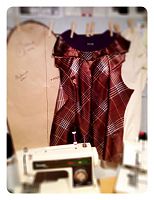
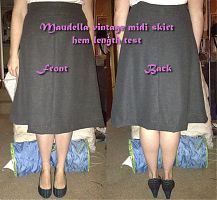
I finished my vintage midi skirt ages ago, but have had zero time to document, or photoshoot or anything. So here’s two photos to test the hem length (which is why it’s just basted here)


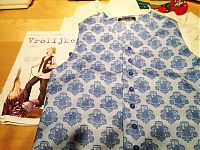
I sewed a little waistcoat for James’s nephew out of this Tardamask fabric on Spoonflower. It’s got hidden pockets inside! He’s 7, and the biggest Dr Who fan ever, so we’re excited to see his reaction on Christmas.

Burda's Roland Mouret "Macha" knockoff dress pattern – detail photos

First of all, thank you all so much for all your comments and praise on my Charcoal pinup dress! I knew I really liked it, but it’s nice when so many others agree.

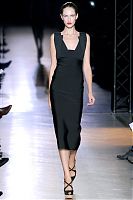
One thing that I hadn’t realised in the magazine discussion, nor sewing, nor wearing it out, however, is that this dress pattern is a very close knockoff of the Roland Mouret Macha dress, which was shown in his Spring 11 RTW show!


(Photo from Style.com)

Really, the bodice seaming is all identical, but there are a few differences:

  • Burda’s pattern is for wovens, RM’s dress is a stretch woven
  • Burda’s has long sleeves, RM’s is sleeveless
  • Burda’s has a back V neckline, RM’s has a square back neckline
  • Burda’s is princess-seamed in the skirt, RM’s appears to be one panel in the skirt
  • Burda’s has a centre back invisible zipper, RM’s has a centre back exposed zipper

The charcoal pinup sheath dress

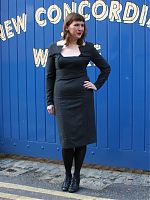
I feel like this post should have a warning, like those awful, dated jokes – Dangerous curves ahead! But to be honest, I’ve been running like a mad woman for the past few months, finally running much faster and further than I ever did before I got ill, so I’m relishing the chance to show off my running body right now*.

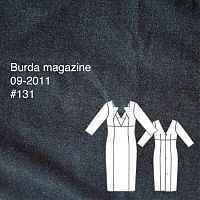
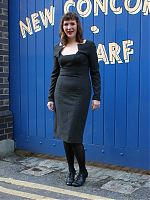
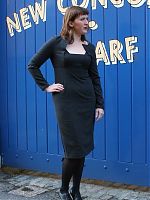
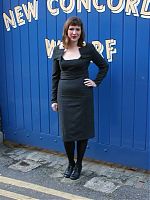
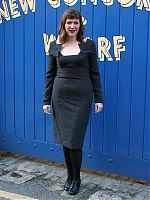
This dress was in the Sept 2011 Burda magazine, but it’s also available to buy as a download pattern on Burdastyle.com if you missed that issue (or believed the blog hype that it was a bad issue, gasp!). I really loved this pattern from the second I saw it, and all I really needed was a little nudge from BurdaStyle and I was totally sold on making this as my double-duty James’s birthday dinner and Christmas party dress.

Though on reflection, it might be a bit too sexy for my office party.

As this was a close fitting sheath with a non-stretch fabric, I opted to go right ahead and make the only fitting alteration I ever make with Burda patterns, and even then it’s only occasionally – I removed 2cm above the waist line across all the vertical panels so the waist of the dress is more in line with my own.

A very beginning sewing lesson

On Sunday I taught a very beginning sewing lesson to three friends who all wanted to learn how to sew and have been begging me to teach them for months! I decided we would learn to use the machines and make a simple bag, and that would probably be more than enough for a first lesson. So I set up my little red machine, my everyday vintage machine, and made space for Veda to bring her new (purple!!) John Lewis mini machine up in the saloon…

The Sewing Machine Driver’s Test

After showing everyone the various parts of the machines, I put an old or blunt needle in each and I had them “sew” on the lines while the machine was unthreaded. The object is to get every single hole touching the line on the page, and when we did this in my home ec class in middle school, the teacher circled any errant holes (if we had more than three, we’d have to repeat that sheet). You start with straight lines, then corners, then a spiral, and finally wavy lines. My girls did great, but opted to redo the last two sheets to get some practice in!

Download my Sewing Machine Driver’s Test here! (Pdf, 200kb)

They all said that this really helped them to get comfortable with the machine and said the curves of the bag were way easier because of it!

The bag

Then we moved on to BurdaStyle’s (free!) Charlie bag pattern, and I showed them how to trim and tape the pattern pages together, then how to lay out the pieces and obey grainlines and learn how to find the selvedge.

I really didn’t like that BurdaStyle’s instructions have you trim off the seam allowances on the bag handles and then overlock them (wtf? What beginner sewer has access to an overlocker??) so I had my girls make a facing for the top of the bag. It got them to practice sewing curves, the importance of clipping the seam allowances, and flipping inside out! And I personally think it’s less fiddly than bias binding when you’re just learning.

Here’s the one I made earlier, to refresh your memory…

Honeymoon lingerie – two more nightgown muslins

After my first muslin of a potential honeymoon nightgown knocked that pattern out of the running, I turned to the slip dress pattern (#219) from the May 2010 issue of Manequim magazine as my next candidate.

This is a simple bias dress with bust darts and bias edge on the neckline. The pattern calls for you to have two lengths of bias edging – the longer one finishes the neckline from the front bust peak, under the arms, around the back and up to the other bust peak. The shorter length of bias finishes the neckline in the centre front portion and continues up to form the straps. Since I didn’t have any suitable lightweight muslin in my stash, I sacrificed this bamboo-printed Robert Kauffman cotton I’d bought on a binge at equilter.com about 6-7 years ago. I hadn’t decided what to do with it between then and now so I figured it’d be good for a wearable muslin.