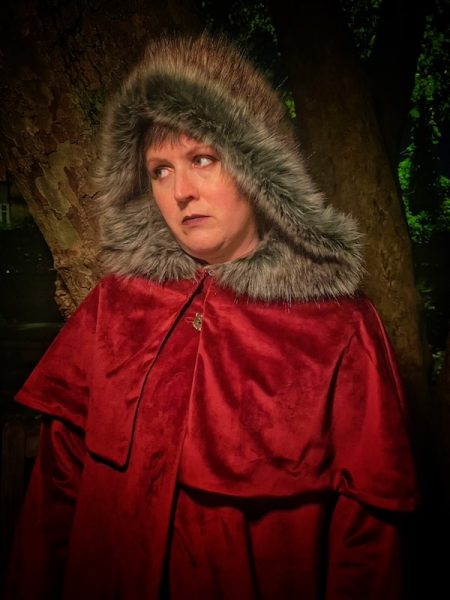
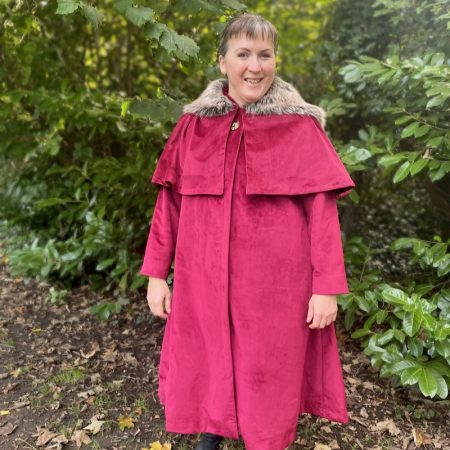
As promised, after sharing our usual daytime photos to document all the different ways it can be worn, the seamlines, and details, etc, I really want to take some photos of my recent Wolfkiller Cloak at nighttime, too. I mean, it’s a coat inspired by a vampire AND it’s nearly Halloween, so what better way to capture the vibes than to do a photoshoot in a local graveyard??
The Wolfkiller Cloak – by night
The Wolfkiller Cloak – by Day
Yes, you read that right – these are just the photos from the daylight shoot – the nighttime shoot photos will be coming coming up shortly! Even so, this is a very photo-heavy post with a lot of detail to cover, so grab a cuppa and settle in…
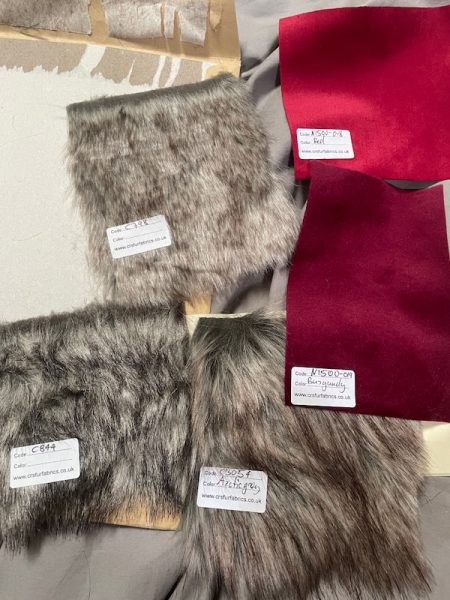
As you recall from my earlier post, I planned to sew a tribute to the iconic Wolfkiller Cloak from Interview with the Vampire, but adapt it to be a swing coat with a detachable fur-hooded capelet in order to make it warmer and more wearable. Honestly, if you haven’t read the other post yet, you really should!
The construction
One of the first parts of the actual construction (after all the flannel underlining basting I did as prep) was to create the bound buttonhole in the swing coat, so no pressure there! Since it’s been a while since I’ve sewn one, let alone in velvet, I thought I’d make a buttonhole in test fabric first, and it’s good I did because I needed to make it a bit longer to accomodate the thickness of the wolf button. I swear I was only pushing the wolf button through to double-check it fit easily through the bound buttonhole I just made, but then his little fangs went over the edge and I had a little giggle! Yup, this is a Lestat coat already. 😂
Planning a tribute Wolfkiller cloak
Yes, this is both a big project AND yet another make inspired by “Interview with the Vampire“! Big enough that you’re going to get at least one In Progress post, in addition to the final reveal. I’m really excited about this one, though, and in a way that I’ve not been fired up for a long time…
The Inspiration
So what is the “Wolfkiller cloak”? In the second novel of Anne Rice’s Vampire Chronicles series, the (still human) Lestat heads out into the woods to kill a pack of wolves that were terrorising his village in 18th c rural France. After barely escaping with his life, the villagers thank him by presenting him with a cloak (and boots!) made with the pelts of the slain wolves. This scene is absolutely iconic, and it’s his wearing the cloak later in Paris that partially attracts the notice of the man who attacks him and makes him a vampire.
Now, because, in the show, they’re not adapting The Vampire Lestat book until season 3, no one was expecting to see anything of Lestat’s 18th c past, let alone THE cloak. But we got a surprise taste in episode 3 of season 2, as part of a 15 minute flashback sequence (entirely in French, too!)
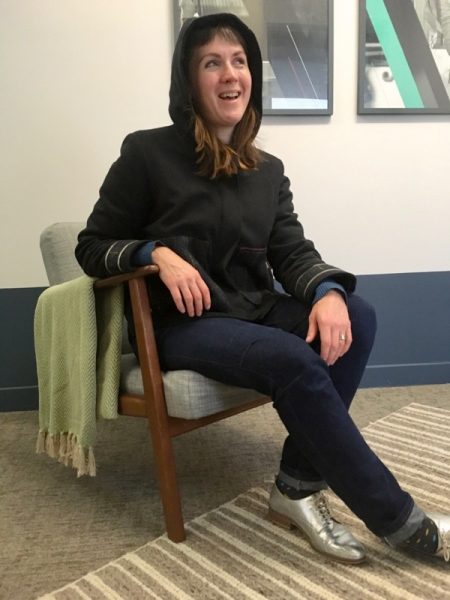
A reflective wool jacket
Buckle up, because the story of this jacket starts four years when I received a remnant of Dashing Tweeds “Urban Shadow” tartan coating from a friend for Christmas. Now, if you’re not familiar with Dashing Tweeds, they’re a really cool company who’ve revived old tartan and twill patterns and modernised them with great colours and even some reflective threads woven in. The remnant I received was one of these “Lumatwill” designs, and has reflective threads running along all the horizontal yellow lines in the design.
A teal wool cape
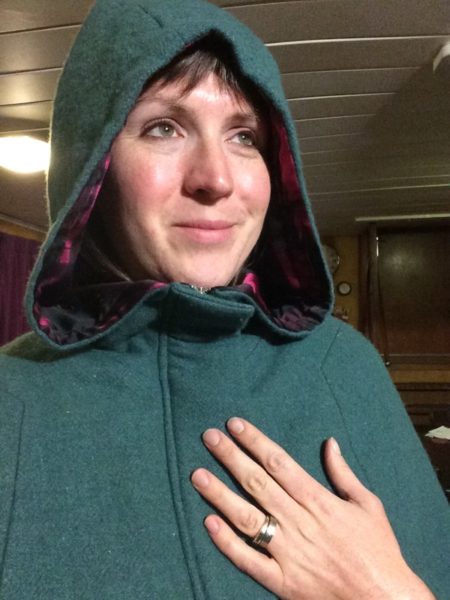
After a few weeks, a head cold, and a lot of hand stitching through two seasons of Ru Paul’s Drag Race, my cape is finally finished! I’ve made an awful lot of coats over the years but this is my first cape. I thought perhaps it was a cloak, having mistakenly thought the difference was that cloaks have hoods, but in fact it’s a hem length distinction, so this is indeed a cape!
I covered a lot of the details of the making of this cape last week, so you’ll already know that it’s entirely underlined in cotton flannel to cut the wind, and that it uses this Burda magazine pattern from 2011 (still available to buy as a pdf). Funnily enough, there’s actually a fairly similar hooded cape pattern in the current December 2016 issue, too, which I’ll cover in my review post soon…
A cape in progress
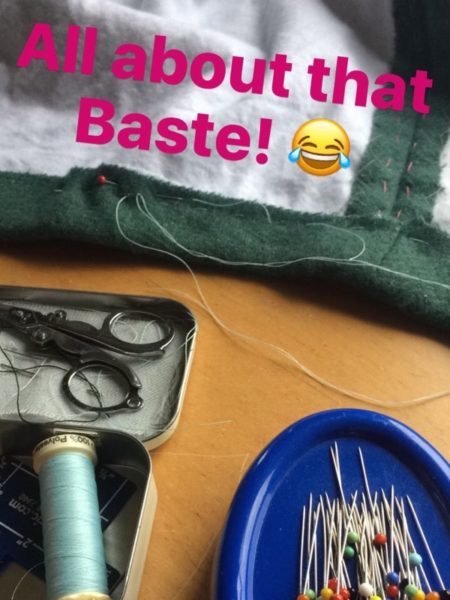
I don’t tend to post about in-progress garment much anymore. I think part of the reason is that I tend to make projects quickly, so there’s not much to document and I roll any construction notes into the finished garment post, but also because I’m not not exactly light on garments to post about and it takes enough time putting together the ones I do share without adding any more to the To Blog pile!
But I’d been making a lot of quick garments in the past few months and decided I wanted something a bit more involved to sink my teeth into, so I started making a cape, using this Burda magazine pattern from 2011 (still available to buy as a pdf). I had some gorgeous teal wool coating a friend had bought for me in Tokyo in January, and I thought it paired really beautifully with some black and pink abstract tartan fabric I chose from Sew Essential as my #sewphotohop prize draw. It’s a lightweight John Kaldor satin with a lovely hand that you really could believe was silk, but alas, it doesn’t appear to be on the site any longer!
Named Harriet lumberjacket in wool & vintage silk
I am both back from our trip to the States and feeling back on form now, so I’ve started to tackle documenting the absolute mountain of finished makes from the last four months. I have some garments from early January, some made more recently and well, I’m just going to share them with you in no particular order! The photos are a bit more slapdash than usual, but I know that if I waited to do proper photoshoots of all of these then it’d be another 6 months before you’d get to see them!
So I’m going to start with a garment that was the longest in the planning, and also quite possibly my favourite of the early 2016 makes. It all started back in summer 2014, when I bought some fabulous navy wool coating & vintage silk twill from Ditto when I was down in Brighton. I knew I wanted to use them together for a transitional, short coat, but then I had quite a journey in finding the right pattern!
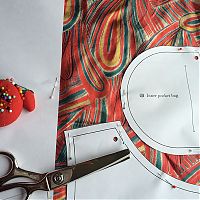
The psychedelic 1960s vintage silk twill lining that was originally made for neckties!
Over the course of 18 months, I ended up making five different muslins before I was happy enough to cut into the wool and silk:
- StyleArc Audrey (the silhouette and proportions were just so bad on me. So bad.)
- Burda Jan 2015 jacket in size 42 (way too small for non-stretch outerwear, oddly, though Burda’s fit is usually very standard)
- Burda Jan 2015 jacket in size 44 (traced ALL the pieces again and it still fit very weirdly)
- Patrones 342 No23 dolman sleeve coat (ridiculously tiny sleeves and zero arm mobility even with the underarm gusset)
And then finally I muslined Named’s Harriet lumberjacket pattern, bought during a flash sale during their advent calendar promotion. And I was like Goldilocks, it was juuuuuuust riiiiiight.
Designer colourblocking inspiration
My next pattern is off with the pattern testers right now and I’m frantically sewing up final samples for photoshoots, filling in missing illustrations, and responding to comments as they come in, but I’ve managed to occupy my brain with the thought of things I might sew for fun next!
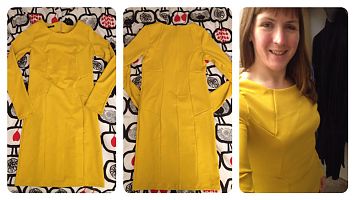
I did indeed wear my traced-from-RTW mustard yellow sheath dress to Number 10 Downing Street last week, and even managed to get some photos with the famous door(!) afterwards, but you’ll have to wait for those until the proper photoshoot is done showing the rest of the dress details in some decent lighting.
But I can say already that I love the dress! It needs some slight tweaking to the shoulder area, but apart from that, my tracing was spot-on, and I’m so chuffed it turned out so well without a muslin.
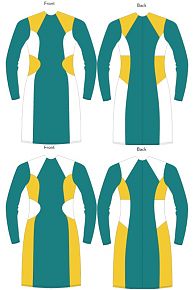
The crazy seaming really started getting my brain thinking about all the ways it could be colourblocked, though, and I looked up and suddenly found inspiration from a magazine photo I’d cut out years ago and had hanging on my sewing cave wall!
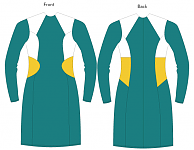
So I rummaged through my ponte scraps and realised that I had the most perfect shade of teal viscose ponte leftover from a client commission, and together with the leftover mustard scraps (and some newly-bought white ponte), I could make my very own Chalayan-inspired sheath dress!
I whipped up a tech drawing in Illustrator so I could play with the different colourblocking combinations, and I’m not sure which I should go for.
I’ve only got 1.2m of the teal and even less of the mustard, but I could buy whatever white I need to make up the rest. I think I have enough to make any of these combos, but I will of course double-check with my pieces before I order the white.
I also finally sewed up a muslin of this short coat from the Sept 2010 Burda (also known as one of my favourite issues Of. All. Time.):
A Coat Muslin Downer & a Pick-me-Upper
Remember a few weeks ago when I took a quick trip down to Brighton and came back with some gorgeous wool coating and vintage Italian silk lining from Ditto? Of course you do!
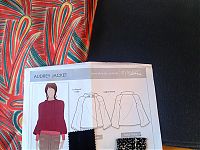
Well, as shown in the photo above, I bought it intending to make the StyleArc Audrey pattern to be a transitional Fall “car coat” (heavier than a jacket, but not a full-on winter coat). So having arrived home to decidedly Fall weather, I thought I should get a move on with this coat or else it’ll be too cold before I can make it!
So I pulled out my Audrey pattern, cut out all the million pattern pieces (the attention to detail is really terrific – the lining and facing pieces are exquisitely drafted rather than just carbon-copies of the exterior), and made a muslin.
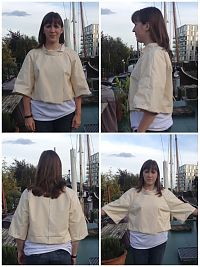
I know muslins can be super useful, especially for fit problems, but there’s something about them that makes me lose all enthusiasm for a pattern once I see it made in beige, crumbled fabric held together with pins and covered in Sharpie marks. I think I’ve probably dumped more coat patterns at the muslin stage than any other garment (let’s all try to erase the Armani coat muslin horror from our minds… oops)! I put this one on, looked in the mirror and thought…. meh.
So I recruited James and a friend for second opinions. They both gave it the thumbs down, then started going through the list of things that could be done to improve it, lengthen here, take out fullness here, etc etc. Err, no – for something that’s supposed to be “fun sewing” I’d rather just dump this and use another pattern I haven’t yet lost all enthusiasm for!
The Sherlock coat
Sewing a coat is always a big accomplishment, but this coat in particular has been a long time in the making. I first told James I’d finally make him a coat like Benedict Cumberbatch wears in BBC’s “Sherlock” for his birthday back in early December. I drafted up a pattern using the details provided in this livejournal post, then made a muslin for him later that month. With only a few tweaks needed for fit and style (I made the lapels too big, for starters!), I then moved on to purchasing the wool coating, cotton flannel underlining, and black acetate lining.
But this is also where the first delay came in, as he wanted a black wool coating with faint blue and brown checks from Crescent Trading, who turned out to be closed over the full Christmas period, when I was hoping to get a lot of the work done. All of the above are detailed more
in this “progress report” post from January.
I then had more hurdles involving the hem bubbling (which meant I had to baste it in place, flip it back wrong-side out, handstitch, re-press, etc), waiting for some woman on Etsy to make more replica buttons (which we finally gave up on and just made our own with gold enamel paint), and getting the right upholstery thread to do all the buttonholes.
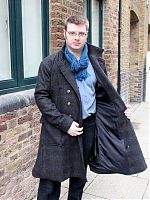
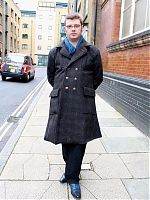
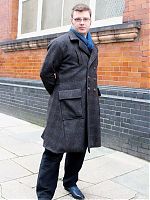
But it’s finished, it looks fantastic on James, and the proportions are really flattering on him, too! So the lengthy making process shall soon fade away in the light of the finished coat. He definitely prefers it open (as dos Sherlock himself), but it can be buttoned up in the coldest of days, too:
It’s a very warm coat, having underlined the body and sleeves in flannel, a trick I picked up in previous coats to stop the wind.
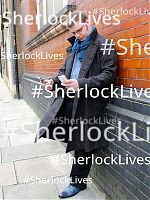
I can’t take the credit for these, as James was having fun with photoshoot ideas!

