Blog

Running arm band pocket (with tutorial!)

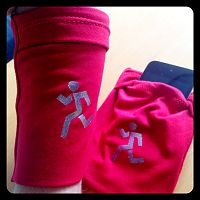
A few weeks ago, I was asked if I wouldn’t mind making two prizes for the RDC Mission Impossible event this Saturday, and I knew it’d be the perfect opportunity to try my hand at drafting some arm pouches while helping out my crew at the same time.

Essentially, I reverse-engineered a Y-Fumble I own to figure out how they constructed it (no Y-Fumbles were harmed – I just thought about it hard and made a prototype first!). The only problem is that they’re available in limited colours and the lycra feels quite flimsy to me, so if I can make my own I have a lot more freedom in the fabrics used.

It’s an arm band that has a pocket on one side, with a simple fold-over flap for keeping things like phones, keys, travelcard, etc nicely inside and tight against your arm while your run. There are no closures – the band just slips over your wrist and up your arm and the stretchiness of the fabric holds it in place. I wear mine on my forearm to hold gels for long runs, but you can also put them on your upper arm, too, if you’d rather. Even though the back doesn’t contain a pocket, it’s still double-sided so all the raw edges are nicely contained inside.

For these prize versions, I used leftover red bamboo jersey from my Donna Karan dress so they’re nice and soft, and should resist bad smells, too.

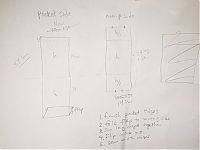
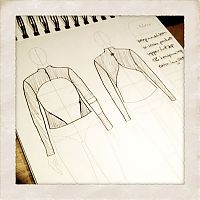
For those of you who are interested in my thought process, here’s the sketch I used when working out what pieces I’d need, and then how I’d construct it all together:

The Liberace Leggings

Viewers of a gentle, tasteful disposition, you best look away now…

My previous pair of purple leggings are my FAVOURITE running running bottoms – so wonderfully comfortable, and the natural waist means they don’t shift around a bit as I run. They’re so comfortable I actually raced in them the other week (and any runner will tell you that if you have any doubts whatsoever about your kit, you don’t wear it on race day!).

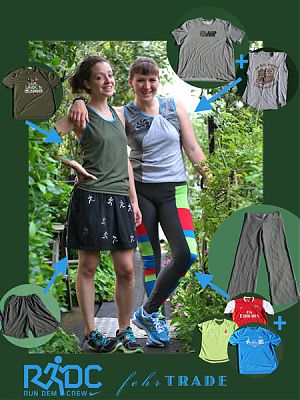
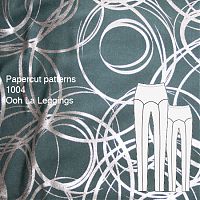
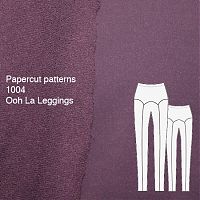
So after a full day of finishing up the Run dem Crew refashion challenge, plus finishing up a skirt, I found myself with a few hours and an inexplicable desire to sew up another Papercut “Ooh La Leggings” pattern (UK stockist here) in the audacious lycra/foil in my stash:

I bought this crazy-ass fabric at Suzi Spandex when I was in Montreal, 80/20 nylon/lycra mix, which they call “Spirographix” (mine’s the charcoal colourway, though it’s much more teal in real life). The hand of these feels quite “leotard” or “costumey” really, but it’s fine for short bursts of exercise IMHO. Certainly nowhere as nice as the Suziplex I bought, through strangely 50% more expensive. Go figure.

Coverstitch binder attachment tips & tricks

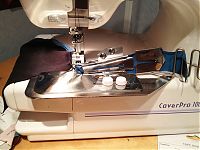
Way back when I was making my first muslins of my new running gear, I realised that the methods I’d previously used to finish knit necklines (elastic, FOE, serged bindings, etc) were just NOT going to cut it on slippery exercise lycra. The results were awful and sloppy, so I allowed myself to be convinced by Pattern Review that a coverstitch binder was the way forward.

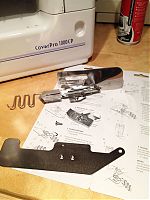
At £80 a pop, they’re not a purchase to be taken lightly, and they’re probably about the most expensive thing you can buy for your sewing room, short of a machine or a dressform! But I wanted to ensure the most hassle-free experience, so I went for a brand-name Janome attachment rather than one of the cheaper, much more hacky eBay jobs. I bought mine from Jaycotts and Janome shipped it directly to me:

Unlike a lot of the eBay binders, this comes with everything you need to get started – the big metal plate, the shorter foot, and a big set of instructions on top of the binder attachment itself. So it’s expensive, but you don’t need to then go and buy all the non-optional bits separately – but I can understand the allure of just buying the binder for your second or third if you’ve already got the plate, foot, and instructions!

Sequin running vest and purple leggings

I’m going to break from tradition here and actually post my next two outfits out of sequence from when I made them, mostly because I just shared my elastic waistband tutorial with you, but also because I’m really freaking excited about sewing exercise gear right now. Honestly, it’s starting to become nearly lingerie-levels of hysteria with me – super quick to make, easy to fit, and lots of wild colours and patterns in small doses! But you’ll get to see my “civilian” top and trousers later this week, so no worries if you’re starting to glaze over at all the lycra…

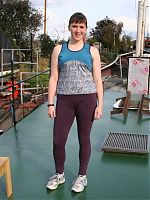
For this set of running gear, I’ve paired up the Papercut “Ooh La Leggings” pattern (UK stockist here) with my self drafted knit block (from Metric Pattern Cutting). And in the case of the top, I altered the seam lines and armhole shape to suit!

You may remember the ex-Prada sequin trompe l’oeil fabric from a few years ago when I used it to make a cowl top. I wear that all the time, but I only had a small piece leftover in my stash, and it was far too lovely to throw away. But with a bit of creative thinking, it was enough for this! Though I think I’ll lower the curve a bit for my next running vest so the peak is just at my underbust…

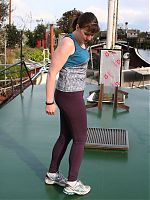
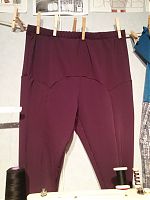
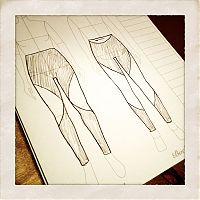
As you can see with the leggings (or maybe not, the purple fabric is quite dark!), there are no side seams here! The shaped front and back yokes give some really cool, curved seams, and they merge nicely into front- and back-leg seams instead.

A better elastic waistband finish – tutorial

While I await a photoshoot on my new Papercut Ooh La Leggings, I thought it’d be nice to share with you what’s become my go-to finish for elastic waistbands. Oftentimes pattern instructions will tell you to create a casing, leave an opening, and thread the elastic through it. I totally hate this! You end up with uneven bunching of fabric, plus the waistband tends to fold up and twist and generally get really uncomfortable to wear.

Over the years, I’ve developed this method which a) attaches the elastic directly to the fabric, and b) protects your skin from direct contact with the elastic. I find it’s much more comfortable than the casing method, looks much neater, and also gives you the added option to have greater stretch in the back if you need it (swayback/bootay ladies, listen up!).

Finished leggings:

Step 1


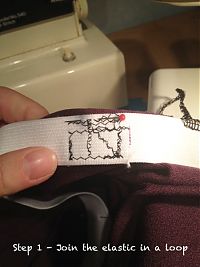
Step 1 – Place the elastic around yourself where the waistband will lie, making sure it’s snug, but not tight (you may want to pre-stretch the elastic a bit first). Mark the overlap edges with a pen, and trim so the edges overlap by an inch or so. With your sewing machine, zigzag the crap out of it so it’s not going anywhere!

Step 2


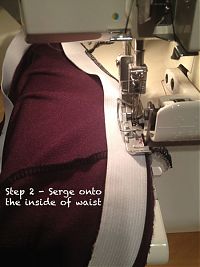
Step 2 – Make the overlap the Centre Back, and mark the opposite side with a pin as the Centre Front. Mark midway between these two with pins as your side seam marks (or offset towards the CB if you want more stretch in the back). Place your elastic against the inside edge of your waistband, and serge/overlock the elastic in place, taking care to not cut the elastic with your serger blades! If you don’t have a serger, that’s cool, just sew near the top edge of the elastic with a narrow zigzag and very short stitch length. Stretch the elastic as you sew/serge so all your pin markings line up.

Beforemath & Aftermath sewing

Thank you all so much for your sympathy and condolences and kind thoughts regarding Bosco’s sudden death. Last week was one of the worst of my life and I’m sorry to say that his departure was only one of a long line of awful things which happened to myself and those I love, so please bear with me while I piece things back together. I’m going to be more fragile than usual for a while.

In an attempt to clear the slate and document some blogging-accumulation guilt, here’s a catchup on the sewing-related events over the past fortnight…

Montreal

I was in Montreal for a few days for work immediately after my birthday, and I managed to shoehorn a very brief visit to Suzi Spandex into my 18 hour work days (in preparation for the launch of Zik.ca – Canadians, go see what I’ve been slaving over for the past 9 months in my day job!).

The shop itself was a bit of a PITA to get to – it doesn’t look far from downtown on the map but was a metro ride + 15-20 minute walk through a really dull neighbourhood, and I’m glad I had the address because the setup was very much like the NYC Garment District – an unmarked, nondescript office building with their premesis several floors up, with a front office and enormous warehouse full of rolls of fabric.

The setting may have been sparse, but I got such a warm welcome and the lady really helped me to choose the best wicking exercise fabric, which by all accounts seems to be their version of supplex, “Suziplex”.

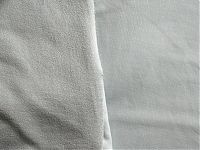
It’s got a great hand and recovery, and fabulously soft inner, loopy side:

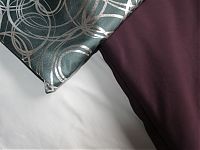
I bought 2m of dark, muted purple and 1m of pale grey Suziplex, and then another metre of some muted turquoise lycra with silver foil swirls.

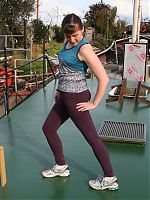
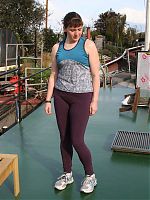
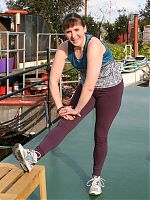
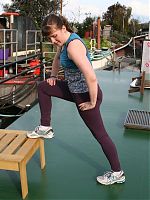
Lycra & Lace running top and leggings

It feels like I’ve been talking about sewing my running gear for ages now, but I think that’s just because anything self-drafted and a bit custom tends to take a bit more time and head space than my average project! But I’m happy to report that two out of three of my first pieces are finished now (the sequin vest is awaiting more coverstitch binder practice, but more on that next week).

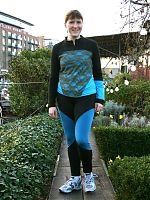
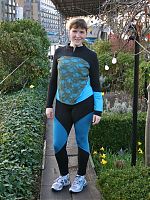
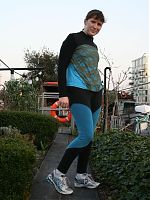
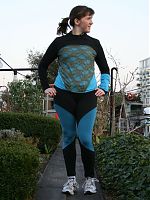
Both of these pieces are heavily modified (bordering on self drafted) from the originals, but the leggings are based on the Jalie 3135 skinsuit pattern and the top started life as my basic KnipMode long sleeved teeshirt.

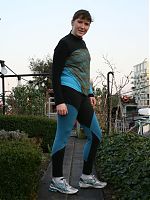
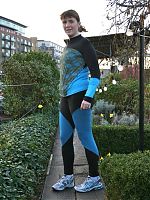
You’ve seen a sneak peek of the leggings earlier, but now you can see them paired with my long sleeved top, though the different turquoise shades mean I probably won’t wear them together often in real life.

The long sleeved top needs three different fabrics in order to get a contrast on the upper body and again at the hip pockets. So I’ve used the black supplex for the top and sleeves, leftover turquoise for the lower back (which wraps around to the front hips), and the same turquoise but overlaid with olive green stretch lace for the front body.

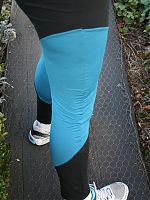
The leggings use black supplex and dark turquoise “silk touch” lycra for the contrast panels. You can see my cool seaming on the thighs below, and in getting design lines to match up, I favoured the outer seams matching. It means it’s not quite as cool on the inner thigh seams, but it means I get a nicer overall panelling.

Post-Paris report

I’m a bit late with my Paris weekend report, but we didn’t get back til Monday night (thankfully taking the Eurotunnel rather than the very-disrupted Eurostar!), and then I had to fly out to Dublin and back yesterday so things have been crazy! Seriously – three European capitals in three days? I feel like I’m on a Contiki tour!

We had a pretty busy schedule while we were in town, but a trip to Paris just isn’t complete without a visit to the Montmarte fabric shops (For more details on those please see my earlier French road trip & Paris fabric shopping posts!)

I’m so pleased we were able to squeeze in a meetup with Veronica again and have lunch, and since she knew I wasn’t able to go to her local fabric market with her this time around, she gifted me a HUGE bag of fabrics, in exactly the colours and prints I love!

Seriously, wait til you see the goodies she brought for me (photos coming later)!

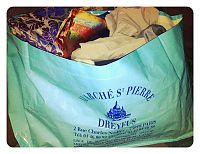
As a teaser, check out the overflowing Tissues Dreyfus bag of fabric!


About half are from Veronica, then another 3 lengths bought by James, then 4 lengths bought by me!

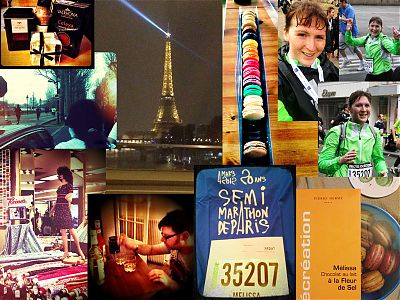
But the main reason excuse for our trip was that I signed up to run the Paris Semi-marathon, which was my first-ever half marathon! I’ve been running for about 7-8 years now, but I’ve only ever run 10ks (with the odd 5k and 8k thrown in there).

Yet more lycra…

Are you bored with lycra yet?

If you recall, I’m sewing three different pieces of running gear – leggings, a vest top, and a long sleeved top. The vest top has stalled while I wait for my new coverstitch binder to arrive, but I was able to finish my leggings this weekend and cut out all the pieces for the long sleeved top.

When I went to look through my stash for fabrics, though, I realised that the long sleeved top needs three different fabrics in order to get a contrast on the upper body, and again at the hip pockets. So I’m using the black supplex for the top and sleeves, leftover turquoise for the lower back and front hips, and the same turquoise but overlaid with olive green stretch lace for the front body. I’m thinking a bit of lace in the running community won’t go amiss.

But now this top is stalled while I await more short, black invisible zips (which should arrive with my binder!) for the pockets and the upper front!

It’s realistically looking like I’ll only have my leggings ready for the Paris half marathon on Sunday, so I needed to take them out for a test run last night prior to the big event.

Be prepared for a totally unflattering, post-hour-long RDC session photo…

(I’m wearing the blue Nike pinny over my jacket ‘cos I’m a group leader!) Overall, I’m really happy with the fit. The ankles are still a bit baggy (even after I took them in a bunch!), but the fit everywhere else was perfect. I was a bit concerned about chafing since I don’t have a flatlock machine so my overlocked seams make small ridges inside, but they were absolutely fine, and the waistband was very comfortable and sat exactly where I wanted it to be with no shifting or tugging. Result! I’ll totally be making more of these from my customised base pattern…

First running gear muslins

I love it when different areas of my life start overlapping! I’ve been a runner for about 7-8 years but I’ve only really sewn running gear a few times (mostly because my mom knows what I like and gets good stuff on sale for me!). But I’ve got the itch to sew the lycra again, and so I made the first steps towards making my own running gear designs a reality.

First step was to make quick and dirty muslins to check the fit and mark style lines. The Jalie 3135 skinsuit pattern was my basis for my running leggings (minus the top half and the front zipper opening!). I used the “silk touch” lycra jersey from Tia Knight as my muslin fabric here since it was the cheapest 4-way stretch she had, but it’s surprisingly really nice! It’s got a hand like a silk jersey, but seems a bit too drapey to be ideal in exercise gear, though it should be fine for the occasional accents or panels if I want to.

So I made my muslin, tried it on, and while I was wearing it, drew lot of placement and design lines straight on the fabric with a Sharpie:

  • I drew in my waistline just under the pattern’s torso double line
  • I marked the knees on front & back, and also where the curve of my bum lies (helpful for placing design lines later!)
  • I took out some excess in the ankle (no cankles here!) and about 4 inches off the length (the legs are reeeeeeeeally long – maybe to cover skates?)
  • And then, finally, I drew in some curved design lines where I thought they might look nice around my thighs and calves

The end result looks a bit like a liposuction patient (which is why I’m not modelling it!!), but it definitely served its purpose!