Blog

Digital-print Cowl neck top

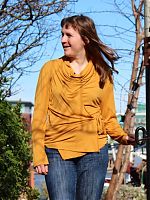
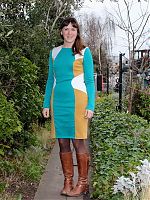
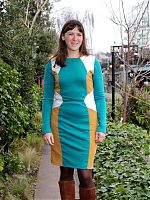
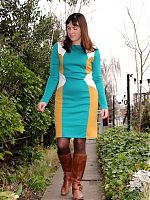
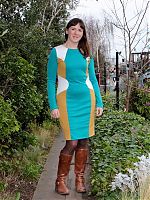
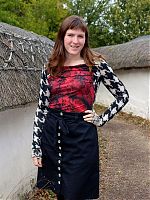
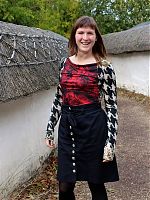
Every now and then, I feel like I really crack a garment – I end up with something that truly blends the most perfect fabric with the perfect pattern. I wasn’t entirely sure until I wore it for a day, but this top really nailed it! It feels 100% designer, special, and yet me at the same time.

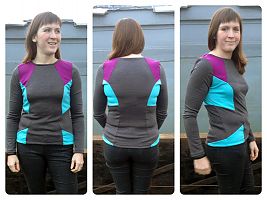
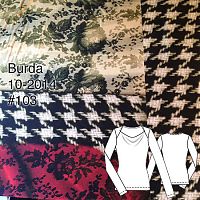
The cowl-neck tee pattern is from the October 2014 issue of Burda magazine or available to buy individually as a pdf, and it came in three versions – a plain top (which is the one I made) – a tee sliced into various colourblocks, or a plain dress.

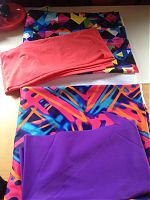
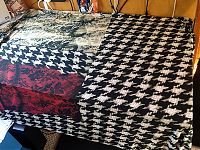
But this garment is really all about the fabric, and the pattern itself plays a supporting role. In fact, most of the time, care, and attention to the entire process was in placing the pattern pieces! Look what I had to start with:

I bought this digital print lycra from Ditto Fabrics when I was down in Brighton this summer (an Italian designer offcut that I snagged for £15!). Originally I thought I’d have the main body in the trompe l’oiel knitted houndstooth as that was what drew me to the fabric, but the houndstooth portion wasn’t quite long enough for the front and back, so I placed those over the “lace” portions and cut the sleeves from the houndstooth instead.


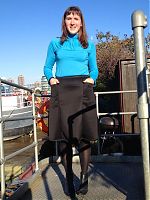
Worn with my Colette Beignet skirt I made back in 2010 that’s sadly, a bit too big for me now (it’s really relying on cinching that belt!

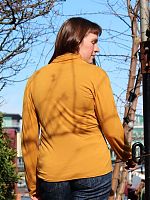
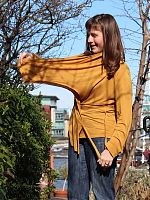
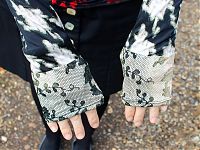
I used a size 40 for the first time here, which is my “new” Burda size since I’ve lost a few cm through training, and the fit is just as I’d like it, really. I loooooove the slim fit sleeves in particular on this pattern. They’re extra long here, too – it’s noted in the instructions are that the sleeves are 10cm longer than normal. I wasn’t sure if I’d keep them extra long or not, but as I was laying out the sleeves, I saw that the piece overlapped into the lace print area nicely, creating a sort of cuff-effect at the sleeve that I really liked the look of:

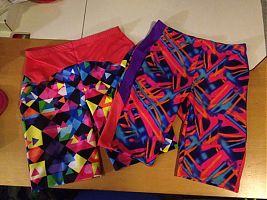
Crazy Cat Lady Leggings

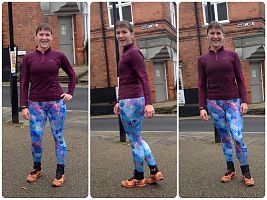
I mentioned at the end of a post earlier this month that I cut into the kitten-face lycra Fleur brought me from the Garment District and made some leggings, but they weren’t finished at the time, and I owed you more photos.

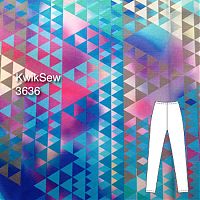
I wanted to minimise the disruption to the print as much as possible (I could hear the kitties screaming every time I chopped through a face!), so I used KwikSew 3636, which is a one-piece legging pattern with no seams running down th outside legs. Coincidentally, this is also the pattern I also in my Lovely Leggings classes (and there’s still time to join this Sunday’s class if you sign up now!), so it’s super quick and great for beginners, too. Perfect for showcasing a wild print!

We were out in Wiltshire at the weekend visiting a friend, so I wore these for a little walk around her village. They actually work surprisingly well as casualwear, especially paired with my trench jacket I made in 2010 and still wear regularly!

Dates for Your Calendar

There are some big things happening in my sewing world over the next month or two you should know about (no, not another pattern release just yet though I am working on the next one already!). So get out your calendar and take note of these…

Monday 13 October

Spoonflower have announced another free shipping day (international shipping, too)!. This is a perfect opportunity to try out our Fehr Trade x Laurie King exercise fabrics if you haven’t already. The fabrics coordinate perfectly with my sewing patterns so you only need to buy one yard of wicking fabric to get coordinating colours and prints.


Seen above, the VNA Top and Duathlon Shorts (booty length) in the coordinating “Maps” citrine & black colourway.

For UK buyers, this means you save $9 on shipping, and if you buy one yard of the Performance Piqué it should fall under the HMRC exemption and you won’t get hit with nasty surprise customs charges.

Thursday 16 October

Next Thursday evening I will be teaching the Slouchy Breton Tee class at the Thriftystitcher studio in Stoke Newington (London), and there’s still space for you to join!


Me in my Purple & green Slouchy Breton Tee

This class uses a pattern drafted exclusively for the class, and has the magic ability of fitting everyone I’ve taught so far without needing an FBA! Magic. Stripey fabric is provided just you just need to turn up and enjoy learning the stretch fabric basics, and go home with your own tee and exclusive pattern.

Tuesday 21 October

OMG, it’s the return of the Great British Sewing Bee, but with a twist! The first of three charity specials for BBC Children in Need airs at 8pm, featuring celebrities who have never sewn before, going through a set of three challenges. Dum dum DAH!

I’m super excited for these to air because, well, I may have spent half my summer working behind-the-scenes on these (there’s a blog post ready for when I’m able to post it!), so I can’t wait to see the finished episodes!

Also, I can confirm that these Pudsey ironing board covers are super cute! Serious bargain at £10 (for charity!), if you ask me.

A purple and green Slouchy Breton tee

You may be forgiven for thinking I have my hands full with designing activewear sewing patterns, running marathons, and working extensively on a certain sewing tv show, but no – I also teach classes! Since I utterly adore working with knits and playing with overlockers, I tend to gravitate towards teaching beginners to sew stretchy stuff, like leggings, tee-shirts, and panties.

So when I bought this fantastic purple & green striped viscose jersey from Tia Knight (formerly Tissu) recently, it practically shouted at me that it wanted to become a Slouchy Breton Tee, which is the pattern that the ThriftyStitcher developed for the class I teach.

Having taught numerous ladies how to make this, I knew it’d be a quick and easy make, and that it also has the magic ability of looking good on all body shapes and being loose enough in the bust to not require any FBA (not that I need one, but still…). What I hadn’t realised though, is that the 2m of the viscose jersey is actually enough to make two Slouchy Breton Tees, so my mom’s getting one, too! Seriously – two great teeshirts that feel like vintage tees for a fiver each? I’m in love!

The fit through the bust, waist, and hips is really forgiving here, and there are two sleeve lengths (well, three, if you just wanted to keep the drop shoulder as a little cap sleeve!) – I made the full length sleeve but in future I’d extend it by another 2-3 inches as it’s not quite long enough for me. There’s also a 3/4 length sleeve option, too, if you prefer.

A camisole from the ashes of failure

It all started back in March when I received for my birthday both the royal blue ponte knit fabric and a Marfy pattern I’d requested (#2935). I was enthusiastic about both, so much so that I spent the day after my party making up the dress.

The first issue came about when I realised that the pattern was missing a piece for the horizontal waist sash. It was pretty obvious it was just a rectangle, but the dimensions of it would be useful to get the gathering right, so I emailed Marfy, and got the following unhelpful reply when I asked for the dimensions of the missing piece:

“you are right, sorry. The important thing is to cut the piece on the bias so that it will follow the body. You can decide the width you prefer, and you can close it on the back.”

Ummm…

But that was just the start, because the horizontal sash was really the least wrong this about the dress. It’s a basic, long sleeved knit sheath dress with front and back darts and waist seam, but then there’s a weird set of gathers above the bust at the centre front that just reminds me of a vagina no matter how much I look at it, and this created a weird lump of fabric just above the bust that had to be pinched out.

But it goes on, because the diagonal sash was angled incorrectly and way too long, but if it was pulled tight enough, it started to bring the neckline down, too. The length was really dowdy, and overall, it was just a really unflattering dress. Somehow it looked straight out of the 1940s despite being modern, and it’s pretty much impossible to have a fabric that is both thick enough to wear on the body but thin enough to stand up to all that draping. Big, big thumbs down for Marfy 2935. This is actually my second Marfy pattern, and the second that hasn’t worked for me, so I’m kinda washing my hands of the whole company now…
But I still really liked the fabric, and wanted to do something with it to reclaim it, so this monstrosity of a muslin stayed on Susan (my dressform) literally for months. My friend FJ would come by and be like “Is that thing still there? You have got to do something with it or get rid of it – it’s bringing you down!” and he was totally right.

But despite being a big dress, the uninterrupted pieces weren’t very big so I had to choose my pattern carefully – and I pulled out the Seamster Patterns Yellowtail Camisole pattern that I’d bought and printed out last summer but hadn’t quite gotten around to making before the weather cooled off.

I was able to fit the pieces into the Marfy dress (plus it felt quite cathartic to cut the sucker up!) and it was really quick to sew!


Seen here with my Donna Karan leggings from earlier this week…

Donna Karan denim-look leggings

Yikes! I actually made these leggings back in early July, but then it was so hot and sunny for weeks that I couldn’t bear to do the photoshoot, even though I was wearing them in the evenings a lot. The impetus for these was that my beloved pleated “denim-look” leggings had come to the end of their life through heavy use. I’ve been trying to find the time to sew a new pair of denim-look leggings over the entire summer, even buying in the fabric ahead of time so it was all ready to go, but alas, other work had gotten in the way.

But then I finally had some spare time so I pulled out my denim-look jersey and Vogue 1378 – the Donna Karan separates pattern.

I’d made these leggings a few months ago in grey ponte, and I really like them – except for the floppy ankle opening things. Those really annoy me, limit my shoe choices to heels, and generally just don’t work for me. So I’d already altered the pattern by overlapping the two ankle pieces and drawing a new seam line where they intersect, and I used the modified pieces here.


Seen here with my new Yellowtail Camisole – more on that later this week!

A basic black Burda tank

It’s typical that I end up making the most boring, basic pattern out of the crazy-amazing June issue of Burda magazine! But I’d traced this out as soon as the magazine arrived, and I was in desperate need of a quick “me project” after a very busy week of work sewing. So I sat down on Sunday morning after breakfast, and had this finished before we left for a BBQ at lunchtime! I literally couldn’t have gone to the shops and back in that time…

This really is just a basic, jersy tank/vest with a racerback as its only detail, so I paired it with some “problem fabric” I had in my stash – I bought this from Minerva at the end of last summer and it wasn’t really what I was expecting. It’s a thin, black viscose jersey with but lines of dense stitching which make the fabric in between the lines sort of gather and pucker. Cool to wear, but a total arse to cut out as it moves all over! It was also fairly linty, so I’m glad to be able to wear it instead of sewing it!


(Seen here paired with my pre-Mexico neopreney leggings and shot on location at a friend’s back garden, BBQ just out of shot!)

Grey Donna Karan leggings (Vogue 1378)

I don’t sew many “Big Four” patterns these days, but when I do, they’re invariably Vogues, and even then, they tend to be the designer patterns. The Big Four are really bad value in the UK, for starters, but then I also hate fighting with massive sheets of tissue paper, playing the “how much ease?” roulette, and dealing with outdated construction techniques. Give me a magazine maze to trace or pdf to tape together any day!

But I do love great and interesting seamlines, so when the Donna Karan coordinates pattern, Vogue 1378 was announced, I immediately wanted to make those leggings (the wrap top? Meh. I’ve seen a thousand like it).

Since there was a sale on Vogue patterns a few weeks before I was due to visit my parents last November, Stacy very kindly bought it for me at sale price (even without shipping, it was like a third of what I’d pay here) and it was waiting for me when I arrived! Thanks Stacy!

But for all the aforementioned reasons, I never quite got around to making it until now – the thought of unfolding all that tissue to trace the tons of pieces just made me choose other patterns instead. But eventually I realised that I really needed some basic, all-around trousers, so out they came! By my measurements, I should be a size 16, but I opted to throw all caution to the wind and make a size 14 instead, as I wanted them to be close fitting, like leggings. Having gone down a size, I now think the ease is just right – not stretched tight, but not baggy either.


(Photos shot whilst holidaying in the medieval Breton town of Dinan, in France! Paired with my Manequim birthday silk blouse)

The Bunka-esque asymmetric Burda top

This might be the quickest turnaround for a pattern I’ve made in ages, but last weekend I put together the weird, conceptual “tube” tee from the April 2014 Burda magazine (I’m so current!!) and some splatter-print viscose lycra jersey I bought at Hancocks when I was visiting my folks in Virginia in November. Or it’s up on the US Burdastyle already should you wish to buy the pdf.

The pattern itself is rather avant-garde – it’s really just one big rectangle! On the right-hand side (as worn) there’s a side seam and a pretty normal, set-in sleeve. But on the left it’s just a fold instead of a side seam and a horizontal slit is cut in, where a sleeve with the sleeve cap chopped off (no, really!) is set into that. The neckline is just the top of the rectangle and is only an inch or two narrower than the hem!

I wasn’t so sure that the weird left sleeve would actually be comfortable, but it really is! I don’t even notice it when I’m wearing it, and it doesn’t really look strange when worn, either.

The body feels super voluminous and quite long to me – I’m tempted to narrow it and the cowl neck as well. I made a Burda size 40 which should be true to my new measurements, but everything is super wide – I’d definitely consider going down a size in the rectangle, but keeping the sleeves at your true size.

My galaxy-print birthday sheath dress

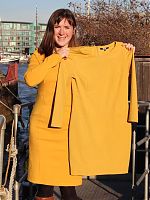
Happy birthday to meeeeee! I hinted about it last week, but I decided to celebrate the occasion this year by sewing up something special to wear, using a fabric that I’ve lusted over for months even before I broke down and ordered it. My feeling is that if you adore the fabric or pattern (or both!) then the resulting garment is pretty much guaranteed to be a hit.

For this dress I used the Derek Lam-inspired knit sheath from the January 2014 Manequim magazine combined with the most amazing galaxy print ponte jersey which is even nicer in real life, I swear! It’s a digital print on a smooth, white ponte jersey base, and it’s both stable and stretchy, making it the bestest fabric ever (and I have just over a metre leftover! woo!).

It’s been a while since I sewed a Manequim pattern and I’ve dropped in size over the past few months of marathon training to a 42 (Burda 40), so I decided to sew up a muslin of this first to test the fit. The resulting turquoise ponte muslin was very close fitting, and I wasn’t entirely certain at first whether it was too tight, or utterly perfect. So I lounged around in it for a day, decided it was comfortable enough, then cracked on with the final version without any pattern changes.

The final version is definitely tighter than the muslin, though, and I’m fairly certain it’s down to adding the lining layer, even though it’s stretchy! You can definitely see some horizontal pulls in the dress showing it’s a tad too tight, and it’s a struggle to get that waist seam on and off over my boobs, but one it’s on, it’s not uncomfortable, thankfully!

The pattern is really simple – a front bodice with both vertical and horizontal bust darts, back bodice with long vertical darts, raglan cap sleeves, and a skirt pattern with vertical waist darts (the same skirt pattern is used for both front and back). The pattern calls for a long invisible zipper, but as I could easily get the muslin dress on and off without it, I was going to leave it off the finished version, too…

…until I discovered the most perfect purple, metal teeth zipper in my stash! So then I decided I had to use it and make it an exposed zipper feature instead. It was a bit shorter than I’d have liked, but it reached exactly to the waist seam, which worked out nicely visually (though for ease of getting in and out of it, a longer zipper would’ve been much better!).