Blog

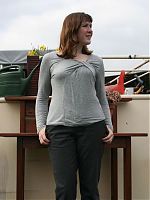
Grey Pattern Magic "Flip Turn" top

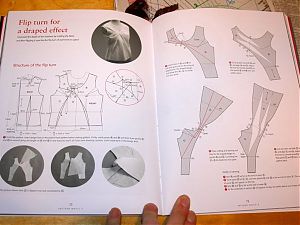
Ever since I first opened the Pattern Magic books, a few designs have been burning a hole in my sewing brain. One of these was the “Flip Turn for a Draped Effect” bodice from Pattern Magic 2, and I was so happy that I was able to draft this on my Morley College Pattern Magic 2 course last month! It wasn’t too bad to figure out, but I’m still really pleased to have the instructor there and because I muddled through (albeit with help), I feel much more confident about tackling other designs in the books.

The only problem was that we drafted all the course designs based on the largest Bunka sloper, which was still rather a lot smaller than me, so if I wanted to actually wear the designs from the course, I’d have to create them again off my own sloper, which just seemed a bit dull.

Or maybe… just maybe… I wonder if the Bunka sloper version would fit if I eliminated the back waist darts and made it in a knit?

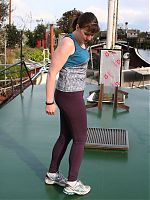
OMG a toile for a fashion college dressform fits me!! :O 😀

Since this was a total fit experiment, I wanted to try this first in a low-risk fabric, and I had just enough of this viscose grey marl jersey leftover in my stash from the Manequim “big shirt”.

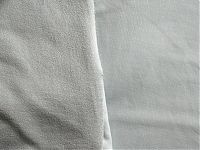
One interesting part of this design is that the reverse of the fabric is shown on a large portion of the lower front, and in this fabric, the reverse is kinda textured and loopy, but without any major colour change from the “correct” side. It means you get a subtle texture change on that panel, but without screaming “hey! I’m the wrong side!”.

To further play up the texture change and to make it look more intentional, I used the wrong side of the fabric on the neck band, too (maybe I’ll do the sleeves on the wrong side next time, too?)

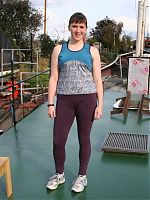
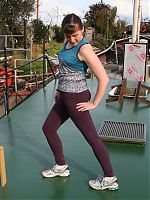
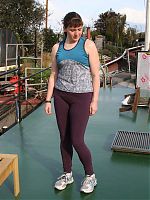
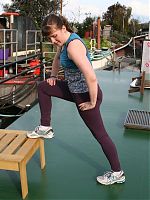
Lycra & Lace running top and leggings

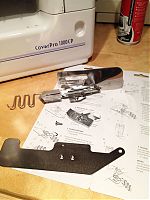
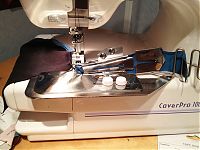
It feels like I’ve been talking about sewing my running gear for ages now, but I think that’s just because anything self-drafted and a bit custom tends to take a bit more time and head space than my average project! But I’m happy to report that two out of three of my first pieces are finished now (the sequin vest is awaiting more coverstitch binder practice, but more on that next week).

Both of these pieces are heavily modified (bordering on self drafted) from the originals, but the leggings are based on the Jalie 3135 skinsuit pattern and the top started life as my basic KnipMode long sleeved teeshirt.

You’ve seen a sneak peek of the leggings earlier, but now you can see them paired with my long sleeved top, though the different turquoise shades mean I probably won’t wear them together often in real life.

The long sleeved top needs three different fabrics in order to get a contrast on the upper body and again at the hip pockets. So I’ve used the black supplex for the top and sleeves, leftover turquoise for the lower back (which wraps around to the front hips), and the same turquoise but overlaid with olive green stretch lace for the front body.

The leggings use black supplex and dark turquoise “silk touch” lycra for the contrast panels. You can see my cool seaming on the thighs below, and in getting design lines to match up, I favoured the outer seams matching. It means it’s not quite as cool on the inner thigh seams, but it means I get a nicer overall panelling.

The Blue and Black Burda February sheath dress

I’m feeling pretty good about the past few issues of Burda magazine. For a while there (2010, I’m looking at you!) they really seemed to be only printing boring, shapeless and awful patterns, but I’m glad I stuck around because the past few months have really been a return to form, as far as I’m concerned.

There were quite a few patterns I want to make from the February issue, but only one demanded I drop everything and Sew It Now, the colourblocked asymmetrical knit sheath dress #117:

I know a lot of people complain about tracing Burda patterns, but I seriously don’t have a problem with it. Most patterns take me about ten minutes to trace, I have the pattern sheets on top so it’s not difficult to see the lines, and I do a few at a time.

This dress may have the illustrated instructions for this issue but WOW was this a total bear to trace! It’s printed in red lines, but this sheet also contains the “easy”, pink shaded pattern, so there are multiple points where you need to trace red lines over pink shading. Add to that the irregular shapes of the pattern pieces and you’ve got yourself a headache.

If you can get through the tracing pain, though, you’re really in for a treat, because the tracing took longer than the cutting or construction combined. I sewed this up last Friday night after work and wore it out to a friend’s birthday the next day!

Manequim draped collar sweater

There came a point about midway through the construction of this where it suddenly dawned on me that I was creating my second draped collar sweater with pieced sleeves of the month. Clearly the sweater knits in my stash were calling out to me, and I’m naturally drawn to drapey styles. Though I really must remember when I’m in fabric stores that 2m really isn’t enough for long sleeves and a big collar!

This the Michael Kors-inspired, collared sweater from the June 2011 Manequim magazine. Last week I showed you details on the construction of the various pieces and altering the size “Small” pattern to my basic knit tee pattern.

The only problem was, when I was laying out the pattern pieces onto my awesome, ex-Versace sweater knit from Ditto in Brighton I realised that yet again, I didn’t have enough fabric to lay out the sleeves without piecing them, argh! I didn’t want to back down since I’d tried to use this fabric for something else last winter, but 2m of a really narrow fabric really limits your possibilities. So I carried on, introducing two seams in the lower arms. Frankly, sleeves tend to bunch up so much around the sleeves that I find the seams kinda get lost visually around that area anyway.

In the end, I was forced to cut the collar on the bias simply because the fabric was too narrow to place it on the cross grain!

Upcoming January sewing

I’ve finally emerged from the craptacular flu (which then turned into bronchitis) that I’ve been under since Dec 28 – thank you for all your well wishes! For me, it really feels like the new year, 16 days late!

The Ruby Slip was my first garment of 2012, but my second and third aren’t far away…

Grey flannel trousers

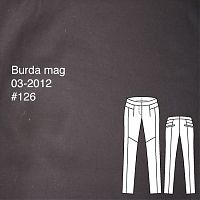
Just before Christmas, I met up with Claire for lunch and she gifted me a massive length of wonderful dark grey flannel. It’s so soft and lovely that initially I thought a dress, but then realised I’m likely to get much more wear out of a really chic, comfortable pair of dress trousers. So on Friday night I traced and cut Burda Jan 12 #122, mostly because the issue was handy, but also because they looked to be a great basic. These have the illustrated instructions for this issue, but I could sew trousers blindfolded by this point, so the instructions didn’t make much difference to me.

I sewed this on and off over the weekend and nearly completed these despite hardly being at home. As a nice tie-in to my previous garment, the pockets, fly underlap, and waistband lining are all done in the pale green silk leftover from my Ruby Slip.

Draped collar winter warmer

Paco Peralta is a Spanish couturier who has recently started making some of his designs available to buy as patterns. Late last year I purchased his “Draped Collar Tunic” pattern when he was having a special offer, and I’m so glad I found time to sew it already!

It’s an oversized, hip-length tunic with dropped shoulder and large, draping collar. All his patterns are hand-traced by him, with Spanish and English markings on the pattern tissue, but no included instructions – he’s got good photo instructions for this pattern on his blog though. I made size Medium here according to my measurements, though I could’ve easily gone done to a Small, as there’s a lot of ease in this style.

Bonus – All Paco’s patterns are 10% off right now with the coupon code here!


(Sorry, there’s no tech drawing provided and I’m too lazy to draw one!)

I had a 80% wool / 20% polyester purple sweater knit I bought at Ditto in Brighton last winter that was SO lush and soft and I just had to use it for this! Funny that Tany also chose to make this in a sweater knit, though she lengthened hers into a dress!

How to finish a cowl neckline

As promised yesterday, here’s a really cool technique I used to sew the shoulder seams and get a clean finish at the neckline of my MyImage cowl tee (M1152 from the Fall/Winter 2011 issue) all in one go.

It’s a variation of “the burrito method”, and you can use it on any top where you’ve got a facing on one side, and a folded edge on the other. So it doesn’t have to be cowl necks, it’ll also work for surplice or wrap necklines with a self-facing, too!

This comes fairly early in the construction of your garment, but by this point you should have already sewn your facing (in this case, my back neck facing) to the body of the garment (the back here), right sides together. You should also stabilise your shoulder seams, either by using Vilene bias tape like I have, or with strips of knit interfacing or clear elastic – whatever your preferred method is!

In my example, I’ve got a back neck facing which is a separate piece, and a folded (ie: integrated) facing on the front.


Step 1. Pin the shoulder seams together from the shoulder edge to the back facing stitching line, right sides together. Keep the front facing and the back facing out flat (ie: don’t pin them!)

The One Hour Cowl tee

First of all, thank you so much for all your comments and suggestions regarding my draped jacket! The consensus seems to be a) try it with skinny trousers, and b) shorten the sleeves at the very least, but I definitely need to take some time away from it before I can contemplate working on it again.

I think you can also predict what came next – a quick knit top! This top was particularly medicinal because last Saturday I’d already sewn up Holly’s maternity coat muslin, then done a bunch of overtime work from home, cut more insulation on the boat, and I found myself about 4pm with a totally frazzled brain and not quite sure what to do with myself.

So I went with my gut instinct, and started tracing the MyImage cowl tee (M1152 from the Fall/Winter 2011 issue)!

This fabric was a gift from Marie-Christine when we visited her in Toulouse at Easter. It’s a viscose(?) jersey printed (or actually, bleached, since the reverse is black!) to look like lace! I’m not a big “prints” person in general, but I’m such a sucker for a trompe l’oeil print, and you already know my love of lace!

There was only 1 metre of this, though, so it’s a good thing it has 2-way stretch since I had to fit the sleeves on the cross grain! If this was just a crosswise-stretch fabric I don’t think I would’ve been able to fit it in…

This pattern really is the essence of simplicity – there’s only three pattern pieces (four if you count the back facing, but I just used a rectangle of fabric instead), and the title of this post is no exaggeration – from tracing to cutting to sewing to wearing it took me only an hour! This really was just the pick-me-up I needed after the long-running draped suit project…

A beginner's knit maternity dress

Just to make things absolutely clear – no, I am not pregnant!

But my very good friend (and beginning sewer!) Holly is, so I’m doing some maternity sewing for her over the next few months, and helping her to sew a few things for herself, too. We’ve already had an afternoon session converting regular trousers to maternity versions (and I’m thrilled to report that she’s since gone home and done a few of these herself, too!), but it’s down to me to start the “from scratch” garments.

The first project was to make a “wearable muslin” of this Burda knit dress from June 2010. She picked this pattern out of a lineup, and it’s actually great for a beginner. The seamlines and construction are pretty straightforward, and you get a lot of bang for your buck with this, as there are two sleeve variations and two length variations!

I traced off all the different versions, and used the double tracing wheel I picked up in Budapest to even add the seam allowances on for her, too (something I never bother to do for myself, as I prefer my patterns without).

For this muslin I used some viscose jersey donated by Claire (Seemane) specifically for muslining purposes. The print is definitely too wild for me, but it might come in handy for Holly while she’s got a limited wardrobe. I don’t think it’s an ugly print by any means, and I could see her toning it down with a black or navy jacket or cardigan.

Upcoming Fall 2011 sewing – the fabric

I posted about my Fall sewing pattern plans weeks ago, but I never quite got around to showing off my lovely Fall fabrics at the same time, and then I went and bought a little more since I sewed through enough of my stash over the past year to make space for more.

Indeed, the first two fabrics were bought long enough ago from the superlative Ditto Fabrics that I’ve actually already used them!

This grey stretch wool suiting is finding a life in my Draped Jacket and Skirt Suit you’ve heard so much about lately, and I’m sure you remember this peach silk habotai from my recent blouse, right?

Well, the day after I bought the above from Ditto’s website, we determined I’d actually be going down to Brighton later that week, so I stopped into their store on the Saturday morning and picked up two more fabrics (along with a good gossip with Ditto’s lovely owner, Gil!).