Blog

Pleated denim leggings

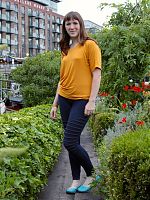
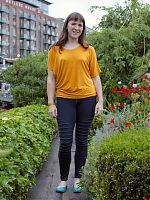
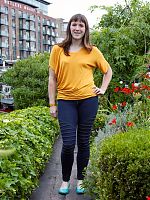
The three words in the title may not seem like they naturally go together, but it’s all made possible by the super stretchy denim I bought from Mood when we were in NYC for my birthday in March. The weave definitely looks more like a denim/twill than a knit, but strangely, there’s more lengthwise stretch than widthwise (about 50-60% compared to only about 20%). There’s still plenty of stretch there for them to just pull on with an elastic waistband, and the fit is definitely more “leggings” than “jeans”, despite the denim.

I made these well over a month ago, and I’ve been wearing them pretty much twice weekly since then – they’re unbelievably versatile and so much more interesting than just a basic stretch denim legging (or, ugh, “jegging”). They were one of the last items to be made in my old sewing room, and I’m not entirely sure why it’s taken so long to photograph these, because I really do like them!

There’s no pattern to talk about here, I’m afraid – I just opened my basic leggings sloper in Illustrator and made some modifications to fit what was in my head.

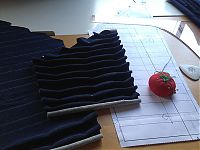
In short, I drew some design lines on the Front where I wanted the pleated panel to be, sliced that off as its own piece, then digitally spread it apart again to have twelve 1cm pleats with 2cm in between. (You can do this really quickly by overlaying a grid onto the pattern piece, splitting it apart, then moving the top (or bottom) piece by the amount you want the total spread to be (in my case, moving it 12 × 2cm=24cm). Then just set those pleat pieces to distribute vertically!) IMHO, this is so much easier then getting out scissors and tape and a ruler and trying to draw out all the pleats myself. I truly am a digital native when it comes to pattern drafting now, I swear!


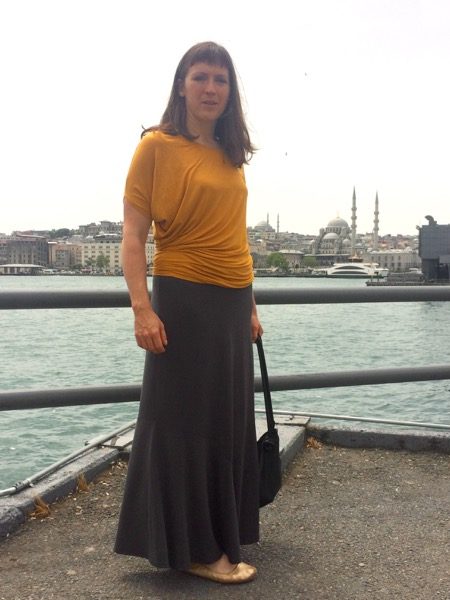
Worn here with my mustard Drape Drape top – still a favourite 2.5 years later!

Bits & pieces

I haven’t got any finished projects or magazines to show you this week, so I thought it’d be a good opportunity to catch you up on all the smaller things I’ve been up to that maybe wouldn’t be enough for their own post…

The New Sewing Room

I know it feels like it’s taking forever (and believe me, it does to me, too!) but my new sewing room in the front of the boat is nearly done, so I’ve been spending a lot of time getting that ready to move into.

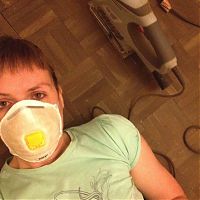
Most recently, I’ve been cutting, piecing, gluing and now sanding the beeeeeeeeautiful smoked oak mosaic panel flooring into place, which, while both expensive and time consuming, is something that makes me happy every time I see it.

The final remaining step is to put a few coats of oil on the flooring and tack the edge trim down and I’m ready to move in! And yes, at roughly 2m x 2m, it’s still smaller than most American closets! Our boat is heowge, but this particular room will be small, and hidden away, but it will be mine.

Seamwork articles

I’ve been a big fan of Seamwork magazine and a subscriber since Day One, and loads of you have written to tell me how much you enjoyed my first article, A Guide to Activewear Fabrics.

This month’s current issue is all about sewing knits (I know, right) and I’ve actually got TWO articles in it!

A green merino Astoria sweater

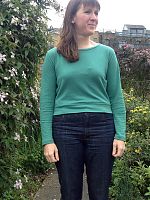
I’ve been a subscriber of Seamwork magazine since issue one back in December, and can I just say that they are killing it with the digital format, pattern bundling, and freemium vs add-on price point? Seriously, this is the future of not just sewing magazines, but magazines. I’m proud to be both a subscriber and a contributor (look out for more of my writing in the June issue!), to be honest! When I saw the cropped “Astoria” sweater in the April 2015 issue, I just knew I was going to sew it! The nice thing about Seamwork (which is made by the Colette Patterns team) is that subscribers get both patterns on the 1st of the month, but if you’re dawdling and don’t notice a great pattern until someone like me sews it up a month or two later, you can still go back and buy the pdf pattern on its own (and they include Copy Shop versions, too).

All the Seamwork patterns are designed to be sewn in an hour, and, just like the Oslo cardigan I made back in January, this one came together in a single evening. Also, I appear to only make Seamwork patterns in wool jerseys, ha!

I couldn’t believe my luck when this pattern appeared, as I’d just bought some gorgeously soft green merino wool jersey at Mood in NYC mere days before! I’d only bought 2 yards (which I’d regretted once I got home!) for $18/yd, but happily there was enough there to cut the long-sleeved version of this plus still have enough leftover for a winter running buff.

I made size Large since my waist and hips corresponded best to that size, though my bust is a Medium on their chart. At first I made size Large with no alterations, but I wasn’t 100% sold on the fit. It took a whole day of me wearing it to decide that it’d be better with the sides taken in by 2cm (an inch) on each side. In hindsight, I could’ve gone with the Medium, I think.

So I cut off the hem band, took in the sides from the armpits down (taking off the same 2cm from each of the hem band seams, too!), and overlocked the hem band back on, this time with only the minimum seam allowance to avoid shortening the hem any more than necessary. And the fit is waaaaaaaay more to my liking now!

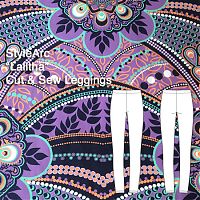
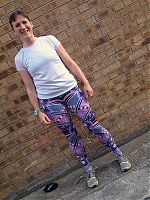
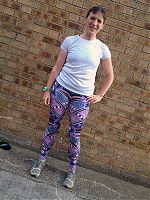
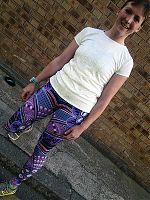
StyleArc Lalitha Leggings

I’ve been on the Aussie pattern company StyleArc‘s mailing list for a while now, and I always like to keep an eye on their new patterns, but their fabric options have never really appealed to me, to be honest (I’ve got to really like a fabric to pay for it to be shipped halfway around the world!).

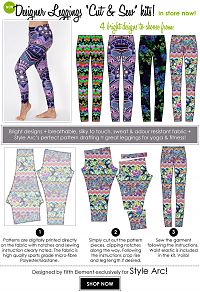
Until March, that is, when they sent round details of their new range of “cut & sew” leggings, printed directly onto activewear knits:


They’ve since removed these from their site due to demand, so I’m reposting the original ad here so you can see the other colourways.

I’ll be honest – I was as intrigued by the concept as I was the prints, and for $60AU (£30) shipped, plus the freebie March pattern (knit top Melinda), I was sold. Quality leggings in great prints go for the £80-90 range in London, so for me, £30 was worth a gamble in the name of research. StyleArc had teamed up with a company called Fifth Element for these leggings, which you can also buy ready-made for about £45.

I ordered the “Lalitha” colourway the very next day, and then waited over 6 weeks for delivery (maybe they printed on demand?), but the kit finally arrived in mid-April. I was kinda hoping that the fabric would be printed all over, or in zones, like my collaboration with Laurie King, but you really only get the outline of the legging, with the rest in plain white.

Before I get into my complaints, let me just say that the fabric quality is fabulous – it’s soft, and stretchy, with great recovery and super vibrant colours, and from handling enough activewear fabrics in my day, I believe the that this is proper wicking fabric. I pre-washed it before cutting out, and everything remained vibrant, too.

My secret Funkifabrics marathon mission

Intrigued by the title yet? Well, it didn’t start out as a marathon mission, I just decided to add that part in.

But let’s start at the beginning – I’ve long said that I love FunkiFabrics’ lycra (the standard “Flexcite” stuff), but that I personally wouldn’t wear it to run anything longer than a half marathon, and only then in cool conditions, as it isn’t wicking. I’ve made loads of leggings and shorts out of their digitally printed lycra over the years, and it really is fantastic quality – never fading, or pilling, or bagging out. But I still wouldn’t wear it to run a marathon.

I finally just up and asked Funki if they had any plans to ever print onto a wicking lycra base, since they sell supplex and now compression fabrics, but only in plain black or white. Cue a bit of technical discussion on their end, and then about a month ago they asked if I wouldn’t mind testing out two different new base fabrics and giving them my opinion as both a sewist and a runner. Umm, would I???

So just before we left for NYC, my two experimental Funki flavours arrived, one with the Beam Two Bright print and the other with Checker Magic Multi, plus some really geeky technical specs of each base fabric, plus their regular Flexcite data sheet for comparison.

I read the data sheets, picked the one I thought would probably be best, the went away to NYC and promptly forgot which was printed on which base. Which was good, as it’s better for testing purposes if you’ve not already formed an opinion! After a quick prewash, I sewed the Beam Two into a pair of Duathlon Shorts and the Checker Magic into my Steeplechase Leggings, both biker short length, and with scraps of wicking lycra for the sides and yoke.

I ended up testing both by running (I had planned to cycle in one, but plans fell through), and in warm weather, too – so the tests were under as similar conditions as I was able to get!

I wore the “Checker Magic” / Steeplechase pair to run the second half of the London marathon route with friends (about 14mi at steady pace, for 2hrs) a few Sundays ago. It was a sunny day, and feeling pretty warm in general – my Garmin data says it was 10C and sunny, but I’d estimate that by the end it was certainly closer to 15-17C. In any case, this pair felt great, no issues at all in terms of feeling cloying or rubbing, or anything. Pretty boring, with nothing to report.

A mustard wool StyleArc Elita wrap top

I don’t often click buy immediately when I see a pattern release, but when StyleArc announced this “Elita designer top” pattern, I had to buy it immediately! Though I’m not entirely sure what makes it designer? I’m especially glad that they released it simultaneously as a printed pattern or a pdf, because I vastly prefer the latter, and it meant I didn’t have to wait for it to ship from Australia before I could get started.

The pattern is essentially a cross-over wrap top, with a shawl collar that extends in front and joins itself to create a really long loop, which the pattern calls a “trunk”. This nomenclature amused me way more than it should! Anyway, you’re supposed to double the loop back over your head to get a sort of double-cowl effect.

I love this design – the first time I wore it I had two friends pleading with me to make versions for themselves! My only gripe on the download is that StyleArc don’t print their symmetrical pieces on the fold, so the entire Back piece had to the pieced together here, when it could’ve saved a significant amount of paper to just have half the piece. It’s also kinda annoying to only have one size per pdf, even though you get three sizes (as separate pdfs) when you order. I’m generally only one size, but this could be a bummer if you usually mix sizes. Their paper patterns are the same, though, so it’s not like the pdfs are any worse.

I had to shorten the “trunk” by 8cm to fit it all into the 2m of mustard yellow wool/viscose jersey I’d bought from Guthrie & Ghani (now sold out in this colourway). Some other reviewers found that the trunk creates a weird, triangular fold at the neck and recomended changing the angle of the trunk piece, but I cut mine as is and I don’t have that fold – perhaps because mine were shortened to begin with? In any case, there’s still plenty of length left to create a nice cowl shape, so I would recommend it if you’re a tad short on fabric, too.

Designer-inspired Colourblocked Sheath Dress

I started planning this dress way back in the first week of December when I got your opinions on all the different colourblocking options, and it should tell you everything about how crazy busy I’ve been that I’ve only actually been able find the hour or two to make it last weekend.

You may recall the story of this “pattern” from when I made it in a solid, mustard-yellow ponte the first time around – I had a very well-loved ASOS dress that I traced off so it actually wasn’t from a pattern at all. (Others have asked if I’ll release it as a pattern, but it doesn’t really fit with my brand sorry!)

What I didn’t show you is that I tested my few pattern changes afterwards with a version of this pattern colourblocked in random ponte scraps from my stash, shortened to top-length, minus the CB invisible zip, and with a teeshirt-bound neckline instead of a facing.

It actually works quite well as a top (though I think the pieces near the hem could be better thought-out), but I wasn’t quite sold on the colourblocking choices, which were mostly decided based on fabric scrap sizes. It felt a bit… starfleet commander. And that’s a look only Catherine Daze can pull off!

But the original goal was to make another dress similar to the mustard-yellow version, inspired by this Chalayan dress that’s been hanging on my sewing room wall for ages:

I had the perfect teal viscose ponte leftover from a client commission, but I went out and bought a half metre of white and a metre of mustard ponte at Goldhawk Road to make up the other pieces. I really wanted the yellow at the waistline curve, but that would’ve meant having the white at the hem (instant grime!), so I ultimately went with the second colourblocking option!

I finally got a few minutes to cut out the pieces in mid-January (having been ill for the entire Christmas holidays!), but then I had to fly to the States for my Granny’s funeral a few days later, and the pieces were waiting for me when I got back. I finally had two hours spare last weekend to close myself into my sewing cave, so this was a great pick-me-up to get me back on track.

A black wool Oslo cardigan

Last Friday I talked about the new digital magazine, Seamwork and my article on activewear fabrics in the latest issue. Each issue comes with two quick-and-easy pdf patterns, which you can get on subsciption for $6 USD an issue (so they’re $3 each).

I’m a little behind, but on my last day of the Christmas holidays, I decided to sew up the Oslo Cardigan from the first (December) Seamwork magazine. Since this is from a former issue, I’m not sure whether you can actually purchase this pattern anymore (if you subscribe now, you’ll get the January patterns – a very nice bias cami and cuffed leggings).

My measurements fit pretty neatly into their size Medium but all the Seamwork patterns go up to 3XL, which is brilliant for plus-sized sewists! I was really happy with the fit on this cardigan – it’s nice and slim without being either baggy or tight, and the sleeves are the perfect length for me (a little over the wrist). The hem comes down just over my bum.

All the Seamwork patterns claim to be able to be sewn in 2 hours or less. After piecing together the pdf pattern (it also comes with a copy shop version) and cutting out my fabric, it only took 55min for me to sew together!

Mustard ponte seamed sheath dress

Like many of my most well-loved dresses, this one was quite a long time in the making. A few years back I’d bought a yellow ponte sheath dress from ASOS that had some amazing seamlines. I don’t often buy clothes anymore these days (preferring to spend my time sewing than fighting my way to the shops, or waiting days for an internet purchase that’s low quality or not quite right), but I really liked this dress, and wore it often despite the sleeves and hem being too short. Inevitably, the yellow also got dingey and pilled over time, but I still liked the overall design.

So I traced it! I literally just laid the dress over brown paper and ran a serrated tracing wheel over the different sections, leaving an impression underneath, just like how I trace patterns. I remember I traced James’s well-loved linen shirt at the same time, so it was a few months ago, and even though I had this mustard ponte in my stash for even longer, it took me a while to get around to sewing it up.

It may look like a complicated design, but it’s actually really quick to sew up on the overlocker, and only the back invisible zipper takes a little bit of sewing machine time.

Here you can see me holding the original dress, whilst wearing my copy!

All the things I loved about the original dress are present here – the figure-hugging design, the flowing, curved panels, the vibrant colour – but the sleeves are nice and long instead of “unintentional bracelet length”, and the hem doesn’t go scandalously short when I bend over!

Triathlon Leggings and Three Molehills

I’ve been a fan of FunkiFabrics for a long time (ie: before it was cool!), having made a sports bra, shorts, and leggings from their digital print lycra back in 2013. I’ve been meaning to get some more to use for myself, but it always felt like I was buying it on request for clients and students and never for me!

But recently I decided enough was enough ad I splurged on some luuuuuuuuuscious Funki Fabrics lycra in the “triathlon” print (bought with my own money). This fabric could not be more me – geometric print with turquoise and purples?! (It also comes in a red/orange/pink colourway).

I teamed it up with the basic, one-piece Kwik Sew leggings pattern that I’d recently altered in strange places to suit my runner’s legs, so I knew that the pattern would work well on the run and not bother me by shifting around! I’d made these with an eye to wear at the Three Molehills race, but the old adage “Nothing new on race day” lives deep within my psyche, so I took them out for a test run through Hampstead Heath (and the infamous Swains Lane) the weekend before:

It was only a short loop round the Heath, but long enough for me to tell they were going to be great (and that the mud washed out of them just fine on a cold sports wash!).

When I got home and put a sweatshirt on to warm up, I realised how well the print teamed with royal blue as well as purple! It’s a definite bonus for me when I can pair leggings with a number of tops in my running wardrobe…

So when the morning of the Three Molehills race arrived, I wasn’t even all that concerned that the forecast was for heavy downpours the entire day – at least I had fun leggings to wear round the super hilly, 16 mile course mudbath!


Photo credit: SussexSportPhotography.com