Blog

Black flannel pyjama bottoms

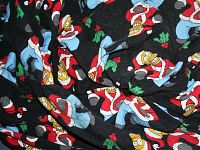
James isn’t normally the pyjama sort, but it’s been particularly cold this winter and he’s been in need of some PJ bottoms for quite a while. He only has one pair and it’s kinda sad to be wearing Santa Homer Simpson in February:

(Note to family – please don’t take this as a plea to send more. He really only needs and wants this one pair!)

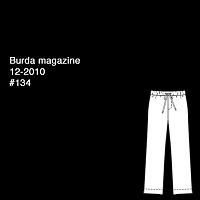
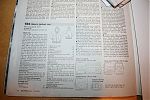
So I took pity on him and said I’d sew him a new pair to wear, and Burda magazine 12-2010 #134 was particularly handy. There are tons and tons of unisex pyjama trouser patterns out there, but this one was easy to find, and I know Burda’s sizing is so consistent that a 52 would fit him fine.

We were going to use the grey knit fabric we bought at Ditto, but I greatly underestimated the width of that so there was nowhere near enough (totally my fault as Gill asked “are you sure that’s enough?”). In a sea of insipid cutsey prints, Chawla’s came through with this solid black cotton flannel for cheap (3m for £11 shipped and I’ve got extra for jacket interlining if I like now, too). Chawla’s may not have the widest selection of natural fibre fabrics, but they are consistently the fastest shippers ever – I ordered this on a Tuesday, and it arrived in Thursday’s post!

James's fantasy jacket

I’ve been calling this James’s “fantasy jacket” because he’s asked me to recreate a beloved unlined, simple, waterproof jacket that was stolen from a pub on the night he met me all those years ago.

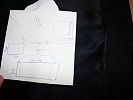
He recalled it from memory while I attempted to create an accurate tech drawing, and then once that was agreed, I compared this against my vast pattern magazine archive (made much easier since I started tagging my At a Glance scans online, so I just had to shuffle through those issues tagged “menswear”!).

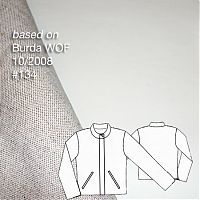
I decided that BWOF 10/08 #134 was a pretty good starting point for what James wanted, and I went from there. The muslin went well, so around Thanksgiving I started on the final jacket, made from a very cool laminated linen from Mood in NYC, with bias binding made from some dark red and black tie silk bought in Dublin three years ago.

How to sew welt pockets

It may be FREEZING in London, but the heat is on for me to sew James’s fantasy jacket in time for his birthday on Saturday!

I’m calling it his “fantasy jacket” because he’s asked me to recreated a beloved unlined, simple, waterproof jacket that was stolen from a pub on the night he met me. So he recalled it from memory while I attempted to create an accurate tech drawing. Then I compared this against my vast pattern magazine archive and decided that BWOF 10/08 #134 minus all the bells and whistles plus a few different whistles and bells was the best starting point. The muslin went well, so this weekend I started on the final jacket, made from a very cool laminated linen from Mood in NYC, with bias binding made from some dark red and black tie silk bought in Dublin three years ago.

The rubberised coating on the fabric means any and all pin holes show, so I needed to treat it like leather – pattern weights and rotary cutter for the pieces, and since it’s unlined, I also needed to create metres upon metres of bias binding for the exposed edges. I used a continuous bias binding method for the first time ever and it was very quick, though not very intuitive.
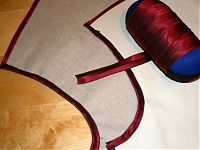
(I wrapped the binding around a sunglasses case to avoid creases. And because it was handy. Let’s face it – I’m not going to be needing the sunglasses any time soon!)

After binding most of the edges, I then set to work on the front welt pockets, which were rather tricky on a fabric that requires a press cloth (I’m paranoid that the laminating will melt!) and can only be basted where it will never be seen. So I thought I’d document the process and give you all a little welt pocket tutorial.

This is also exactly how I do bound buttonholes, but because the scale is much larger here, it’s easier to try welt pockets first to get the technique down and then just do the same thing on a smaller scale for buttons once you get the hang of it.

How to sew a double welt pocket

My pockets here are 7 inches long (6” is standard but I wanted to make sure his big man paws would fit in), and the opening is a total of 2cm wide (1cm on either side of the centre opening line). So the welts I cut out were 4cm wide (folded in half, they’re 2cm wide so straddle the stitching line nicely), and 8 inches long (so I get some overlap at the ends). You’ll need two welts per pocket. I folded each of these lengthwise and machine basted close to the cut edges to keep them together. If your fabric frays or shifts in anyway, you may want to interface the welt pieces in addition to the area around the pocket opening.

Step 1
Hand baste the pocket edges and central line. When you’re basting (in general), never turn a corner with your hand stitches, but leave the tails free at the corners. Also, you should extend the short edges here two centimeters or so beyond the long lines. I haven’t here because the needle holes would show!

Christmas Present – Colour blocked hoodie

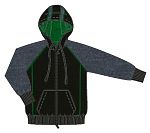
And now, to start off a few posts showing off “What I Gave” this year (ok I’m a little late), here’s the hooded sweatshirt I made for my main squeeze, James.

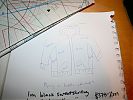
James really liked the look of the men’s sweatshirt in the December Burda magazine and when I asked him which colour(s) he’d like it in, he proceeded to sketch the sweatshirt and fill in all the sections with the colours he wanted, plus where he’d like some added piping, too. Looks like I had a tough bill to fill in time for Christmas…

Ticking Over

I’ve been doing loads more Christmas sewing but I can only show you the barest amount since so many friends and family read the site. But that just means there’s going to be a glut of posts going up between Christmas and New Year, plus I just got two KnipModes so I can show you my picks from October through January, plus I got gifted the Twinkle Sews book so I’ve got loads to say about that, plus it’s soon time for my year end roundup! So lots coming up, and it’s probably a good thing we’re staying at home over the holidays!

But first, two gifts I can show you some peeks of… My friend Pip has cottoned on to the fact that I can make her things in silk that cost way less than in the shops – last year it was the silk pyjamas, but this year she really wanted silk pillowcases, so I made her a pair in black silk charmeuse based on the measurements of my own cases, plus I added a bit of contrast reverse side and a line of piping to jazz it up a bit.

And even though James reads the site, he had so much input into his sweatshirt that it’s hardly going to be a surprise on Christmas morning!

Gold silk Eclair dress (and bonus purple bow tie!)

Sorry for the delay – I finished the Colette Patterns “Eclair” dress last week but couldn’t quite squeeze in a photoshoot until we were actually at the wedding venue on Saturday (the very nice London Canal Museum in King’s Cross. Though all the tiny canal boats made me feel like the 50 Foot Woman in comparison!).

If you recall from the previous post describing the invisible zipper details, I’m making this newly released dress pattern in gold silk crepe, with aubergine silk crepe ties and gold silk habotai lining.

I was a beta-tester for this new pattern company, so mine was only a rough photocopied draft, but it was enough for me to see that this is a definite keeper! I’m really jealous now after seeing the finished storybook packaging that I almost want to buy it again, just to have a pattern as beautiful as the dress itself!

Birthday blue sweatshirt

James’s birthday was on Thursday and since we can always use more warm, comfortable clothes around the boat, I decided to try BurdaStyle’s free Amin pattern that was just posted a few weeks ago. The example made in the photos uses a thick and chunky sweater knit, but I opted to make James’s as a more practical sweatshirt that could be tossed in the washing machine at will.

It’s got really nice lines for a mens pattern – princess seams (or would that make them “prince seams”?) that flow nicely into concealed hip pockets, but I decided to make these one better and create an iPhone pocket-within-a-pocket –

Vintage Navy uniform detail photos

I realise I’m an entire week late for Veterans Day and Remembrance Day here, but I thought that my dad’s vintage 1960s Navy uniform would still be just as interesting today.

Here’s my dad leaving Boot Camp in 1960:

(Compare that to his Santa-look these days – he blames it on all the beer and bratwurst when he was stationed in Germany!)

My dad was cleaning out his closet and thought I might like his old uniforms, so he dry cleaned them up and sent over the navy wool dress uniform first (the whites are coming later!). Much to my surprise, his old uniform fit me exactly – it was almost eerie, I tell you! Apart from the arms being an inch or so too long in the cuffed-sleeve top, it’s like it was made precisely to my measurements. And apart from one worn hole in the trousers, they absolutely look like new…

Me in 2008:

The quickest pirate coat ever

SCENE: Last Sunday night on the boat…

James: So for Simon’s stag night on Saturday we’re going to dress him up like Dick Whittington. I thought he could wear my pirate coat and we’ll get him a tricorn hat and he can carry Bagpuss as his cat…

Me: If anything happens to that coat, I will murder you. I would sooner make a whole new coat than see anything happen to it after I slaved for two years making it.

James: Oh really? You’d make another coat? Would you?

And so begins the tale of how I made a pirate coat in less than a week.