Blog

Muslins, muslins everywhere…

…but not the time to sew!

I’ve had an incredibly busy week and weekend, between my whirlwind social life, an influx of new work at the office, hardcore boat DIY, moorings duties, and keeping up with my running, so I’ve hardly had any time to step foot in my sewing room, let alone sew! It doesn’t help that pattern drafting moves at a glacial pace as compared to just tracing off a pattern and sewing it up!

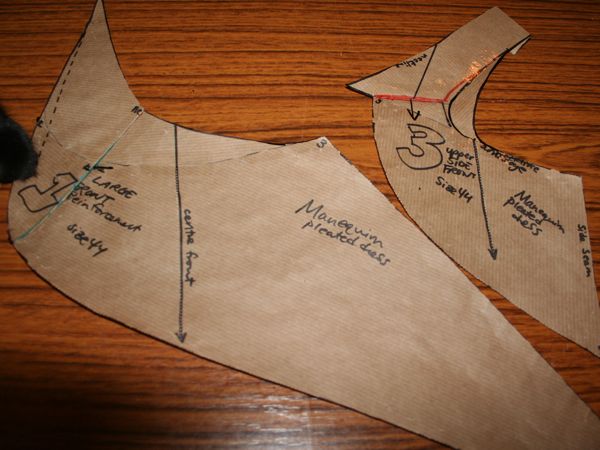
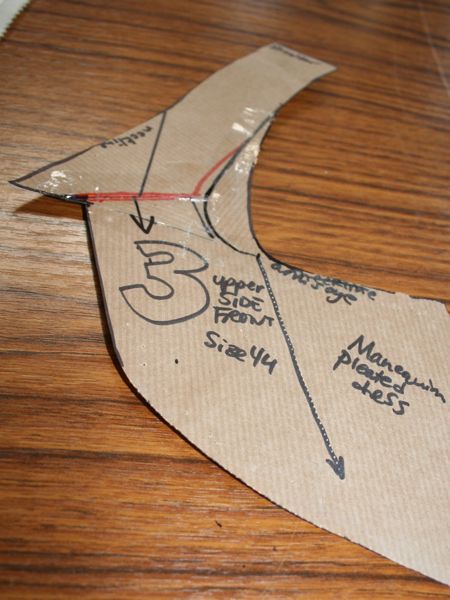
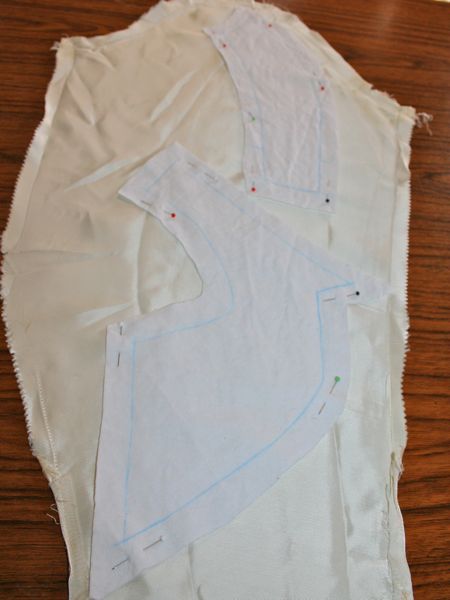
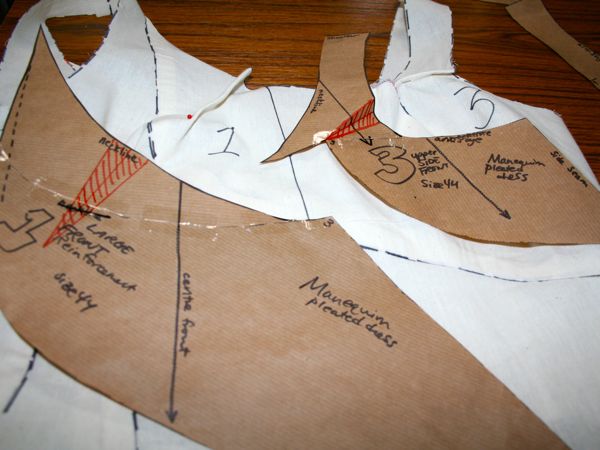
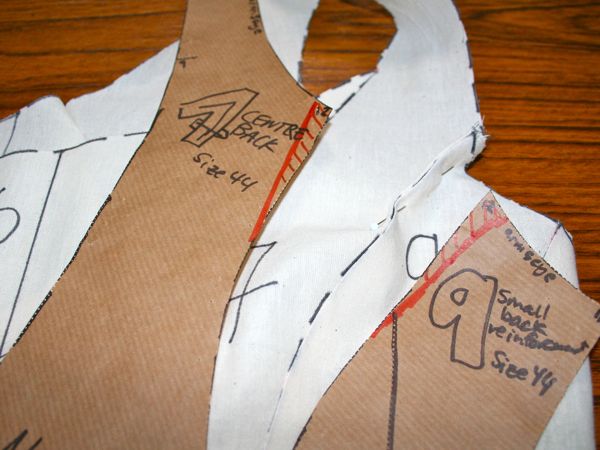
If you remember, I’m using Pattern Magic and the Bunka draft to revisit pattern drafting. So far I’ve made my bodice sloper and drafted up this variation from the first Pattern Magic book, “Tying a Bow D”.

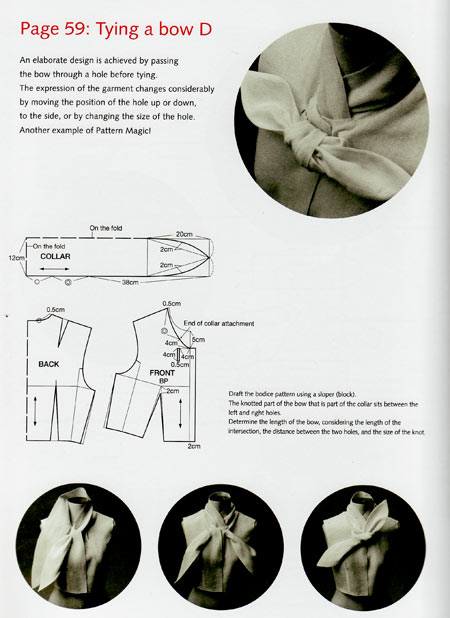
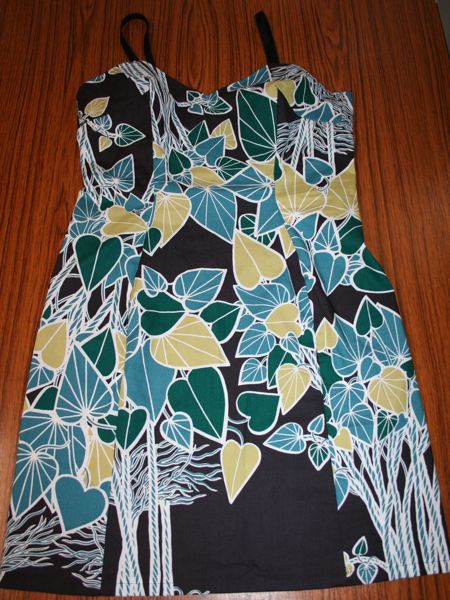
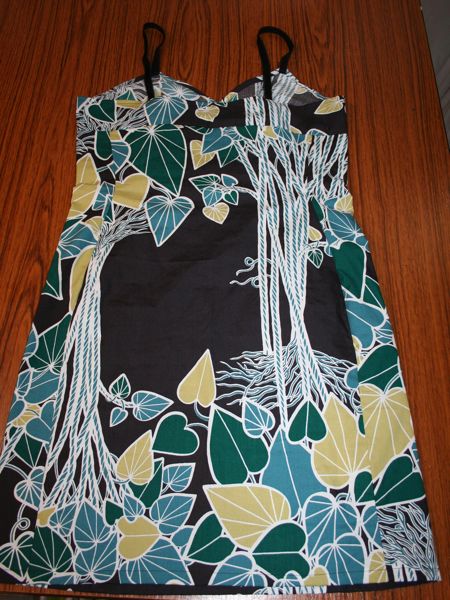
This is one of about five designs across the books that I’d really like to make, but it’s also by far the simplest draft so I thought it’d be a good place to start. The only difference is that I want to a dress from this instead of a blouse, so I’ve also drafted up a skirt sloper and am just now starting to match up the darts to the bodice and insert some flare to make it usable for a nice shirtdress.

Revisiting pattern drafting and the vintage tab dress muslin

Remember the vintage dress pattern I graded down to my size a few weeks ago?

Well, I made up a muslin with my grading changes in place, and though I didn’t get any photos of it on me, I did get some on Susan. I realise that diagnosing fit issues on a dressmaker’s dummy is particularly futile, though, so you’ll just need to take my word for it!

On first glance, the worst issue is that there is way too much fabric in the upper back, but also I think I may need to raise the waist seam by an inch, and narrow the shoulders by an inch or so, too.

The skirt length is d-o-w-d-y so I’ll need to shorten all those panels, too (happily I’ve got a “lengthen or shorten here” line on both the bodice and skirt pieces).

While the sleeves themselves fit nicely, there is an unholy amount of excess ease in those sleeve caps, omg. So I’ll need to shave down those caps to take a good few inches out of there.

It wasn’t necessarily the list above that made me lose enthusiasm for this dress, but I can’t really put my finger on what it was. But it turned out that doing all the boring grading reawakened in me a desire to conquer pattern drafting, which I dabbled in when I received “Metric Pattern Cutting” by Winifred Aldrich last year, but didn’t get far.

A different kind of lingerie success

I’ve made three bras so far, and despite winning the PR Lingerie contest last year, I’ve never been that happy with the fit of any of those bras. I mean, they were okay, but the style is different to the kind of bras I buy, and the underwires dug in, and well, the girls just didn’t look their best. So they’ve kinda worked their way to the bottom of my lingerie drawer, which makes me sad. I sew to wear, not to shove in a drawer!

As I mentioned last week, I got very excited about the notion of sewing a bra made with foam cups, which are the sort I always buy, and speaking to Kellie at The Sewing Chest, she got me all set up with the right bits to have my first go. I made a toile using her purple hearts foam cups over the weekend and the fit is so good I wore it all day Sunday and now again Monday!

I started the process by making a rigorous comparison of the Kwik Sew 3300 pattern vs two RTW bra backs and ended up drafting a back similar to a Ted Baker one that fits me well.

Here you can see the difference between the KwikSew back (in brown) and my newly drafted-from-RTW back (in white) –

Grey leather skirt – muslin

You’ll get to see my Manequim silk blouse tomorrow, but in the meantime I thought I’d give you a progress update on the fourth item in my March Mini Wardrobe, the leather skirt (Burda magazine 08-2010 #128 – though #127 is nearly identical).

I’m making this skirt in some utterly luscious grey leather I bought while on honeymoon in New York, and despite having sewn with leather loads of times before, this is my first real leather garment. So knowing what I know, I knew I had to make a muslin first because once you sew leather, it’s done – the needles holes are permanent so you can’t rip out stitches!

I made up a quick muslin at the end of February, and, unusually for Burda, the size 42 was too tight over my hips. Rather than trace a bigger size (boring!) I drew two long lines up the front of the skirt on either side of the centre front. On the waistband and yoke pieces, I added 2cm width to each line, and for the lower skirt piece, I made a triangular wedge which tapers to nothing at my marked hem.

Un-petiting the Burda September cover dress

While I wait for the weekend to photoshoot the Lekala ribbed top (either you all are too smart or I’m too predictable!), I’ve started work on creating the cover dress from the September Burda magazine. It’s a really cool, curved seam design with no side seams and designed for knits, but it’s one of Burda’s Petite patterns.

I am in NO way petite – at 5’8” (172cm), I am closer to Burda’s Tall height (180cm) than I am to the petite height( (160cm). I have a sneaking suspicion that my torso is quite compact and my height is mostly in my legs, but in any case… I’ve made a few of Burda’s petite patterns before with good results, namely, my 30th birthday dress and the blue silk cocktail dress, so I wasn’t totally scared off because it’s for petites.

I made up a muslin of the top half of the dress (the half I’m most concerned with) on Wednesday night and I’m happy with my alterations so I thought I should share what I did.

First of all, lay out pieces 1 and 2 so that their folded edges are aligned, taping the pieces together loosely. Then lay out pieces 8 and 9 so that their folded edges are aligned, and that these meet the front pieces at intersections 7 and 8. Don’t worry that the shoulders are far apart or that some of the curved seams don’t meet up whilst flat.

My alterations are the white pieces shown below:

The Burda meets Armani coat – muslin FAIL

I absolutely LOVE the Burda magazine September 2010 issue. Loved it from the first second I saw the technical drawings, and now, several issues later, I’m still not seeing much that tops it. I literally have 11 or 12 must-sew patterns from it, and one of them is the Tall coat, #118.

As you recall, when I was in New York, I saw an eerily similar coat in the window of the Armani 5th Avenue store, and this sealed the deal – I must make this coat using my super thick, ex-Burberry dusty teal coating that’s been in my stash since last winter!

I don’t make muslins for a lot of things, but when the fabric is expensive, or can’t easily be resized (like leather), or if there’s a lot of work involved before a fitting can be made, then I’ll grumble and moan and make a muslin first rather than waste my nice fabric (and time!) and get any fitting issues out of the way first.

Let’s get down to the instructions first – Burda’s instructions aren’t too bad on this one EXCEPT for the zippered inseam pockets – they are absolutely nuts, and account for a good third of the instructions for the entire coat. But the instructions are besides the point, because if you jam your hands into your winter coat pockets when you walk like I do, you really don’t want metal zipper teeth digging in to the backs of your hands! So leaving off the zippers not only saves you time, but makes for a much more usable coat.

Honeymoon Lingerie – nightgown muslin

True confessions – I took a brief break from the wedding gown. I don’t deal well with long projects and I was getting really itchy to complete something (I didn’t have any completed projects in July because of the gown, aaaaagghh!).

So I took one evening out to do a test run of one of the patterns I’d earmarked for honeymoon lingerie and Shasha’s Malaysian silks, Burda 7418 (on the right in my earlier image below):

This is a brand-new Burda envelope pattern, but I just went and bought the pdf version instead because a) I’m impatient, b) the pdf patterns are way cheaper than the paper versions (we have a laser printer and printer paper is cheap!), c) piecing together pdf patterns takes only 5 minutes longer than tracing a paper pattern and I can do it sitting down, and d) no seam allowances, woooooooop!

This was my first downloadable pattern from the German Burda site, and I was pleased to find that the instructions were in nine languages, with fully illustrated instructions. I was expecting it to just be in German! But do pay attention to the print preview, though, because you may not need to print the last ten pages or so (the English instructions only take up a few pages). The only weird thing is that they decided to waste some paper giving us two side panel pattern pieces (one to be cut in lace and the other in self-fabric) and the two pieces are absolutely identical. Weird.

Bridal bodice – Prepping the pieces

I finally got the muslin fixed and finished! Thanks for all your advice, though I haven’t had a chance to reply to hardly any of you, for which I do apologise…

Muslin #3 changes –

  1. Unpinned the shoulder change, took off the waist stay, and since it seemed to be pulling everything upwards before, I reasoned that it must be too low. I repinned it a little higher and everything seemed to sit nicely and correct those weird problems it threw up before.
  2. I’ve said it before but I’ll say it again – I detest Rigilene boning! Only someone who hates women could’ve come up with those tiny, needle-like implements of torture. My spiral steel boning for the finished dress arrived and it just feels wonderful.
  3. No one actually came up with the fix I needed for piece #3’s weird bubble. As it turns out I just needed to flatten the curve a bit below the inset corner. (Before and After are below)
  4. There’s no way I’m muslining the skirt. It’d literally take a whole week of sewing time to even approximate the panels on the existing skirt, plus the drape and weight of the muslin fabric is totally different, and it won’t achieve much of anything I won’t learn in the actual skirt attachment anyway. End of story.
  5. Yes, I know about wearing proper undergarments. I’ve been wearing the bra I intend to wear on the day all along (though I got sharpie on it during my muslin marking process so I need to buy another copy of it, boo.). I was not being serious about the push up bra.

So with the muslin done, on with the dress itself!! Hurrah!

First step was to lay the pattern pieces onto the wrong side of my flannel underlining, fuzzy side down (I’d been transferring all my changes onto them and I prefer paper with no seam allowances over muslin with allowances). Once pinned in place, I then chalked the seam lines, waist, centre back and fronts, and the two notches onto it. Then I cut out the pieces with eyeballed seam allowances (when you’re dealing with seamlines, the size of the allowances are largely unimportant).

Next I laid the flannel pieces onto the wrong side of the satin, pinning only in the seam allowances because all the pin holes show on this fabric.

Yet another bridal bodice muslin

I’m no big fan of muslins and fitting tweaks, so the title is really reflecting my impatience at still being in the fitting stage. I want to get on with the fun stuff! But I also really want to get the fit and design perfect here as I can’t really go unpicking the vintage satin (the needle holes remain), so here I am, still soldiering on, though hopefully not for much longer…

Yesterday was my day off so I devoted pretty much the entire day to this dress. Right after breakfast I made up Muslin #2 (not shown because no one was around to photograph me), which incorporated the neckline changes and better-drafted add-on straps. There’s no photos, but essentially, I just needed to pinch some fabric out in three places, which you can see here shaded in orange on my pattern pieces:

So I made those changes to my paper pattern, unpicked pieces 1 and 3 from the muslin, cut new ones out, and reattached them, bringing us to Muslin #3. And I was pretty happy with the fit, apart from a bulge above my right breast which I immediately knew the cause of and fixed it on the paper pattern.

Bridal Bodice Neckline – opinions needed!

I am very happy to report that my dress for the BurdaStyle book is completely, 100% finished, packed up in an airtight bag and ready to be FedExed this week. HOORAY!

I’m afraid that’s all you get to see until next year, to. Boo.

But it means I can now devote ALL of my sewing time to my wedding gown. So the first step is to attack the muslin. I’ve marked my waistline in green, and the possible boning positions in blue. Once I marked my waistline I realised exactly how short the bodice is so I’m elongating it all by an inch so the back and sides aren’t ending exactly at my waist. My waist is an inch higher than the standard measurements anyway so I think this alteration will help (note: I’m not short-waisted. My bust-hip measurement is standard, my waist is just shifted up a tad).

But I really, really need your help choosing the right neckline for this gown!!