Blog

An extended weekend full of sewing

Last week saw the end of a very good but busy work project, so what do I do when faced with a bit more time and mental energy than usual? Why, I sew of course!*

Liberty, but not as we know it

I received some lovely Liberty gift coins for my birthday, and because Previous Me knows Future Me so well, I had stashed some extra birthday cash along with it in the suede pouch, knowing I’d forget all about it and be pleasantly surprised. Which is precisely what happened!

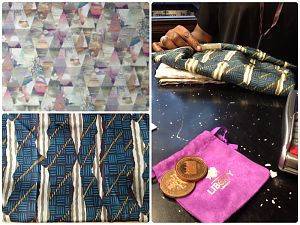
So now armed with £60 to play with in Liberty, I decided to take advantage of a rainy day and go shopping. Now, I know loads of you go weak at the knees for anything Liberty, but I don’t. I find most of the traditional Liberty prints to be painfully twee and nothing I’d ever, ever wear. So I was thinking I’d see what was on offer in their jerseys, but first I got waylaid by the remnants table, where I scooped up a vaguely-African print silk twill (1m for £25, seen lower left).

The jersey selection was really small and mostly ditzy print (gag), but I kept being drawn to a dreamy, blurry, triangular print that came in a few shades, but only in Tana Lawn. I finally decided that if I kept coming back to this print then I should buy it and figure out a project later. So 1.5m of the palest colourway came home with me (seen upper left above) and brought my grand total to £58. Now that’s budgeting!

Refashioned suede wristlets

A friend had recently given me two skirts which no longer fit her, a suede one and a silk one, and mentioned that I might want them for the fabric. Of course! So I chopped up the suede one on Sunday, making two of the free Cake mini wristlets.
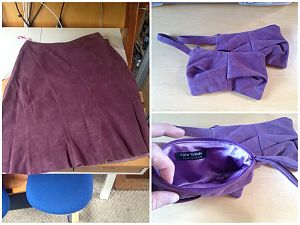

(The colour on the left is more accurate…)

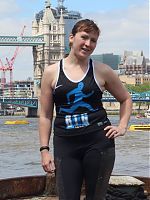
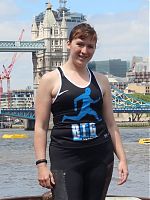
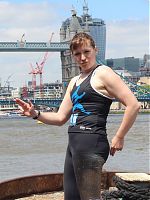
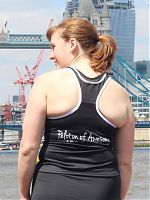
Bridge the Gap refashioned race tee

Following on from yesterday’s Boston Street Running refashioned top, I thought I’d show you the other refashioned race tee I made from my starting pile, the “BTG” one in the centre:

This one has a whole lot of meaning for me – the urban running crew I’m part of, Run dem Crew, has a bunch of sister crews all over the world with a similar ethos, so when we go to races in other countries, the host crew lays on parties, sightseeing, and pre-race hospitality. When crews get together like this, it’s called “Bridge the Gap”, and the Copenhagen crew even designed special shirts to commemorate the Copenhagen marathon weekend.

But I was a bit late to the Expo, and they ran out of Medium shirts, so I asked to be given the largest size they had, which was XXL! (Why they thought they needed to print any that big for marathon runners is another question entirely!). So this one was ripe for refashioning, and I had a lot of fabric to work with, which was great.


When I Bridge the Gap, I really bridge the gap!

The original shirt had the blue NBRO man on the front, with BTG and the date underneath, and the back had “The Peloton of Awesome” and all the participating crew logos across the shoulders. There were also mesh panels running down the sides, which I used in the Boston Street top instead. Unlike that top, however, here it was absolutely essential that I preserved the original designs.

Refashioned Boston Street running top

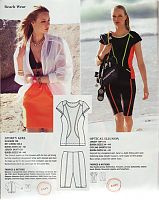
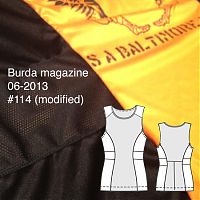
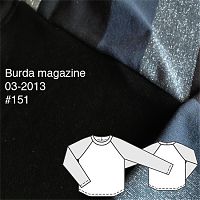
One practical aspect of being a sewing runner (or a running sewist) is that I can take all those oversized race tee shirts that seem to accumulate and refashion the nice technical fabric into something more suitable. Oftentimes I just trim down the front and back based on my knit sloper (like I did with my Paris race tee), but this time around I thought I’d change things up and use a Burda pattern instead of my usual sloper, since one presented itself nicely in the form of the “scuba set” in the June 2013 Burda magazine (or you can purchase as a pdf here).

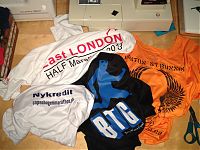
I started by pulling out a pile of race tees I wasn’t 100% happy with (though in reality I only did two of these four)…

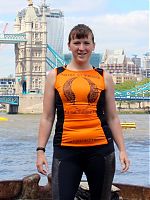
This particular shirt was always destined to be refashioned – I visited tons of running shops when I was in Baltimore in April, but my favourite was a small, very friendly shop run by a very enthusiastic runner, Boston Street Running (Baltimorians, it’s down by the big Safeway in Canton). I ended up chatting to him for ages about nutrition, races, running fashion, and he despaired that he only had one of their shirts left, and it was XXL with a printing mistake, as he really wanted to give me one!

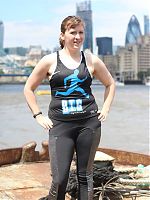
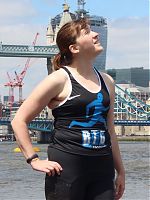
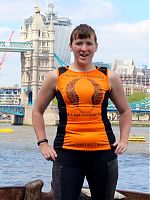
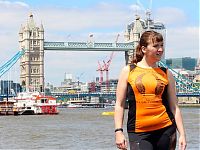
I assured him I’d refashion it down, and send him photos of me wearing it in front of Tower Bridge…

One thing I really like about this pattern is that there are no side seams – it uses side panels instead!

My refashioned Paris race tee

As I mentioned earlier this week, one of the projects I wanted to work on was refashioning the free (but too large) shirt given out at the Paris half marathon a few weekends ago. Pretty much every race these days gives out a shirt, and usually they’re in nice wicking fabrics, but very rarely are they nicely designed, or vests. I prefer to run in vests instead of teeshirts (even if I’m wearing a jacket over top), so after I finished sewing my mom’s latest chic sweatshirt, I set to work on the race tee.

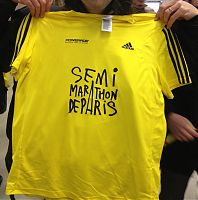
Here’s a “Before” shot, with my friend Daniel holding up his at the race expo (this is the “Medium”, but it’s massive, like a men’s large!)

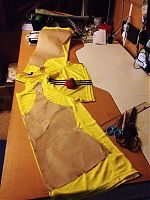
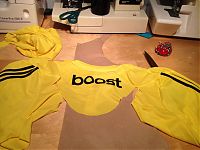
I really like the Paris logo, so I wanted to keep that on the front, but I didn’t care about the adidas stripes on the sleeves or “boost” on the upper back (the new shoe they’re promoting). So the first step was to carefully cut along the sides of the shirt and sleeves, so I could lay the shirt out, folded along the centre front and centre back and pin my (self drafted but based on the Kristina Shin sloper) vest pattern pieces down:

I then cut the pieces out, with seam allowances at the sides and shoulders, but none at the neck and arm edges, since I planned to bind those with some of the black technical strips I used with the disco running top.

These were the only bits of the shirt I didn’t use!

First step is to use my little pizza wheel measuring device along the bound edges to work out what length strips I need…


I caught my mistake before binding – the neckline length needs doubling, as I measured both on the fold!

Simultaneous sewing

I generally like to only work on one project at a time, but sometimes, for ease of tracing or bulk-cutting, or because (heaven forbid!) I run out of some necessary supply, I end up working on multiple projects at once. For me, this road is the way to Unfinished Objects (UFOs), and a treacherous one to travel down.

Far, far more frequently, though, I get a posting backlog so it just appears as though I’m working on a few things at once!

So right now, my tally is…

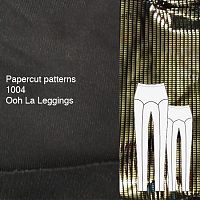
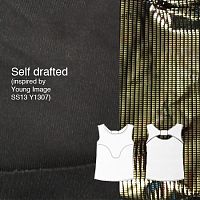
The Disco top and leggings

I posted about the leggings in December and the top last week, but I owe you a proper photoshoot for both!

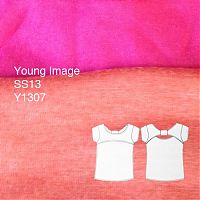
The pink and orange tie-back top

I can’t talk too much about this one here because my niece reads the site, but this one has been finished for a few weeks, and I’ll get some photos of her wearing it when I’m over in the States after Easter.

The striped raglan tee

This is new-to-you, but I’ve also sewed a top for my nephew to give at the same time. I just finished this one this weekend, and I’ll also get photos of him wearing it when I’m in the States.

Run dem Crew Refashions – Ladies first…

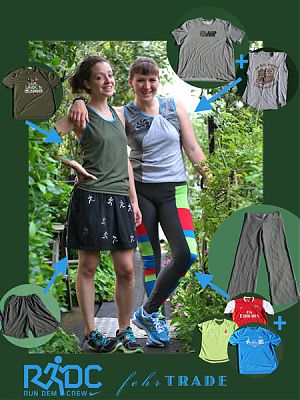
This is probably the longest-running project I’ve done since my epic wedding gown refashion, but I’m really proud of the results and the fact that I can finally show them off after much hinting and whispering round these parts. This would’ve never happened at all without the spark from Charlie, the founder of Run dem Crew (the Tuesday night running family that has utterly transformed my life in the past year I’ve been a member). When he found out I sewed, he raised the idea of a refashioning project, then proceeded to gather together all the pieces to make it happen.

The idea was simple – start with 19 pieces of running clothing – some used, some promotional, and some brand new with tags on (including some ££££ Gyakusou designer gear!), and refashion them.

I started this project back in April, but stalled during the 5 weeks our boat was in drydock and I was without access to my overlocker and sewing room. Happily, I got some fantastic help with ideas from fellow RDC runner Jennie, who’s worked for years as a product designer for a well-known clothing company, and came over to sift through the clothes and it really helped for me to bounce ideas off her and vice-versa.

So her reward was some enforced modelling when the project was finished! Ha!

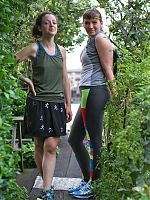
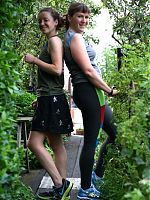
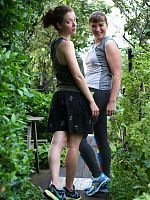
From the initial bag of clothes, I made 8 garments – tops and bottoms for two ladies and two men. I’ve been promised some modelled shots of the men’s clothing coming up soon, but here are the two ladies’ outfits, modelled by Jennie and I….

I had the fore-thought to take images of all the Before clothing, so I was able to do a nice collage like this, showing you what the various pieces turned into:

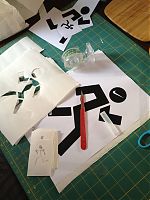
PSA – Freezer paper and laser printers don't mix!

This is a bit of a Public Service Announcement, but as I couldn’t find this information easily myself, I thought it was really important to get it out there to save some other poor sod the frustration and money I just spent.

Freezer paper stencils are great – fast, fairly easy, you get good results, and you can reuse the stencils a few times. Search for freezer paper stencil tutorials online, and you’ll get tons of results, all saying you can either print directly onto the freezer paper, or lay your design on top of the freezer paper, and trace around it with an exacto knife.

The latter is what I’ve always done in the past, but for my upcoming RDC refashioning project, I have a ton of stencilling to do, so I thought if I could cut out the step of taping the paper layers together, it’d go a bit quicker.

Only thing is, clearly none of the well-meaning tutorials out there own a laser printer. Laser printers use heat to print. Freezer paper uses heat to bond to the fabric. You see where this is going…?

DO NOT PRINT DIRECTLY ONTO FREEZER PAPER WITH A LASER PRINTER!

A beginner skirt sewing lesson

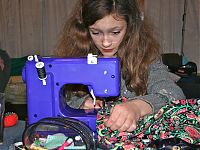
Sunday afternoon was Lesson Two for my beginning sewing ladies, following along from the first lesson a few weeks ago when they learned how to operate a sewing machine and make a shopping bag.

At the end of the last lesson, Holly, Ness, and Veda were all begging to learn how to make a skirt, so how could I refuse? I decided they should follow in my footsteps and learn with New Look 6843, which was one of the VERY first patterns I ever made (then remade over and over again with a few variations!).

They picked out their own fabric and zippers, with Ness choosing a navy corduroy (so we got to talk about nap!), Holly choosing a beautiful navy wool suiting fabric, and Veda going for a bright and cheerful Liberty print.

Here’s Veda sewing on her own purple JL Mini machine (like my red one!)

We talked through measurements, pattern layouts, what the symbols on patterns mean, and also how you don’t have to follow the directions if you don’t want to (since I thought New Look’s order of construction made it awkward to check the fit of darts, and their zipper insertion made things more difficult than they had to be!).

Free ruffled wristlet pattern!

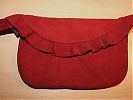
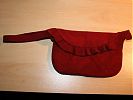
This might possibly be my longest running project-to-post duration since I drafted and sewed up this cute wristlet last February using some scrap leather and some vintage lingerie fabric for a lining. I made it as a gift for a neighbour who wanted to remember a dear departed friend who left her a stash of vintage fabrics, and I loved the resulting wristlet purse so much that I felt compelled to share it with all of you! But I had problems digitising the pattern so it languished… but recently I was inspired to take another stab at it and I love the way it turned out!

The great thing is that because it’s a small purse, you can really make this out of leather scraps, or even an old leather skirt or jacket from a charity shop (thrift store or op-shop)! Or it doesn’t even have to be from leather at all, it’d work equally well in corduroy, denim, or even felt! And because it’s a wristlet, you can keep your hands free for drinks & canapes, or for beers & barbecues!

Download the free pattern by clicking the image below!

To anyone linking – please link to this page, not directly to the pdf file!

I hope you all enjoy this and please email me any photos if you make one for yourself! I’d rate this as an Advanced Beginner project just because of sewing the zipper, but it’d make a GREAT first leather project if you’ve never sewed with it before.

Illustrated instructions!

Text instructions are included in the downloadable file, but I wanted to provide photo instructions to make it easier for beginners to sew this, too. But when I put the photos in the file itself, it turned out way too big so I compromised and I’m offering them here instead!

Step 1


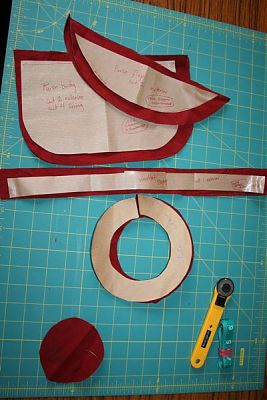
Using the exterior fabric, cut out two copies of the purse body, two copies of the flap, one of the ruffle, and one of the strap (or omit the strap for a ruffled clutch). The interior circle from the ruffle is unused and can be turned into a decorative flower by pinching the centre and securing with a few hand stitches.

Race tops and new patterns

It is an enigma that, while the overwhelming majority of 10k race participants are slim and svelte, race shirts given away to participants are always enormous!

I had two race shirts made out of the nice wicking polyester that were way too big to wear (hanging down to my mid-thigh! And I’m not exactly Tinkerbelle…) but too nice to let rot in my wardrobe, so I cut them up!

I used the same KnipMode pattern as before, but got lazy and just serged all the edges with my white woolly nylon thread and didn’t bother with the elastic. The armpits were a tad too high before, so I lowered those, but otherwise just approached this as a no-nonsense reconstruction to get some wear out of garments I previously wouldn’t touch.