Blog

Tips for sewing with faux fur

I’ve finished sewing together the furry exterior of my luscious long pile faux fur coat, and now, as I set about creating the lining for it, I thought it’d be a good time to share all the tips and tricks I picked up along the way. Some are from the special “sewing with faux fur” supplemental lesson in the October 2008 Burda WOF magazine, but others are from my own experience.

Faux fur sewing tips!

  • Only cut one layer of fabric at a time, with the wrong side facing up. Be sure to cut through the backing only and NOT the fur itself! I used the very tip of my tailor’s shears, but an exacto knife would also work. A flat layout also means you need to duplicate any pattern pieces that would normally be placed along the fold, and other pieces must be cut out as mirror images (ie: one sleeve needs to be cut pattern face down and the other cut pattern face up so you end up with a left and right

Conquering bound buttonholes and interlining my winter coat

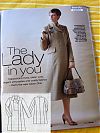
Cast your mind back to the heady days of May, when I decided to join hands with the internet and start in on The Great Coat Sew Along, with this beautiful long coat pattern from BWOF 09/2005 #102:

(There are two similar views – mine’s using the exposed buttons and sleeve tabs of 102, but the in-seam pockets of 101.) Anyway, I got as far as the material gathering, muslin fit and alterations, and even sewed together the body pieces of the coat before I lost momentum in August. The half-finished coat has hung in my sewing room ever since, taking up valuable space and making me feel bad every time I glanced at it, but the abnormally freezing cold temperatures we’ve had in London have made me jump back in with both feet to get this finished, because I could really use this on my daily walking commute to work. I’ve got a RTW long wool coat, but with the wind and extreme cold we’ve had, I can feel the cold through what I’ve got now (the papers are gleefully reporting that, at -10C, London is colder than Antarctica right now, and I’ve lost count of the number of Russian-style fur hats I’ve seen out and about).

Sleeping beauty mask

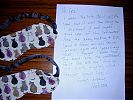
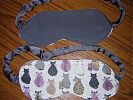
I was in such a buzz of sewing activity on this bank holiday Monday that I finally got a chance to make BurdaStyle’s Marcel sleep mask pattern that I’ve been meaning to sew for ages now!

One sleep mask is for myself, but the second one is a surprise for my friend (and will-be bridesmaid) Gez (who got it slipped through her letterbox last night!).

The adorable kitties fabric is from a tunic she gave me that was a bit too long for a shirt but too short for a dress, so I chopped off some length and saved the offcut to make something for her. The grey fabric is from a skirt her auntie gave me years ago that I completely forgot I even had until I dived into my scraps bin looking for something to use here. The dark grey backing was the skirt itself, and the shiny (silk?) casing used to be the waistband of the skirt. So it’s an entirely recycled sleep mask!

There aren’t any instructions for the pattern, but it’s very easy to make one and would be a great project for beginners:

Silver wedding fascinator

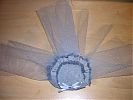
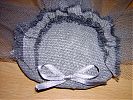
You may remember that I made my silver linen dress to wear to our friends Holly and Simon’s wedding this weekend. While at Holly’s delightful (and crafty!) hen party / tea party on Sunday, I mentioned that I was debating whether to make a matching fascinator and it was demanded that I comply!

So in the spirit of my first fascinator, I got out a bit of scrap plastic, some soft, squishy fleece, silver linen leftover from my dress, and grey netting and went to town…

True blue

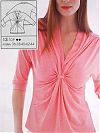
I had a busy weekend of sewing, but it was mostly alterations and some beginning work on James’s linen shirt, and not terribly exciting. I’m finding recently that sewing is a useful bartering tool – in the span of two days last week I managed to trade some alteration work for several technical CAD drawings of our bedroom and lounge renovations, and also for the installation of new tongue & groove wall boards in our captain’s cabin bedroom! But amongst all the DIY work over the long, Bank Holiday weekend, I managed to sneak in a quick knit top I’ve been coveting from the April KnipMode magazine.

I had my eye on this ever since I saw it on the cover of the magazine, but I was recently asked questions about its construction over email, and thinking about it and dissecting the pieces got me REALLY excited to make it and I felt I needed a break (and a boost) from all the technical work on the linen shirt, so I just had to sew it up right away! So thank you, Linda, for inspiring me to make this even sooner!

How to trace a pattern

I often see other sewers complain about tracing patterns from magazines like Burda World of Fashion, Knip Mode, or Patrones, and I thought I’d share my method for tracing patterns. I don’t have a big window, and carbon paper is just way too messy for me, so I’ve gradually come up with this method and it’s quick and easy enough that I trace out all my patterns this way – even the tissue envelope patterns.

Step 1 – Gather your materials

You’ll need a big roll of paper – I buy a big roll of (usually brown) craft paper from Staples, but you can also use rolls from the post office or doctor’s surgery paper or anything else similar. You’ll also need a serrated tracing wheel (found in haberdashery shops), a marker pen, a pair of scissors, and a few weighty objects to keep the layers from slipping around (not shown).

Fascinating stuff

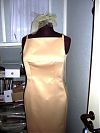
While I’m pretty much in love with every dress from the November Burda WOF cocktail collection, I found myself flipping back to the yellow dress, #105 more than the rest. It’s only 4 pattern pieces, but that 90 degree dart at the waist is just too cool, and I’m very much into sheath dresses this year. I still had some gold duchess satin leftover from the pirate jacket lining, so I lined up the pieces and was able to fit the dress out of the fabric with hardly any scraps to spare (I just love it when that happens!).

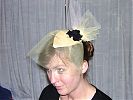
I’m still waiting on the invisible zipper I ordered online to be delivered, but as I was waiting I thought I’d try my hand at making a fascinator to match the dress!