Blog

Vintage silk roses for a wedding bouquet

The main reason for our recent trip to the States was to celebrate my Aunt’s wedding, and since I still had some scraps of my grandmother’s (her mother’s) gown leftover from when I refashioned it into my wedding gown back in 2010, earlier this year I offered to make her something from the silk so that her mother could be a part of the day, too.

I thought perhaps she’d want a clutch bag, or cropped jacket or something, but she requested fabric roses instead. And a lot of them!

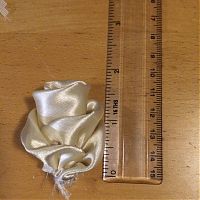
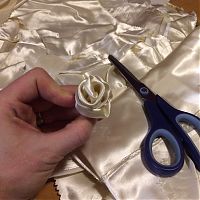
I made my own “pattern” so all of the roses would be the same size, but the pattern was really just two different sizes of pointed ovals. To make each rose, I just folded the oval in half lengthwise and gathered together the cut edge by hand with some running stitches. I rolled up the larger one, tacked it together at the base, then wrapped the smaller around the outside of it, and tacked that together by hand, too.

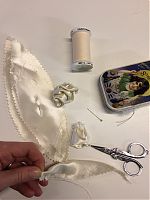
It took a few minutes to make each rose, so I made myself a little kit and tried to do one or two each lunchtime at the office (after I’d finished any messy eating!!).

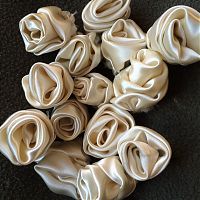
And before too long, I had a whole herd of roses to post off to DC!

Then her florist used floral tape and wire to create “stems” on each and worked them into the bridal bouquet, the flower girls’ crowns, and the buttonholes for all of the men on our side of the family, including my granddad. Apparently as my Aunt pinned his buttonhole onto his label, she told him that the roses were made from Granny’s gown, and he was so touched he started crying!

Minimum Viable Dress (and speed sewing tips!)

In the tech industry, there’s a term “Minimum Viable Product”, which means the absolute minimum you can do to get code out the door. It’s not your best work, but it works.

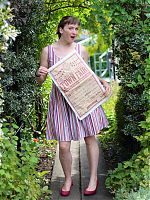
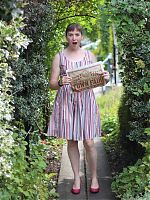
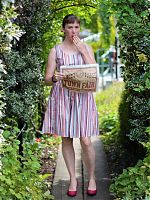
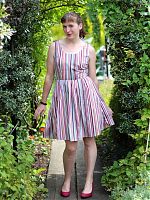
Like half of London, we had tickets to see Secret Cinema’s performance and screening of the first Back to the Future film, where they recreated the entire 1955 town of Hill Valley, California, complete with about 20 business, the clock tower, full fun fair, a cast of hundreds of actors, you name it. We were also all asked to assume an identity (I was “Tiffany Hyslop, developer!”) and dress in 1955 styles. Now, I’ve only got one 1950s dress pattern (which I made into that Porsche dress a few years back) but it’s too big in the bodice now and would require too much work.

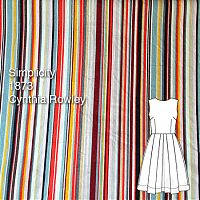
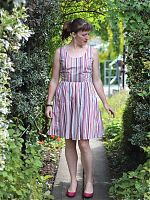
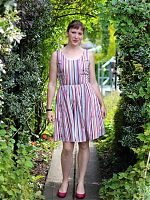
So instead, I picked a modern dress with a 1950s feel – the Simplicity Cynthia Rowley pattern (1873) which I had already made in fuchsia and really liked the fit of.

The pink version was the wrong colour for the 1950s and definitely too short, so I bought some striped cotton poplin from Minerva that had the right vibe, and figured it’d be close enough.

My evening in a 19th century Parisian Salon

Last week I had the extreme pleasure of attending The Salon Project at the Barbican, an event we booked tickets for months in advance and one I’d been so excited for that I was jumping up and down all day in anticipation!

Why, you ask? Because it was essentially playing dressup in amazing costumes and attending a modern equivalent of the salons that the Enlightenment made famous.

Or in in the official blurb, it’s explained as:

The Salon Project Revisited recreates the exclusive meetings at the heart of what was French society’s golden age – an era of change, excess and inquiry. Your evening begins with a transformation into full period costume by a coterie of dressers and make-up artists, before you emerge into a mirrored impression of a 19th-century Parisian salon. As you mingle with guests, pioneers in their fields will provoke discussion, speaking on subjects at the vanguard of 21st-century thought on science, politics, technology and the arts. Revel in the Salon’s splendour, contrast it with the present and imagine what the future will hold in this beautifully crafted night of fashion and conversation.

You can also view a a great, short video of the performance experience here to get a better idea of how it happened.

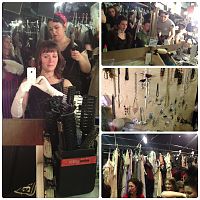
To start with, each of us sent our measurements to the team about a month ago – and it was rather more than just Bust, Waist, and Hips! But it was all worthwhile, because when we arrived, a costume selected just for us was waiting on a hanger with our name on it, along with shoes, gloves, jewellery, hairpiece – the works!

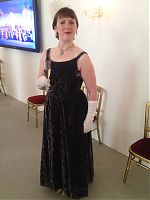
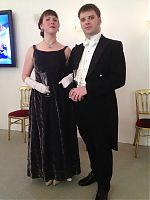
We each had our our dresser to help us get the dresses on, as many of them involved corsets which tied or hooked at the back, and elaborate draped pieces. I squealed with delight to see a sleeveless, corseted, dark grey velvet, floor length gown had been chosen for me! How did they know!? My dresser also found me better fitting shoes when my first pair were too small, and I tried on no less than four pairs of gloves before they found ones they deemed acceptable! The dressing team really did have an amazing array to choose from (way more than what was needed each night) so they really hunted to find the best pieces for each person. Then it was time for hair and makeup – the hair lady curled my entire head with tongs before pinning it back and affixing the jewelled feather piece. We ladies got a few minutes to marvel at each other before the gong sounded and we joined the men in the specially-built salon room!

The men were mostly in 3-piece tuxedos, which was more than James wore for our wedding! Doesn’t he look dashing?? He brought his own pocket watch, which was the envy of the other gents!
Londoners – Vintage patterns for a good cause!

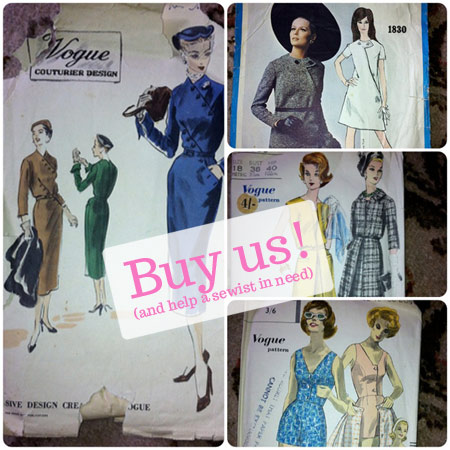
How often do you feel a little guilty when buying yet another pattern or more fabric? Nearly all of us have big stashes and feel a little guilty about buying more, but we’re hardly going to stop, right?? I’ve just been alerted by Tracy (whom I met on the Morley College Pattern Magic course, remember?) that there’s an ageing sewist who desperately needs help, which you can provide by simply buying more patterns!

Sounds win-win, right? I’ll let Tracy explain:

My friend’s aunt had to go into residential care last year as she has dementia. She was a dressmaker all her life and my friend has inherited her fantastic collection of sewing patterns (about 200), along with some fabrics and her handmade dresses. The patterns are mostly from the 1950s and 1960s and include Vogue Couture, Vogue Paris, “ordinary” Vogue, Simplicity, Style, Maudella – mostly unused. It’s mostly women’s but also some children’s and a few men’s patterns. I did post on my blog about them a while back with some photos – which show the quality of the stuff she had.

Every penny, after we pay for the stall, will go towards her residential care – so if anyone fancies some guilt-free adding to their pattern and fabric stash we’d appreciate it. I’d also like to think she would be happy knowing that her collection would go on to be used by a new generation of sewers.

The stall will be at the Vintage Fashion Fair, at Cecil Sharp House, NW1 on the 14 April from 11-5. Afterwards Tracy will post any unsold patterns onto Etsy or eBay so I’ll try and mention the link to that once it’s up.

A Year of Burda Magazine Patterns – Challenge Completed!

I (silently) set myself the challenge to sew one garment from each issue of Burda magazine (aka BurdaStyle) in 2012, and I’m proud to say I completed it! I’m not the sort of person to make New Year’s resolutions, or proclaim lofty goals to everyone who’ll listen – I’m more the sort to quietly commit myself to something, and see if anyone notices what I’m up to before the completion… I do know that Kristy has also been keeping up with the Burda challenge this year, and it’s been fun to see which patterns she’s chosen from the same issues (and on occasion we selected the same pattern!).

There were some roaring successes, a few fails (both my fault and not), and some that I changed my mind on only after months of wear. So I thought it was worthwhile to have a look through all the projects from this year, and my thoughts on each looking back from now…

January


Rating: 9/10
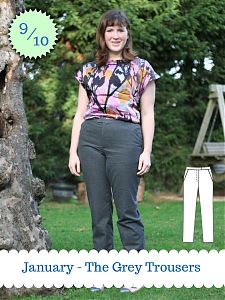
Link to original post: Great Basic – Grey Flannel Trousers

At the time I said: There’s nothing particularly earth-shattering about this design, but I just thought it looked nicely versatile, and something I could wear to business meetings as well as just team with a teeshirt if I fancied it.

My thoughts now: I don’t think these look as nice in the photoshoot as they do in real life. I genuinely love and adore these, and have worn them pretty much nonstop, at least once a week to work, since I made them a year ago. I wouldn’t change a single thing about this pattern, and the silk pocket linings fill me with glee everything I slip my hands inside. I really do need to make some more of these!

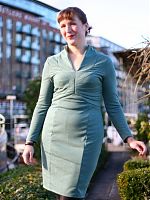
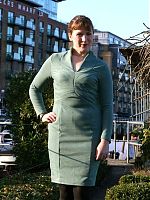
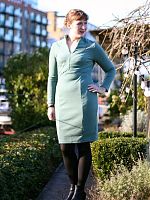
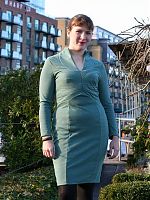
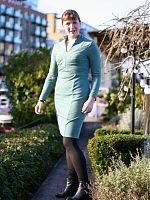
Vintage wiggle dress – photos

Last week I told you all about this dress – the pattern details, how I traced all fourteen of those curved, monster front darts, the things I omitted, the things I changed, and the things I’d want to know if I were you, sewing this for the first time.

So if you want to know all the geeky details (including the UK shop where I bought this lovely sage green marl ponti roma jersey!), then you best read that post, because this one’s going to be light on words and heavy on photos!

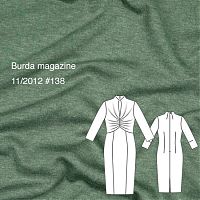
What I will say again is that this is a reprint of an original pattern Burda printed in 1956, but graded up to the normal Burda size range and included in the the November Burda magazine (or you can purchase it as a pdf here if you missed the magazine).

I’m stupidly happy with this dress – it’s the exact right snug, clingy, long sleeved knit sheath dress that I love to wear in winter. For the past two winters, my favourite dress has been the purple September 2010 Burda cover dress and this dress reminds me a lot of it, with a similar fit and feel.

Vintage wiggle dress – pattern notes

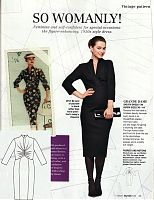
My latest project is this vintage sheath dress from the November Burda magazine (which you can purchase as a pdf here if you missed the magazine)!

It’s a reprint of an original pattern Burda printed in 1956, and one of my favourite running features that Burda magazine have been doing this year. Since the company’s had a very long history, it makes sense that they should look into their archives, dust off a few gems, grade up the sizing to their usual modern range, and translate the instructions!

Contrary to popular belief, this particular one is not a maternity dress, despite the fact that the model clearly looks like she’s “showing”. I can assure you that I do not look pregnant in it one bit, so let’s move on with the catty remarks…

In any case, I finished this one on Sunday night, but considering that it gets dark at 4pm here now, I won’t be able to do a photoshoot until this weekend, meaning you won’t see it on me until next week. By which time I’ll have probably forgotten all the construction details, boo!

So by way of a reminder, I thought I’d type up my thoughts now, then you’ll see the finished design next week. So the “Tell”, then the “Show”!

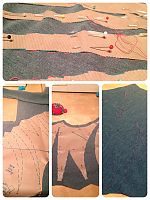
1. The bodice has seven monster, curved darts, all of which needed to be accurately marked onto the fabric. If you have carbon paper, I suggest you make good use of it, but for me, I remove the inside of the darts with scissors, then thread trace each dart with silk basting thread so I can see it on both sides. Then repeat for the other bodice piece. This took a few evenings, but it was important to get them right, as it’s the focus of the entire dress!

A vintage painter's smock

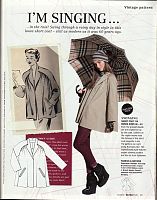
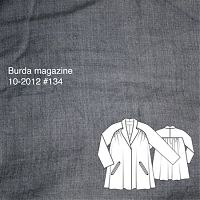
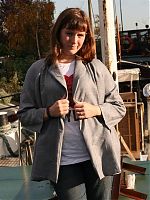
I’m pretty sure this isn’t supposed to be a painter’s smock, but that’s certainly what this feels like to me! In the October edition of BurdaStyle magazine Burda call it a “retro short coat” – a reprint of a vintage pattern that originally appeared in 1952. From the magazine and original sketch, it reminded me loads of a coat Bel wore to the country house party in the first season of The Hour, so I was keen to make it to inject some vintage styling into my usual modern wardrobe.

(It’s available to download from Burda’s English site if you like it, or just fancy reading the instruction pdf)

I made it here in some silver-grey linen gifted to me by Veronica when I was in Paris. It’s nice fabric, but I think the colour isn’t helping the smock comparisons! Maybe it needs something brighter…

Burda’s patterns are very nearly always well-made, but this one in particular is impeccable drafted (well, except for the curved collar), with tons of inset corners that joined up perfectly. It’s one of those patterns that’s a joy to sew, when everything matches up and just comes together like a little puzzle – match up corners and notches here, a bit of gathering there, pieces join to be the Centre Back in unexpected ways – that sort of thing! If I wanted to be picky, there’s some generous gathering across the back, but there wasn’t quite enough gathering on the front seams for my liking. Personally, I’d rather the gathering be concentrated in a smaller area than have it be wide and hardly any gathers.
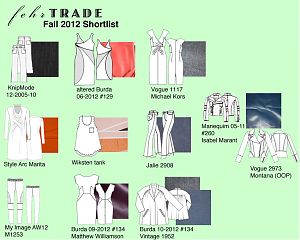
Fall/Winter 2012 Sewing Shortlist

A lot of sewers like to “Sew with a Plan” (SWAP), but I prefer to call this a “Shortlist” rather than a “Plan”, so I’m free to still change my mind and add/remove items as I go along! My main goal here isn’t so much to create a capsule wardrobe that can be worn together, but more to use up fabrics and/or that have been in my stash for a while that I’d really like to just wear.

(Click to enbiggen!)

From the top down, in no particular order:

  • KnipMode 12-2005 #10 – I’ve got some non-stretch denim aging in my stash from a few years ago, and I love KnipMode’s style lines for these. My wardrobe is in desperate need of more jeans, hence why there are two pairs in this Shortlist!
  • Altered Burda 06-2012 #129 – Now that my stretch satin from Gorgeous Fabrics is in hand, I can finally make the final version of this dress after completing the drafting and muslins back in July.

The grey vintage midi skirt

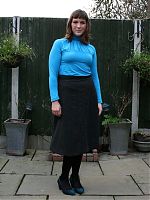
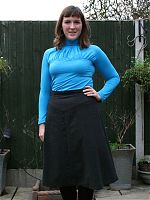
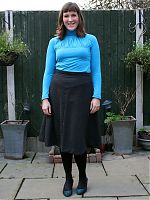
Remember my my pinup sheath dress? Well, I made good use of the remaining 2 meters of so of the ex-designer charcoal grey flannel and made a midi skirt with it!

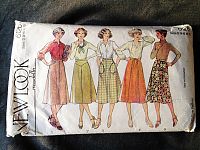
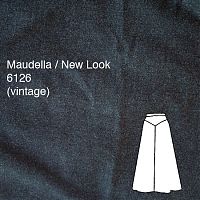
I used this vintage New Look/Maudella midi skirt pattern I bought in Sheffield not long ago:

I made View 2 (seen in my attempted tech drawing above), and the pattern pieces for it and View 1 were already cut to size 18 (my size, judging by the pattern, eep!), which made it easy to just lay on the fabric and cut. There are only three pattern pieces (skirt panel, yoke, and waistband), so it was a really quick skirt to construct, though the hem sat ready to be handsewn for a week or two before I had time to do it!

At first I was concerned that the front and back pieces were exactly the same, but I haven’t noticed any problems in the fit while wearing it. I think this might be down to my pancake butt, but someone with a more pronounced derriere might have issues.