Believe it or not, I’ve still got a backlog of finished projects from the holidays to tell you all about, so I’m going to attempt to get them all up before the end of January (because nobody likes hearing about Christmas presents in February!). First up is my Christmas holiday project for this year – a set I’ve had in mind since I quit my office job last Fall and went full-time working on the sewing business. I mostly work from home, but I also like to get a change of scenery once or twice a week and work elsewhere. I’ve actually found that our favourite whisky bar is a brilliant choice during the day – great atmosphere, lovely staff who know me (so therefore don’t rush me along and don’t mind if I just drink water for hours), comfortable seats, wifi, and music that’s easy to zone out. And it’s an easy 30min cycle along mostly segregated cycle paths, too. Plus I get to reward myself with a cocktail at the end of the day, too!
But I quickly realised that my options for lugging my new laptop around were definitely less-than-chic, and I needed something that looked a bit nicer without screaming “I’m a laptop bag!”. The case off my old laptop (bought in 2010 and therefore an ancient 6 years old!) was way too big for my slimmer new model even though they’re the same screen size, so I first thought about making a cushioned, zippered case for it, and the idea spawned into a bag to put the laptop into (and also hold my normal purse stuff), and something to contain the charging cables and USB sticks, too.
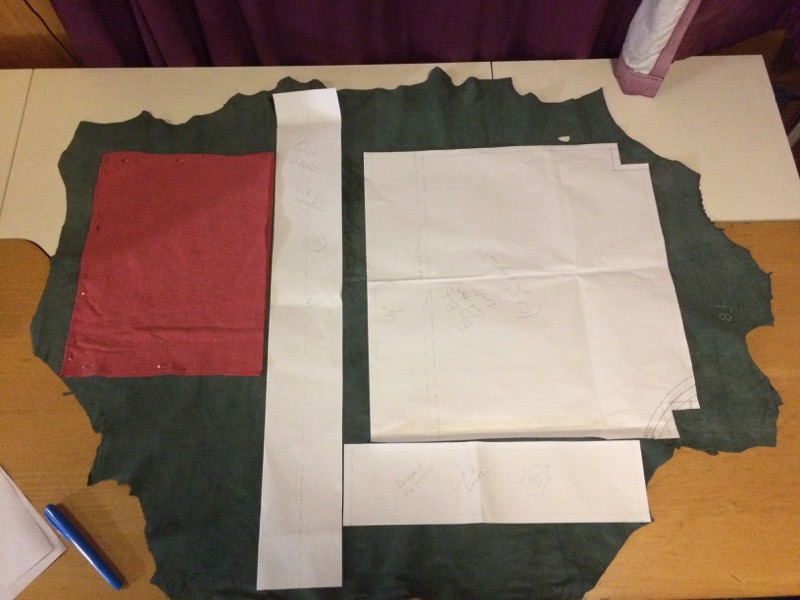
I remembered that I had some gorgeous green pearlised leather that I’d bought in 2010 at Global Leathers in NYC when we were on our honeymoon – I’d bought two skins thinking I’d make myself a handbag (back when I was making HotPatterns Nairobi bags as my everyday bag). But I mostly use my orange satchel these days, and as it turned out, I had just enough leather to squeeze in all the pieces for the bags – with the laptop case designed to tightly hold the laptop, the tote to neatly hold the laptop case on its side inside, and the whole thing to still fit inside the pannier bags on my bike (for those days I cycle, but the tote also works for walking to local remote working spots, like our local arts centre).
Since it’s been quite a while since I last sewed leather, I thought it prudent to start small – so I first tackled a simple lined pouch to hold the charger & mouse or other bits. This is just a basic, lined, zippered pouch, but I used one of the posh silver zippers from Hickey’s in Dublin, and I lined it with an old sushi-themed quilting cotton from my scraps drawer. And because it still looked a bit plain, I added a little matching tassel to the zipper.
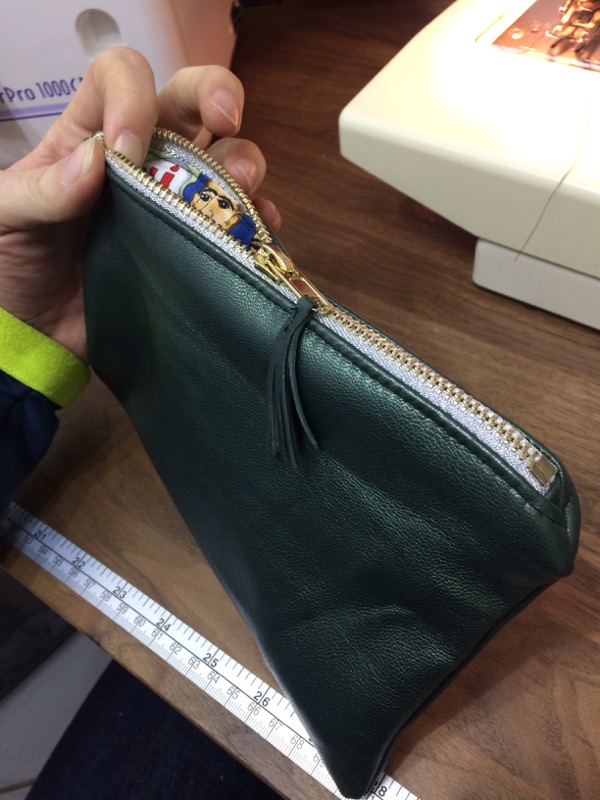

The charger and cable fits nicely inside, with room to spare for other bits I may need to bring along, but without the cable getting tangled up everywhere!
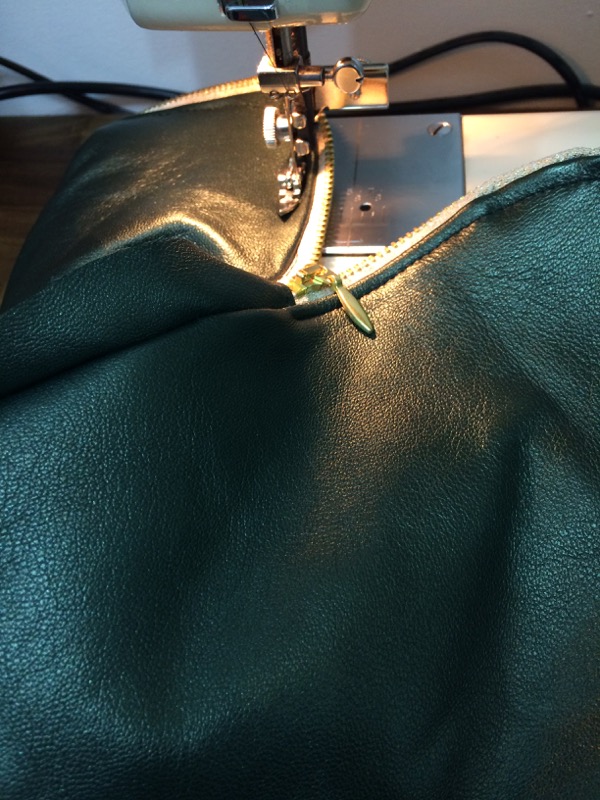
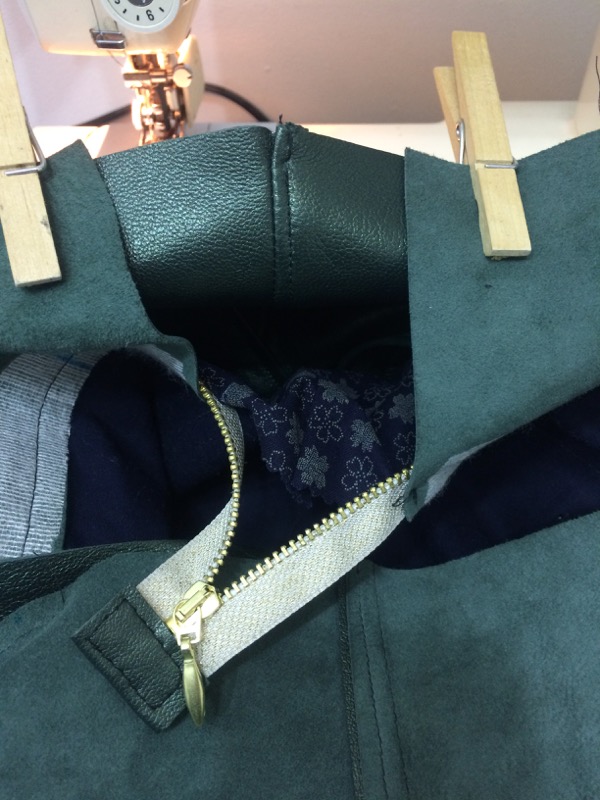
Next up – the laptop case itself! I wanted to provide a little bit of cushioning besides the leather so I lined it with sweatshirting from my scraps drawer, which I’d bought in Buenos Aires to make my mom a Kimono Sweat top (and I’m not entirely sure I ever blogged about it?). I started to get a bit worried that the sweatshirting might be too bulky at the zipper, though, so I used a strip of Liberty lawn (leftover from my DKNY shirt) along the top edge to make the zipper seaming a bit less chunky. And speaking of the zipper – I had only bought short posh ones in Dublin, so I had to get into town to MacCulloch and Wallis to get longer ones for the laptop case and tote, and they had some beaaaaaauuuutiful metallic ones in stock! I’m not even going to think about how much I paid for these two zippers (it was probably as much as the two leather skins), but I really like the extra bling they add to the finished pieces.
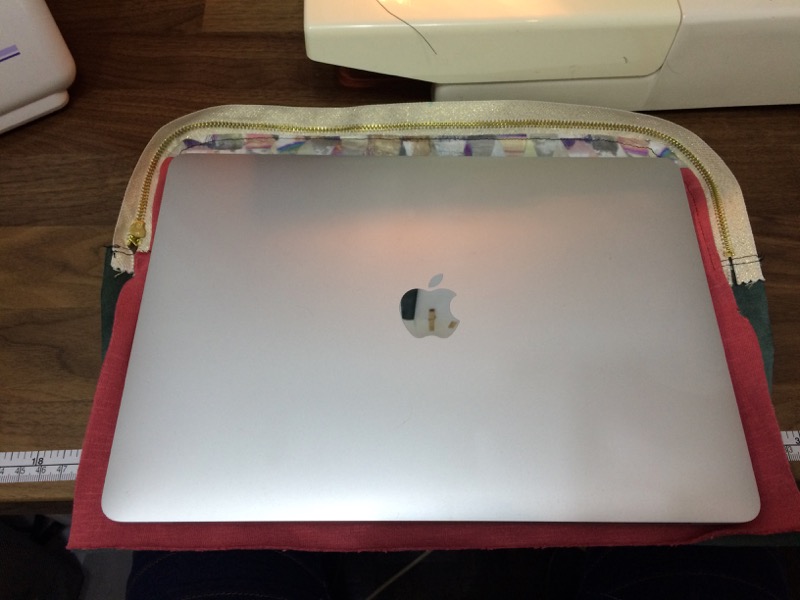
I must say – even with basting the lining to the zipper first, getting the zipper sewn onto the leather around that curve without using any pins (or ability to unpick anything) was really tough – I’m not that pleased with the finished zipper insertion, to be honest, but there’s not much to be done about it and at least the laptop fits in snugly. With leather you get one try and one try only, and this involved several layers and getting everything precisely aligned along two different curves. I strive for beautiful and functional, but if I have to choose just one, I’ll take functional every time.
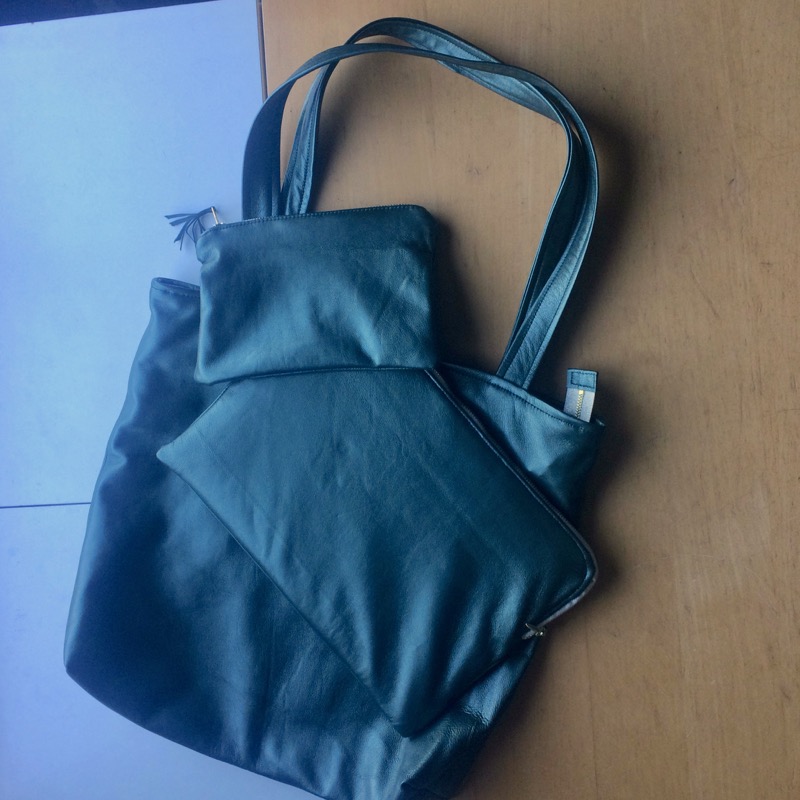
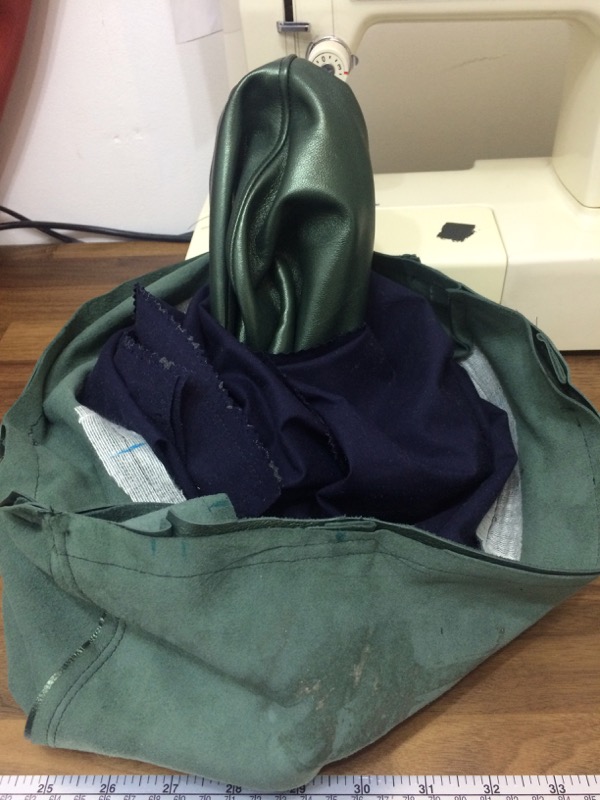
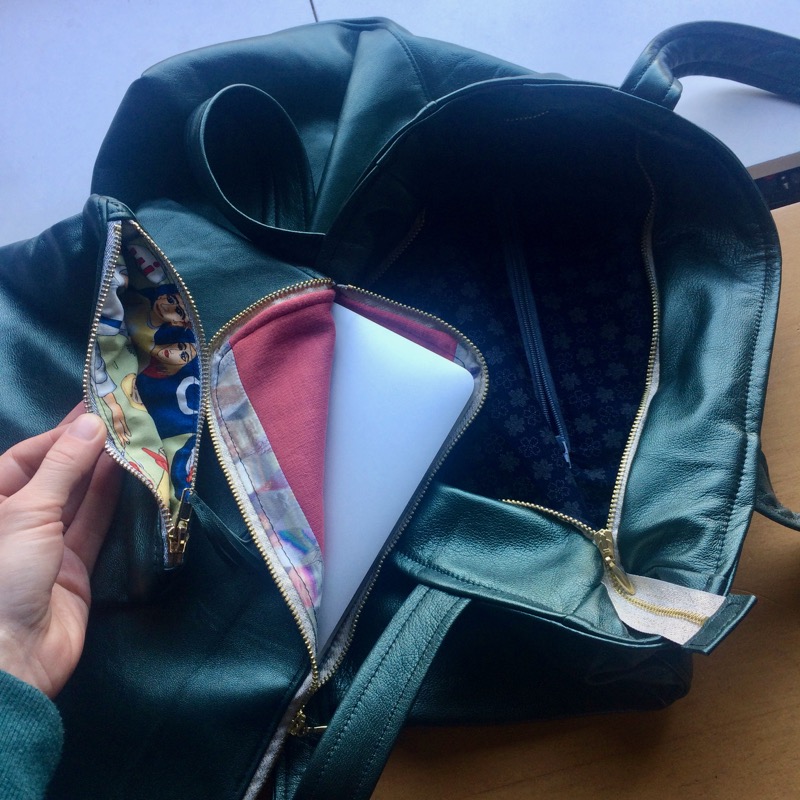
With the first two bags out of the way, my final challenge was to sew a self-drafted leather tote to carry the laptop, charging cable case, and all my usual purse bits in. As I mentioned before, I based the drafted size around the need to fit my laptop on its side but still fit it inside my cycling panniers. I think the finished tote size is just about right – it’s big but not quite so big it feels “oversized”. Plus, it’d be a kick-ass carry-on bag if I ever need to travel for work again!
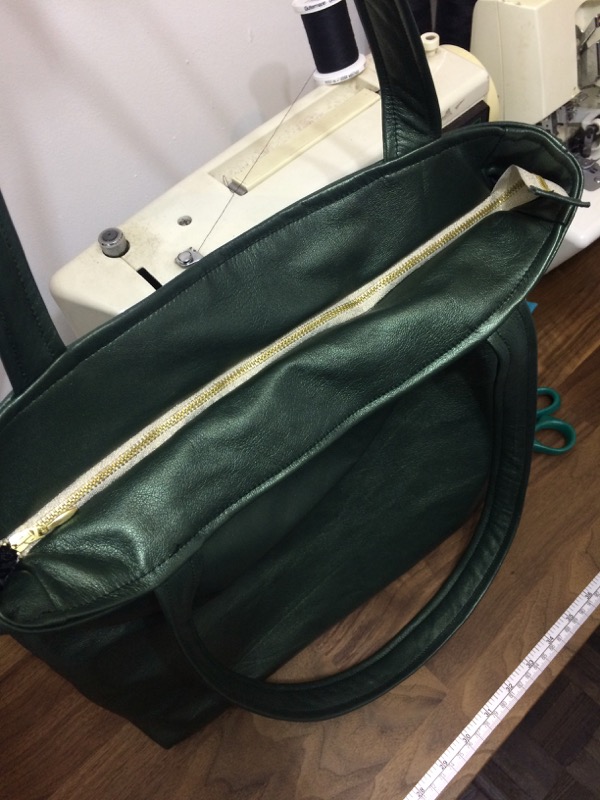
One main requirement I had, though, was a secure top closure. I’ve made a million open-top or snap-top bags, but I really wanted this one to have a secure zipper top to it. Strangely, I couldn’t find any tutorials for one online (if you know of any, please comment!), but I did find some instructions in my “Bag For All Reasons” book (meant for a diaper/nappy bag, but applicable to other designs).

I must’ve read these through ten times but to be honest, they were really lacking in photos and details in key construction points. There was certainly room on the pages – there were lots of photos of the remedial steps, like making zipper tabs, but no photos of how the ends of the bag/zipper around the gusset should look or how to achieve it! Eventually I just decided to go for it, and I ended up with a big gap at the ends I had to fudge with some spare leather.
Lisa eventually got back to me a few weeks later to ask if I figured it out, but by that point I’d already “made it work” but I really would like to know what was actually intended to happen someday… I think my fudged end result is fine though, and I really only have a few extra seams as a result.
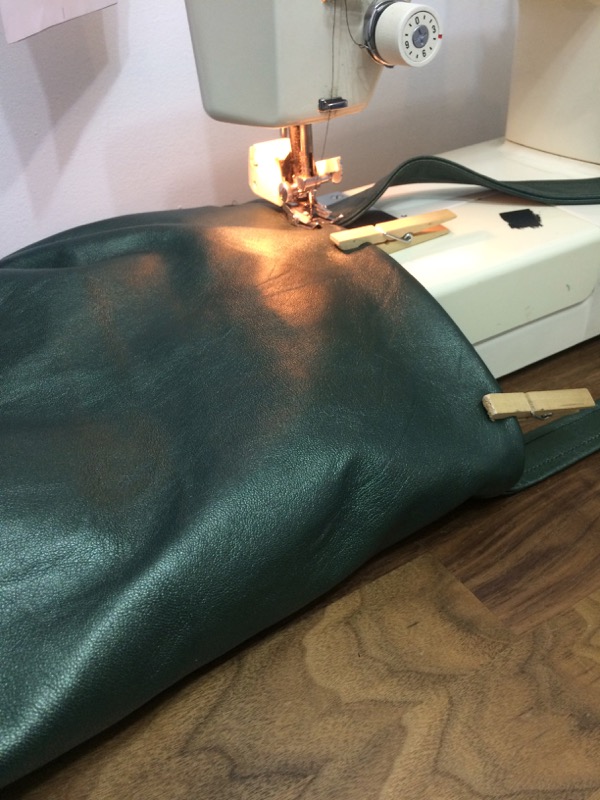
Since the main body panels are all one piece, the bag looks quite plain. I always think leather looks at its best with topstitching, so I concentrated my efforts to the straps, around the zipper, and the side and gusset seams to strengthen and keep those edges crisp in the absense of pressing.
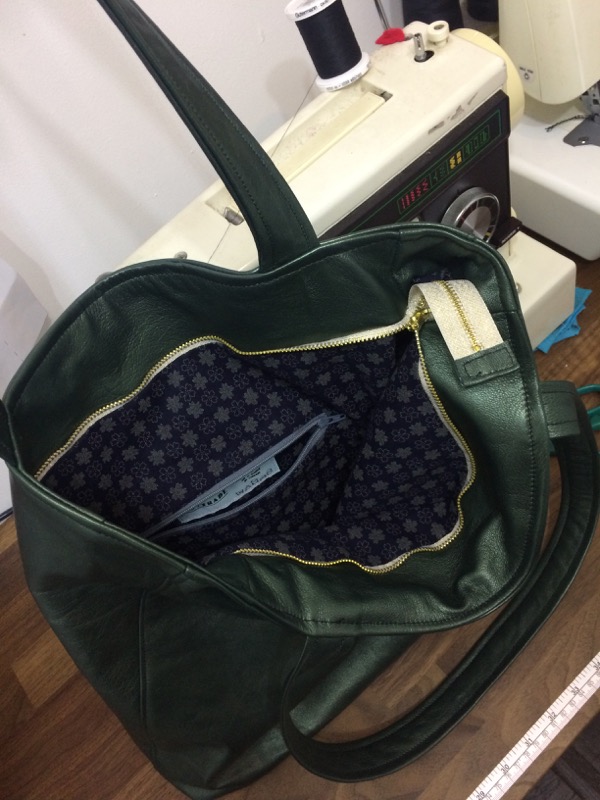
Since it also has to serve as my purse, I included some zippered and patch pockets in the lining, as well as a key leash, as I’ve learned in the past that the bigger the bag, the longer it takes to fish my keys out when I’d really rather just be at home. The fear of dropping them in the river has diminished, but it’s also another factor in giving myself a leash!

Now I’m ready to work remotely in style! I also really like that this is a truly global set, with parts coming from NYC, Dublin, London, Buenos Aires, and Toyko (the tote lining, which was leftover from my Almada robe).