You’ve seen my version of this fantastic cowl top, now’s your chance to make your own and show me yours!
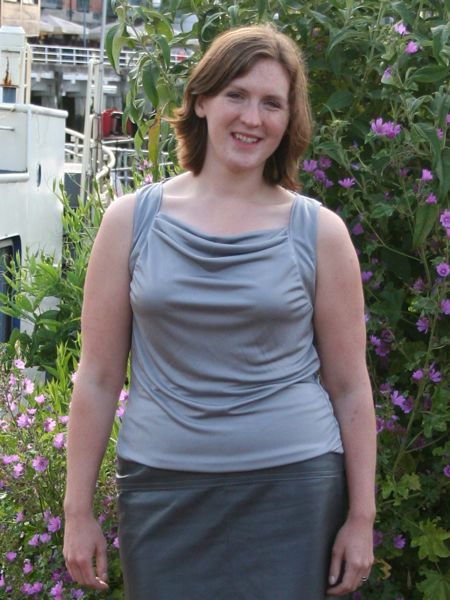
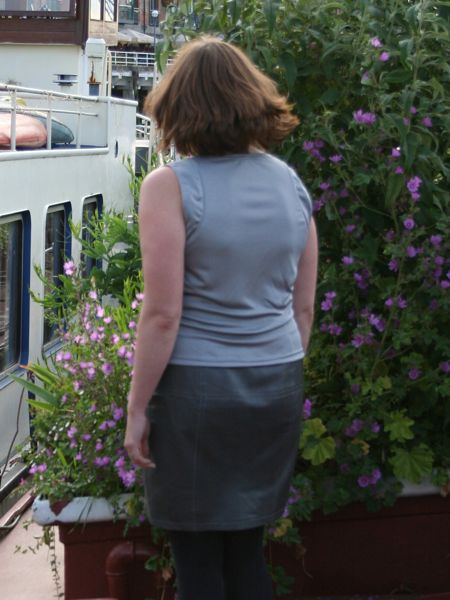
As you’ll recall, the above is made using Lekala 4020, but I’ve created sleeve bands on the back to echo the ones on the front, so our first step is to alter the pattern for this.
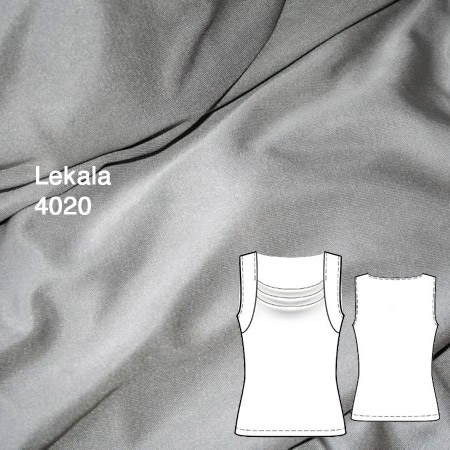
Here’s the (unaltered) tech drawing:
Lekala give full pattern pieces rather than placing some patterns on the fold, so the first thing I like to do is fold the front and the back in half. If you’re altering the back like me, then cut the back piece in half along this foldline (at the CB).
To echo the sleeve bands/yokes on the back, first lay the front sleeve band/yoke piece onto the back, and mark the corresponding widths at the back shoulder and the back side seam, so the two bands will align nicely when sewn together. Then, using the front yoke piece as a guide, draw a nice curve to join the two points, trying to keep the width of the yoke even. Lastly, draw a double notch somewhere in the lower half across the line, so you’ve got the notches on both the back piece and your new back band piece. Then cut along the line and treat as two pieces.
You’ll end up with something like this:
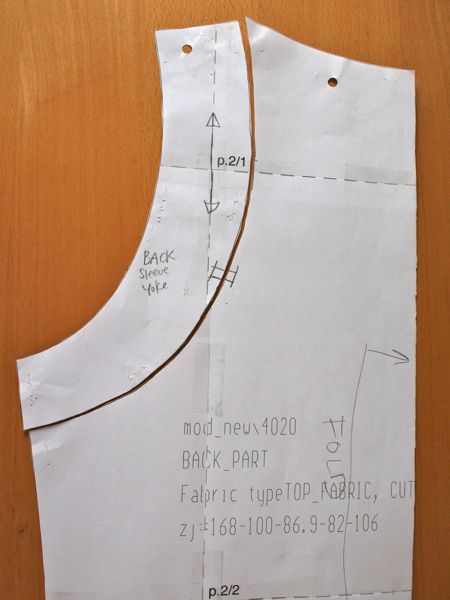
(Note that Lekala pattern generally do not come with seam allowances unless you specifically request them to in your custom order. I prefer my patterns without seam allowances included, but if you do, remember to add seam allowances onto the curve you’ve just cut!)
Cut out four front bands and four back bands, and fuse a lightweight knit interfacing to two of each of these.
I’ve found that this pattern is fairly straightforward to construct, but with all the curves it can really tax your overlocking/serger skillz so it’s extra important to baste before overlocking/serging at each step! You really don’t want to be unpicking overlocking stitches if you don’t have to…
My order of construction:
- Join the shoulder seams of the band pieces, matching up an interfaced back with an interfaced front, and so on.
- With right sides together, align an interfaced band with a non-interfaced band. Pin, baste, and then overlock the shorter, curved armscye edge. Repeat for the remaining bands.
- (If you do not want to topstitch your bands, then you should understitch these armscye edge now.)
- Pin, baste, and overlock the front band edge from the shoulder seam to the notch. Clip to both stitching points and flip right sides out. Repeat for the other band.
- Pin, baste, and overlock the back band to the back bodice, treating both band layers as one, and matching double notches.
- Pin and baste the front band to the front bodice for the first few inches from the side seam, treating both band layers as one.
- I found it helpful at this point to try on the garment (either on a dummy or yourself), pinning the side seams in place, and pleating the edges of the front neckline to the yokes in a way that you’re comfortable. The top edge of the neckline should meet at the notches of the front bands. For me, this meant having the pleats higher up the neckline, and with a wider seam allowance so the cowl doesn’t droop as low. One you’ve got the pleats pinned the way you like them, baste these on their own. The top edge of the front should be folded inside about an inch and left with a raw edge so it doesn’t show through.
- Pin and baste the remainder of the front band to the front bodice. (You may want to try this on again here!)
- Overlock the front band to the front bodice.
- Overlock the side seams, taking care to match the band seams.
- Turn under the hem allowance and coverstitch (or twin-needle) in place.
- Optionally – topstitch the yokes with Gutermann Upholstery thread in the colour of your choice.
While my brain was too frazzled to work out the above steps a few weekends ago, but I still wanted to sew, I pulled out a pair on pants (underwear) to work on. I had done the seams on a bunch of pairs a few weeks ago, so this purple silk jersey pair only needed the elastic added onto the legs and waist.
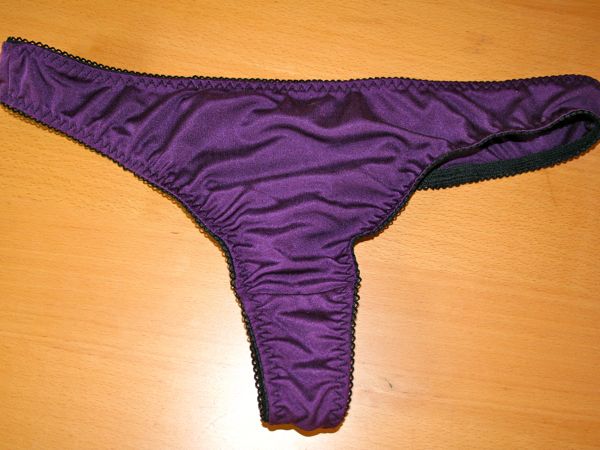
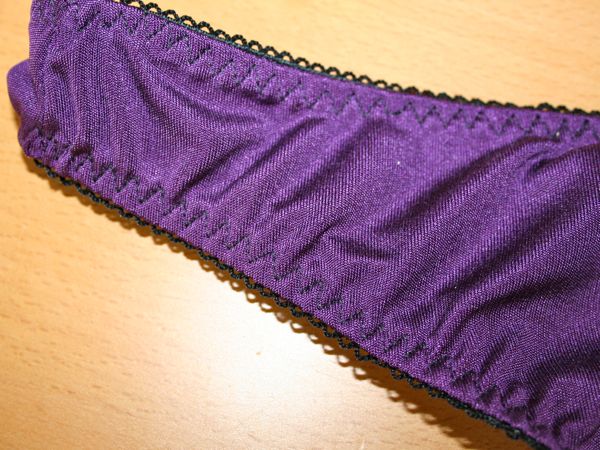
These are made from scraps leftover from Pip’s bridesmaid gown (how’s that for symmetry considering the silk silk jersey is leftover from Gez’s bridesmaid gown??), with a bamboo jersey gusset/lining and some nice black picot edge plush elastic that was in my stash.
Lekala giveaway
After seeing my version of the cowl top last week, the owner of Lekala Patterns very kindly donated five passwords, which I’d like to offer as a giveaway. Each password is loaded with two credits, so you’ll get to try two patterns in your custom measurements (or one if you’d prefer seam allowances included, as they “cost” double).
If you’d like a chance to win one of these passwords, please reply below with the number of your favourite Lekala pattern (no fair if you ALL choose the new Kate Middleton-a-like dress! 😉 ). I’ll pick the winners this Sunday 26th June.
EDIT: The giveaway is now closed. Winners are being contacted and the results will be posted later today. Thanks for entering!