Blog

Tutorial: Lightspeed Active Leggings (for Men!)

One of my favourite things about the block-based approach to the designs in my “Sew Your Own Activewear” book is that you can use just about any block patterns as your starting point – not just the ones I’ve included in the book.

As I say on page 16, “The included blocks are designed for women in the sizes shown in these size charts, but if you’re not a woman or your body doesn’t match any of the measurements in the size charts, using your own block means that these designs could work for children, men, disabled people, trans people and non-binary folks, those who prefer modest clothing and those whose measurements are beyond the size range here. There really is no limit: if you’ve got a body, you can exercise, and if you can sew, you can make activewear.”

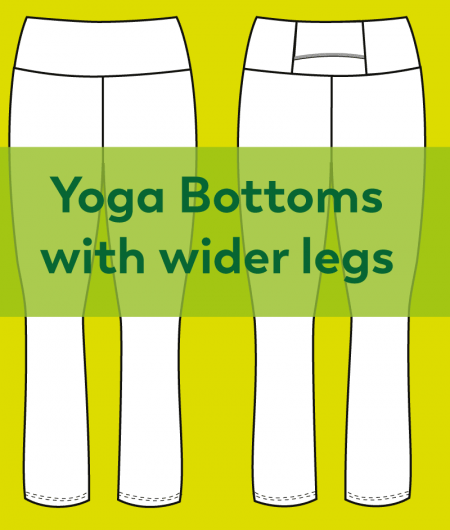
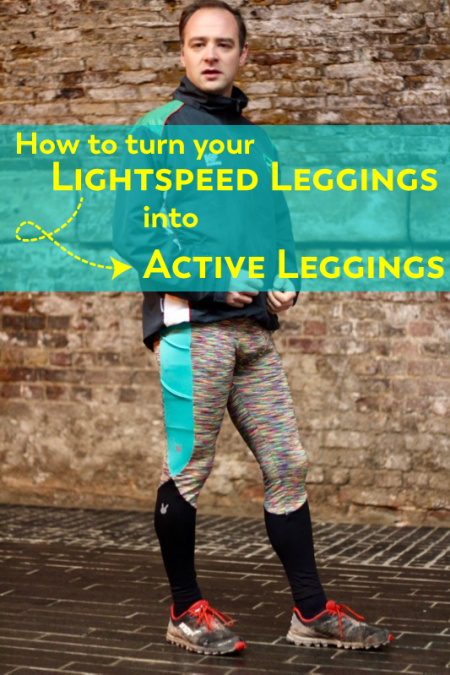
It’s one thing for me to say all of this, but it’s another entirely for me to show you. So today I’m going to show you how to take my men’s leggings pattern, the Lightspeed Leggings, and use them as the starting point for the Active Leggings in my book. (Scroll down for a discount code for the Lightspeed Leggings, too!!)

How to add hand mitts or a turtleneck to the Winter Base Layer

I absolutely love the Winter Base Layer for cold weather exercising – I’ve both run and cycled in mine and I get so many compliments whenever I wear them! But with a few simple steps you can also change both the sleeves and neck to make it even more versatile.

Today I’ll be showing you how you can use the hand mitts from the Surf to Summit Top pattern instead of the included thumb cuffs, and also how to extend the neckline into a turtleneck (aka polo neck) if you’d prefer.

How to widen the Yoga Bottoms’ legs

Current fashions in activewear are pretty much exclusively for a narrow, close-fitting ankle on leggings, but this wasn’t always the case. Just as in the wider fashion world, activewear follows current trends and what goes up must come down and wider legs will surely come back around again! When I started running in the early 2000s, my first few pairs of running trousers were all bootcut, and I know there are people out there who prefer a wider ankle opening on their activewear, too. After all, do we not sew in order to have our clothing exactly the way we want it?

Luckily, altering the Yoga Bottoms in order to have a straight leg or bootcut is really simple. As this design doesn’t change much from the block below the knee, you can actually make this alteration at any stage before cutting the fabric, but if you’d like to do the same to, say, the Active Leggings, you’ll want to widen the lower legs of you block before following the pattern change instructions from the book.

Let’s talk about gussets

Let’s all take a moment to talk about gussets – crotch gussets in particular, and what they can and can’t do, because there is just so much misinformation floating around about them. A gusset is a separate piece of fabric sewn into a seam, most commonly seen on underarms (especially in vintage styles) and on the crotch of trousers.

The purpose of a gusset is to increase the range of motion of the limbs nearby – so in the case of the vintage blouse, its because a dolman sleeve doesn’t really allow the arm to raise naturally due to the shape of the bodice/sleeve piece and the limitations on the non-stretch fabric. So a small gusset is added to the underarm will allow the wearer to raise her arms. The same principle applies to crotch gussets – the purpose of a crotch gusset is to increase the range of motion of the legs.

Sewing Activewear Without a Serger

One of the biggest misconceptions about sewing your own activewear seems to be that you need to have a serger/overlocker to do so. Even people who don’t sew end up asking me about this immediately after they find out what I do, and it’s just not true! You really can make sturdy and functional activewear even if you just have a regular sewing machine, and there’s no better time to get started than right now!

On my stall at the Great British Sewing Bee Live show last September I had a list of about ten different activewear techniques I was ready to demonstrate to visitors. I showed a fair few how to do the basic three elastic edge finishes, but I pretty just spent all my time showing people how easy to is to sew basic activewear seams using a regular sewing machine – over and over again!

Elastic edges three ways

Today I’d like to show you how you can change up the look of your “Sew Your Own Activewear” Vest Top by simply changing the way you finish off the neckline and armhole edges. Elastic edges are super important in activewear as they hold the fabric close to the body, reducing the risk of chafing, but also making it less likely to get caught on things (a real safety risk when climbing!), or exposing yourself accidentally (hello downward dog!), and also to keep contents from falling out of your pockets, too.

These methods are great ones to have in your sewing skillset as you can also use them on the Crop Top (which we’ll be looking at more next week!) as well as my XYT Workout Top pattern. All three of these methods can be done on your basic sewing machine, and once you get the hang of them, you’ll find all sorts of uses!

How To Add Bust Support to the Vest Top

Earlier this week I introduced you to the Vest Top design from my “Sew Your Own Activewear” book, and today I’d like to show you how you can add some bust support to it so that you can wear it without a separate sports bra if you wish. The Crop Top design uses some of the same pieces as the Vest Top but includes two layers of power mesh to add support for low- to medium-impact activities, so we’re going to use portions of both designs to create a Vest Top with support inside but the same appearance outside.

A quick tip for topstitching activewear seams

I’m sure some of you may know this tip already, but if you’re someone who prefers to topstitch down all your seams for your activewear makes, get yourself a roll of Prym Wonder Tape, stat. I’ve known about this stuff before, as I’ve seen other people use it for basting zippers in place, but I hadn’t realised exactly how great it could be for topstitching until I decided to give it a try on a pair of Steeplechase Leggings I’m sewing for Cambridge Half next weekend.

Wonder Tape is essential double-sided, sticky, washaway stabiliser, and it comes in a narrow 6mm (1/4in) tape roll. You stick one side, peel off the backing, stick something to the other, and that’s it. No need to heat up the iron or anything and it comes out in the wash, leaving you with perfect topstitching. When I’d topstitched my seams before, I’d usually use pins (and always my trusty walking foot!), but pins can make things lumpy and you’ve still got to constantly feel for the seam allowance underneath if you’re stitching around curves (like on the Steeplechase’s curved yoke yokes). This stuff just made it easy.

How to add side pockets to your Steeplechase Leggings

I’ve got a little something different for you all today, compliments of fellow reader and runner Elaine Klein, who emailed me to show off a fantastic modification she did to add side pockets to her Steeplechase shorts.

The Steeplechase Leggings pattern includes a hidden back waistband pockets, but, if like Elaine, you too prefer to keep your keys or lip balm on your leg instead, then read on and see how she added these. Thanks so much, Elaine! -melissa

When my running buddy suggested that we celebrate our favorite trail run by wearing watermelon patterned shorts, your patterns helped us realize that kinda silly dream. Our matching melony shorts were quite a hit! Thank you.

More remarkably, as I dialed in the steeplechase pattern to suit me perfectly (having learned from your blogs and community that this is possible and preferable to wearing ill fitting running shorts) I grew confident enough to tinker a little, so I added pockets to my shorts. I tried the pouch pocket, but I prefer side pockets – I usually tuck an ID or gel or tissue or lip balm in these, but they are large enough to hold my smartphone (though not secure enough to do so comfortably for a long run). They’re also a fun decorative accent.

Adjusting the Duathlon Shorts pockets for bigger phones

My Duathlon Shorts pattern has been one of my best selling designs, and for good reasons – it’s easy to sew, has a bunch of length options, and suits a wide variety of activities. It’s also got two pockets integrated into the side panels, great for stashing your stuff. But when I made this pattern back in 2014, the iPhone 4 and 5 were the standard size phone, and phones have gotten so much bigger over the past few years! I’ve had a few requests asking how to enlarge the pockets to suit an iPhone 6, and it’s really easy to do!

I’ve drawn out the changes into the below diagram, but essentially you need to add both width and depth to the pocket for bigger phones.