Blog

How to line the Burda peplum top

Peplums are a major AW12 trend and one that’s well within reach of most home sewists and high street shoppers. There are plenty of patterns out there, but one of the nicest I’ve seen so far is the cover design from the August 2012 Burda magazine, which is also available to purchase as a pdf download here (and you can look at the full instructions and layout diagrams on that site for free).
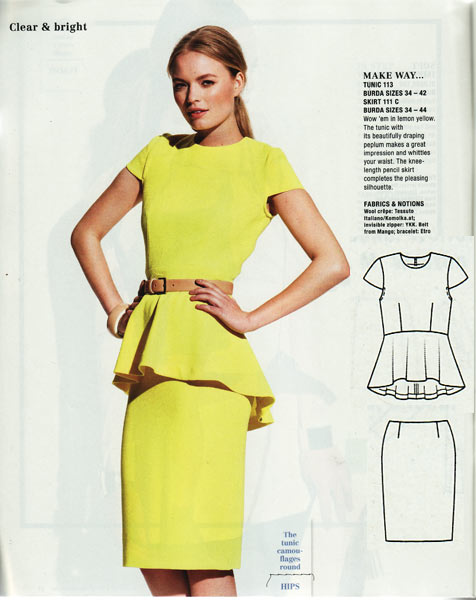
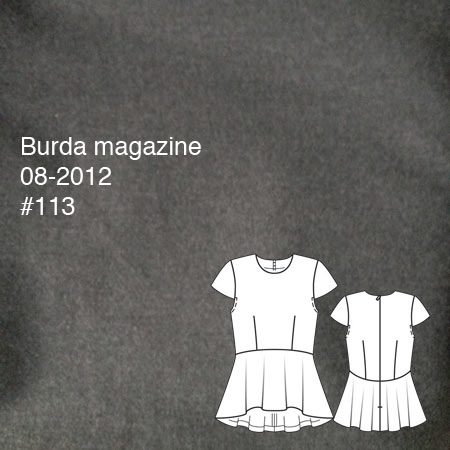
A lot of peplum dresses just feature a ring of excess fabric around the hips, but here, the curved waist seam plus the sloped hemline and bias-cut peplum on this particular pattern really sets it above the rest. I also like that it’s separates, so I can pair my top with a skirt, slim trousers, or leggings and get much more wear from it than just a single dress.

One thing I don’t love about this pattern, though, is that it’s unlined. Or rather, it has lined cap sleeves, a narrow bias edge on the underarms and a neck facing, but nothing further. It’s pretty straightforward to make lining pattern pieces from the shell and facings (see below), but the construction was more challenging to figure out. It is possible to do a nice clean finish almost entirely by machine (you still have to sew the hems by hand), but you have to do a bit of clever reordering of the construction…

Luckily for you, I made notes as I sewed so I can share my clever order of construction with you!

As mentioned above, you’ll need to modify your bodice pattern pieces after you’ve cut out your shell fabric. Place the neck facings on top of the bodice pieces (annoyingly, in this case they must be face-down so the shoulder seams and CB/CF edges line up), trace the neck facings onto your front & back bodice pieces and then cut these off before cutting your lining pieces. Remember to add seam allowances to these new cut edges, too!
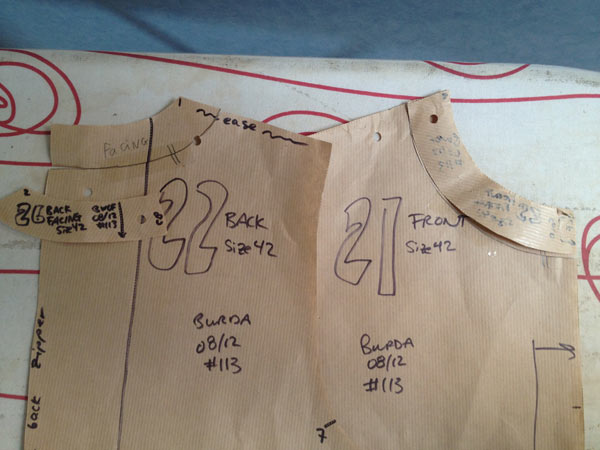
Be sure to interface the facing pieces, then attach them to the lining pieces and treat as one for the rest of the construction.

Instructions for a clean-finish lining!

  1. Sew all darts, attach peplum pieces to bodice on the shell, and sew at shoulders (but keep it open at side seams and centre back!), ie: the follow the first few steps of Burda’s instructions, but stop before the zipper insertion!
  2. Do the same for the lining
  3. Sew the sleeve shell pieces & sleeve lining pieces together at the bottom edge of the sleeve. Understitch, then baste around the other (armscyce) edge
  4. Baste the sleeve onto the shell with right sides together (beware of excess ease!! Don’t skip this basting step!)
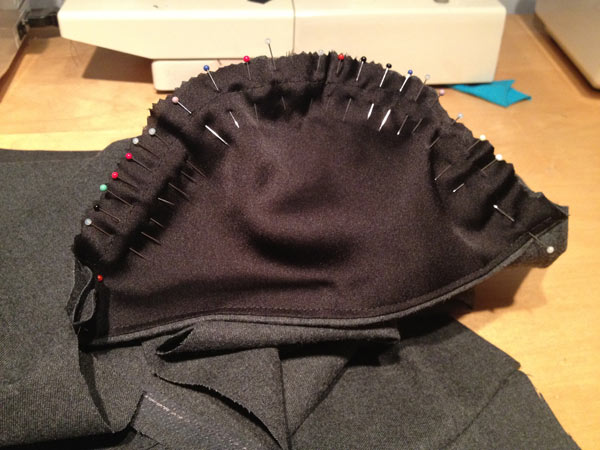
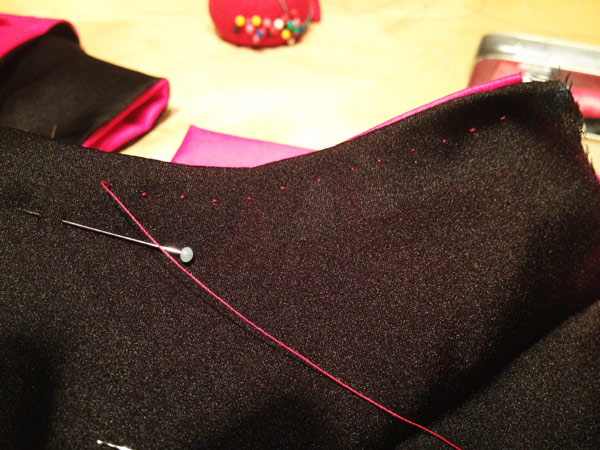
Details matter!

I spent part of last evening working on the fuchsia Cynthia Rowley party dress, and I just love it when I come across a lined bodice without neck or armhole facings, as it’s the best opportunity to do some beautiful prick-stitching!

Contrast prick-stitching is not for the faint of heart, but I enjoy both the process, and the finished result.

Inspiration from all angles

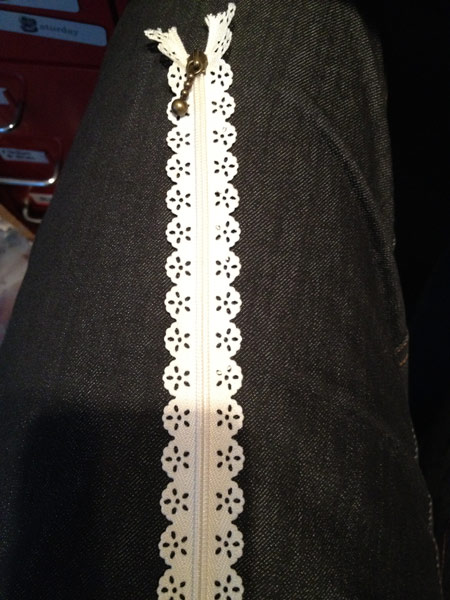
I’ve got lots of bits and pieces on the go right now, and I’m finding that I’m being inspired by lots of little things – not just from the fantastic last few issues of pattern magazines (hello, August Burda!), but also some supplies which have found their way to me, like this amazing laser-cut eyelet zipper from my friends Alex & Liz, bought at the V&A shop!

Mine’s skirt-length and now I totally want to make a pencil skirt with an exposed zipper just so I can show this off! After I got mine, I’ve since seen that they’re available on etsy in a bunch of different colours, too.

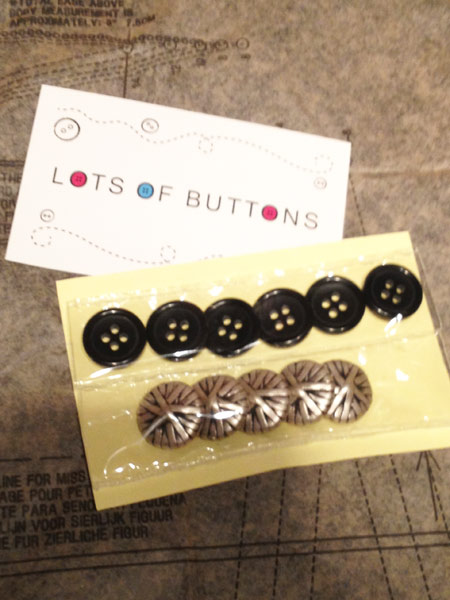
Not long after that, I was approached by the owner of Lots of Buttons asking if I’d like to try their shop for free. My initial reaction was that the prices in dollars surely meant exorbitant shipping to the UK (boo!) BUT as it turns out, all the orders are fulfilled in Hong Kong so the shipping is the same anywhere in the world (great for the Antipodeans, too!).

So I picked out some basic black horn buttons (just like the ones my stash was missing for my black knit trousers the other week), and some gorgeous overlapping metal buttons I thought would go really nicely on a jacket. All in, these would’ve cost me $10 total (with shipping), which is like half the cost I pay to get nice buttons in central London, with a travelcard cost on top of that!

These arrived in 7 days, too, along with a discount code for my next purchase. I also really like that they seal off each button type in its own clear plastic bag, so you can see what’s inside without them all getting jumbled up together. Genius! So I went from being skeptical to totally pleased and very happy to recommend them in the space of about 10 days!

Olympic leggings – sneak peek

How amazing was the Olympic opening ceremony last night? It was all the better because no one in London was expecting it to be any good. Sure, absolutely everyone was watching it, but we all expected it to be utterly awful, and to be the topic of mass moaning for the next several years.

But WOW, even the cynicism of the British was cast aside for Danny Boyle’s spectacle, full of heart, charm, eclecticism, great music (and some terrible music, too), and all the things London and the UK are generally very proud of. (Woo NHS!!)

It also helps that I watched it from our outdoor popup cinema on the moorings, so when the fireworks went off on Tower Bridge and David Beckham’s neon speedboat holding the torch raced by, we were right there. And we saw all that 30 minutes before anyone else in the world, since there was a big delay before that part was on tv!

We’d also witnessed the helicopter flying through Tower Bridge a few weeks back – a bunch of neighbours gathered on one of the barges to cheer on the two helipcopters and make a night of it. At the time, the rumour was that it was for a Bond film, but we had no idea how close that would end up becoming!!

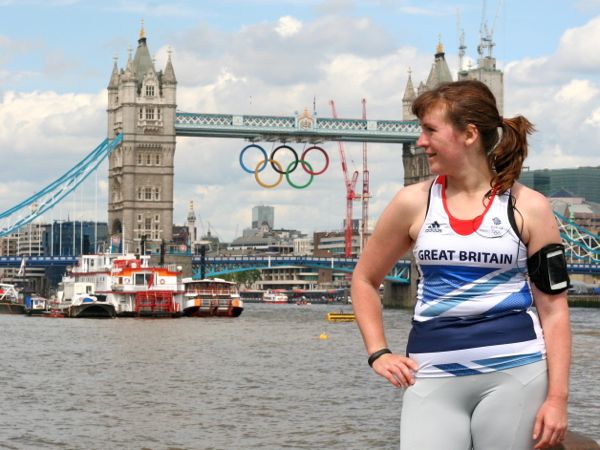
Happily, I also started feeling a bit better this week after I posted the last message, so thank you all very much for your thoughts and good will – you did just the trick! I went out this morning for my first run in 17 days, and did so in my official replica Team GB vest and my new grey Ooh La Leggings.

Sewing through exhaustion

Apologies for sporadic posting, but if you’re following me on Twitter, you’ll already be aware that I’ve had an awful cold/flu for the past 15 days now. F-i-f-t-e-e-n days! It started with a sore throat, then incredibly running nose and lethargy now for the bulk of it, and it’s just not going away. I’m sleeping 12-13 hours a night and still needing naps, and the hospital say it’s definitely viral and there’s nothing to be done but wait it out. I have no idea how long it’s going to last, as I literally feel no improvement now than when I first picked this up. I’m really just giving you these details because like half of London has it right now, so I’m hoping someone will tell me how long I can expect it to hang around (and also, expect all the Olympic visitors to bring it back home, cheers!).

So in the few hours where I’ve been strong enough to sit upright and not actively be sleeping or working, I’ve finished a few bits of sewing, but I’m in no fit state to model them, so for full photoshoots you’ll need to wait a bit longer:

Swirled lines sheath dress – 2nd muslin

Thanks very much for all your feedback on my post regarding the design lines for my upcoming sheath dress – I decided to go with the top design, and save the bottom one for some later colour blocking (maybe in ponte jersey?).

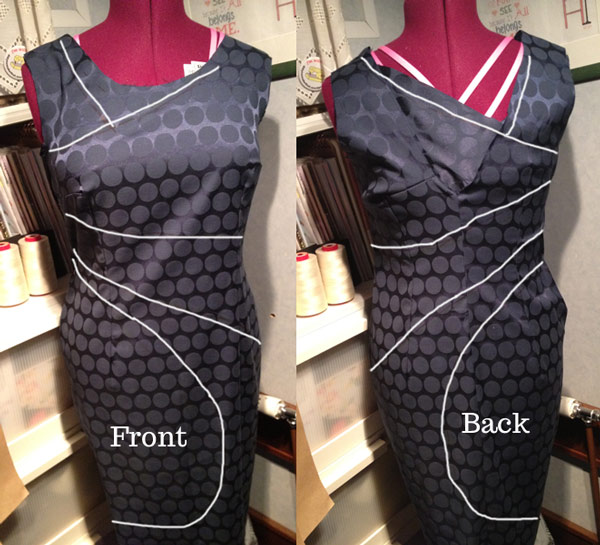
Once that was decided, I sewed up that basic Burda sheath dress (which fit me very well, as expected), then while it was on my dressform I drew rough design lines on to match. After the rough lines were on, I cleaned these up with French curves while the dress was lying flat (these photoshopped ones are just free-handed on top since my black lines on navy blue fabric were hard to see in the photo!)

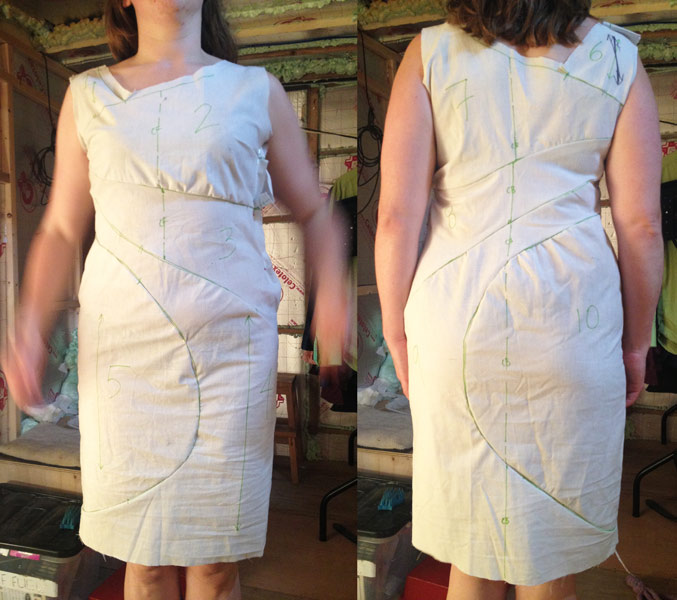
I then cut apart the Burda muslin along my new lines, and cut into the curves a few times to release any bumps. I then transferred these altered pieces onto a second muslin to test that all my new curves matched up well:

Design lines and ideas

I know it’s a cliché to say so, but I’ve been very busy lately! So busy that there was no sewing activity whatsoever last weekend (though I did cut and fit an awful lot of insulation for the new boat bedroom, attended two out-of-town barbecues, and raced a new 10km PB in the weekend available to me!). In two weekends’ time I’ve got a friend’s wedding and ever since we were invited, I knew I wanted to apply a Pattern Magic technique onto a sheath dress for this occasion.

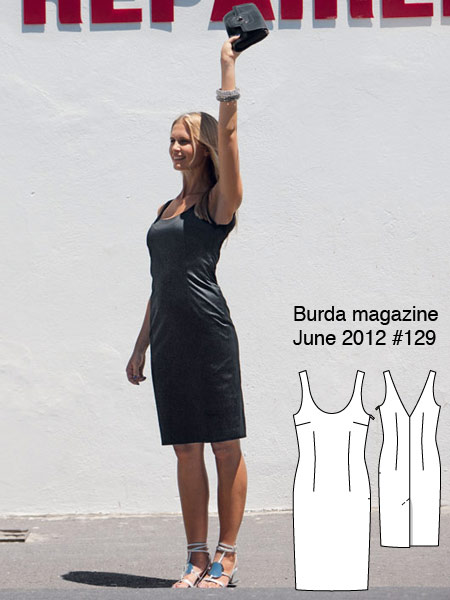
Overall, I was disappointed by the June Burda magazine, but I saw dress #129 and knew it’d be a great starting point since I know Burda’s dresses fit me very reliably (and I’ve already raised the waist by 1 inch to make it perfect).

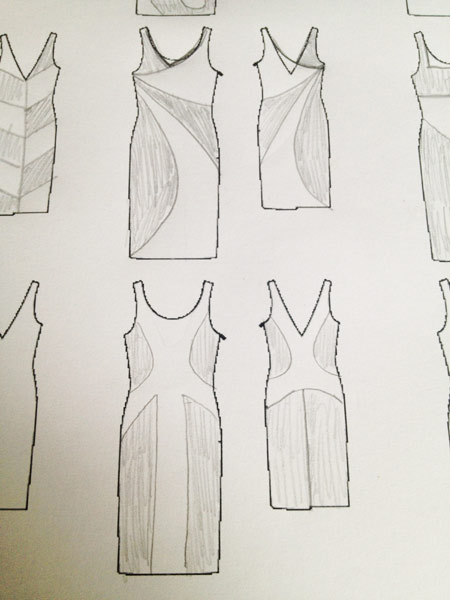
The technique I’m looking to apply here is one I learned on my Pattern Magic 2 course at Morley College, though it’s well documented in the second book, too. Essentially, you make a muslin of a basic block (in my case, I’m using this Burda pattern), draw design lines wherever you like, cut along those lines, and then release any lumps into the curved edges of the new pieces.

So thus far I’ve copied the tech drawing off Burda’s site, raised the neckline a bit, and removed all the darts in Photoshop (since mine will be incorporated into my new design lines anyway), then printed off a bunch of these empty tech drawings onto a sheet of paper.

Apple peel leggings – sneak peek

As promised, I sewed up the “Apple peel” leggings from the new Pattern Magic Stretch Fabrics book last Thursday night, but before I could get a proper photoshoot, we took a few impromptu photos of them after I wore them to work on Friday.

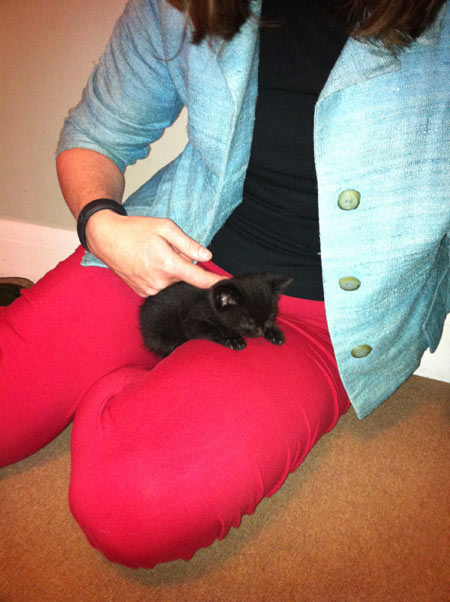
I thought you all might like a sneak peek of my leggings, sewn up in cherry red jersey:

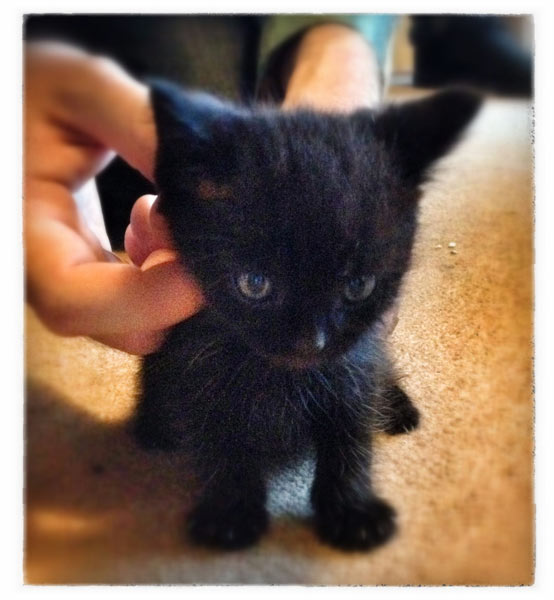
Oh? What’s that you say? You want a better look at the unbelievably cute, tiny kitty that fell asleep on my lap?!? Ok then…

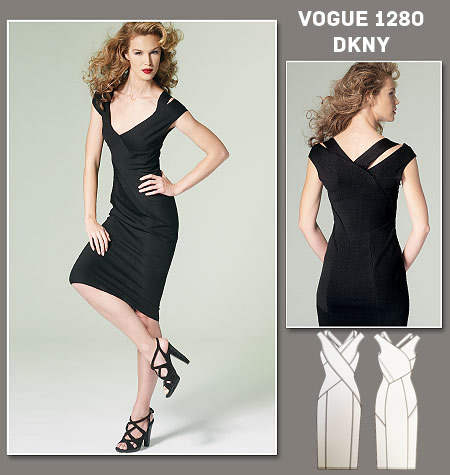
Hooray for the Vogue 1280 DKNY sheath dress pattern!

Even though I live in London, I grew up in America, and my family all still live there. A week or two ago, my mom saw there was a pattern sale coming up and very kindly offered to buy me a few if I wanted! There were two Vogue patterns on my Wish List – one was a Michael Kors knit dress that’s now OOP (and her Hancock’s didn’t still have it), but she was able to buy me one of the new DKNY Vogue patterns I was after, plus ship it to me, all for less than half the price we pay for Vogues in the UK on sale!

(Ever wonder what sad souls pay the full list price printed on envelope patterns? Yeah, that’s us. Little wonder I mostly sew with pattern magazines!)

So Vogue 1280 arrived in the post yesterday, and I immediately set about devouring the instructions and construction details of this.

It’s a really interesting, asymmetrical knit sheath dress with a characteristic (for DKNY) lack of side seams, so there’s a lot going on here!

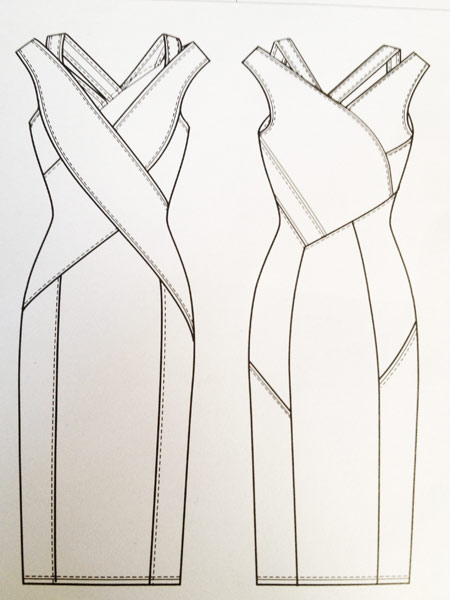
Here’s a better shot of the tech drawing from the envelope. On Vogue’s site, the tech drawing is really too small to see that nearly all the seams are lapped, with a raw-edged piece of trim inserted, and then double-stitched (hello, coverstitch!) on top.

Diamond Jubilee Bunting Prep

Apologies for the radio silence – the past week has been dominated by our preparing to leave the boatyard, and then actually sailing our boat back home again. Everything went incredibly well, but I’m still sorting through piles of stuff as we merge our temporary living quarters back into home again, plus I ran a 10k race (new PB of 50:27, wooo!) the morning after*, plus switching over to my summer wardrobe finally, and my sewing room is in a shambles as a result.

Amongst all this, we’ve got a massive four day weekend coming up this weekend for Liz’s Diamond Jubilee, and because we’re moored on the Flotilla route, we have to look extra pretty in exchange for getting an official flotilla pennant.

Boat prettiness can mean only one thing – bunting!

So while we were sat in a muddy boatyard in Kent on Friday, I took some rare downtime to cut up enough bunting flags to occupy 22 metres of ribbon – long enough to stretch from our front mast to our garden decks on both sides.

This meant cutting up 116 flags! It actually made a depressingly small dent in my scrap stash…