Once a year or so, I go all-in on lingerie sewing for a bit. More often than not, it tends to be when it’s cold out and I’m sick of sewing sweaters and warm layers. Many times it happens in January, but it seems my sewing proclivities are earlier than usual this year, because I’ve just sewn an absolute lingerie explosion. This is just the first of four posts!
It doesn’t hurt that none of my nice, pre-Long Covid lingerie really fits anymore, and I’m sick of wallowing in Axis Tanks and bog standard comfy underwear day in and day out… So I thought I’d celebrate losing half of the weight I’d gained during Long Covid by sewing up a few nice sets for myself.
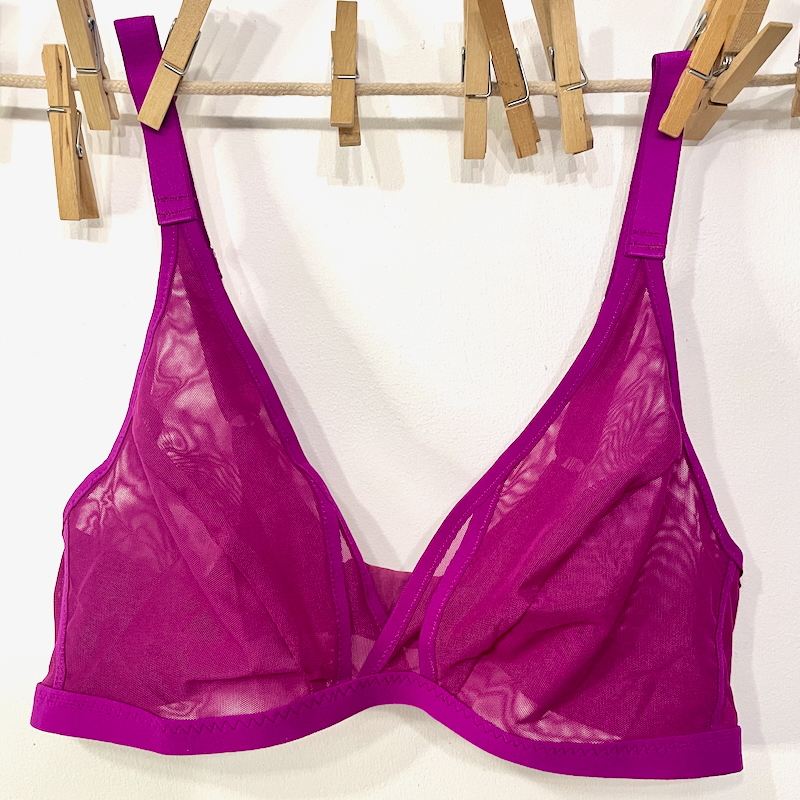
The fuchsia bra
I’d made the New Craft House Wren Bra twice a few years ago, both times using the kits of mesh & elastic that NCH sold.
Back then, I sewed a size 34A/B since I’m a very standard 34B when at my usual weight. But the cups were always a smidge too small (hello sideboob), so this time I not only increased the band for my added Long Covid weight, but increased the cups, too, sewing a 36C/D. I’ve never been close to a D in my life, but it seemed logical to move up since the A/Bs were too small…
Happily, I had been gifted one of the original NCH fuchsia mesh kits by Emma Crafty Clyde from her stash after her mastectomy, so I’m very appreciative that I can sew this again with all the matching mesh and elastic!
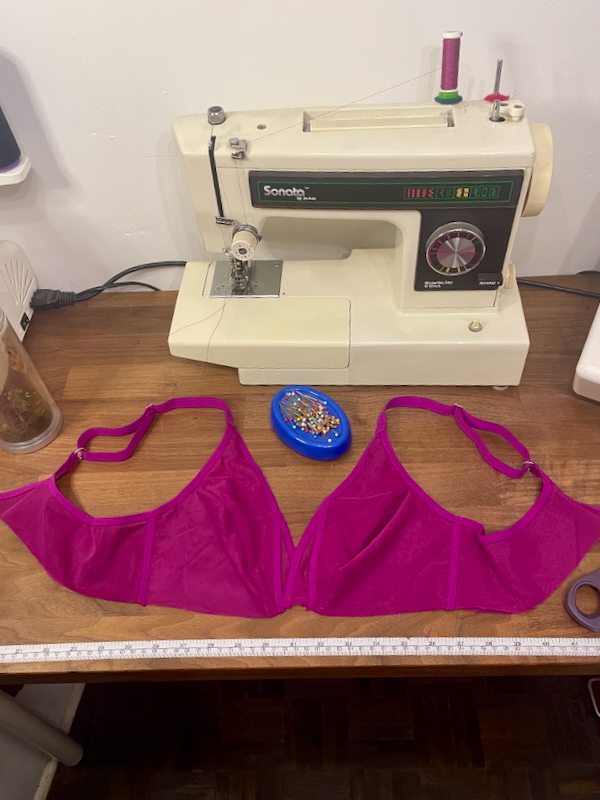
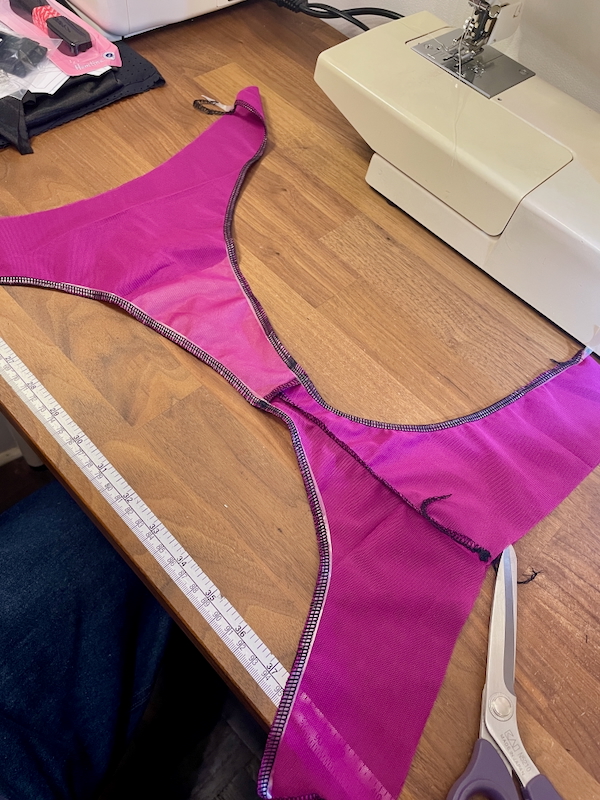
Cutting out, I realised that their fuchsia mesh had greater lengthwise stretch than width-wise, so I had to rotate my pieces 90 degrees so that the degree of greatest stretch (DOGS) arrows were vertical instead of horizontal, with the most stretch running around the body.
I actually still had some scraps of this mesh leftover from my earlier bra and panty kits, and I could actually squeeze all the pieces except two out of my previous mesh. So I had a LOT of mesh leftover after cutting out the bra – enough for two matching thongs!
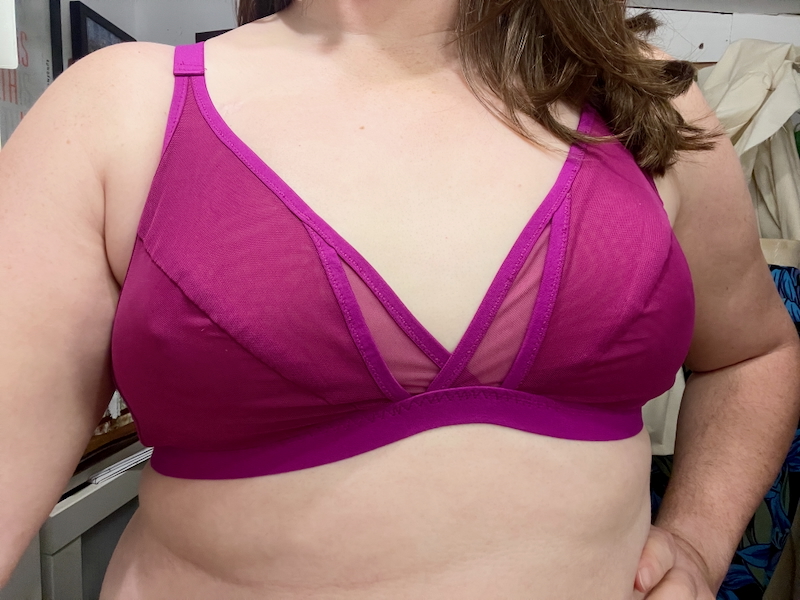
The instructions are illustrated and very clear, and I’ve got no complaints. You should be comfortable applying FOE to multiple layers at a time but otherwise it’s a very easy bra pattern – no channelling or underwires to worry about!

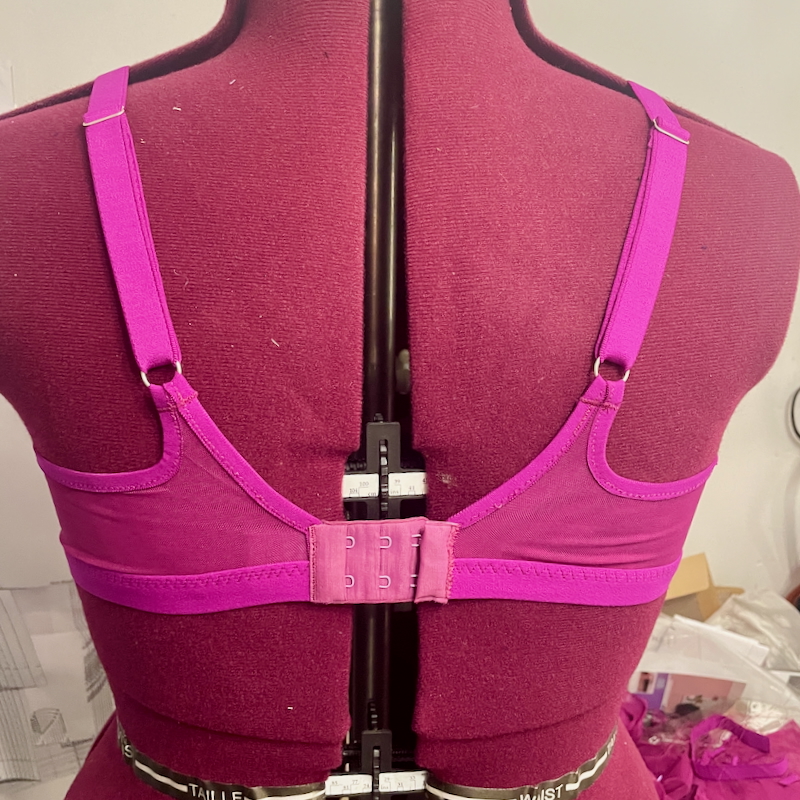
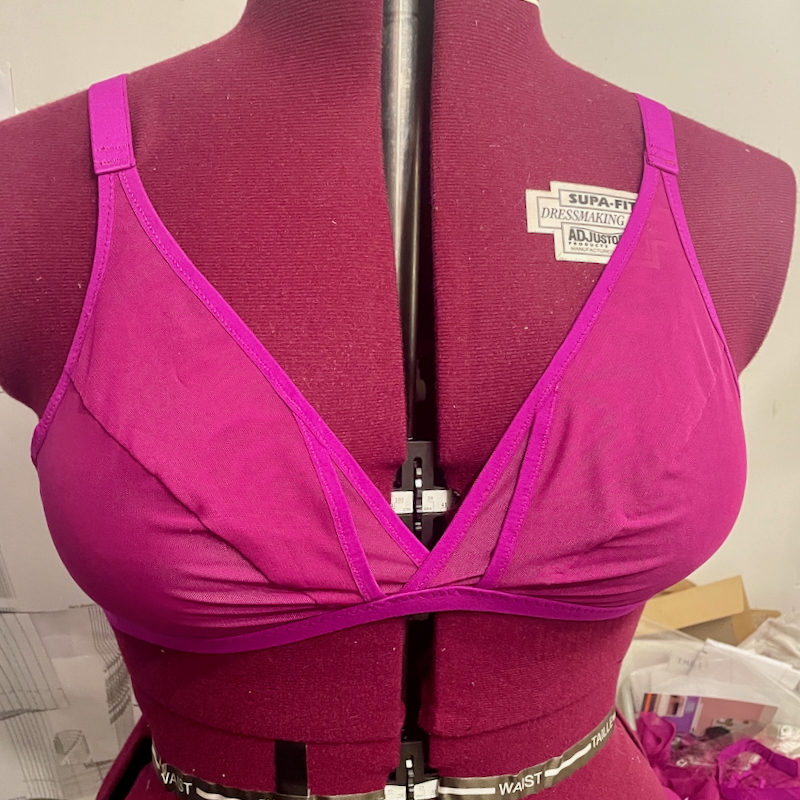
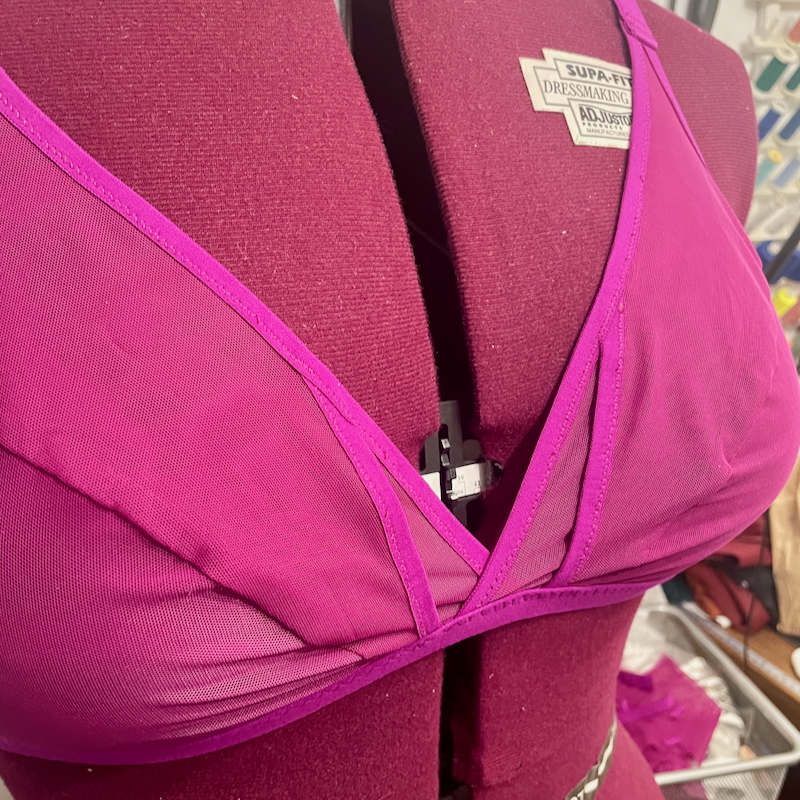
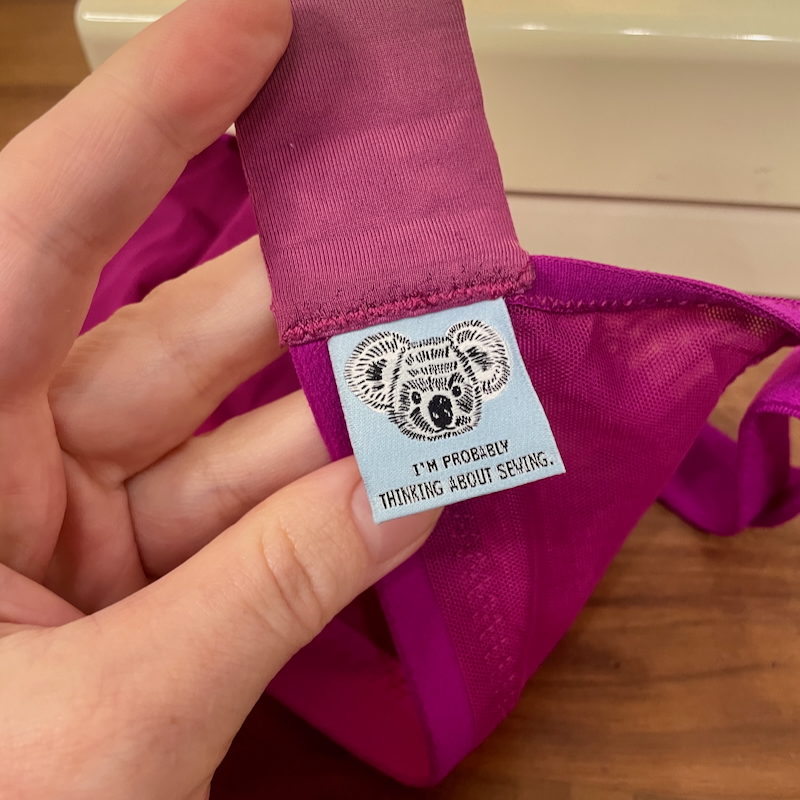
I wanted to be able to tell this bra apart from my other fuchsia Wren bra in my underwear drawer so I added a label under the hook and wrote “36 C/D” on the back.
And of course, with bra sewing you can’t really check the fit until you’re 100% done, which is nerve wracking but… omg this is the best fitting and most comfortable bra I own right now?! 😝😝😝
The test thong
For the matching underwear, I thought I’d try a pattern I downloaded a while back but never sewn, the Lore Piar “Sporty Scrappy Thong” pattern.
It’s a free pattern designed to use up scrap jerseys, which I have tons of, and that it’s similar to my favourite Lululemon thongs that also use zero elastics. This pattern uses a folded band along the waist edge, and the leg edges are just turned under and hemmed.
But the “instructions” are just a size chart and how to put together a pdf. 😒 For the actual construction, you have to watch a video on their IG. As I would rather claw my eyes out than watch a video, I scrawled down my own order of construction:
- Assemble the fronts
- Assemble the backs
- Join front, back, and crotch lining at the crotch seam
- Sew side seams
- Join waistband into a loop then attach to the top
- Fold under seam allowance at leg openings and topstitch
- (Optional) Topstitch other seams flat
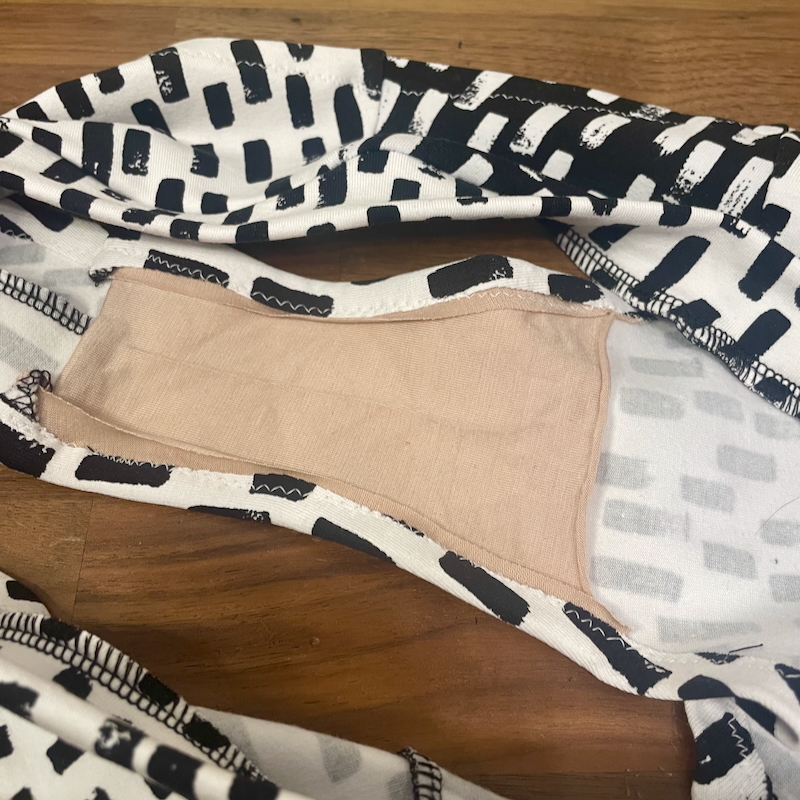
I was between a L and XL on the size chart so I made a L and the fit at the hips is good. Before cutting into the fuchsia mesh, I pulled some cotton jersey out of my scraps to sew up a test version first, and I’m very glad I did, because I have several complaints about the design and drafting:
First, when folding under the leg openings, there is zero need for the seam allowance to be on the crotch lining/gusset piece. It needlessly adds bulk, and it’s caught by the other fabric anyway. So go ahead and trim it off the sides on your pattern piece (you still need the seam allowance at the bottom!)
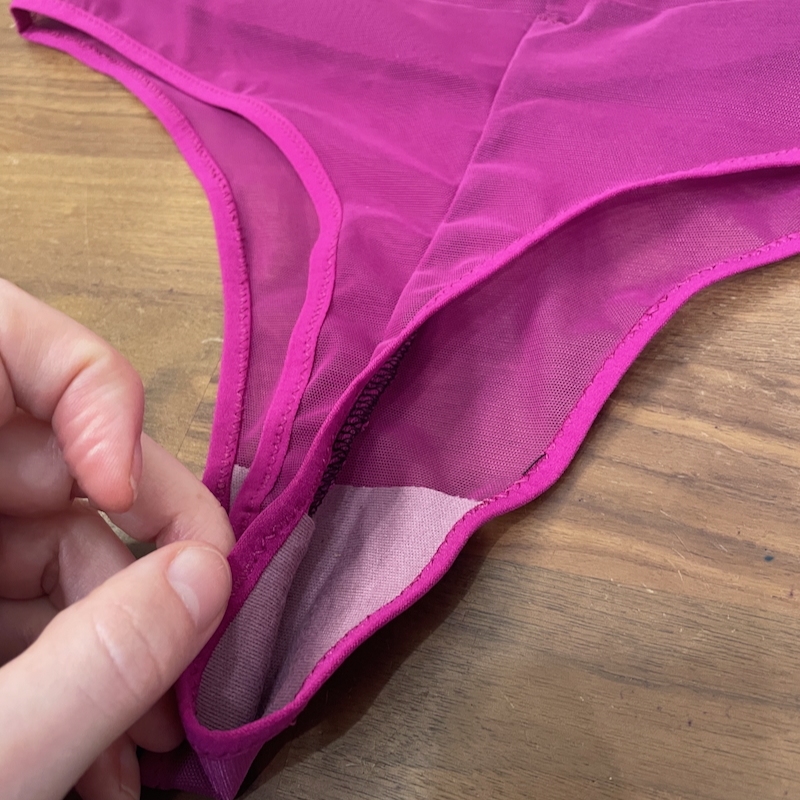
The second, and more important issue, is that this is not a thong. The back crotch area is just as wide as the front – a finished width of 7cm (2 3/4in)?!?! That’s an awkward halfway house between a thong and a brief and will be uncomfortable for 100% of the population. I refuse to believe anyone actually tested this with an all-day wear! 😒 For comparison, the Evie La Luve Chloe Thong is 2cm finished width at the back crotch.
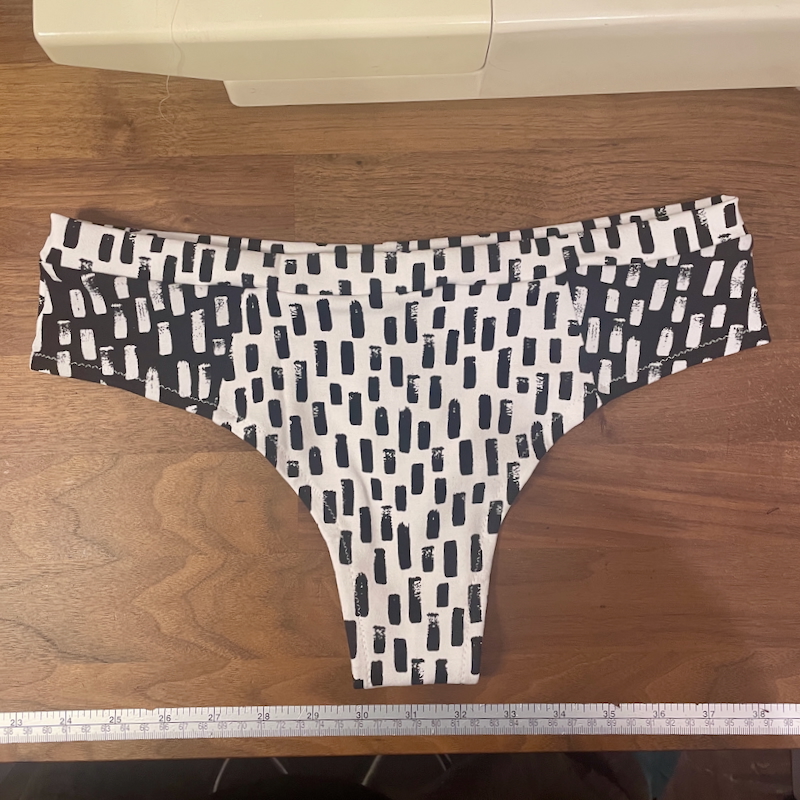
(the front after hemming the leg openings…)
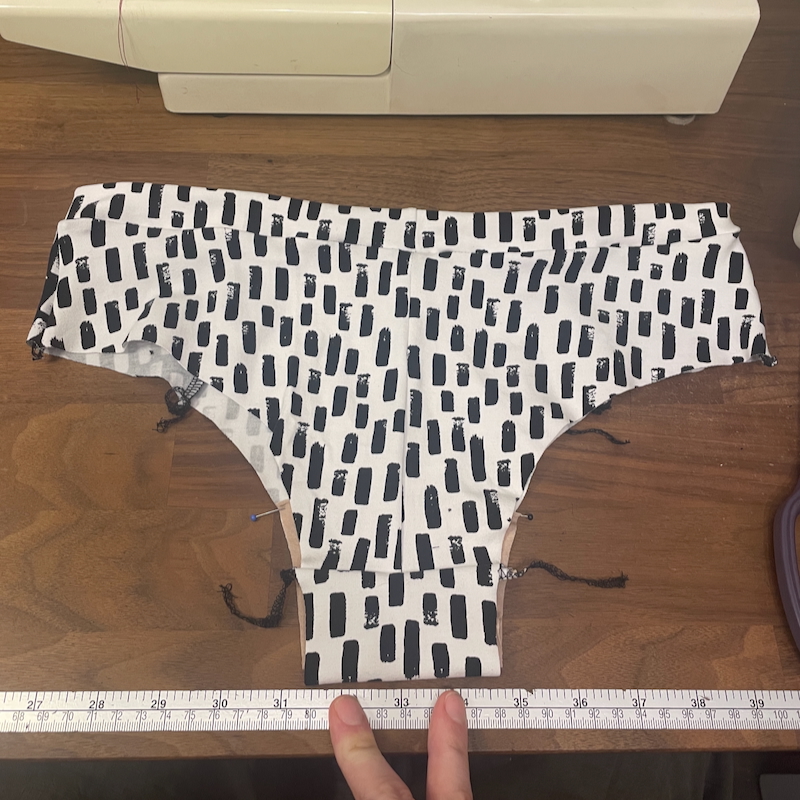
(…versus the back before hemming. My fingers are showing the finished width)
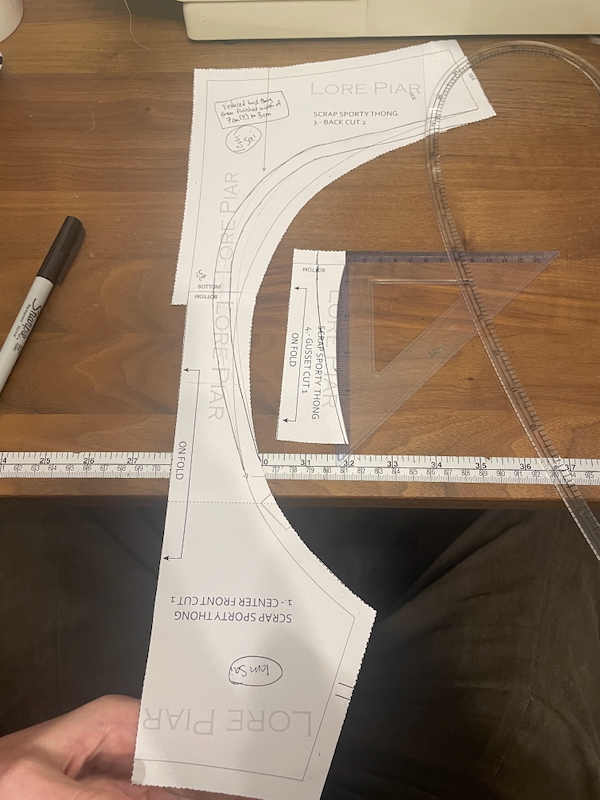
So I had to redraft the entire crotch area, narrowing it to be a finished with of 3cm (1 1/8in) instead, and a higher curve to go around the cheeks.
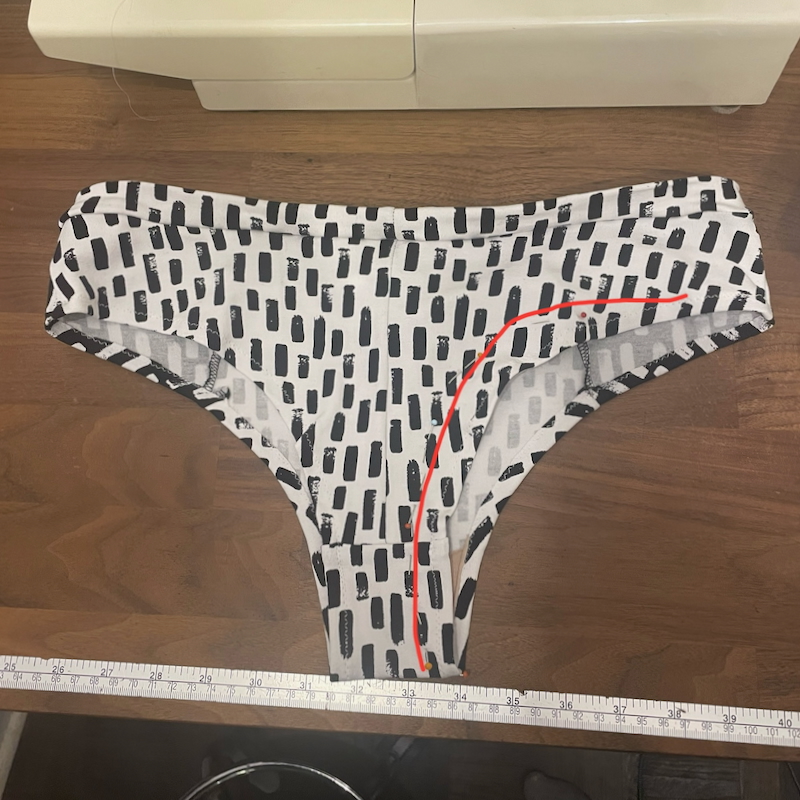
It’s much better after this, though I could still make that area even narrower. Seriously, the less fabric there, the better (something that Evie La Luve definitely knows!)!
My final change was purely for personal preference, but I prefer my underwear to sit under my gut in the front rather than midway up, so after wearing my test pair for a bit, I lowered the CF by 3.5cm, tapering to 1cm lower at the side seams, then to no change at the CB.
For the amount of work I did at redrafting this, it’s a good thing this pattern was free… I’ve never sewn anything from Lore Piar before but this doesn’t exactly instil confidence in me.
After sorting out all the above changes on a cotton jersey pair, I cut into the remains of my fuchsia mesh for a further two pairs.
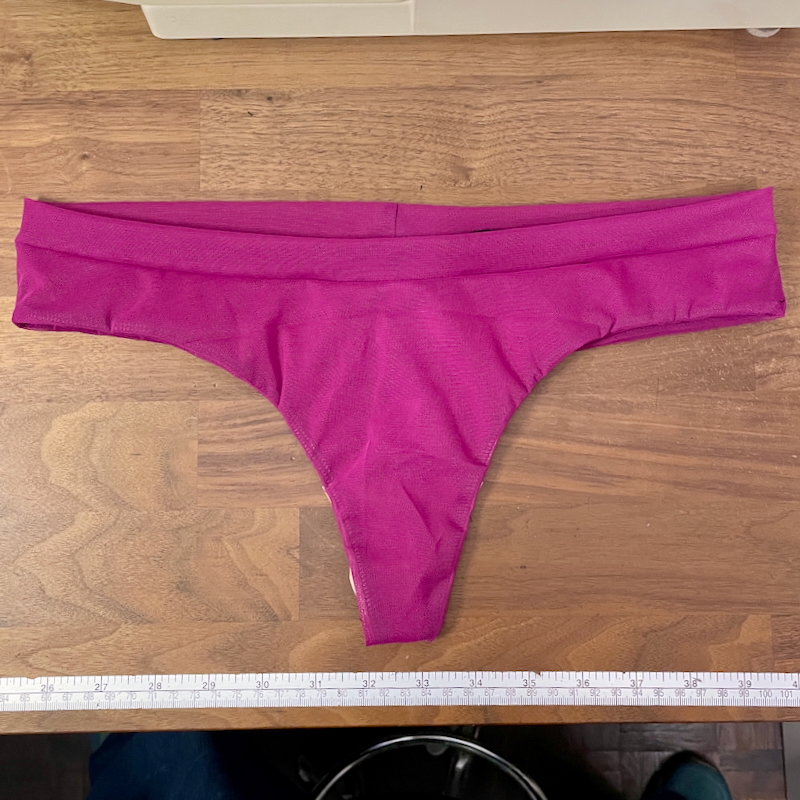
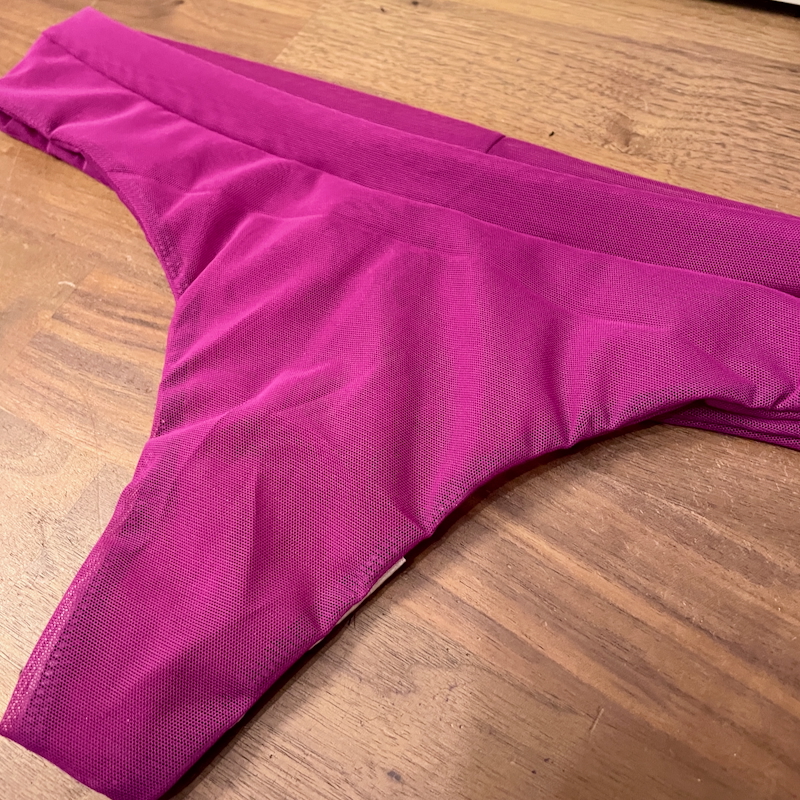
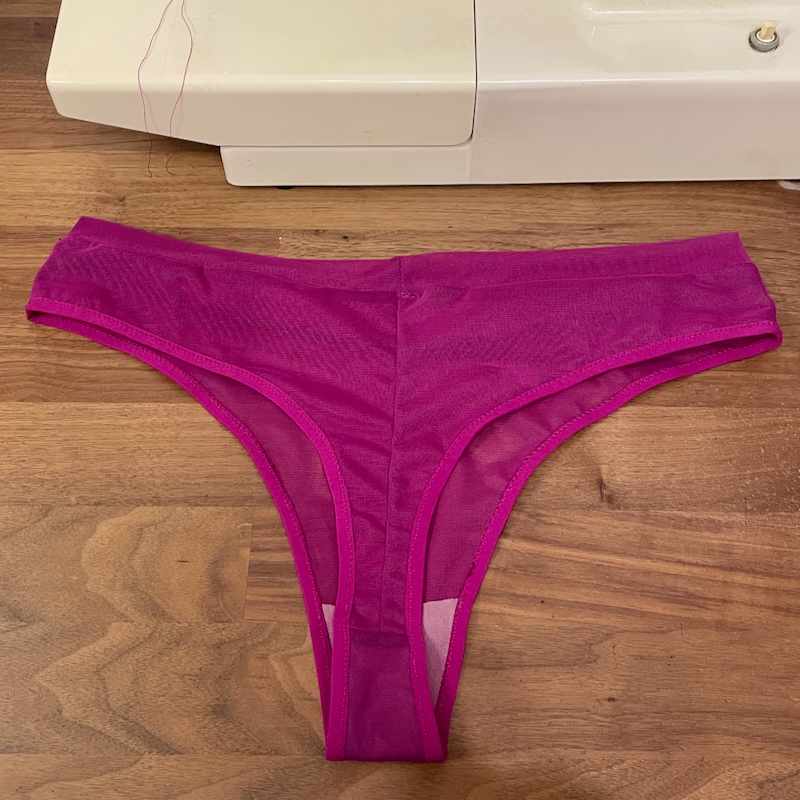
The first fuchisa thong
The folded-under leg seam allowance is fine, butI wanted to try seaming the leg edges instead with clear elastic. To do this, I changed the order of construction around a bit. Since I had enough fabric to cut the Front as one piece I just joined the Centre Front & Side Pieces together and cut as one but this is just my style choice (you absolutely don’t have to!).
To achieve the seam-free leg edges, I cut the Fronts and Backs twice each in mesh, so I have an exterior and a lining.
- Join Backs together along CB seam. Repeat for the other Backs
- Join Front, Back, and Crotch Gusset at crotch seam. Repeat with other Front and Back (no gusset)
- Join the two sets, right sides together, along the C-shaped leg openings (with clear elastic if you want), making sure to catch the lining in.
- Flip right side out and topstitch flat along the lining to keep it from flipping out (optional – I ended up not doing this)
- Sew side seams, right sides together
- Sew and attach Waistband as before, topstitch seams flat if desired.
This resulted in a fabulous seam-free finish (except for the waistband seam), but I’d forgotten that the fuchsia mesh has very little lengthwise stretch! So these are a bit on the low rise end of things, eep.
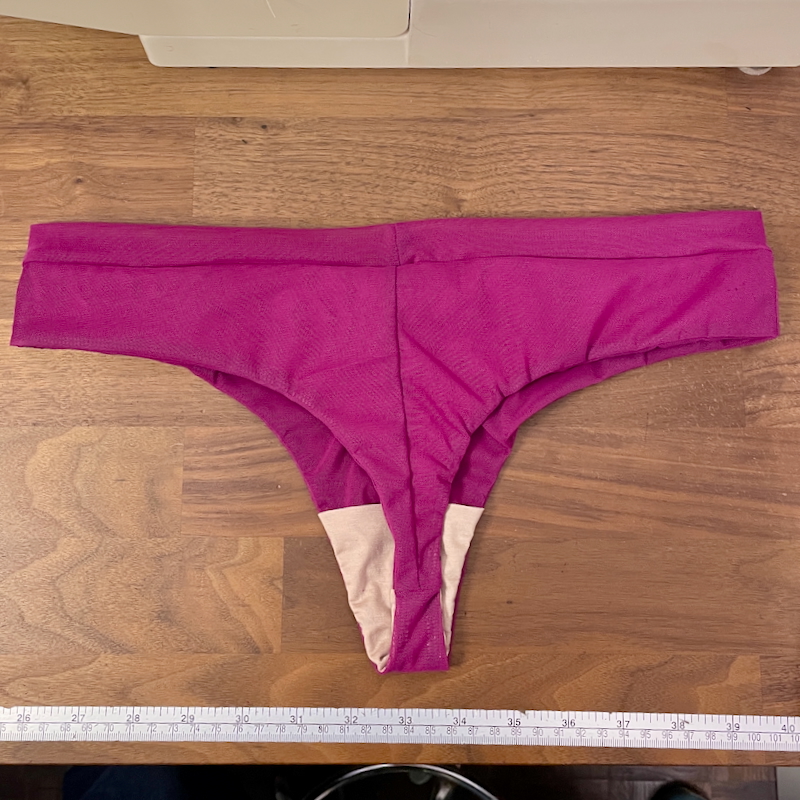
The second fuchisa thong
So for my second fuchsia pair, I decided to use the matching FOE for the leg openings (the same as what’s in the kit, but I bought more separately from NCH). So I copied off my altered Scrappy Sporty Thong pieces, removed the seam allowances at the leg openings, and then added 3cm of length into the Front piece (1cm each at 3 different spots), and 2cm into the Back piece in order to account for the lack of vertical stretch in my fabric.

This was a bit of a guesstimate, but ended up being perfect! Hurrah!
I was so happy with this lingerie set that I then sewed three more…