I think it was inevitable that I’d need a quick and fun distraction from all my pattern drafting and muslins, and nothing spells “quick” and “fun” like lingerie! Seriously, if you’ve never sewn lingerie, you won’t really understand the appeal, but playing with tiny bits of lace and trim is just so creative and rewarding, especially for ladies like me who really aren’t into embellishment elsewhere in their wardrobes.
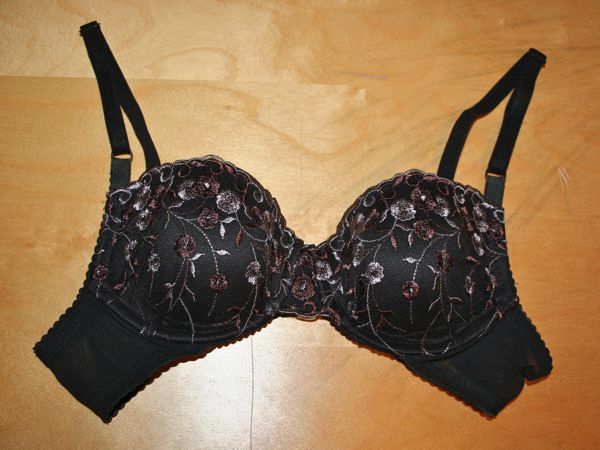
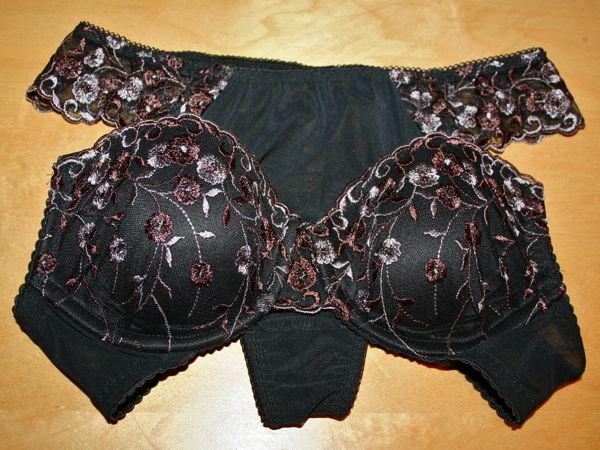
Since it fit so well before, I used the same modified bra pattern from my purple hearts bra, though this time I used black, pushup foam cups and the black/brown Alice lingerie kit from The Sewing Chest (scroll down for a special freebie offer!!).
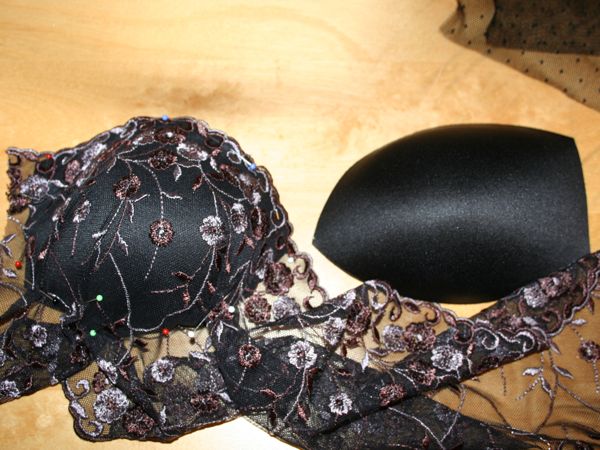
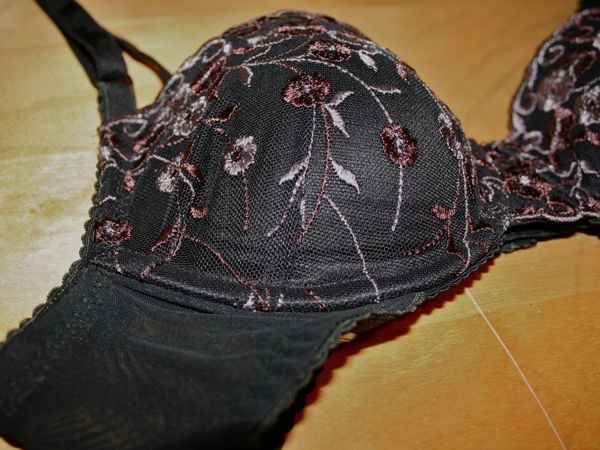
The first step was to cover the cups with the rigid lace. The lace in the kit was 50cm long, with two scalloped edges, so I aligned a scalloped edge along the top of the cup, then pinned and smoothed and made a few needed pleats in order to get it looking nice. If the lace or covering material is stretchy, then you don’t need any pleats in it, but as mine was rigid, a few small pleats were necessary towards the bottom.
Here’s the covered and uncovered cups:

Then I did the same with the other cup, though I had to use the opposite scalloped edge so both cups were symmetrical. In bra making, symmetry is king!!
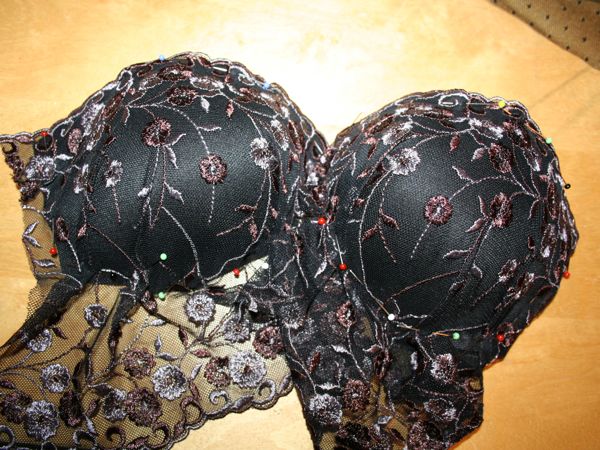
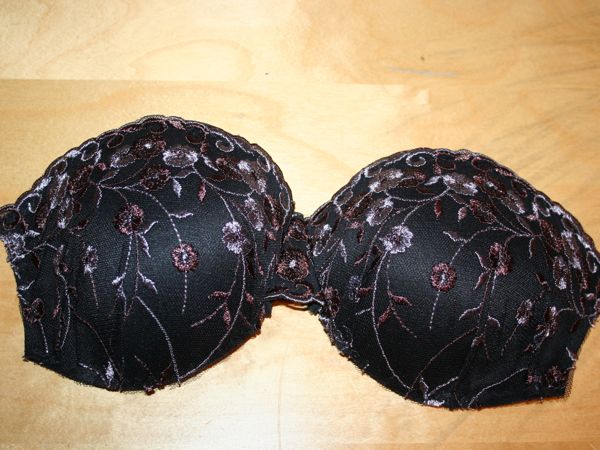
With a wide zigzag stitch, I basted the lace around all the edges and trimmed the excess. I actually went back later and added some stretched, narrow elastic on the inside of the top of the cups, but I’d recommend actually doing this, or applying FOE (foldover elastic) to the upper cup edge before stretching the lace over your cups to avoid a second line of zigzagging over the lace. Even if you think your cups are sturdy enough to not need the elastic, it really makes a difference in keeping the top of the cup close to your body and not getting any gaping.

I sewed on the rigid, central triangle, in three layers – interfaced power net, power net, and a bit of the lace, using the scalloped edge as the bottom portion to further prettify things:
I attached the elastic to the bottom edge of the power net wings, and then basted them to the sides of the cups.
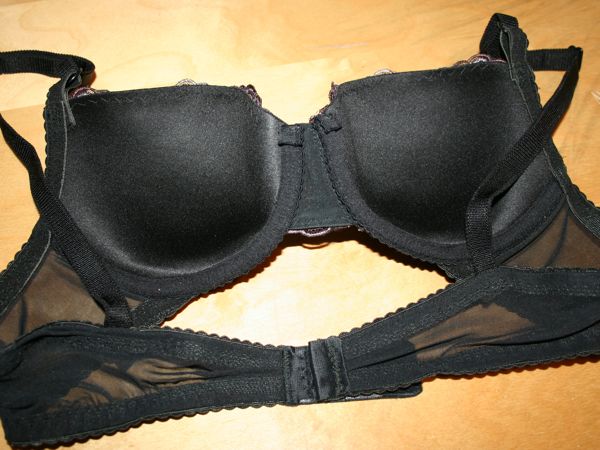
It was at this point that I had a bra-making revelation. I realised that even though it looks correct to have the wings outstretched at 9 o’clock and 3 o’clock, this is actually wrong, and for these cups, the wings need to be attached at the bottom, at about 7 o’clock and 5 o’clock:
Yeah it looks w-e-i-r-d, right? But I had a bit of a eureka moment in the way small angle changes in bras make big differences to cleavage. Have a look at the shape of the bra cups when the wings are at rest (on the left), and pulled up to the sides, where they’ll be when worn (on the right). Va. va. voom!


I then finished the bra in the usual steps (Sigrid’s “partial band bra” tutorial is 100% aligned with how I make mine, too), and tried it on for the moment of truth… and hurrah! A second well-fitting, comfortable, flatttering bra I made myself!

So for £2.50 for the cups, £1.25 for the underwires, and £6.74 for the bra kit (bought on sale), that means this bra cost me about a tenner. Except that I didn’t even use the dotty tulle included in the kit, and I had enough lace and power net left to make a pair of matching panties, too (I did have to add some picot edge lingerie elastic from my stash to make the panties, though)!
I used my TNT KnipMode thong pattern with the leftover black power mesh in the central portion of the pants, but I used the lace over the hips, with the scalloped edge on the leg edge. This means there’s no side seam over the hips, and no elastic where there’s the scalloped edge. I usually use knits for this panty pattern, but you can use rigid fabrics like this lace, too, so long as there’s enough stretch to make up for it. I’d say that the amount of rigid I used here is about 50% of the total circumference at the waist/hips, and I’m probably at about the max of non-stretch fabric you’d want to use, as these are a bit more snug than usual.
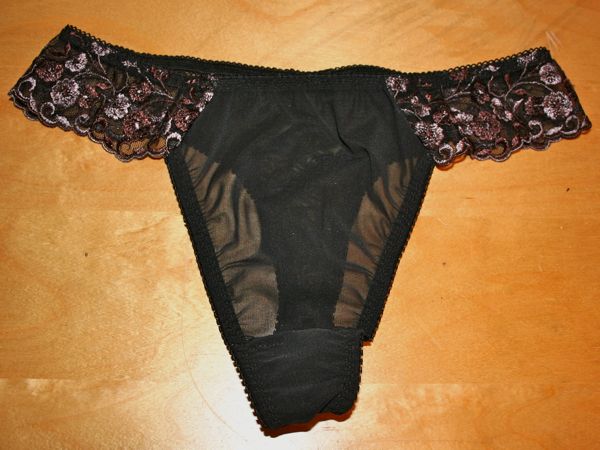
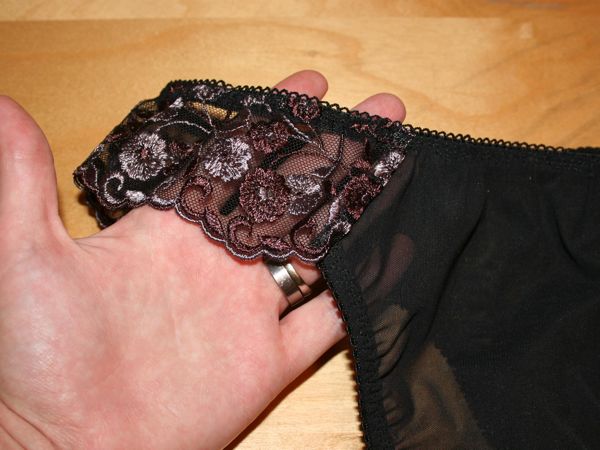
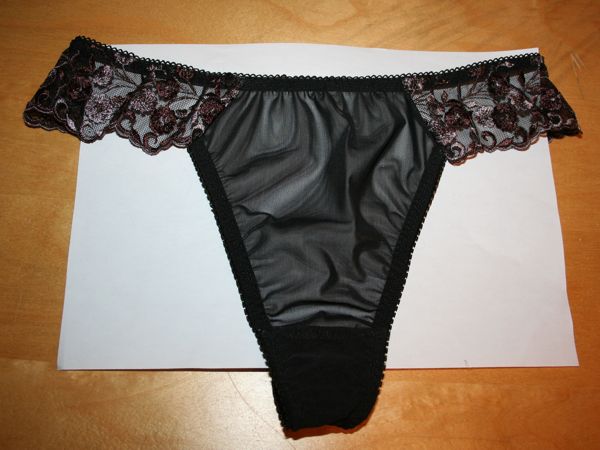
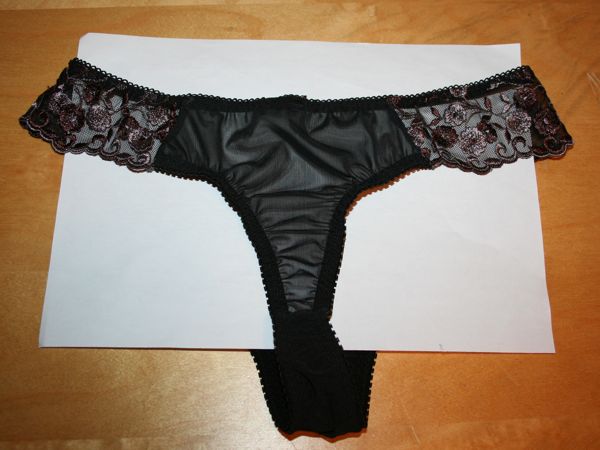
I’ve made these panties so many times that I totally forgot that, in this case, I needed to construct these a bit differently than usual and I had to unpick a serged/overlocked seam. Usually, I construct the body of the pants (crotch seams and side seams) on the overlocker and then finish the edges with elastic on the sewing machine. But in these, I made the lined crotch (burrito-style, and lined with thin, black silk jersey), then applied the leg elastic while the pants were flat, then added on the lace hip sections, attaching the top edge elastic last.
I used pretty much all of that rigid tulle lace between the bra and the pants. This is what was left!!
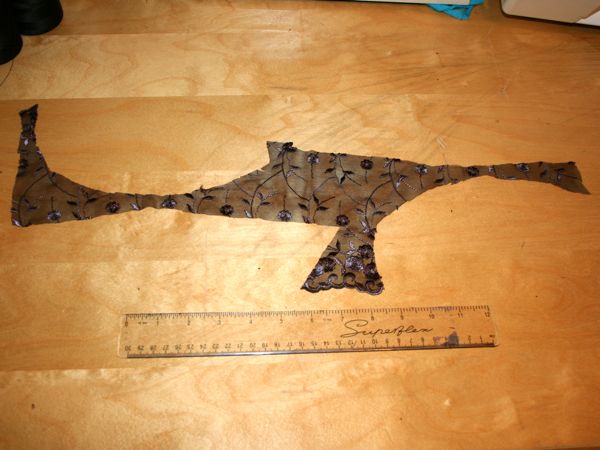
I can even identify the holes: upper left is where the right cup was covered, lower right was where the left cup was covered, and the lower left and upper right where the hip portions of the pants!
So for £10 and a few hours, I’ve got a lovely, matching lingerie set that fits well, looks great, and I’m super happy with it!!
If you need any more reasons to start sewing lingerie, you should have a look at Audrey’s recent bra making for some more inspiration…
Exclusive freebie offer!
Kellie at The Sewing Chest is so super nice and helpful that she’s arranged a special freebie for FehrTrade readers! Click here to get a free pair of hook on, clear elastic bra straps! The small print: If you’re buying anything else, this will be added on for free with no additional shipping costs. But if you only order this, then you’ll need to pay shipping. Limit one per customer. She’s just added some more moulded cups, she’s also got lovely bra and lingerie kits, plus the widest range of FOE and picot elastics in the UK. And the clear straps mean you can wear your own custom-sewn bras with spaghetti straps and not have your straps showing… You just need to create four little ribbon loops at the point your straps attach so you can hook the straps on rather than sew them in permanently.
As before, if you’ve got any questions about lingerie or corset sewing (figuring out which underwires to buy is particularly tricky), be sure and email Kellie because she’s done the research and knows her stuff! (And no, she hasn’t paid me or given me any freebies apart from the same one offered to you above. I really am just a super happy customer!)