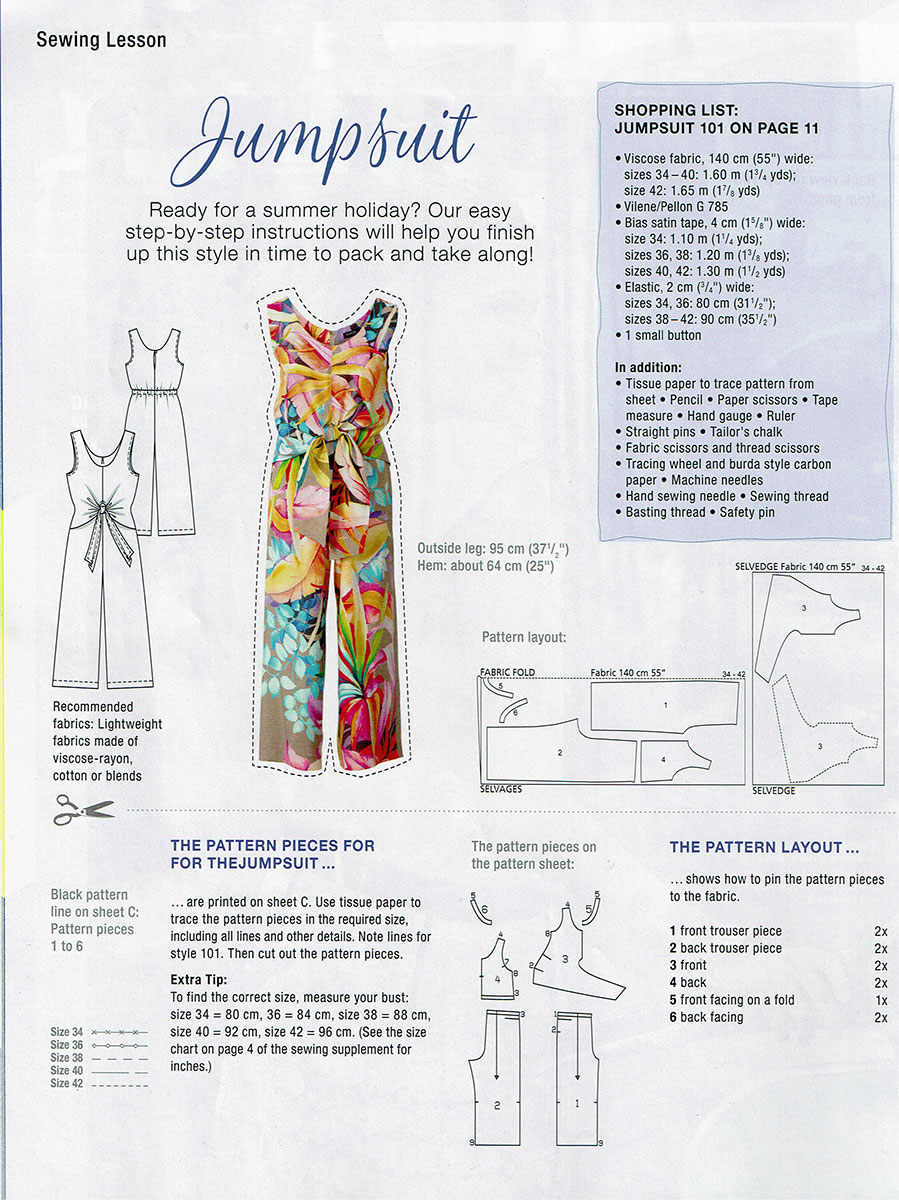
In the May issue of Burda magazine, there was a behind-the-scenes feature into how they design and develop their sewing patterns and the example they used was an amazing wrap-front jumpsuit, which I immediately wanted to sew! But I found out that the jumpsuit would be in the next issue, so I had to wait a whole month before I could get started.
It ended up actually being the cover star of the June 2020 issue, and even better – it also has the fully illustrated instructions for the issue, too! If you missed this issue, it’s also available to purchase as a pdf pattern from the (otherwise awful) English Burda site.
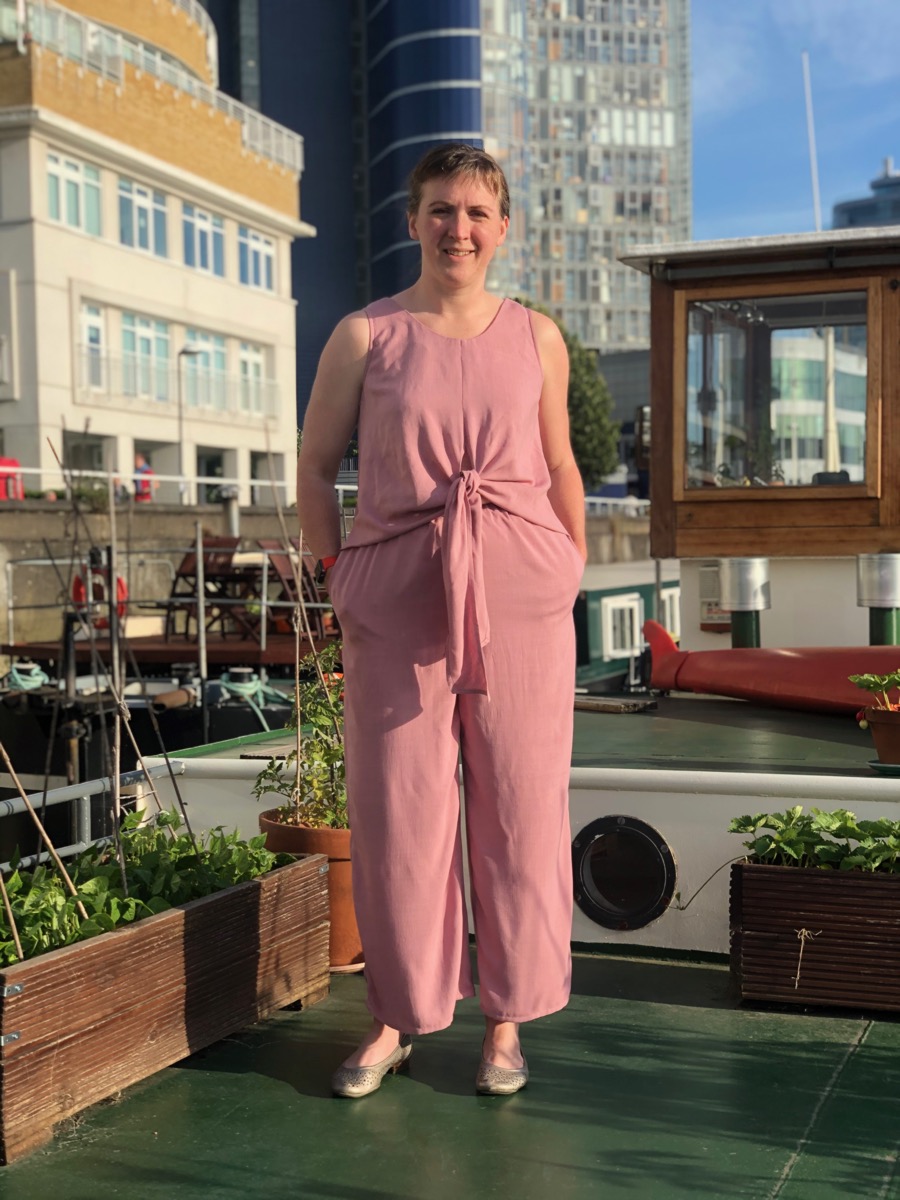
While I was waiting for the issue to arrive, I took the opportunity to buy my fabric for it, selecting this “linen-look” viscose in “old rose” from Like Sew Amazing, but I feel a lightweight linen or standard viscose would also work well here. I just barely squeezed it into my 2m, though – I had to place the upper front piece slightly off grain to do so, and reduce a few seam allowances to 1/4in to make everything fit. So you might want to buy slightly more!
One weird thing I noticed when I went to trace this pattern is that there’s actually a size 44 included on the pattern sheets that isn’t mentioned anywhere in the instruction text… And since I’ve gained a bit of weight from a 6 week cold then 15 weeks of lockdown, I took it as a sign and traced the 44 (when usually I’d be sewing a 42). Thanks, Burda gods!
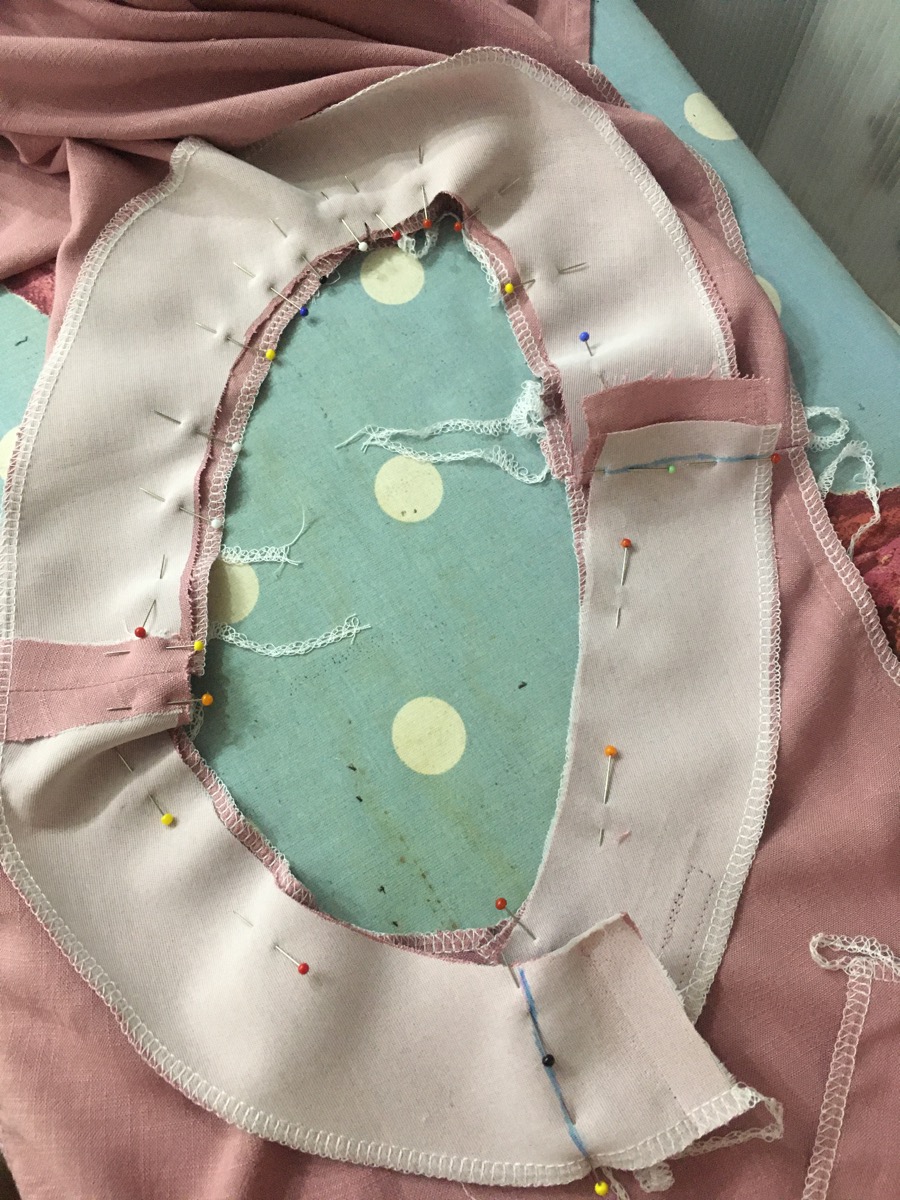
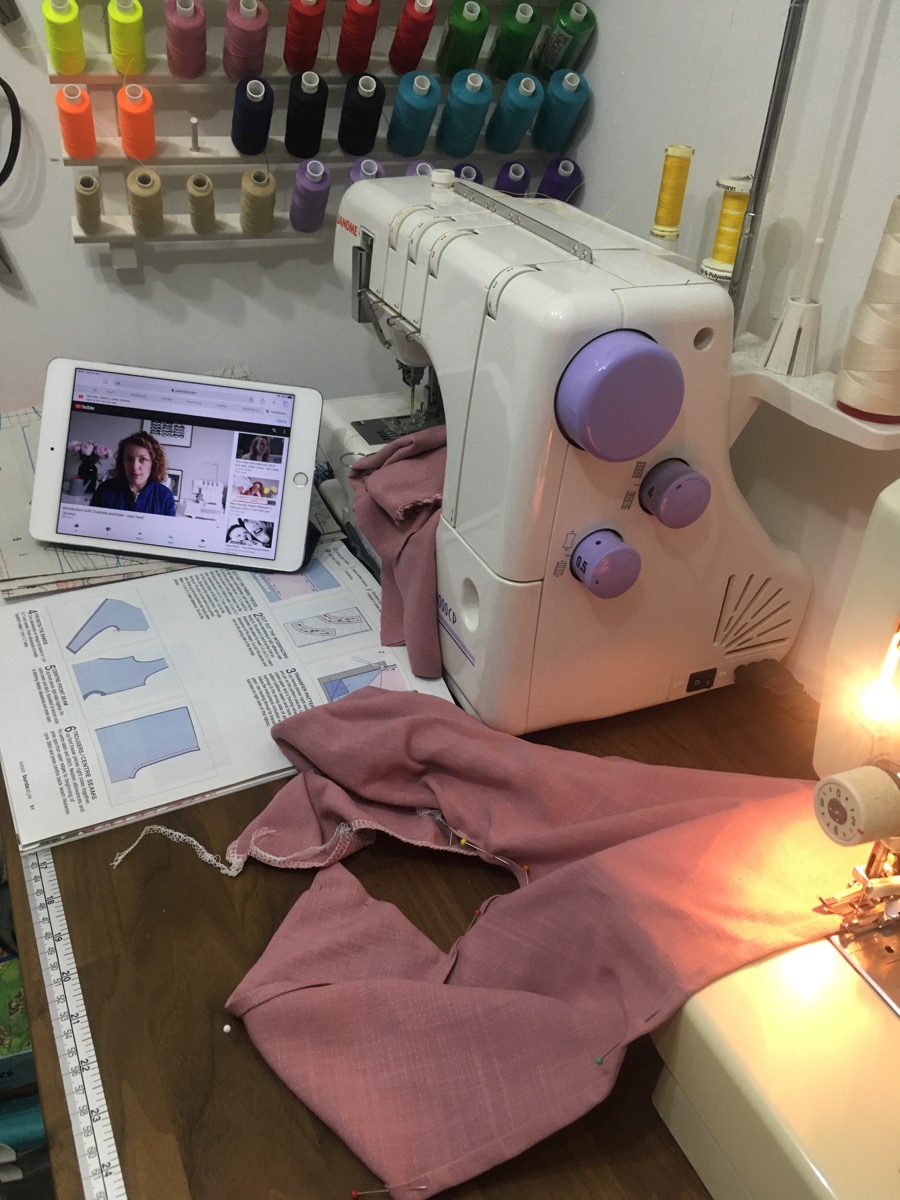
Before I even started sewing, though, I took the extra time to prep all my cut pieces. Since the fabric was quite prone to fraying I opted to overlock all the edges, and I also staystitched the neckline and armholes to prevent stretching out (which this fabric was quite prone to do), and even hand-stitched the markings since my notches would be lost in the overlocking. Even so, I found that my facings had stretched out between my cutting and interfacing them?? So I had to adjust those after lining them up with the garment neckline.
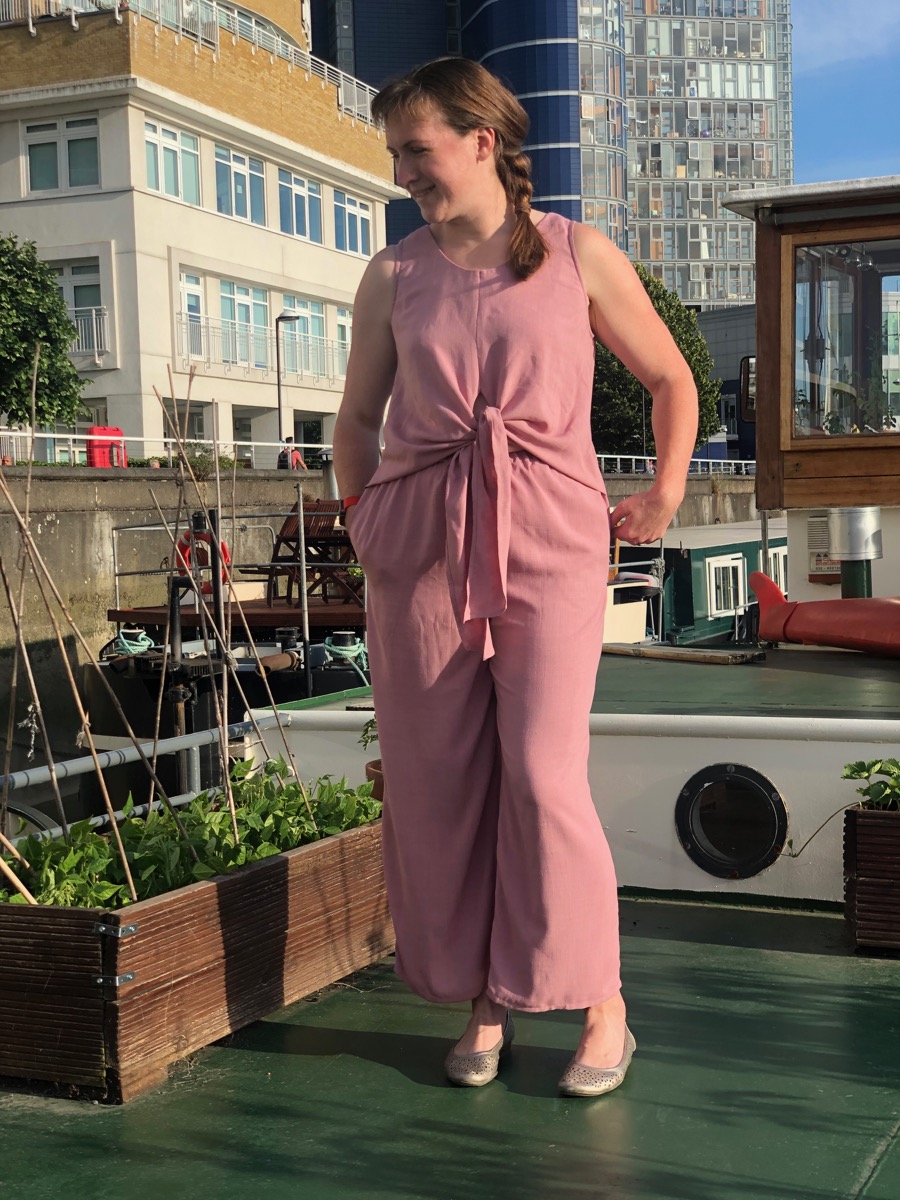
I’ve attended all four previous versions of the Sewing Weekender over the years so I was thrilled that the organisers decided to run it as an online event this year with two full days of videos and demonstrations and live chats and hashtag sharing. So I selected this as my project for the Weekender, thinking the illustrated instructions would be pretty distraction-proof! I sewed the entirety of this jumpsuit over the two days, with friends over video chat the whole time! We definitely need to do this again sometime soon.
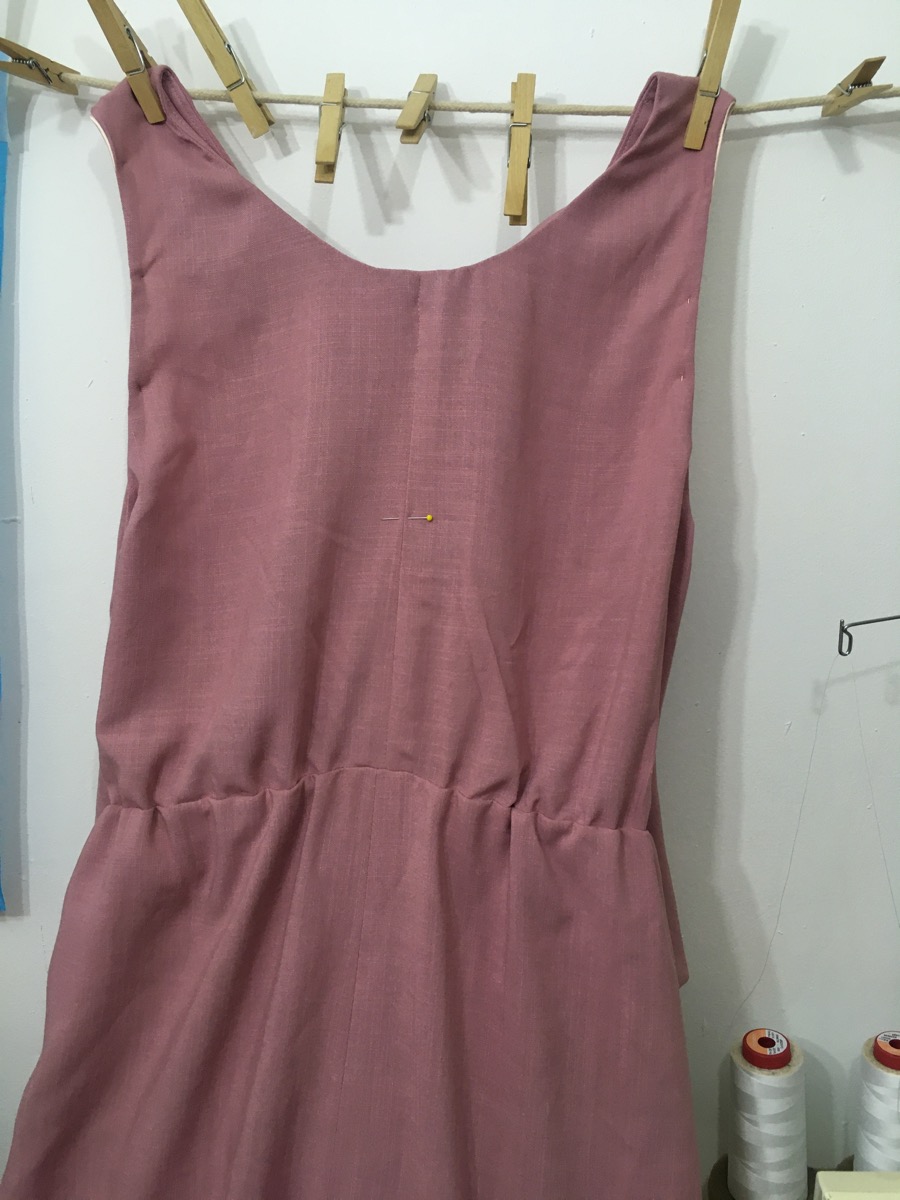
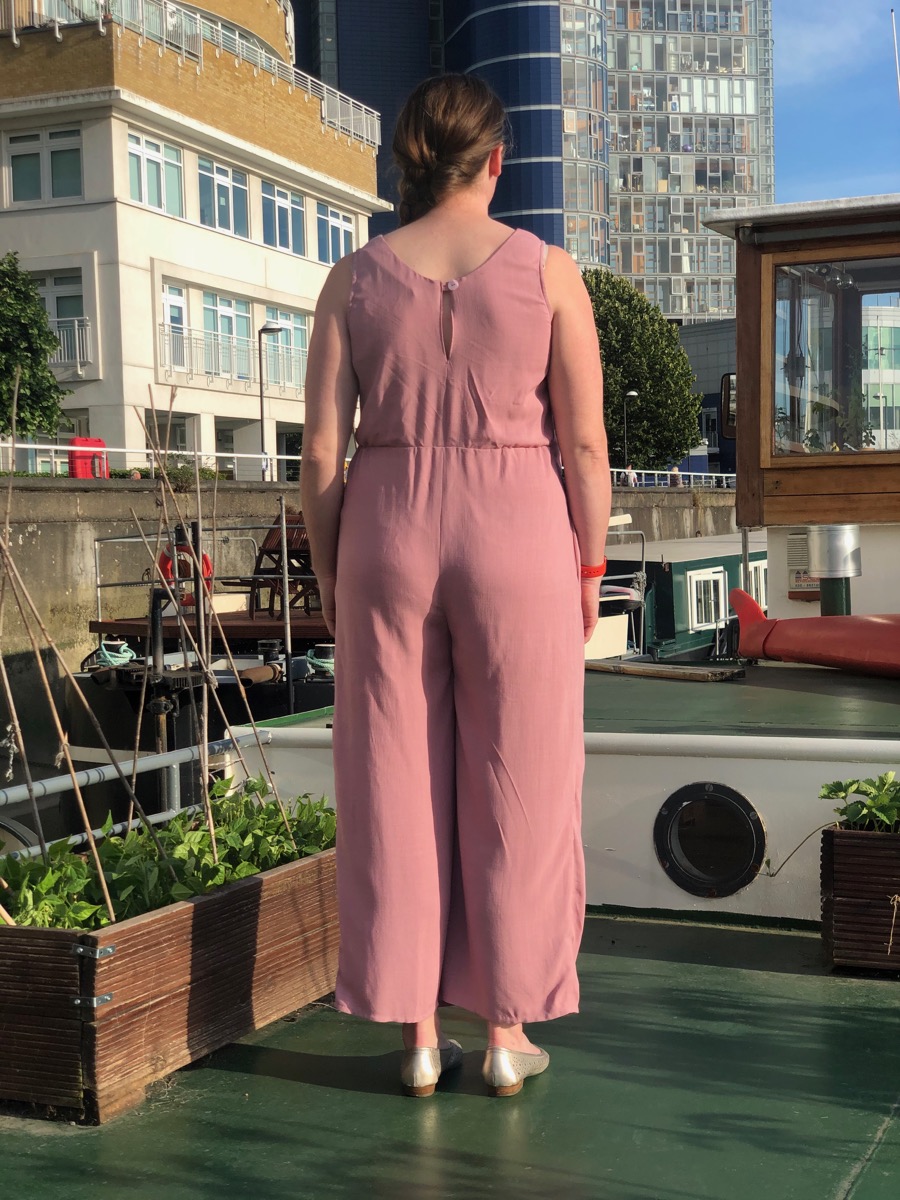
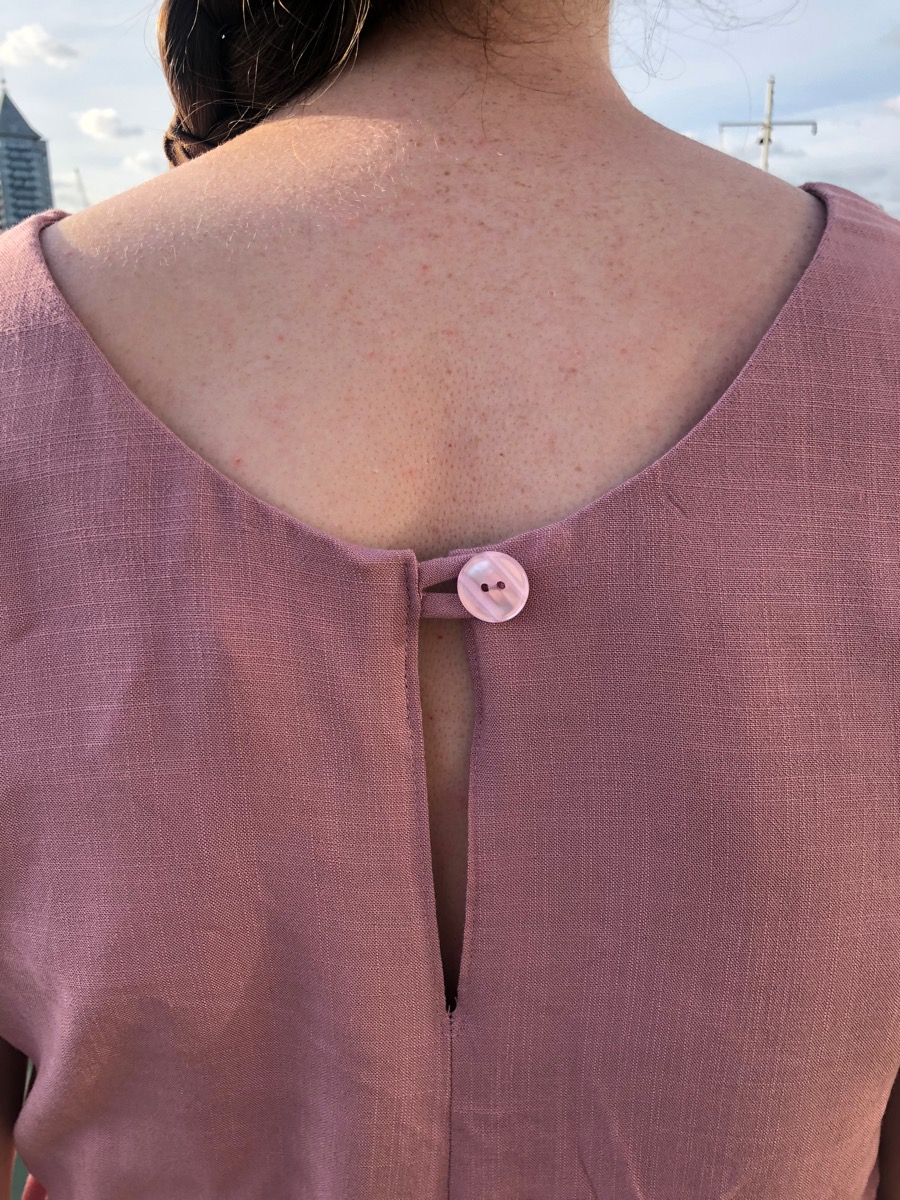
But even if the instructions are illustrated – you still need to follow them! My big lesson here is that the back slit isn’t optional!! Just because the neckline can fit over your head doesn’t mean you can omit it, Melissa. Because jumpsuit necklines also have to fit over your hips, duh! (Thankfully this was easily fixed)
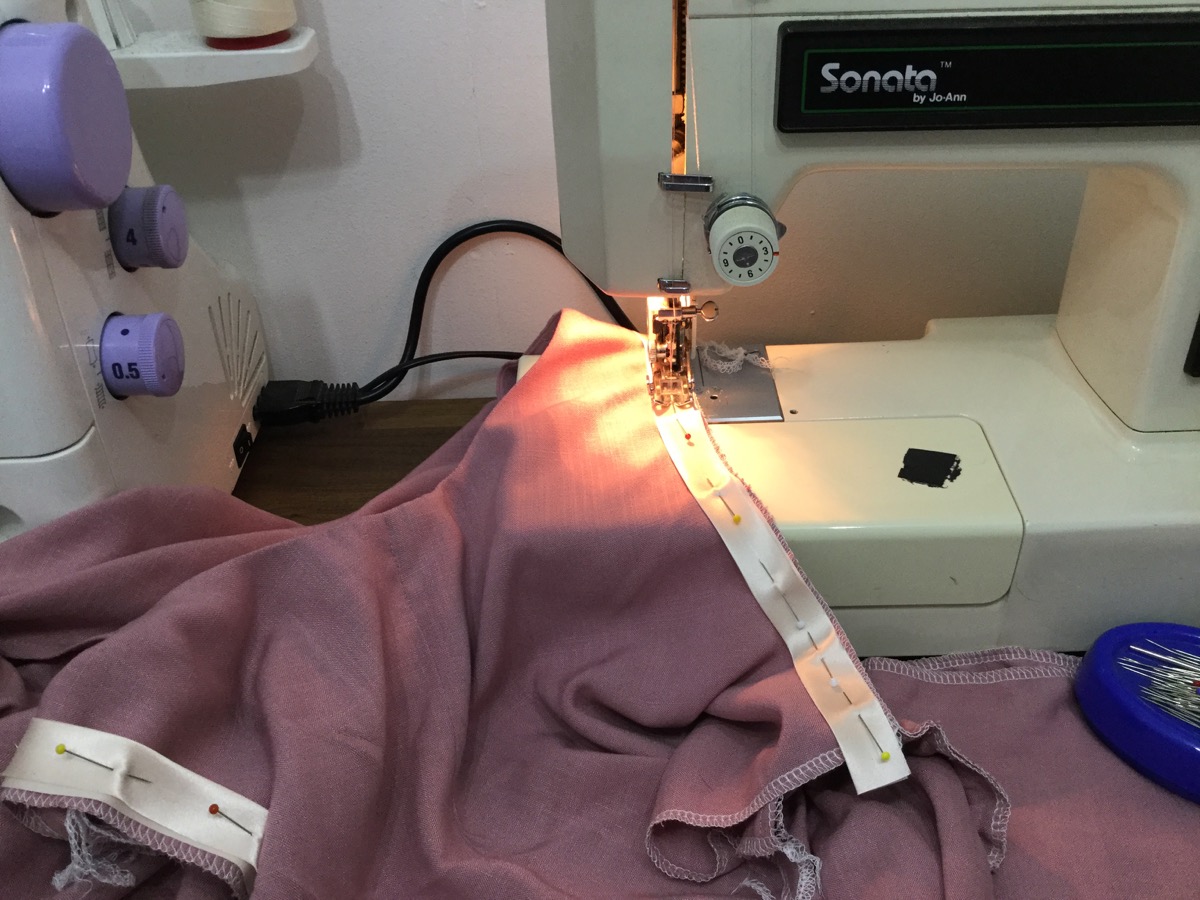
Check out my incredibly not-matching pink bias tape for the armhole edges! It was either this or baby-pink since I didn’t have any chance of squeezing bias tape out of my paltry scraps of leftover fabric (I could barely squeeze the pockets in!).
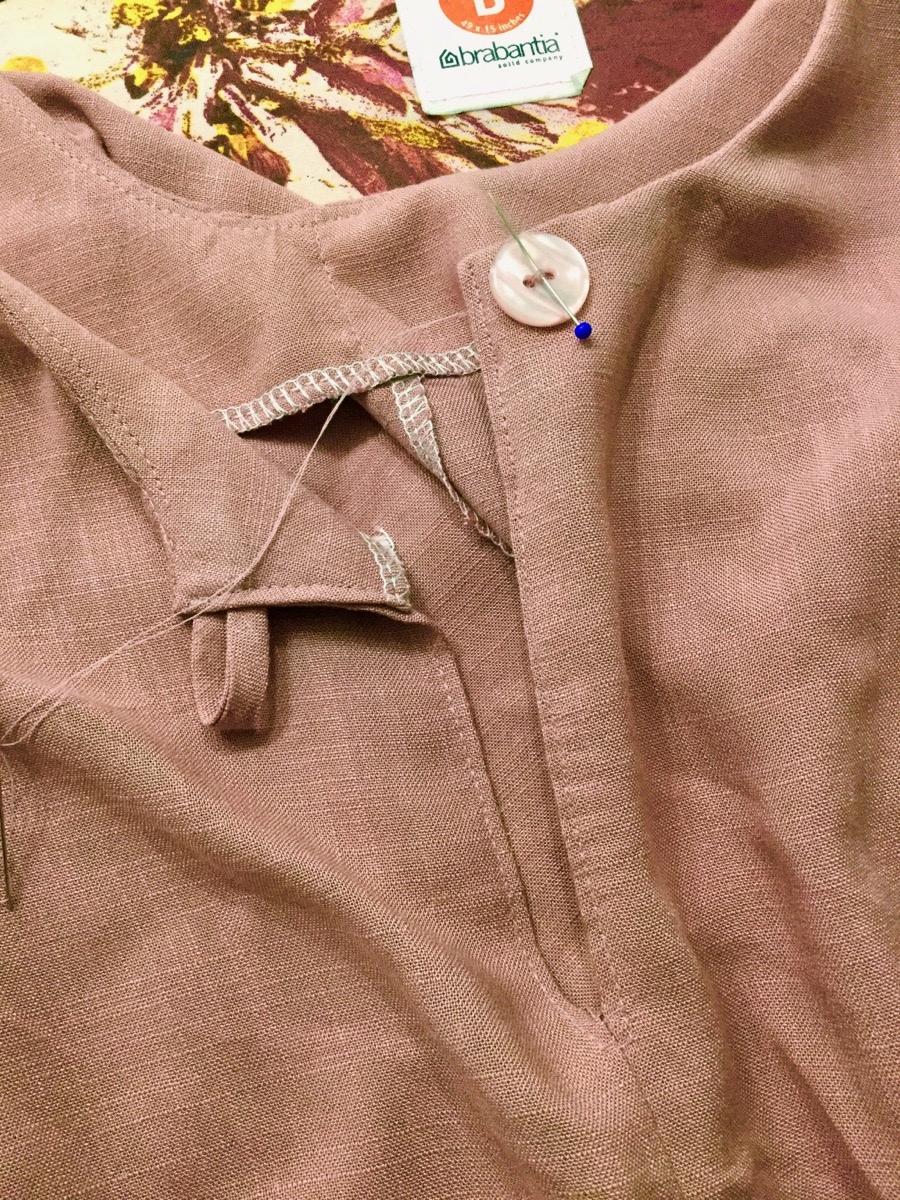
And speaking of pockets – I added inseam pockets to this since any other sort would’ve been a bit of a faff. I actually remembered that I wanted to add pockets quite late in the day, so I needed to unpick my side seams in order to add them in, but this was only a few minutes lost to the unpicker but increases my chances of wearing this jumpsuit ten-fold!
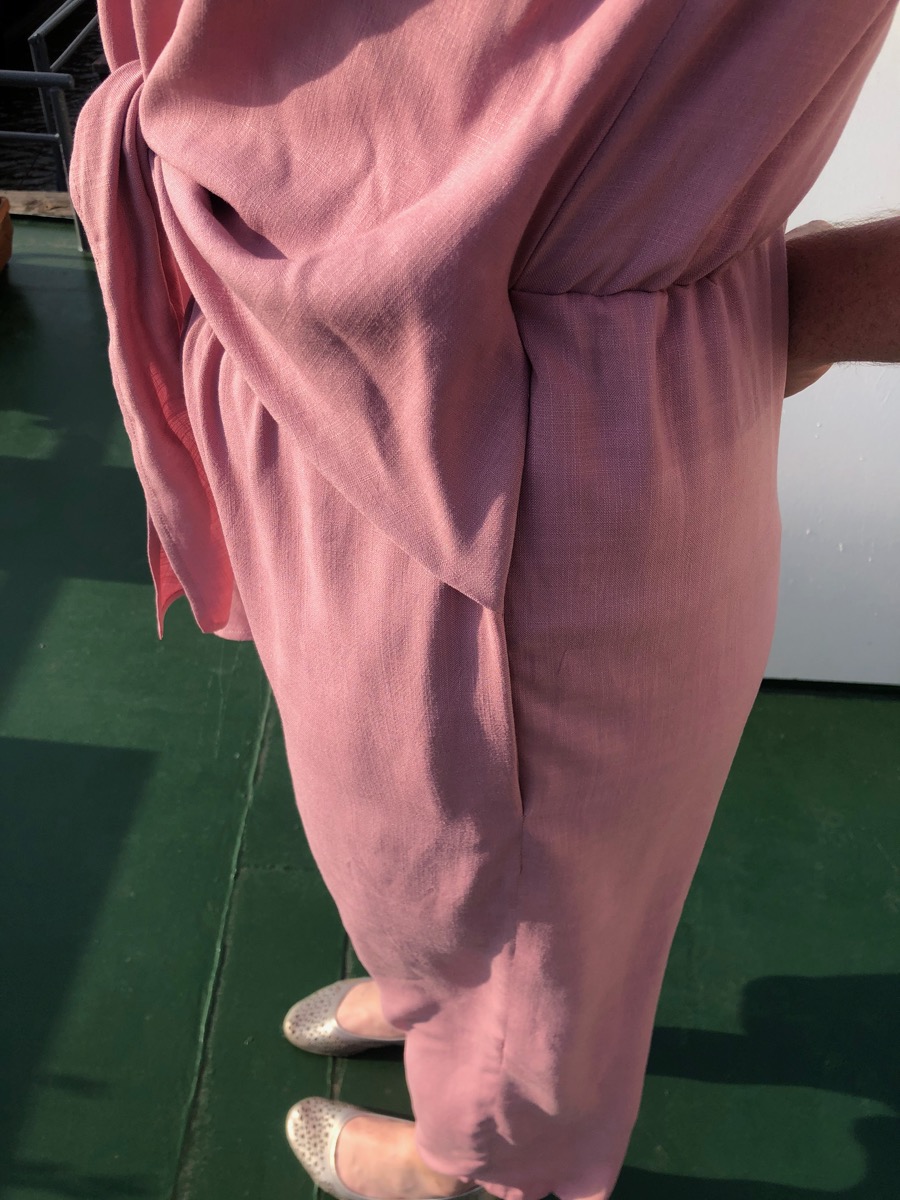
The instructions were great on this, but one change I’d suggest is to not baste the upper front pleats to the front trouser as they say, but instead just do them when you sew the side seams, otherwise you may find you have to unpick the basting anyway later as the pleat markings aren’t very clear.
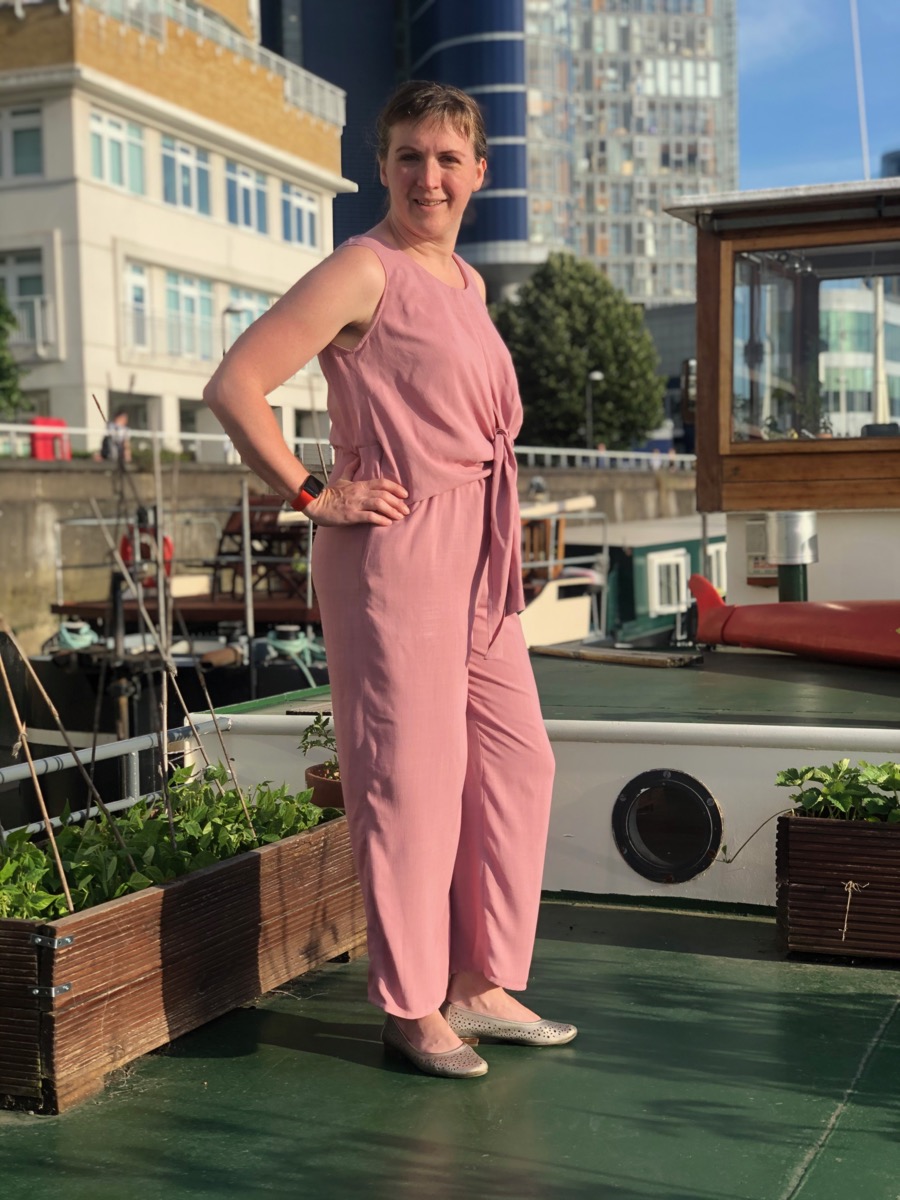
If you’re short-waisted I would increase the trouser rise by 1in since the elastic waist and ties will want to sit at your natural waist, but the rise is otherwise fine – definitely not the excess rise I’ve seen in other jumpsuit patterns *cough* Zadie *cough*. I also added 2in to the overall length as I have long legs (a standard alteration for me on Burda trousers).
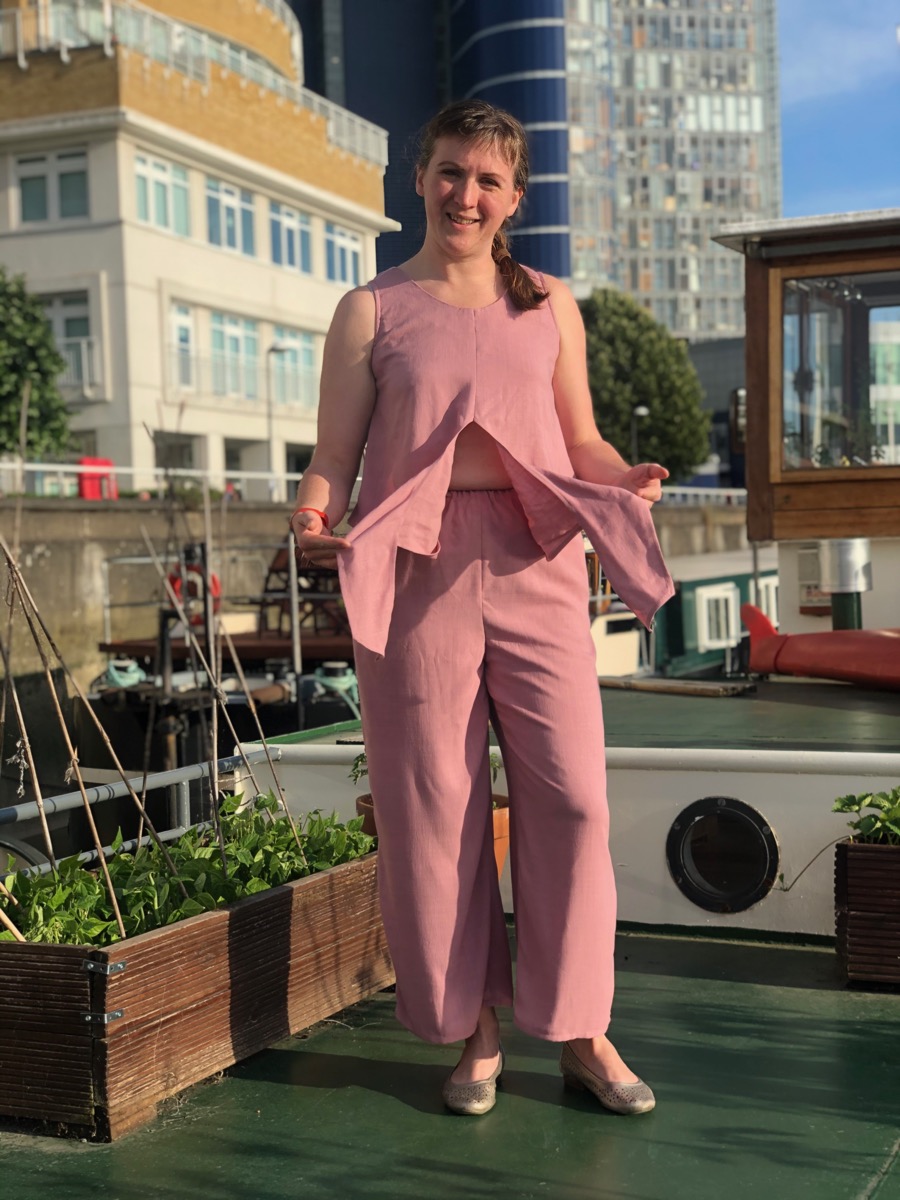
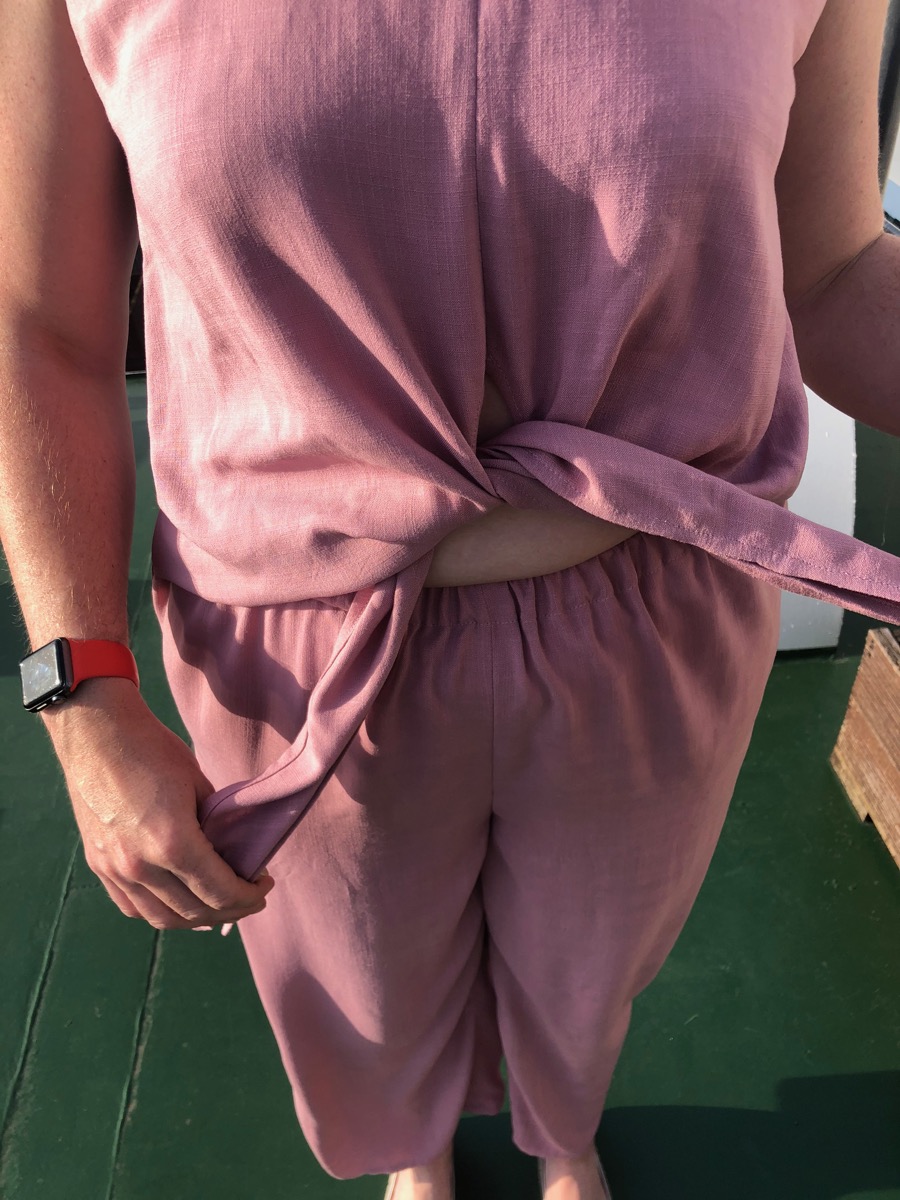
While I love the finished jumpsuit, be aware that there is a fair amount of midriff skin on show if you’re not careful – the fronts are only connected at the side seams and the front slit to form the tie is quite high too. I didn’t think this was very apparent in the magazine photos!
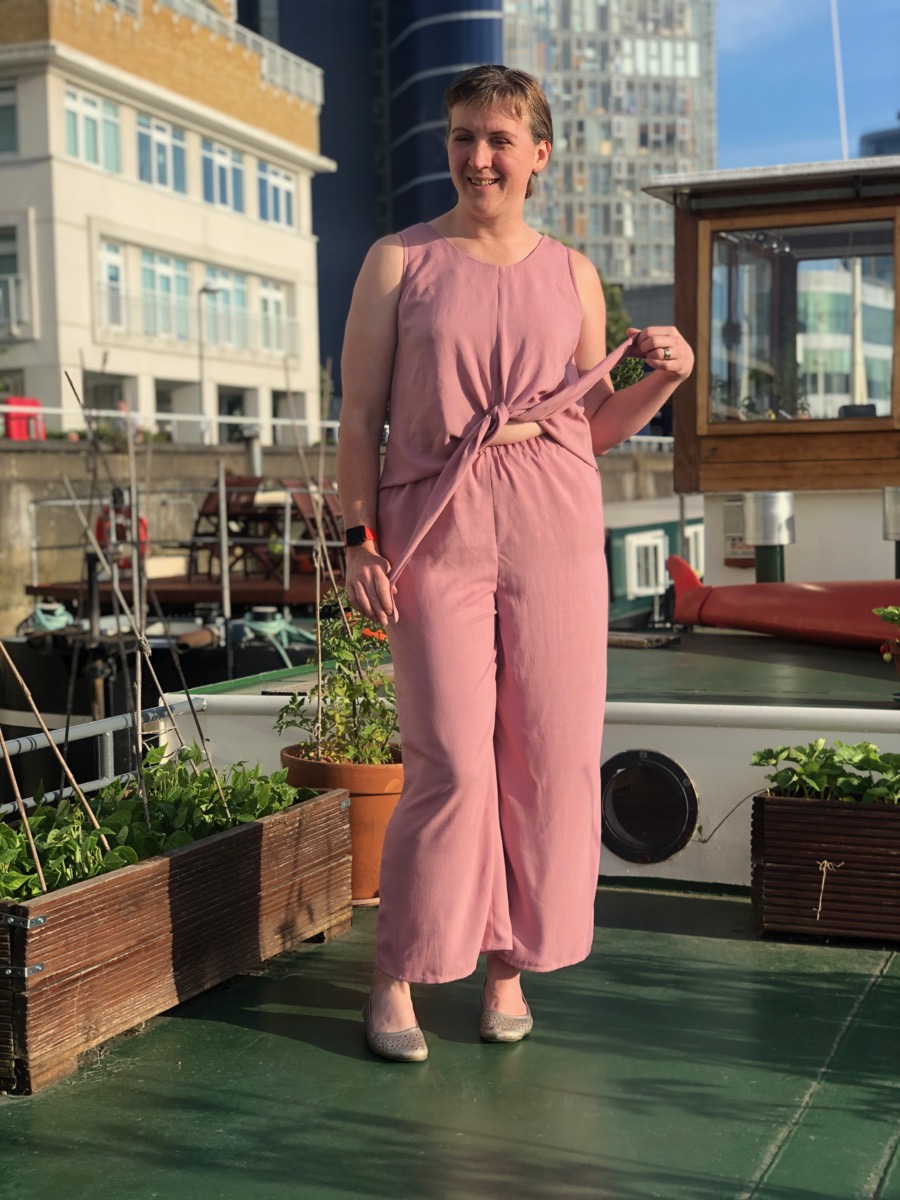
But I’m still really happy with how this turned out – I wasn’t sure of the colour on me at first but as soon as I tried it on I knew it was a great colour on me! I shy away from baby pink shades but this muted one reminds me more of the Vogue sheath dress I made years ago and loved.
I can’t wait to wear this more this summer!