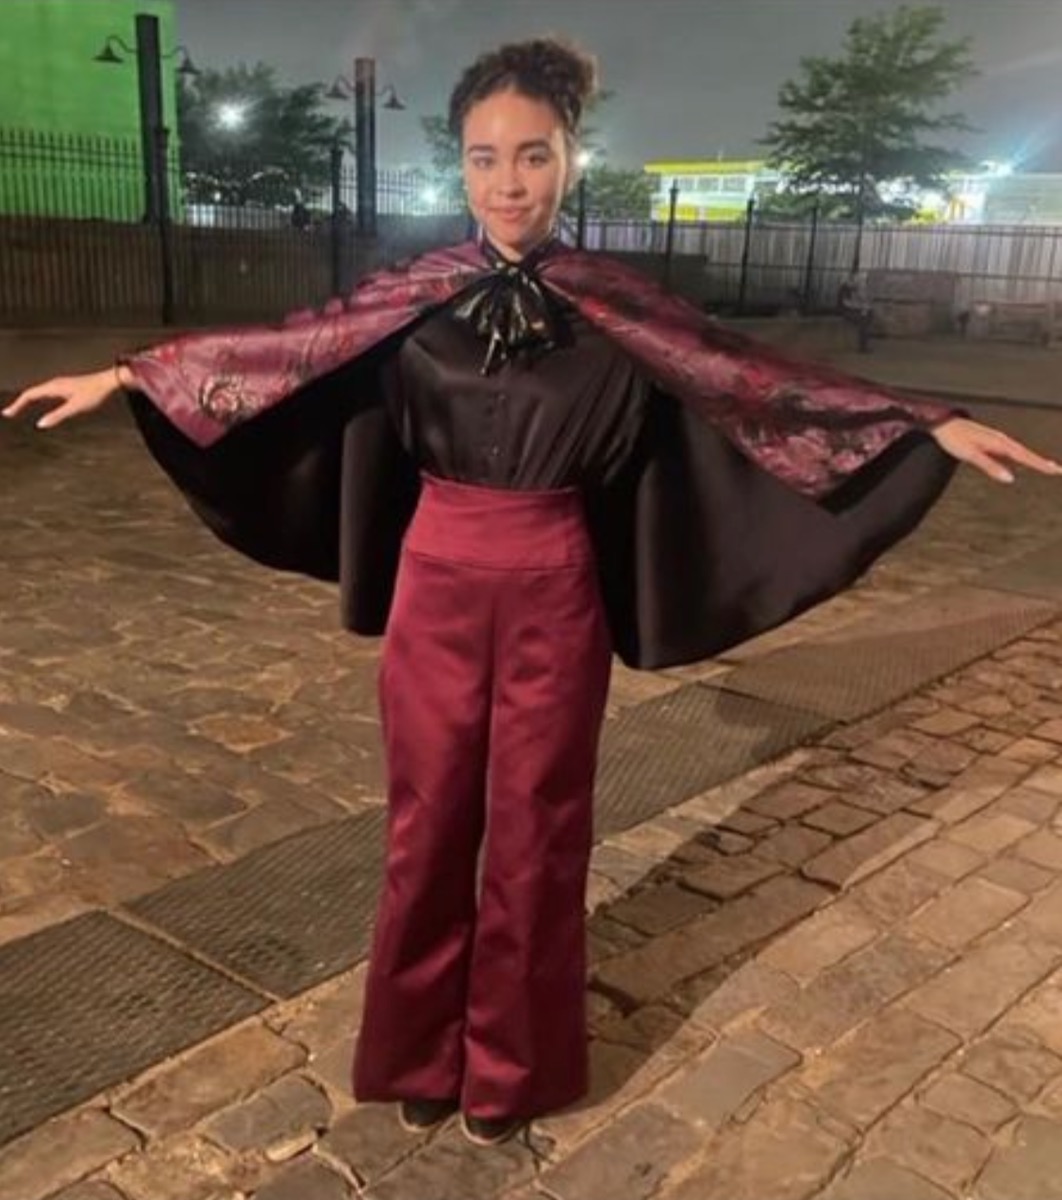
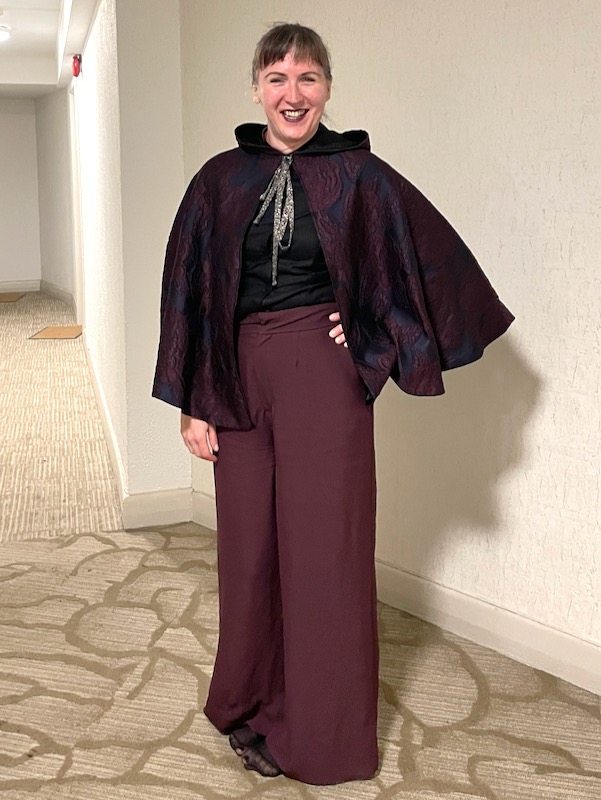
After talking about the inspiration and my goals for this outfit, the drafting and sewing of the cape, and the incredible details of the silk shirt, we’re now onto the final piece – the plum trousers!
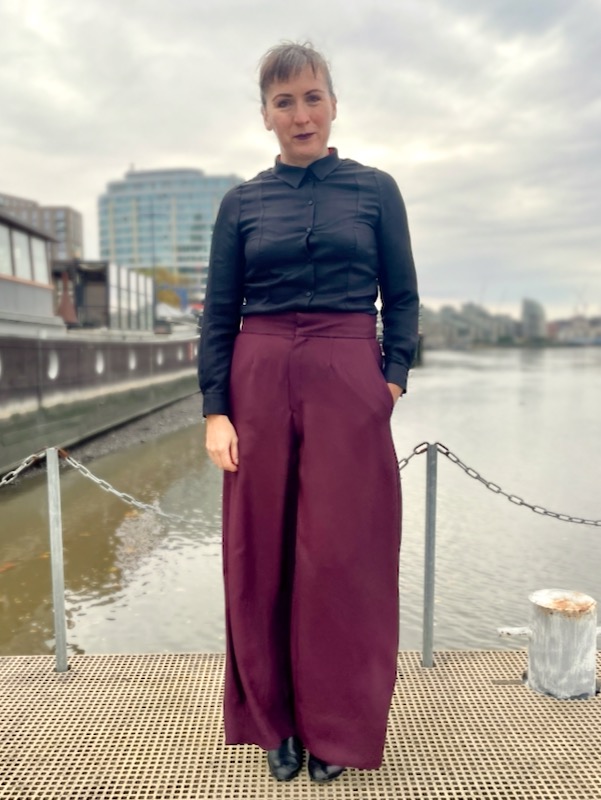
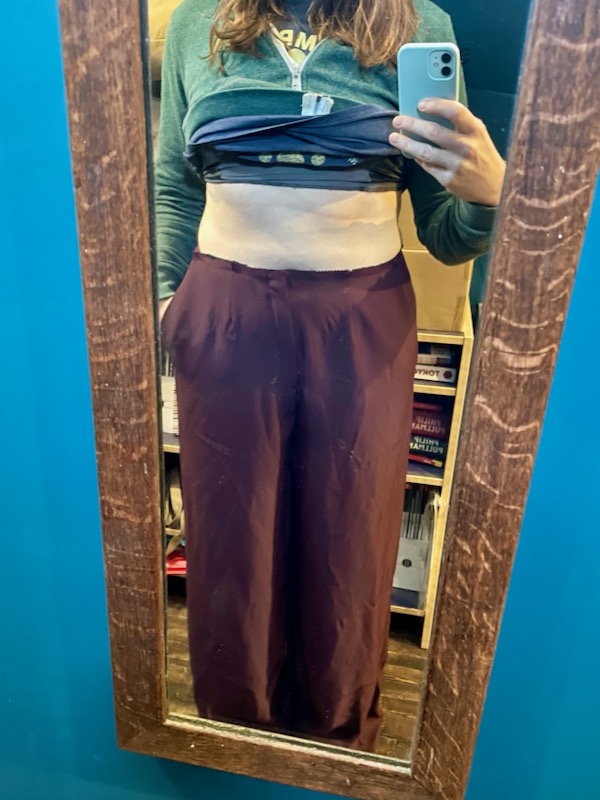
If you recall from my first post, the trousers used in the show were high waisted, wide legged, with a wide waistband and presumably a side zipper (as there’s no front opening on the wastband). I actually hate wearing all of these things, so making this fit my own tastes while still looking similar was going to be a challenge!
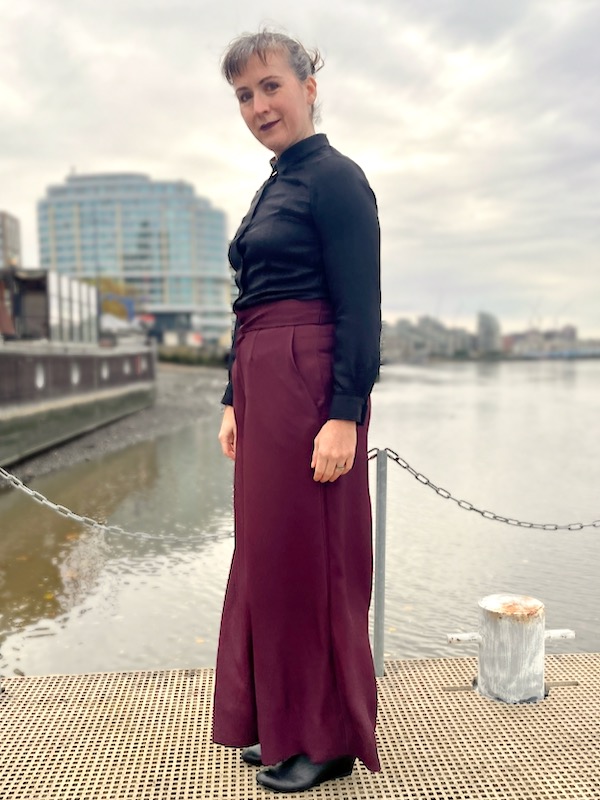
Thinking back to my original goals, I wanted to keep in the spirit of the outfit but make it my own. I’ve always hated photos of myself in wide legged trousers – I’m 5’8 (172cm) but for some reason a wide hem makes me look super short and super wide no matter how glamorous I may feel. But I didn’t feel like I could make a narrow legged trouser and still be in keeping with the original – or the vintage time period – so I resigned myself to looking through my pattern stash for wide legged trousers.
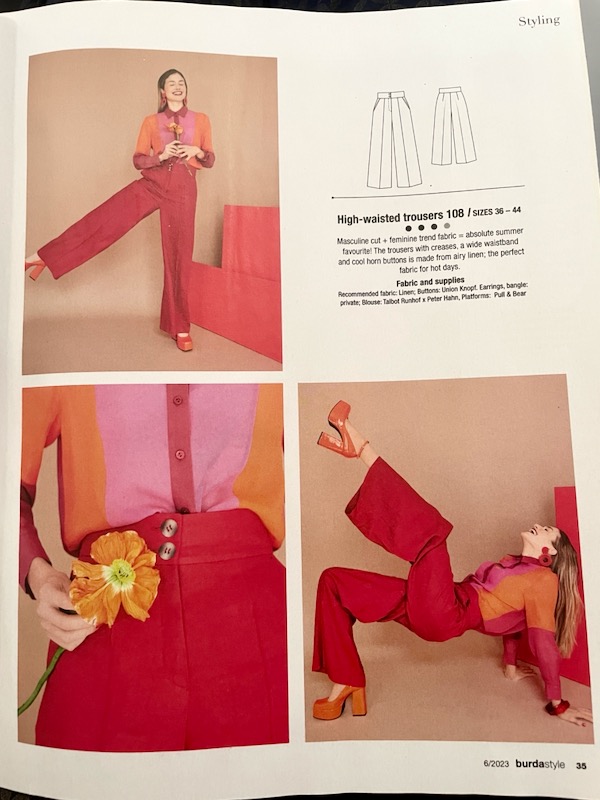
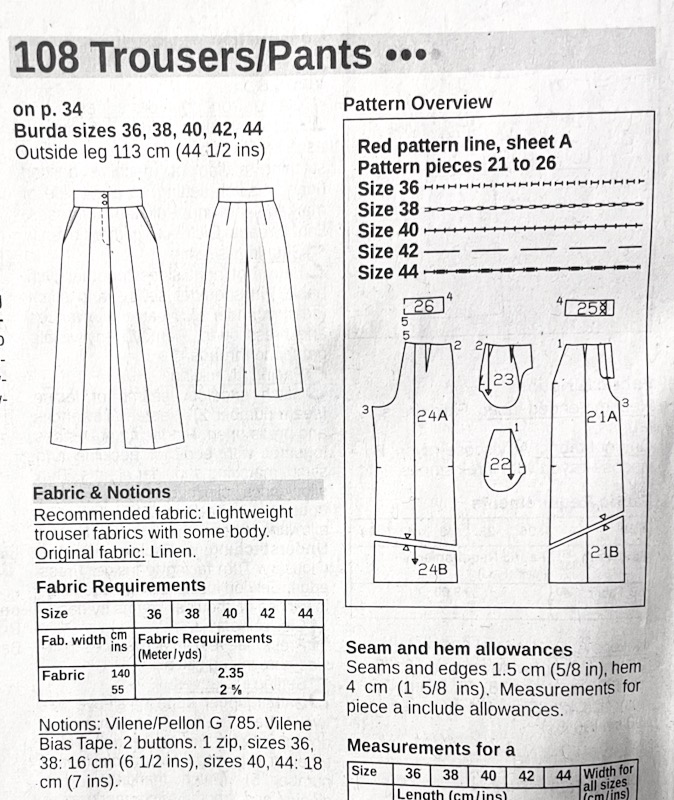
I decided to also keep the high waist but I opted for a front fly opening instead since side zippers always irritate my skin. Luckily, I found the perfect pair in the June 2023 Burda magazine, #108.
I had already bought the fabric for these trousers back in August (which I took along to match against cape fabrics), a gorgeous ex-designer Japanese burgundy acetate twill from New Craft House.
However, when I went to cut them out in October, I actually couldn’t fit these into the initial 2m I’d bought because of the very wide legs!! I was extremely lucky that this fabric was still in stock so I could buy more! I ended up buying another 1.5m so at £12 per metre it still added up to £42 in total.
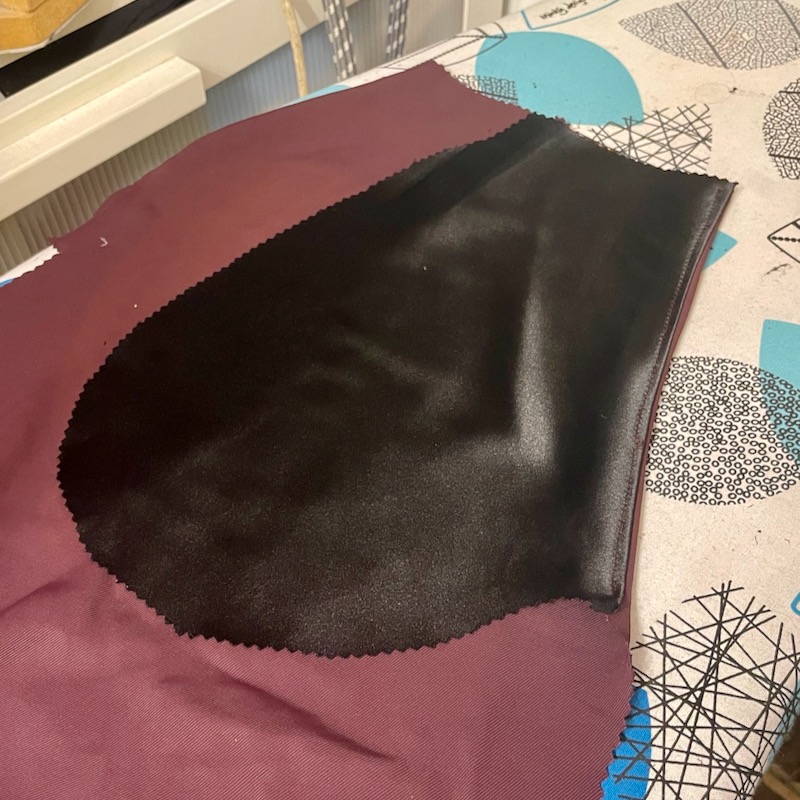
There weren’t many opportunities to add special touches to these trousers but I did cut the pocket linings from the same black satin as the cape lining. It gives a subtle tie-in to the whole outfit plus feeling divine when I put my hands in the pockets.
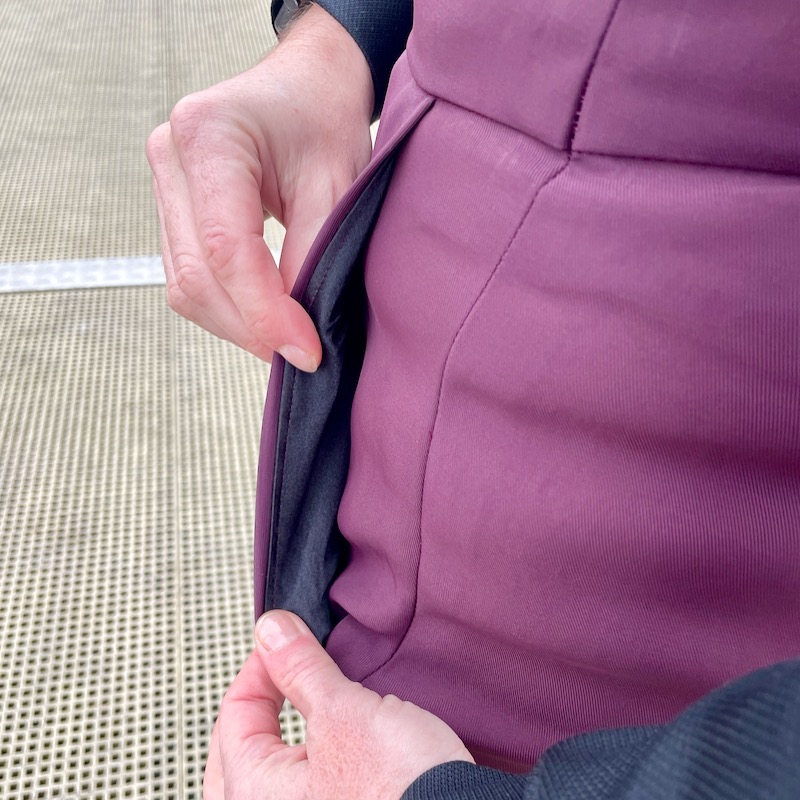
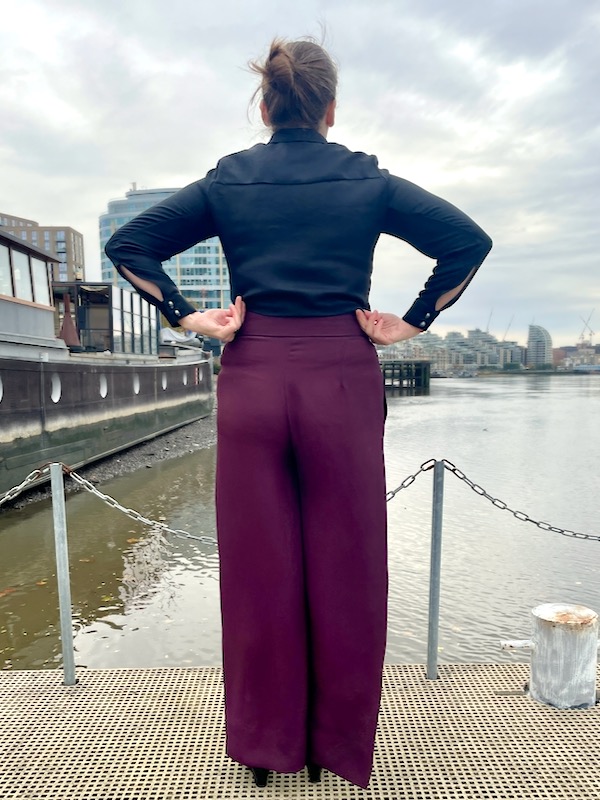
I knew I’d gained about 5cm from my usual waist measurement while I’ve been stuck in bed with post-Covid fatigue for the past ten weeks, so I tried them on midway through construction with some trepidation. I’d gone up to a size 44 but even so, I still cut the waist area with extra wide 3cm seam allowances just in case. And it turned out that I needed them afterall! I went back and unpicked the side seams of the upper trousers and waistband pieces to let them out in the waist. It was a bit annoying but I’ve done so in such a way that it’s much easier to take them back in again later once I can start exercising again.
I’m pleased I took the extra time to let out the waist of these though, because it meant that they were much more comfortable to wear to the vampire party.
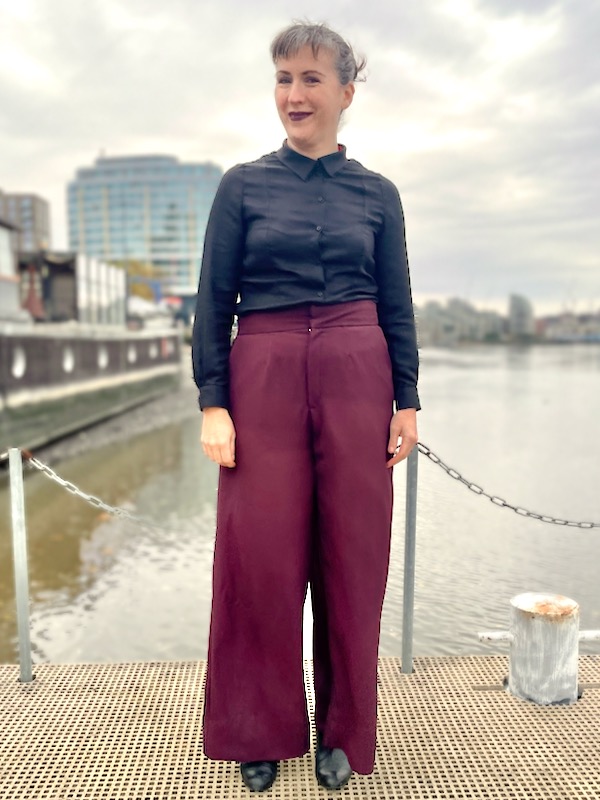
I love this fabric so much – it’s the most perfect drapey, bouncy, heavyweight fabric for wide legged trousers. So much so that these trousers have won me over to wide legs for life – the first pair of wide legged trousers I’ve ever loved! I’ve even gone and bought the same fabric in black now, too, so I can make these same trousers again! A bonus is that the black is also 50% off right now!
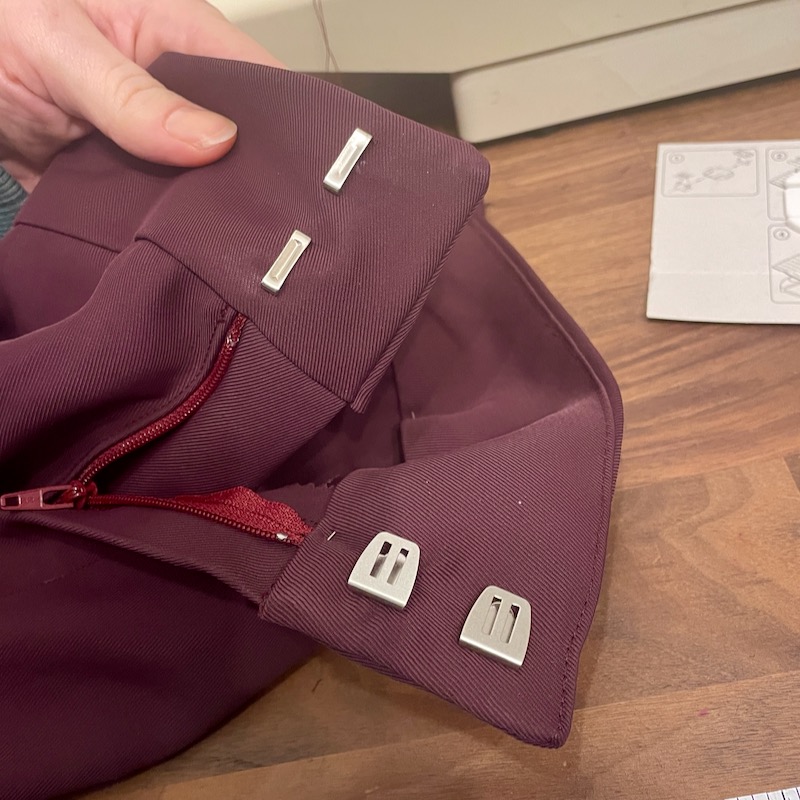
To keep the front of the trousers sleek, I used Prym hammer-in trouser hooks so they’d be concealed and closer to the original costume, but it does mean they’re pulling a little bit at the waistband, which is annoying. It wouldn’t have been apparent with buttons since the holes anchor both sides of the waistband, but since the hooks are only attached to the inner waistband, it’s pulling a bit here.
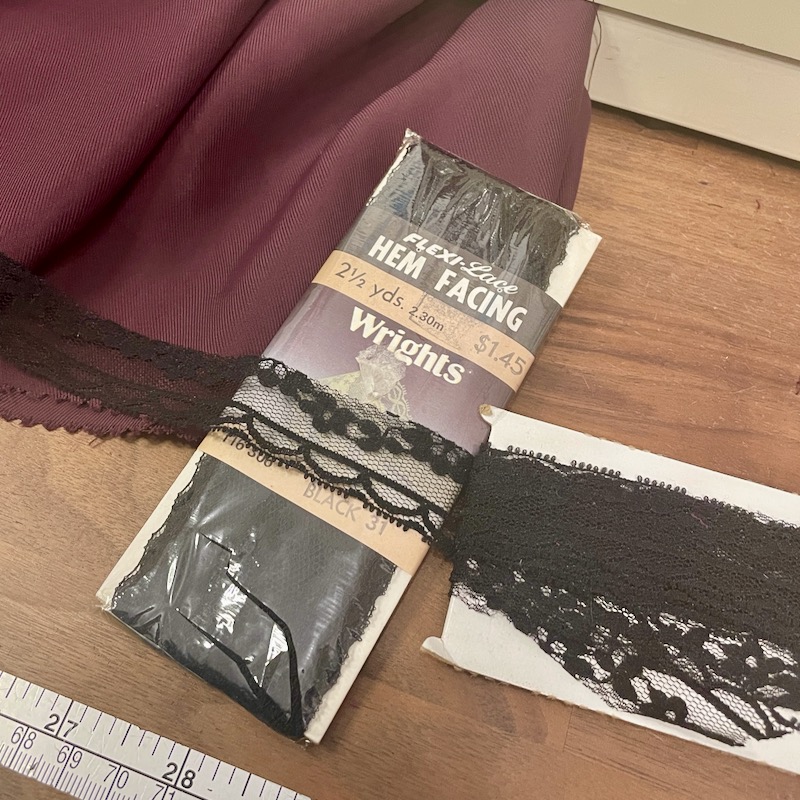
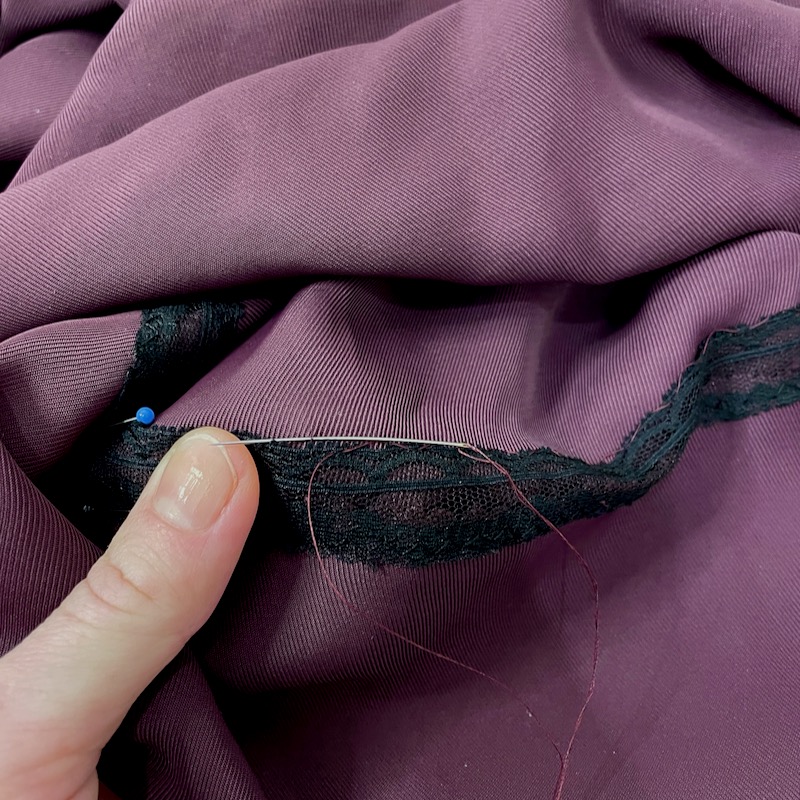
I also used my favourite concealed hem technique – I sewed trouser hem lace to the bottom edge by machine, and then hand stitched the lace to the trousers for a more lightweight hem that’s totally invisible, even if you squint!
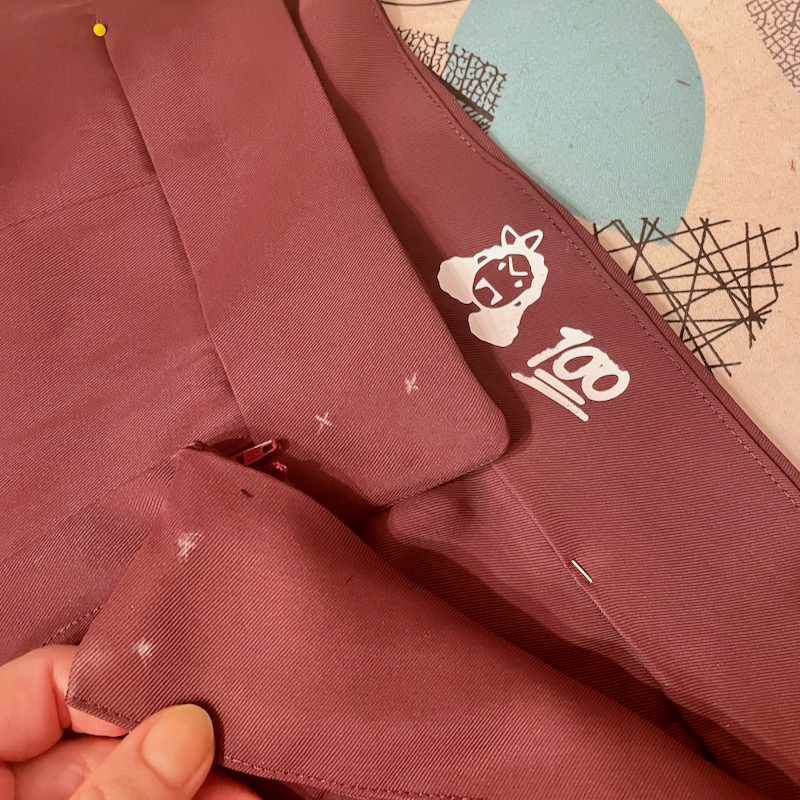
Even though it’s hidden, I added a further tribute to Claudia inside the waistband, too.
Before I’d even finished sewing these I was already starting to pair them with tops in my wardrobe so I’ll definitely be wearing these again!
And this brings to a close my posts about this epic tribute to Claudia’s New Year’s Eve outfit! What was your favourite detail of the set? Anyone planning to sew something similar based on anything I’d made here?