A few months ago there was a Pattern review thread highlighting this amazing top by designer Rick Owens that seemed like a great pattern drafting challenge!
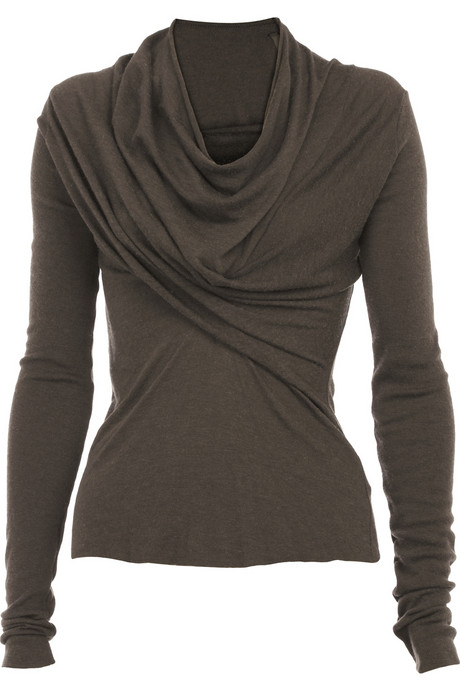
The original top is here but I think Sigrid’s analysis of it is more interesting. There are obviously the folds to contend with, but there’s also a hidden seam at the shoulder, and frankly, just trying to visualise what a pattern piece for this would look like is rather far beyond my limited drafting skills.
But help was at hand! There’s apparently a quite similar pattern in the June 2008 La Mia Boutique magazine, but, looking back through my older copies, I realised that this wasn’t a month I’d managed to pick up. A few weeks passed and I gave up much hope of ever making the top myself, until I was sifting through my pattern magazine scans online and suddenly I realised that I have that pattern afterall! I found it in the June/July 2008 issue of Idees Couture, which I do have! I’d suspected the two magazines were linked somehow since they’ve got a very similar feel (though one is in Italian and the other in French), but I think this pattern appearing in both confirms that they’re essentially the same magazine.

Even on the original pattern I can’t really make sense of what to do with that front pattern piece or the small tab A – and are those buttonholes in the middle there? Any native French speakers care to do a rough translation for me (Leave a comment and I’ll email you a big photo of the instructions)? Usually I can figure out foreign patterns myself just by looking at the pieces and tech drawing, but I’m afraid the construction of this has still me stumped.
But once I figure out the original, the pattern alterations that Marita worked out to get it looking very close to the Rick Owens top should be a breeze! I think with Marita’s fabulous side-by-side pattern pieces and the original I can make a fair go at this, if I could only figure out how to assemble it. I’m sure it’s something akin to the KnipMode twist top, where the pattern pieces look alien until you get the “ah-ha!” moment…
Update!
Thanks to Trena, fastest French translator in the west, I now understand how it’s all meant to go together! A-ha! The small, buttonhole-like slashes on the front pattern piece are actually meant to be pinched together to form that front diagonal drape. Which makes sense, as you can see the lower front fabric is being pulled up underneath the drape in Sigirid’s breakdown.
And as for Piece A… it’s a bra strap retainer. Really! At first it seems a bit ridiculous that they’d specifically tell you to make these, but then the more I thought about it, the more I realised that they’re actually pretty important to the design here. They’re pretty much the only thing stopping the huge neckline from falling off or down your shoulders, as there’s no lining or smaller, inner layer here to keep everything together. Hurrah for the humble strap retainer!
So, with great thanks to Trena, here’s a rough idea of how to construct this top (the notes are hers)!
- Sew the front dart.
- Make the pleat/fold on the right side of the front following the markings and sew for 3 cm. [It appears the three short markings indicate an inverted pleat, except if you’re making it on the right side of the fabric maybe it’s an extroverted pleat.]
- Sew the shoulder seams.
- Insert the sleeves into the armscyes.
- Sew the sleeve and side seams at one go.
- Fold the neckline binding in half, wrong side to wrong side, and fix the two ends with pins. Place the raw edges of the neckline binding along the neckline at the right side of the blouse from the left shoulder. Baste in place, stretching as you sew. Before sewing, turn it up to make sure the collar turns perfectly. Trim off the excess of the binding and join the two edges with an interior stitch [I assume this means right side to right side]. Sew the binding in place. Turn the binding up and sew the seam allowances in place with a twin needle keeping the needle as near as possible to the binding.
- Make the hem of the blouse and stitch in place with a twin needle. Sew the ends of the cuffs together. Fold the cuff in half, wrong side against wrong side, and hold in place with pins. Turn the sleeves inside out and sew the cuffs in place.
- Prepare the loop strips, sew and turn. Place the loop strips on the shoulder seams (one on each side) and fix one end to the shoulder seam allowance. One the other end of the loops sew half of a snap. Sew the other half of the snap to the seam allowance of the shoulder. These are to keep the strap of your bra from showing. [How annoyed was I when I got to the end of these complicated directions and realized they were just for bra strap keepers!]
- Iron with caution.