I’m just going to put this out there and say it – writing a book is a TON of work, whether you’re doing it on your own or with the help of an international publisher (like I did with “Sew Your Own Activewear”). When I realised that I wanted to supplement our new beginner pattern with an eBook focused entirely on beginner activewear sewing tips, I had a pretty fully formed idea of what I wanted it to contain, but not really sure of how to get there.
I wrote out a rough outline of chapters and before starting anything, I approached my publisher to make sure that I was legally okay and not breaching any non-compete or future works clause in my contract from SYOA. Thankfully, they could see that both books were fundamentally different and gave me their blessing to self-publish it myself, otherwise it couldn’t have happened at all!
I think most people assume that the actual writing takes up the bulk of the time spent “writing” a book, but for me, getting the actual words onto paper was the easy part. I closed myself into our back cabin for a few days and by the end of it, I had 90% of the text written!

The much, much harder part for me was getting the text into a professional-looking layout and taking the HUGE amount of photos needed to illustrate everything in the book. Both of these aspects were handled for me by my publisher the first time around, and I don’t think I truly recognised how skilled they were at doing this!
I am absolutely under no delusions about my graphic design skills, so I chose to buy a book template from Creative Market which took the heavy lifting off my shoulders in terms of graphic design. The one I selected had a clean aesthetic, a ton of different page styles to mix and match, and (crucially!) a commercial license option so I could actually sell the book afterwards. Once I bought the template, I started to transfer over the text I’d written in Word into the stylised pages, making sure the text flowed properly from one column to the next without flowing off into the abyss (an easy thing to do!).
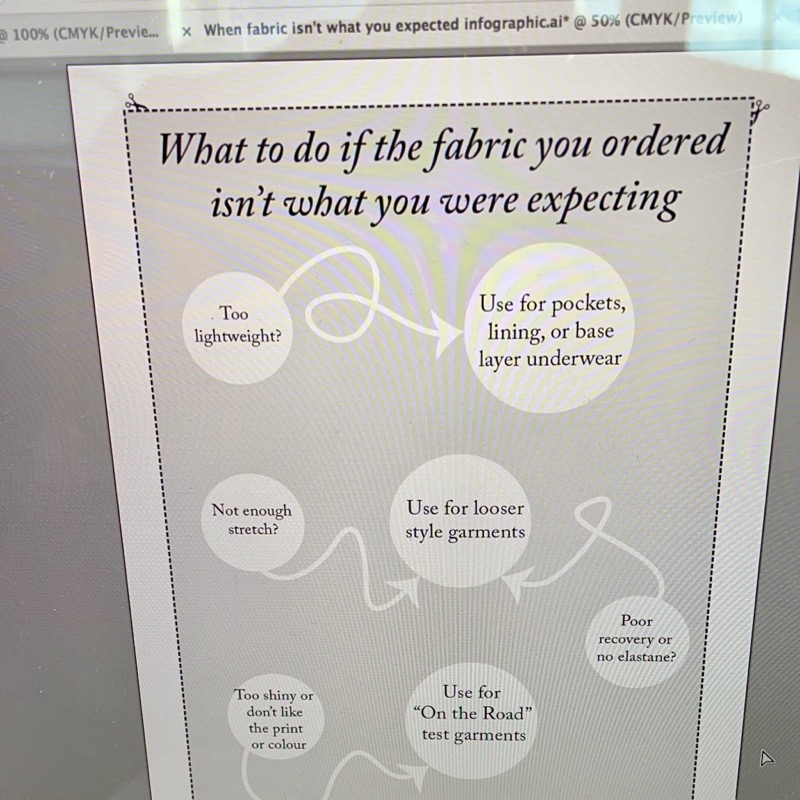
Once the text was in, I could start to create a list (ok, a massive spreadsheet!) of the photos I needed to take based on what was talked about on each page. There was a mix of shots, from ones of me in my sewing room, to objects in isolation, to outdoor action shots, and even a few full-page infographics. The infographics were actually the easiest for me since I’ve been illustrating all the FehrTrade pattern instructions for years, but professional-level photography was not a skill I had in my toolkit!
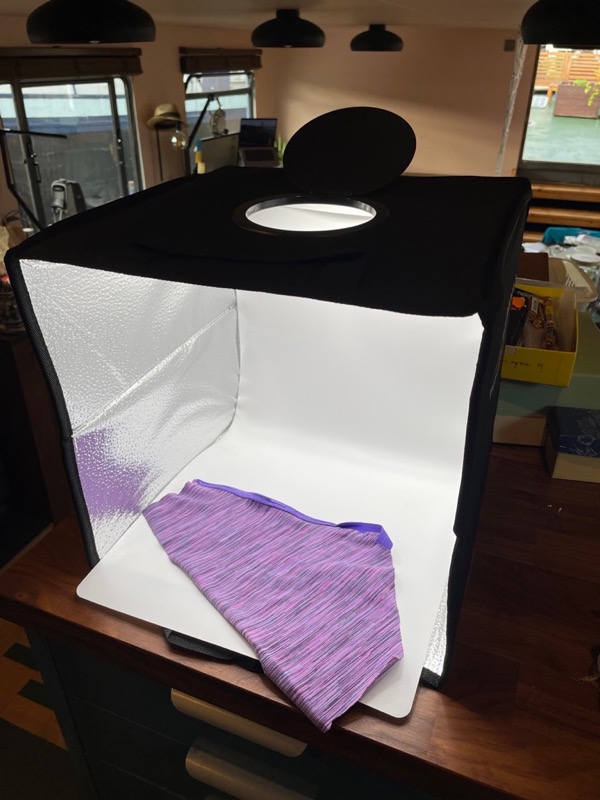
After a bodged photoshoot full of dark and yellow-tinged shots, I broke down and bought myself a lightbox and omg this changed everything! It made it far easier to eliminate shadows and get the crisp and bright object photography I was after, and it was such a game changer for the eBook!
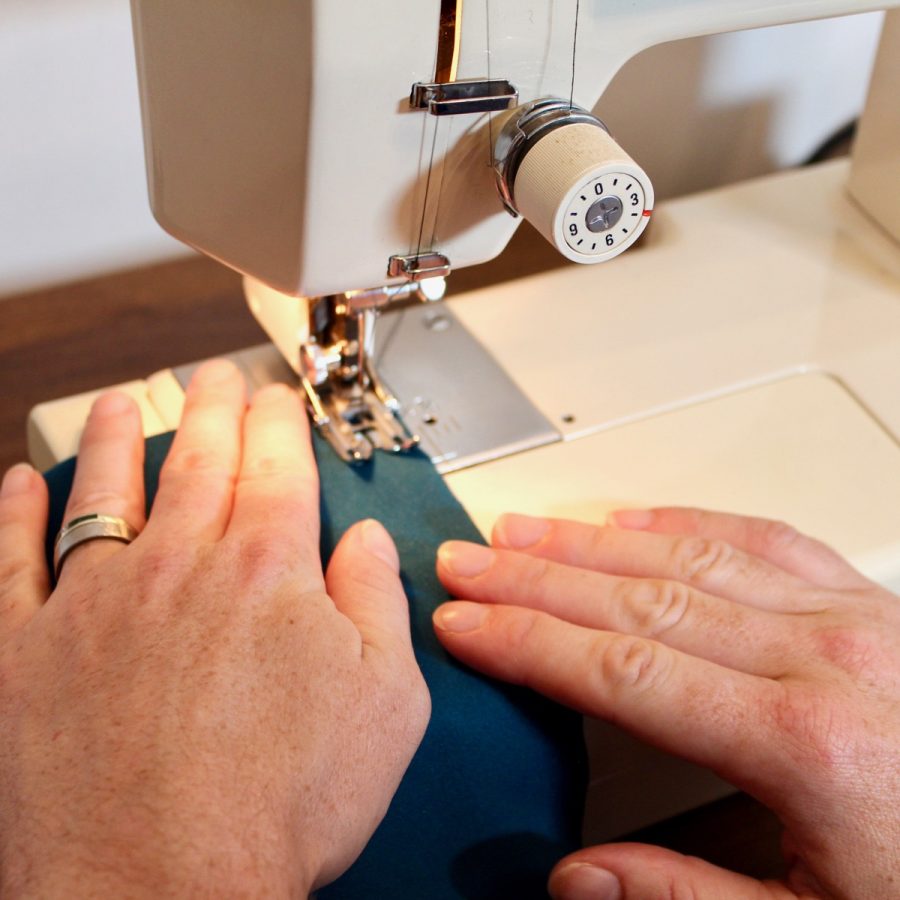
Even so, it took several full days to prepare and photograph every shot needed for the book, but thanks to my organisational skills, I was able to sort which ones required the lightbox, which required to be shot in portrait or landscape, and which required my lovely assistant because my hands needed to be in shot!
Once I was finally happy with the fonts, the photos, layout, inserted all the internal links (from page X to Y or to a website), generated the QR codes, and applied the feedback from some active sewing proofreaders, I could finally release it out into the world alongside the Tenacity Leggings pattern!
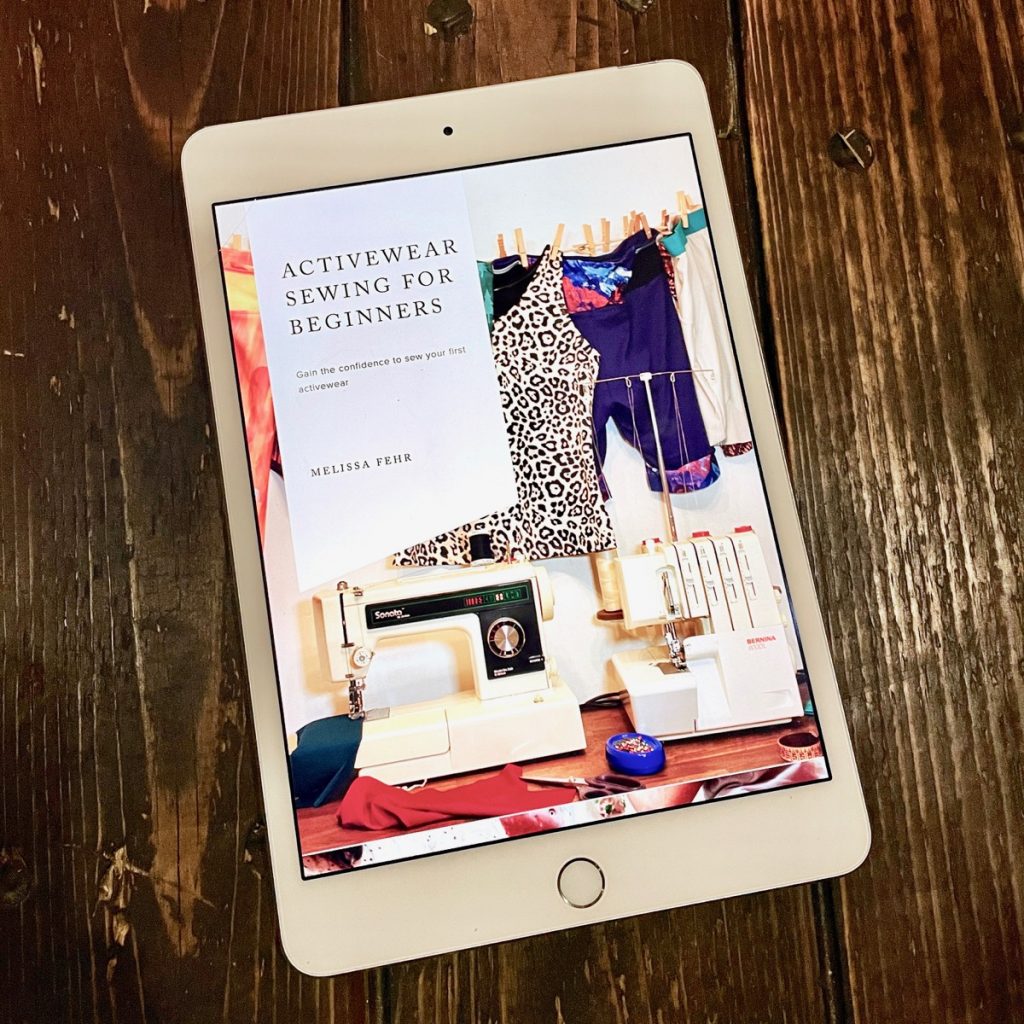
Writing this eBook was a totally different experience from writing “Sew Your Own Activewear”, not just because of the time scales involved, but because of the level of outside support involved, too. Even though “Activewear Sewing for Beginners” doesn’t contain any patterns, it covers a much wider variety of topics than I was able to talk about within the constraints of page counts in a physical book. I feel super proud about what I achieved, and I really hope it helps others gain the confidence to start sewing activewear, too.
If you’re one of the many sewists who’ve bought a copy already, I’d love to know what your favourite tip, or thing you’ve learned is – tell me in the comments below.
And if you haven’t bought yours yet, you can still save 20% on this eBook as well as all sewing patterns (including the Tenacity Leggings) by using code BEGINNERFUN at shop.fehrtrade.com til 14 November.