Blog

Patrones spring coat – finished shell

Are you thoroughly sick of the sight of the Patrones spring coat yet? Well, too bad, because it’s taking me forever!

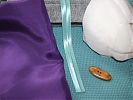
The good news is, I sailed smoothly over the speed bump that caused me so many headaches and delays in making my winter coat – the bound buttonholes. I’d already decided that with such a thick, loosely woven fabric that’s so prone to unravelling, that I’d use the satin bias tape I’d bought for binding the hood seam allowances to also make the bound buttonholes.

So I pressed the satin bias tape flat, cut it down to 1/2 inch wide strips, then folded these in half (right sides out) to make the buttonhole “lips”. After basting my ladder stitches on all the coat tabs, I did the usual technique of sewing these lips to the right side and cutting open the buttonholes.

But here’s where I deviated a bit – since my wool unravels so much, I knew that trying to stitch those tiny triangles at the ends would just be an exercise in futility, so I pulled out some lightweight knit interfacing and cut out a tiny strip. I then pulled the triangles to the back and fused the interfacing over top to keep them out of the way:
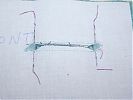

(It’s a bit hard to see but the mesh white interfacing over the left and right ends is there!)

Patrones spring coat – hood and more…

On Saturday I went shopping for supplies with Johanna Lu while she was holidaying in town, yay! We hit up Goldhawk Road and MacColluch & Wallis so I was able to get the rest of the supplies I needed for the spring coat, as well as stock up on a few things I knew would be difficult to get online for the rest of the year, like quality interfacings (I knows it when I feels it, okay?). She had the forethought to bring a camera along shopping, so you’ll have to stalk her blog for the next few days to see us giddy in fabric mecca!

I was very disciplined on Goldhawk Road and only bought three fabrics (at the end of the list there) – grey corduroy, since I adore the cords at one particular shop there and I don’t think I’ll be able to go back before Fall, a red & white cotton poplin with stylised flowers that’s already earmarked for two projects, and my one impulse buy – a very cool lycra jersey with tons of overlapping stripes going every which way. Oh, and the lining for my Spring coat.

Speaking of that Patrones spring coat:

Patrones spring coat – muslin & alterations

Since I’m not entirely confident of how Patrones patterns fit me, and I’m equally not confident that I am a size 44 anymore (well, I was when I traced it 18 months ago, argh), I decided to play it safe and make a bedsheet muslin for my Patrones spring coat before cutting into the basketweave wool. If you remember, this is the coat:

And this is how the muslin looks straight off the pattern sheets:

Gold silk Eclair dress (and bonus purple bow tie!)

Sorry for the delay – I finished the Colette Patterns “Eclair” dress last week but couldn’t quite squeeze in a photoshoot until we were actually at the wedding venue on Saturday (the very nice London Canal Museum in King’s Cross. Though all the tiny canal boats made me feel like the 50 Foot Woman in comparison!).

If you recall from the previous post describing the invisible zipper details, I’m making this newly released dress pattern in gold silk crepe, with aubergine silk crepe ties and gold silk habotai lining.

I was a beta-tester for this new pattern company, so mine was only a rough photocopied draft, but it was enough for me to see that this is a definite keeper! I’m really jealous now after seeing the finished storybook packaging that I almost want to buy it again, just to have a pattern as beautiful as the dress itself!

Prepping for Patrones

Now that I’ve finished all my other spring projects (the Colette dress is coming, sorry for the delay!), I can now devote all my available energy toward making my spring coat, Patrones #261-17, as voted on by all of lovely you!

Also sewing along with me are Zoe (whom I borrowed and traced the pattern from originally!) and Houkje, who’s also tracing and joining in a bit later on, creating our own London-Patrones micro-Sewalong!

First off, Zoe says:
I took a quick photo this morning of the fabric I’m using for the coat.

The wool on the left is a remnant from the cloth house and not enough
for the whole coat. The velvet on the right is for the hood, button
tabs and possibly the collar if I don’t have enough of the wool for
that. I bought some great brass toggles on Walthamstow market (couldn’t
find them a 6am without waking the family up), but forgot about the tabs
on the sleeves so I need to get back soon to get some more. I’m looking
for a two tone lining in beige and turquoise to match the stripes in the
wool, but no joy so far. Need to find time to get over to Shepherd’s
bush I think.

Whereas for my coat, I’ll be using that great, soft teal basketweave wool, bulk fusing it with lightweight interfacing, before cutting, then overlocking all the cut edges to prevent fraying and unravelling.

I’ve got 4 yards of the wool, but only ordered 3 metres of the Vilene H180 lightweight interfacing. Only I forget it was super narrow, so by the time I laid it side by side on the wool, I only had about 1.5m of the wool covered. So I’m waiting to see if I can lay out all the pattern pieces that wouldn’t normally be interfaced onto the bulk fused section, and the pieces like the collar, facings and button tabs onto a section that I’ll cover with heavier interfacing to avoid having to buy more. Confused? Don’t worry, this plan might fail anyway…

Thank You Part Two

Following on from the post “Thank you!” from a few months ago, I’ve now got three weeks to go before I go into hospital for my bone marrow transplant so I wanted to get my address up for any of you who’d like to send some boredom-relief packages.

Please read the earlier post for an idea of what I’m talking about here (it’s okay, I’ll wait. . . . . All done? Great!). In addition to all that, I will have my little red sewing machine and my Mac laptop (with low-bandwidth internet) in my little room with me, if that helps with ideas.

Ground rules

  1. Please wrap all boredom-buster(s) individually inside the postal envelope, enclosing your name and email address inside! (as I will gather them all together in one place to open one each day so they’ll get separated from their envelopes and I want to know who to thank!) Newspaper/magazine/recycled flyers are more than fine for wrapping!
  2. It is extremely important that you do not send anything if you or anyone in your home has even the slightest cough or sniffle. Please wash your hands for good measure anyway before wrapping, too (I will have zero immune system and what would cause a slight cold for you will result in a serious illness for me on top of everything else!)
  3. I am not allowed any flowers or fruit you cannot peel (though, admittedly that’s probably more pertinent for in-person guests…) because of the chance of fungal infections.
  4. If you’d like to send a card, please hold off – I’ll post up my hospital address as soon as I’m in so they’ll come straight to me (I don’t want the nurses to have to deal with any early arrivers, and I don’t want my co-workers to have to lug in a ton of post for me, either!)
  5. Please forgive me if I sound like a bossy, ungrateful cow. 🙁

Address for parcels only:

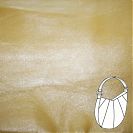
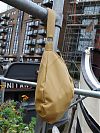
Mustard yellow leather bag

This bag was long overdue, so I finally managed to squeeze in another HotPatterns Nairobi bag this weekend, made for about the 6th time now(?) I think!

It was originally a download-only freebie pattern, but it’s been long discontinued until a few weeks ago, when they started selling it again in paper form for a limited time! I highly, highly recommend getting this pattern if you don’t have it already!

I find it’s really difficult to photograph bag linings once they’re done, so I’ve taken some photos of the lining before assembly so you can clearly see my pockets!

KnipMode May 2009

Last Tuesday I had the extreme pleasure of meeting fellow sewer Sigrid as she was visiting London with her family and had a short break in their sightseeing to come and stop by the moorings! It’s so funny, within minutes it was like we’d known each other for years, even though we’d never met in real life before, only observing each other from our respective sewing blogs…

Besides the great opportunity to blather on about sewing with someone whose eyes don’t glaze over within 5 minutes, she also brought me some really nice gifts! Oh Sigrid, you can definitely come visit again, you didn’t have to bribe me!!

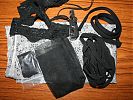
First up was a gorgeous silver and black Kantje Boord lingerie kit for my birthday!

Pillowcase Challenge giveaway!

Cast your mind back to May last year, when I posted about sending off some submitted projects for a book about reusing old pillowcases… You there yet? Great!

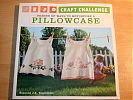
Because Craft Challenge: Dozens of Ways to Repurpose a Pillowcase has now been published! Or rather, it was a month or so ago, I’m a tad late…

I’ve got my copy here, which is full of really basic, easy sewing projects that are perfect for beginning sewers. The other cool things is that you don’t really have to use pillowcases for your starting points here – you could just as easily make things like the hat, stuffed toys, kimono (pictured above), remote control armchair caddy, cape, etc, from equivalent lengths of scrap fabric or fun quilting cottons. I sourced all my vintage pillowcases off eBay to make my samples for the book, too, so you don’t have to feel bad about cutting up your family heirlooms if you don’t want to, either.

So without further ado, here’s my winning submission, the “Flirty pyjama set”, featuring a camisole and French knickers made from one pair of pillowcases!


(Photo of the Flirty Pyjamas compliments of Lark Books!)

The disappearing silk zipper

The Colette Patterns “Eclair” dress is not a quick, one-weekend project, but it’s well worth taking my time over and going through all the careful steps in the instructions to get a nice finish. I inserted the side, invisible zipper last night (more on that in a second), so now I only have to attach the lining to the zipper tape, stitch in the ditch along the waistband to join the shell and lining, and hem the two skirts! I’m doing well on time, too, since the wedding’s not until May 9th and I’ve got a bank holiday between now and then, too.

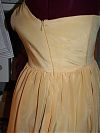
So here’s the invisible zipper on the side seam (yes, I am rather proud of matching the waist seam there!):

You can’t tell on the tech drawing, but this dress has inseam pockets, too, and the instructions have a very clever way of dealing with the pocket, side seam, and invisible zipper area that makes it all nice and neat!