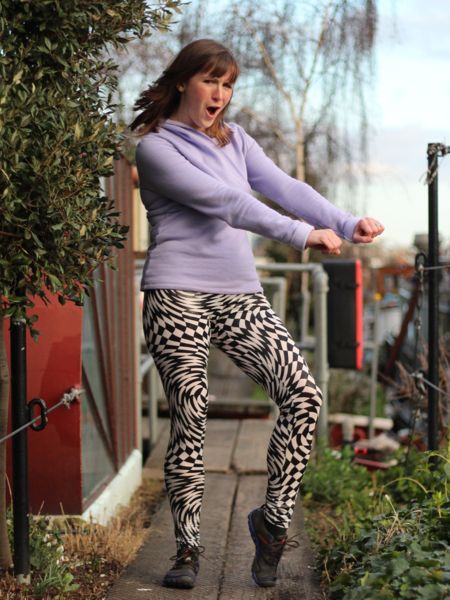
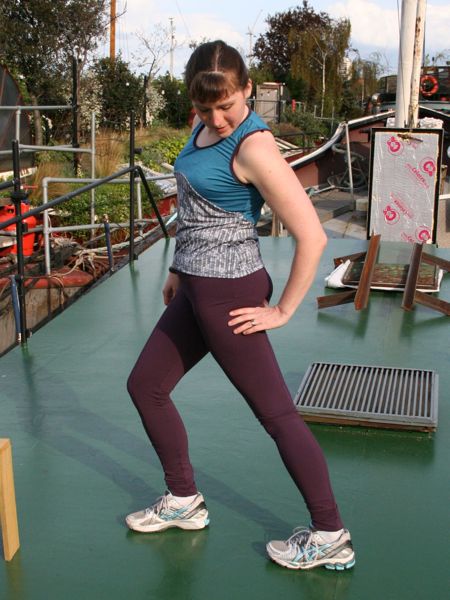
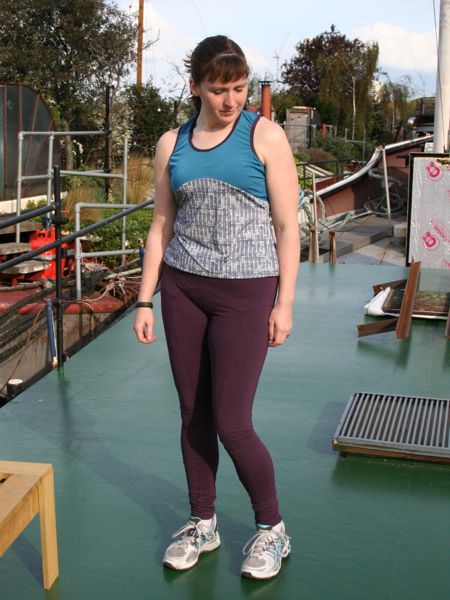
Donna Karan denim-look leggings

Yikes! I actually made these leggings back in early July, but then it was so hot and sunny for weeks that I couldn’t bear to do the photoshoot, even though I was wearing them in the evenings a lot. The impetus for these was that my beloved pleated “denim-look” leggings had come to the end of their life through heavy use. I’ve been trying to find the time to sew a new pair of denim-look leggings over the entire summer, even buying in the fabric ahead of time so it was all ready to go, but alas, other work had gotten in the way.

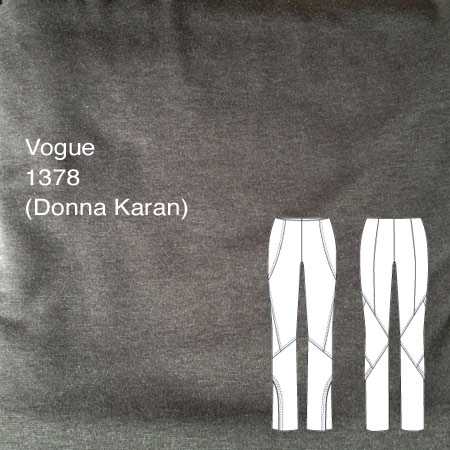
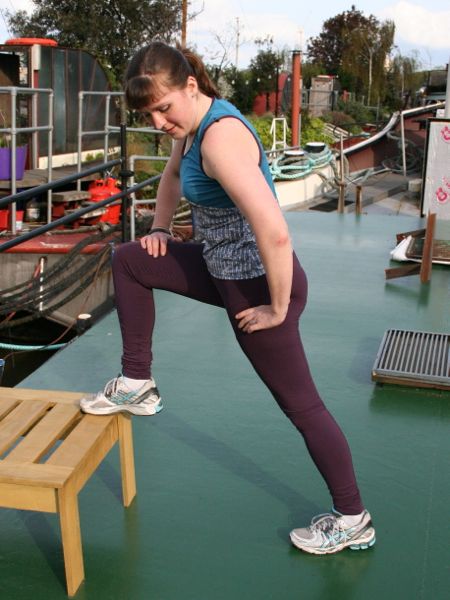
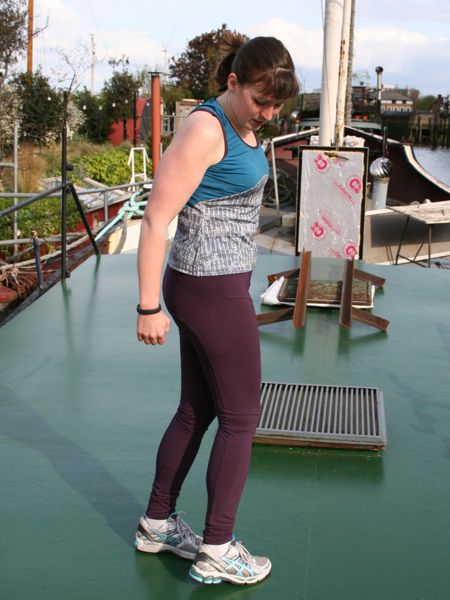
But then I finally had some spare time so I pulled out my denim-look jersey and Vogue 1378 – the Donna Karan separates pattern.

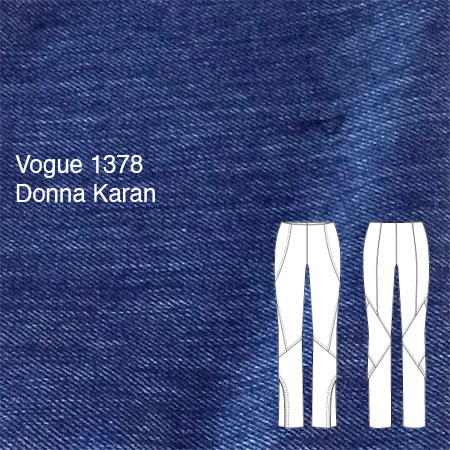
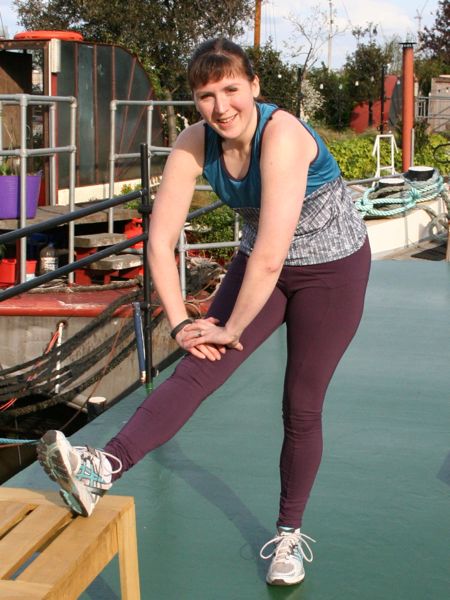
I’d made these leggings a few months ago in grey ponte, and I really like them – except for the floppy ankle opening things. Those really annoy me, limit my shoe choices to heels, and generally just don’t work for me. So I’d already altered the pattern by overlapping the two ankle pieces and drawing a new seam line where they intersect, and I used the modified pieces here.


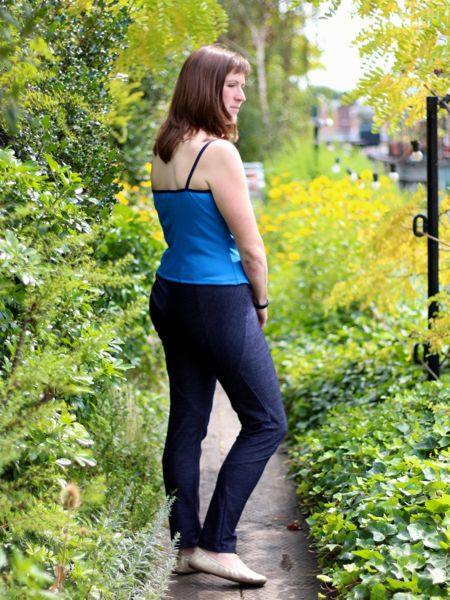
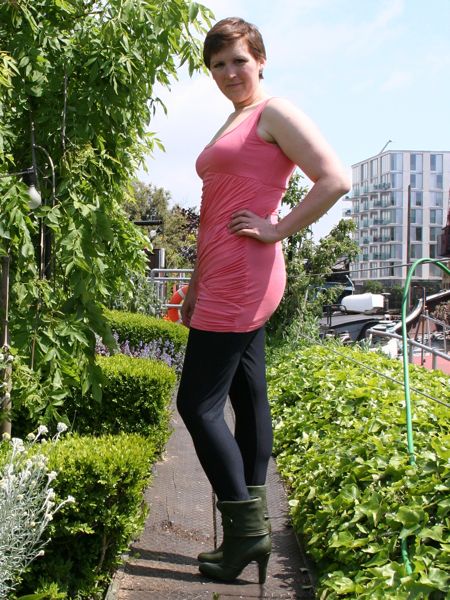
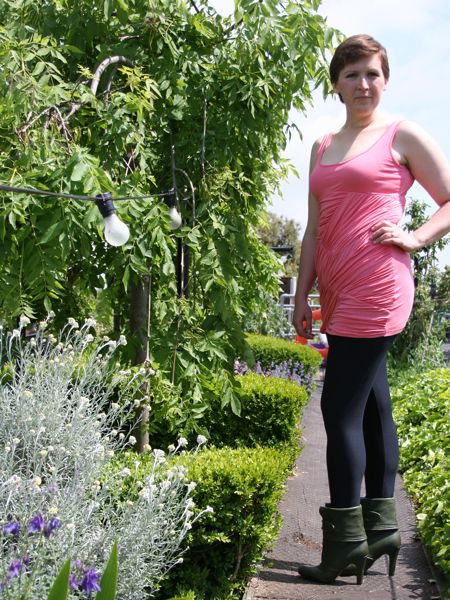
Seen here with my new Yellowtail Camisole – more on that later this week!

Grey Donna Karan leggings (Vogue 1378)

I don’t sew many “Big Four” patterns these days, but when I do, they’re invariably Vogues, and even then, they tend to be the designer patterns. The Big Four are really bad value in the UK, for starters, but then I also hate fighting with massive sheets of tissue paper, playing the “how much ease?” roulette, and dealing with outdated construction techniques. Give me a magazine maze to trace or pdf to tape together any day!

But I do love great and interesting seamlines, so when the Donna Karan coordinates pattern, Vogue 1378 was announced, I immediately wanted to make those leggings (the wrap top? Meh. I’ve seen a thousand like it).

Since there was a sale on Vogue patterns a few weeks before I was due to visit my parents last November, Stacy very kindly bought it for me at sale price (even without shipping, it was like a third of what I’d pay here) and it was waiting for me when I arrived! Thanks Stacy!

But for all the aforementioned reasons, I never quite got around to making it until now – the thought of unfolding all that tissue to trace the tons of pieces just made me choose other patterns instead. But eventually I realised that I really needed some basic, all-around trousers, so out they came! By my measurements, I should be a size 16, but I opted to throw all caution to the wind and make a size 14 instead, as I wanted them to be close fitting, like leggings. Having gone down a size, I now think the ease is just right – not stretched tight, but not baggy either.


(Photos shot whilst holidaying in the medieval Breton town of Dinan, in France! Paired with my Manequim birthday silk blouse)

Acid Trip Leggings and a Not-Sacrificial Sweatshirt

A few months ago Rosie (aka DIY Couture) gifted me this crazy, mind-melting lycra when she was moving house, saying it looked like something I’d like! It definitely falls into the “fabric I’d run in” category rather than my normal wardrobe, I’m sure you’ll agree, so I knew I’d make leggings from it!

As it happens, I needed to test out KwikSew 3636 for a leggings class I’ll be teaching soon (yay!) so I thought I’d whip up a quick pair with this lycra, which I’ve decided is an acid trip in lycra form. In reality like it’s even more loud than the print itself though – because it’s actually wet look, too!

I mean – who looked at this fabric and though “Nah, not enough. How can we make it CRAZIER? I know – add some wet look shimmer!”?

If you’re a regular reader, you know I don’t often sew with Big Four or envelope patterns much these days (and especially not for something I draft myself, like leggings) but credit where credit’s due – I was impressed by this pattern, actually! It’s a one-piece pattern with two different fit options – one at 100% of body measurement, and the other with negative ease. Clearly I went for the negative ease one!

I was also impressed that they finish the waistband in my preferred method, which I’ve never, ever seen on a pattern before!

Cutting out the pattern made for some stomach-churning moments – don’t stare directly at the fabric! Lucky for me I only had to cut out one piece, and the construction was so quick I was wearing them in well under an hour.

During the photoshoot, James asked why I was “going all Sasha Fierce”, ahahahah! Blame it on my acid leggings, I suppose!

Sequin running vest and purple leggings

I’m going to break from tradition here and actually post my next two outfits out of sequence from when I made them, mostly because I just shared my elastic waistband tutorial with you, but also because I’m really freaking excited about sewing exercise gear right now. Honestly, it’s starting to become nearly lingerie-levels of hysteria with me – super quick to make, easy to fit, and lots of wild colours and patterns in small doses! But you’ll get to see my “civilian” top and trousers later this week, so no worries if you’re starting to glaze over at all the lycra…

For this set of running gear, I’ve paired up the Papercut “Ooh La Leggings” pattern (UK stockist here) with my self drafted knit block (from Metric Pattern Cutting). And in the case of the top, I altered the seam lines and armhole shape to suit!

You may remember the ex-Prada sequin trompe l’oeil fabric from a few years ago when I used it to make a cowl top. I wear that all the time, but I only had a small piece leftover in my stash, and it was far too lovely to throw away. But with a bit of creative thinking, it was enough for this! Though I think I’ll lower the curve a bit for my next running vest so the peak is just at my underbust…

As you can see with the leggings (or maybe not, the purple fabric is quite dark!), there are no side seams here! The shaped front and back yokes give some really cool, curved seams, and they merge nicely into front- and back-leg seams instead.

Self-drafted leggings

I bought this ASOS ruched tunic back in April and I love the design of it – the ruched panels are really flattering, it’s a viscose knit and it’s entirely lined in lingerie mesh. But when it arrived, I realised it was way too short to wear as a dress, but too long to wear as a shirt and looks just plain lumpy when worn over regular trousers or jeans. And with the panels going at weird angles creating an intentionally uneven hem, there wasn’t a natural point to cut it off and shorten it, either.

So I filled the wardrobe hole by creating some leggings specifically to wear with this top!

Happy 2016! (My year in review)

Each year I like to take the first of January to look back on what I’ve sewn in the previous year. So while this post is a celebration of the new year, it also helps me to put into perspective the year that has just gone. Somehow I always think the year has been a bit low on finished makes until I put everything together for the year’s collage!


Click the image to see it better, or right-click here to see it in a new tab to get a better look!

Tip: If you’d like to skim back through the posts for the above projects, you can click Gallery in the top menu, which will only show you finished projects, without all the magazine reviews and in-progress reports getting in the way! (Though a few of the makes in the bottom row I haven’t blogged about yet!)

The Year in Stats

In terms of pattern companies used this year, I made:

  • 25 FehrTrade patterns (I put my money where my mouth is I guess!?),
  • 9 Seamwork magazine,
  • 6 Self-drafted (including traced from RTW),
  • 4 Jalie (well, the same sports bra pattern four times!),
  • 3 from the Great British Sewing Bee: Fashion in Fabric book,
  • 2 Burda Style magazine,
  • 2 Style Arc,
  • 2 Orange Lingerie,
  • and 1 each from La Maison Victor magazine, Named, Paprika Patterns, Imagine Gnats, Simple Sew, and Kwik Sew.

By my count, I made: 21 tops, 19 trousers (including leggings & shorts), 2 jumpsuits,
2 dresses, 10 pieces of lingerie (bras, panties, slips, etc), 1 bikini, 2 jackets/coats/cardigans and zero skirts (!). I made presents for my mom, sister-in-law, niece, and nephew, and James also received four tops and a pair of lounging bottoms this year, the lucky guy!

Happy 2024! (Year in Review)

Sigh. For the second year in a row I’m left thinking “ugh, good riddance to a rubbish year!”. And for the second year in a row I’m facing an unknown future of post-viral fatigue stretching out before me, then months and months of rebuilding my body (and my life) once that finally ends. And life feels unbearably bleak.

But hey, part of the reason I write these posts at the start of every year is so I can look back and at least appreciate the good things that happened – and there are always at least a few things! It’s human nature to remember the negative more clearly than the positive I think, and this reflection and reset helps me remember things in a more holistic way.

Even if I did only have 7.5 months in my year when all the rest of you got 12 to accomplish everything… (yes, I tallied it up and I was sick and bedridden for 4.5 months of 2023.)

An asymmetric swimsuit

It’s been a while since I’ve had to write a negative pattern review but hoo boy, this one’s a doozy. The thing is, I ended up with a finished swimsuit that I really like and feel great in, but that’s in spite of this pattern, not because of it. I significantly redrafted all the pieces and relied heavily on another blogger’s instructions in order to get to the finished result.

I’m not even sure how the Edgewater Avenue “Marley One Piece” pattern came on my radar, tbh. I’ve never heard of the brand before, but they seem to specialise in swimwear sewing patterns and this particular one was on sale for $5 for a limited time, so I bought it.

Developing the Triumph Suit pattern

The Triumph Suit pattern is not only our first triathlon-focused pattern, or our first Advanced pattern, but I’m also fairly certain is the pattern that was in development the longest. And also very likely the one I nearly gave up on the most times (I don’t deal well with very long-running projects!).

So today I’d like to walk you through a bit of its development process so you can get a feel for the timelines involved and the sheer number of hours, weeks, months, and years that go into something as complex and specialised as this!

I started thinking about a trisuit pattern all the way back in early 2021 (I was still shielding during the time, remember!). It was the first inspiration to hit me since the disruption of 2020. During 2020 I concentrated on updating all of our patterns to be layered and projector-friendly, rather than developing anything new simply because I had zero energy for creativity. It started with me combining two blocks together and drawing out design lines – both on paper and on myself!

All the best Triumph Suit features

Thank you so much for your wonderful comments on the launch of our latest Triumph Suit sewing pattern earlier this week! It feels like such an accomplishment to finally get this one out into the world after so much work.

I’ve got SO much to say about this pattern, but today I wanted to share some of the really cool features in this pattern that may not be apparent at first glance.

Pockets

This pattern has the most pockets of ANY of our patterns – a whopping SIX in total! The lower back is compromised of three layers (two of exterior fabric with a layer of mesh in between), with top entry and side entry pockets between the layers, and a vertical dividing line of stitching to keep the contents from migrating around.

The side entry pockets have a scooped opening edged with FOE that’s still deep enough to keep the contents in place. This is where I usually keep my phone, for example.